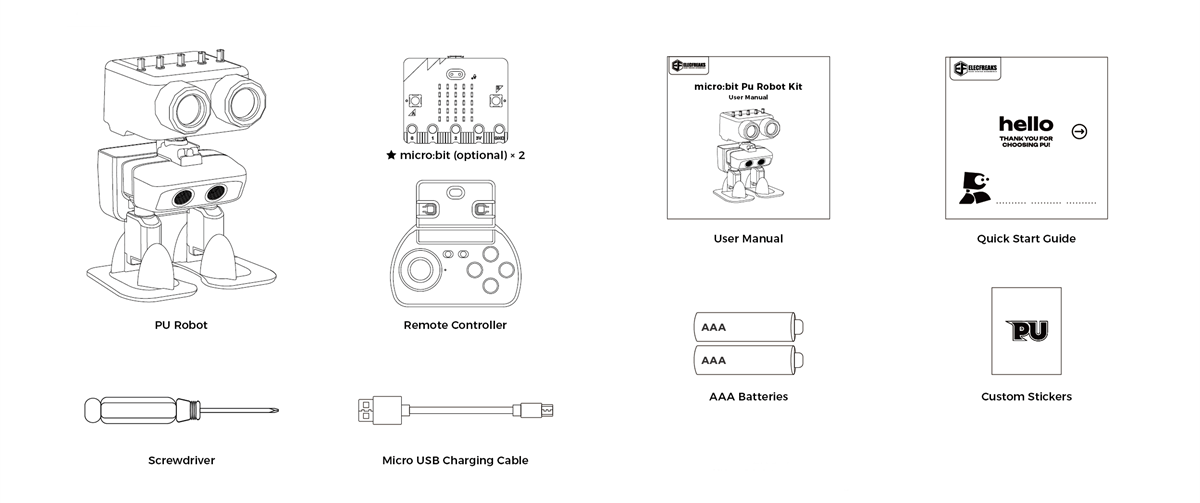
Quick Start
Unboxing Guide
- Take out the PU Robot and remote controller from the packaging (if you have purchased the micro:bit option, it has already been installed in both the PU Robot and the controller).
- Open the outer box and take out the user manual.
- Find the accessory pack in the robot's backpack (rear storage compartment), which contains 2 AAA batteries.
- Prepare a screwdriver (for battery installation).
- Check that all items are intact and undamaged.
Battery Installation
- Locate the battery cover on the back of the remote controller.
- Use a screwdriver to loosen the screw on the battery cover.
- Insert 2 AAA batteries (pay attention to the positive and negative polarity).
- Replace the battery cover and tighten the screw.

Safety Notes:
- Use only new alkaline batteries.
- Do not mix old and new batteries or different types of batteries.
- Remove the batteries if the device will not be used for a long time.
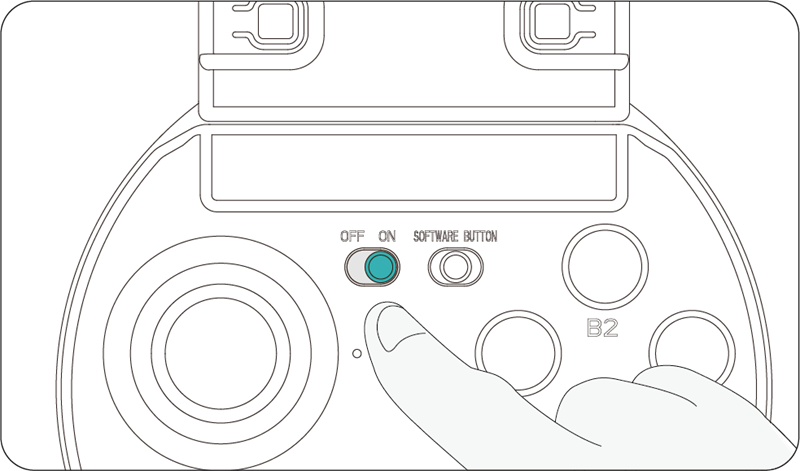
Turning On the Remote Controller
- Find the power switch on the side of the controller.
- Slide the switch to the "ON" position.
- The micro:bit LED screen displays the current radio control channel number.
Turning Off the Remote Controller
- Slide the power switch to the "OFF" position.
- The LED screen turns off.
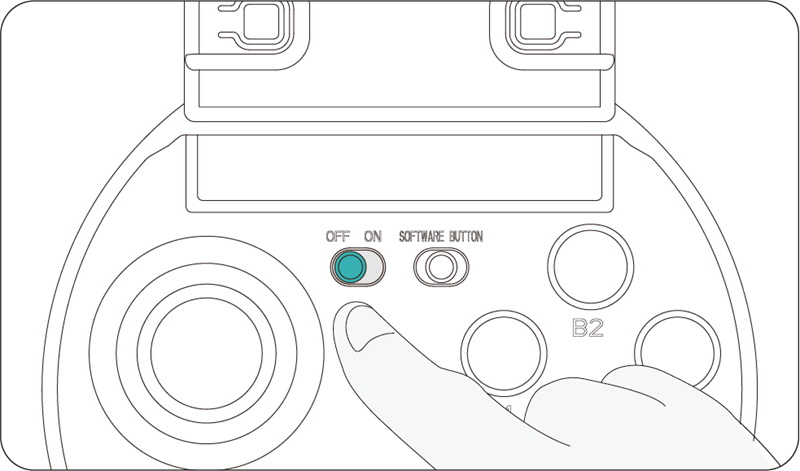
Power-Saving Tip: Turn off the controller when not in use for an extended period to save battery power.
PU Robot Power On/Off
- Locate the black power button on the robot’s chin.
- Power on: short press the power button once / Power off: short press the power button twice.
- Wait 2 seconds after power-on for calibration to complete.
Location Note: The power button is on the front chin area of the robot.
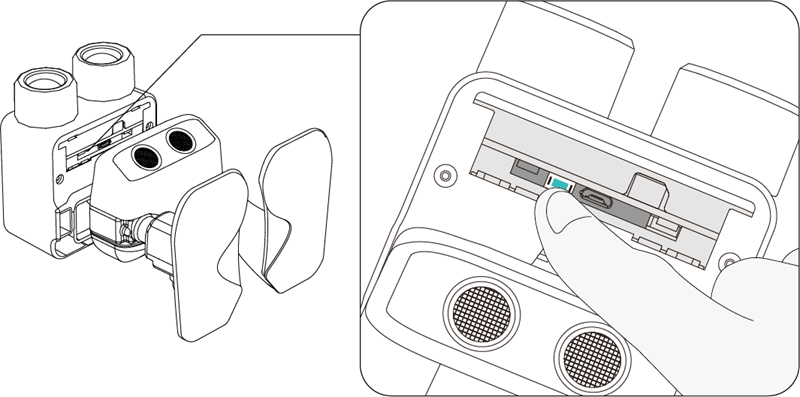
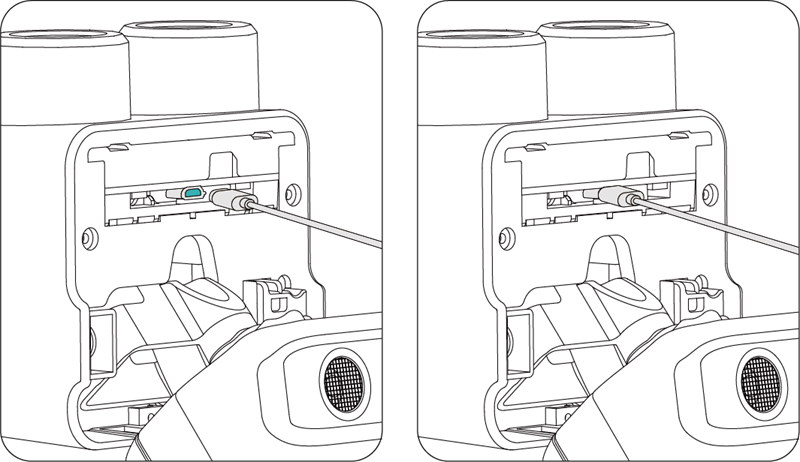
Charging Instructions
- Locate the USB charging port on the robot’s chin.
- Insert a USB cable to start charging.
Operation Guide
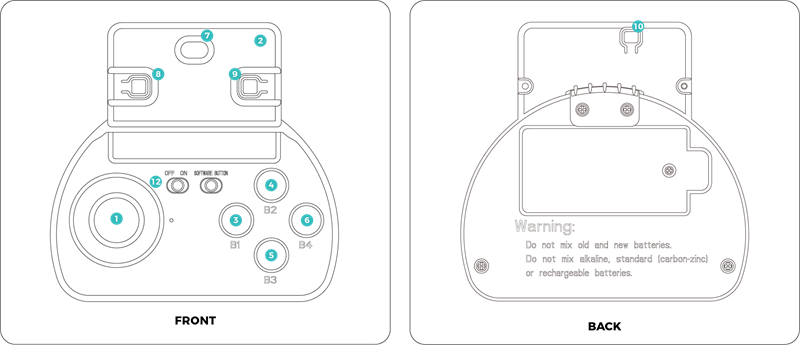
| No. | Control Item | Function Description |
|---|---|---|
| 1 | Joystick | 1. Push the joystick forward/backward to move the robot in the corresponding direction; the farther you push, the faster the robot moves. 2. Tilt the joystick left/right to turn the robot in the corresponding direction; the larger the tilt, the wider the turning angle. 3. Press the joystick once to put the robot into rest mode. 4. Tilt the joystick fully left/right to make the robot strafe in the corresponding direction. |
| 2 | Micro:Bit Gesture Control | While using the joystick, tilting the controller up/down controls PU’s head to swing up and down; tilting left/right controls the head to turn accordingly. |
| 3 | B1 Button | Activates automatic driving mode, allowing the PU Robot to walk autonomously or explore mazes. |
| 4 | B2 Button | Makes the PU Robot jump, ideal for football games and dance scenes. Do not press repeatedly; wait for the previous jump to finish before the next one. |
| 5 | B3 Button | Makes the PU Robot dance. When music is playing, PU dances to the rhythm and its LED lights change color with the beat. |
| 6 | B4 Button | Makes the PU Robot kick, suitable for football game scenes. Do not press repeatedly; wait for the previous kick to finish before the next one. |
| 7 | Micro:Bit Touch Logo | Touch the Micro:Bit Logo area to make PU speak or sing randomly. Content depends on recent activity and can be modified via programming. |
| 8 | Micro:Bit Button A | Increases the radio control channel; the channel number is shown on the Micro:Bit screen. |
| 9 | Micro:Bit Button B | Decreases the radio control channel; the channel number is shown on the Micro:Bit screen. |
| 10 | Micro:Bit Reset Button | Restarts the controller program and resets the radio channel to default 6. |
| 11 | Micro:Bit A+B Combo | Press A and B simultaneously to display the actual radio channel (actual channel = displayed number + 160). |
| 12 | Power Switch | Turns the remote controller power on or off. |