Case 12: Shy Little PU – Sensing Distance with Ultrasound
Case Introduction
In the previous lesson, we designed an emotional system for the PU Robot – using lights and movements to express moods like happy, sad, and angry. However, those moods were switched manually by buttons, and the robot could not "perceive" what was happening around it.
Today, we will give the robot real environmental awareness. The PU Robot’s ultrasonic sensor acts like its "sixth sense" – it can "feel" if something is approaching ahead. We will set a new personality for Little PU: it is a shy little guy! When the front is clear (distance > 30cm), it is bold and walks normally; when something approaches to 10~30cm, it becomes nervous, lights up yellow, and makes sounds; when something gets too close (< 10cm), it gets scared, lights up red, stops, and shakes its head anxiously. This case comprehensively uses five modules: ultrasonic sensor, conditional judgment, lighting, movement, and music, allowing students to experience the programming idea of "sensor data-driven behavior".
Teaching Preparation
| Name | Image |
|---|---|
| PU Robot Kit (with ultrasonic sensor, 4×RGB LED + 2×white spotlights, buzzer) | 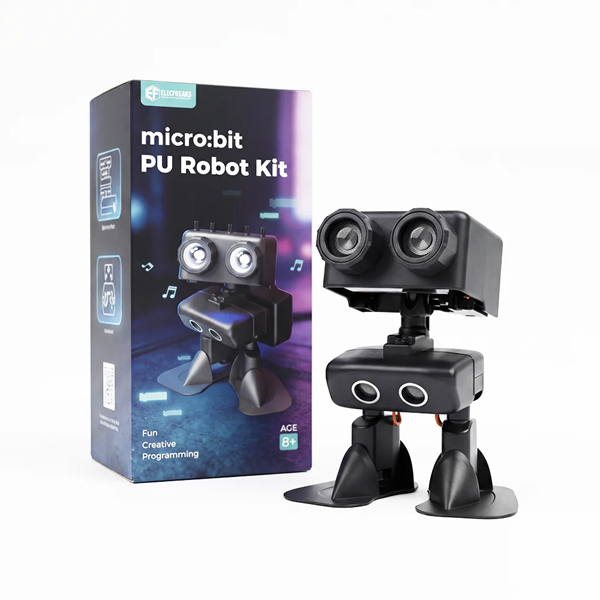 |
| Programming Device (Computer) | |
| Flat Ground | |
| Obstacles (blocks/books/paper cups) | |
| Ruler (for distance verification) |
Hardware Review – Ultrasonic Sensor
| Parameter | Value | Description |
|---|---|---|
| Detection Range | 2cm ~ 400cm | Unreliable data beyond this range |
| Installation Position | Front of the robot body | Detects obstacle distance ahead |
| Working Principle | Emits ultrasonic waves → reflects off obstacles → receives echo → calculates distance | Similar to bat echolocation |
Teacher Tip: In Case 8, we used ultrasound for basic obstacle avoidance (turn when an obstacle is detected). This lesson is an advanced use of ultrasound – no longer a binary judgment of "obstacle or not", but multi-level judgment of "how far is the obstacle". Guide students to review knowledge from Case 8 as a starting point.
"Shy Little PU" Behavior Design
| Distance Range | PU’s State | Lighting Effect | Movement | Music/Sound |
|---|---|---|---|---|
| > 30cm | 😄 Confident – Safe ahead, walk boldly | RGB green steady on | Normal walking | None (quiet walking) |
| 10 ~ 30cm | 😳 Shy – Someone is approaching | RGB yellow | Keep walking | Play alert sound |
| < 10cm | 😰 Scared – Too close! | RGB red + eye lights fast flash | Stop moving + shake head | Play short alarm sound |
Teacher Tip: Help students understand why we set 30cm and 10cm as boundaries. Think of 30cm as "social distance" and 10cm as "safety line". Guide students to gesture these distances to build physical intuition.
Course Objectives
Consolidate the use of the ultrasonic sensor and understand the programming mode of sensor data as "conditional judgment input";
Master the nested structure of multi-level conditional judgment (
if...else if...else), dividing three behavior zones with distance thresholds;Link ultrasonic data with lighting, movement, and music modules to realize a complete response chain: "different distances → different expressions → different movements → different sounds";
Understand the design idea of "Shy Little PU" – using anthropomorphic thinking to convert sensor data into understandable behavioral stories.
Course Introduction
Class, have you ever had this experience: walking on the road, someone comes towards you from far away, and you don’t really care; when that person gets closer, about two or three steps away, you start to feel uncomfortable – "What is this person going to do?"; if that person suddenly steps right in front of you, you might get startled and step back instinctively.
This is the human instinct of "social distance" – different distances lead to completely different reactions.
Today, we will give Little PU this kind of "social distance"! It is timid by nature. When the road ahead is empty, it dares to walk confidently; once something gets within 30 centimeters, it starts to get nervous; if it gets within 10 centimeters – it gets completely scared, stops, and shakes its head anxiously!
We will use the ultrasonic sensor as its "distance detector", paired with lights and movements, to bring Little PU’s "shyness" to life.
Learning Exploration
Step 1: Review Ultrasonic Sensor Basics
- Review Case 8: Open the obstacle avoidance program from Case 8 and review the use of the ultrasonic sensor:
Read ultrasonic distance– gets the distance value of the obstacle ahead (unit: centimeters)If distance < 10 then...– basic conditional judgment obstacle avoidance logic
- Clarify Today’s Upgrade: Case 8 only had one threshold (10cm), and Little PU only knew "obstacle" and "no obstacle". This lesson uses two thresholds (30cm and 10cm) to divide three zones, giving Little PU three different reactions.
Step 2: Multi-Level Conditional Judgment – Three-Zone Programming
Basic Practice 1: Three-Level Distance Display – First verify conditional logic with the LED matrix:
Distance Range LED Display Meaning > 30cm Checkmark ✓ Safe, walk confidently 10 ~ 30cm Exclamation mark ! Someone approaching, caution! < 10cm Cross ✗ Too close! Scared! - Programming Structure:
If distance > 30 then ✓ else if distance > 10 then ! else ✗ - Key Question: Why can’t we write three separate
ifstatements?- If using three
ifstatements, when distance = 15cm, the firstif distance > 30fails, but the thirdif distance < 10and secondif distance > 10both check – useelse ifto ensure only one branch runs
- If using three
- Programming Structure:
Basic Practice 2: Distance-Driven Lighting Switch – Replace LED display with RGB lights:
- Distance > 30cm → RGB green steady on
- 10cm < distance ≤ 30cm → RGB yellow
- Distance ≤ 10cm → RGB red
- Students place their hands in front of the sensor, move slowly closer, and observe the three-level light change: green → yellow → red
- Teacher Tip: Test lights alone first without movements or music. Modular testing – confirm one function works before adding the next.
Step 3: Complete Behavior – Lighting + Movement + Music
Shy Behavior Programming – Safe Zone (> 30cm):
- RGB green steady on
- Eye lights steady on
- Normal walking
- No music (walk quietly)
- Debugging: What walking delay is appropriate? (Recommended 2 seconds, then loop distance detection)
Shy Behavior Programming – Shy Zone (10 ~ 30cm):
- RGB yellow
- Eye lights steady on
- Play a "nervous alert sound"
- Design Discussion: Why not "stop" but "slow down" in the shy zone? Because shyness ≠ fear – Little PU is nervous but still dares to walk slowly. This fits the "shy" personality.
Shy Behavior Programming – Scared Zone (< 10cm):
- RGB red fast flash
- Eye lights fast flash
- Stop moving → Shake head (left → right → left → right, repeat 3 times)
- Play short alarm sound
- Movement Details: How to simulate head shaking? Use "turn left → short delay → turn right → short delay" loop, small angle (~10~15°), fast speed, looking like anxiously looking around.
Step 4: Testing and Parameter Tuning
- Phased Testing:
- Phase 1: Test only light switching – move hand slowly from far away, check if lights change green→yellow→red in order, accurate switching distance
- Phase 2: Add movements – test correct robot behavior in three zones
- Phase 3: Add music – test matching sound effects in three zones
- Phase 4: Full integration – place obstacles on the ground, let robot walk freely, observe complete behavior chain
MakeCode Programming
Distance Level Display
Program 1: Three-Zone Distance Detection + Light Switch (Green/Yellow/Red)

Program Link: https://makecode.microbit.org/_271HL4Pdj5K5
Complete Shy Behavior Program
Program 2: Shy Little PU – Ultrasonic Distance-Driven Full Program (Light + Movement + Music)
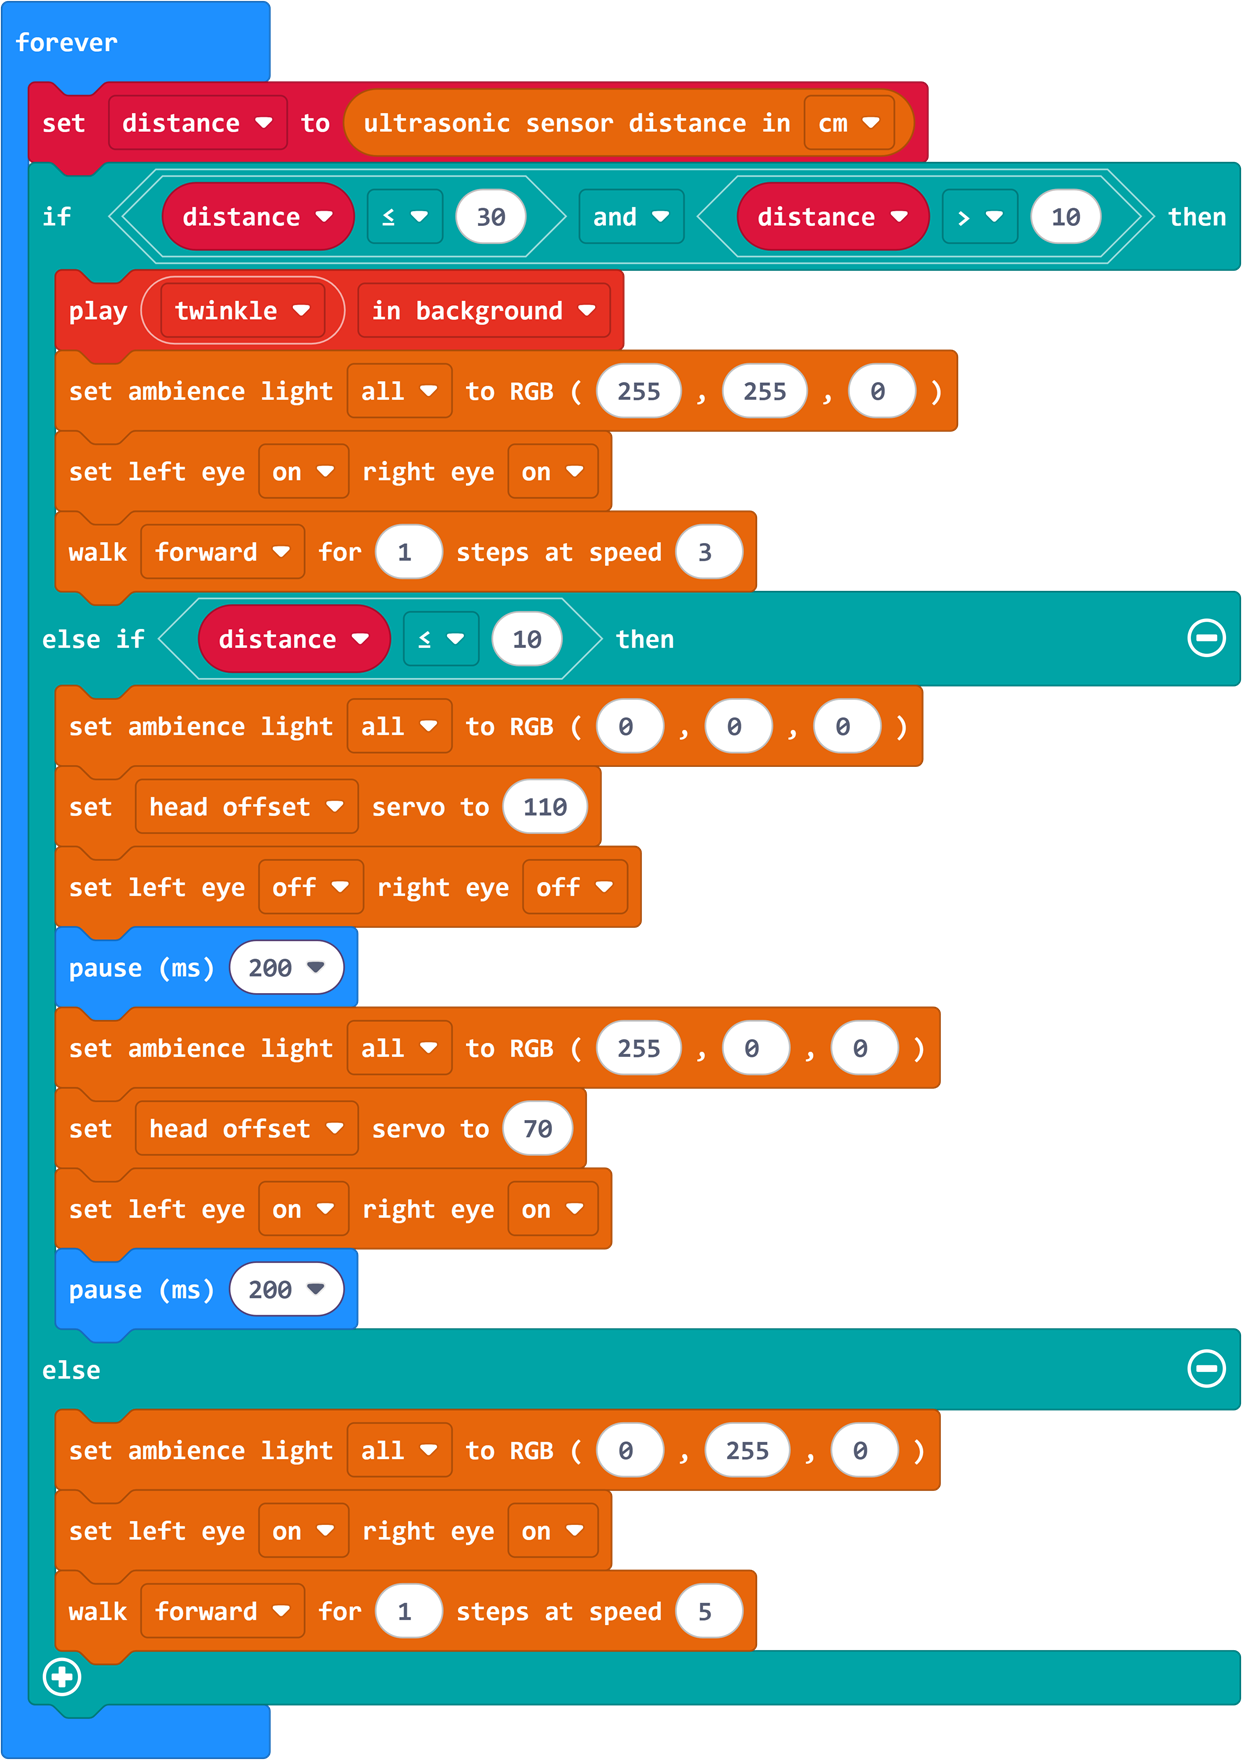
Program Link: https://makecode.microbit.org/_Wordf1HpoWHz
Summary & Sharing
Each group presents "Shy Little PU" – let classmates approach the robot slowly and observe its three-level reactions. Share tuning processes and creative designs. The teacher summarizes based on presentations:
Sensors are the robot’s "perception": Humans use eyes to sense distance; Little PU uses an ultrasonic sensor. Sensors convert physical "distance" into numbers the program understands, and the program reacts accordingly – this is the complete link of "perception → judgment → action";
Multi-level judgment is more "human-like": Case 8 obstacle avoidance only had two states (go/stop), like a switch. Today’s Little PU has three states – calm, shy, scared – more like real emotional responses. Real intelligent systems are multi-layered, not black-and-white;
Thresholds are "personality parameters": A Little PU with a 50cm threshold is "shyer" than one with 30cm. Just like humans – some have larger social distances, some smaller. Tuning parameters is actually "tuning personality";
Anthropomorphism makes technology warm: Today we didn’t say "multi-level conditional algorithm", we said "Shy Little PU" – the same program becomes much more interesting with a story and character. Good product design often does this – anthropomorphism turns cold technology warm and friendly.
After-Class Extension
Challenge 1: "Social Butterfly Little PU" – Change shyness to "outgoing"! >30cm normal walk, 10~30cm speeds up toward obstacles (friendly), <10cm stops to "greet" (nod + welcome sound). Think: What parts need to be modified?
Challenge 2: "Shy Recovery Animation" – When obstacles move from scared zone (<10cm) back to safe zone (>30cm), design a "recovery" animation: red fades to yellow then green + ascending scale "ding~ding~ding~". Tip: Use a variable to remember "last state", trigger recovery when changing from "scared" to "safe".
Further Exploration: Research autonomous car "safety distance" classification systems – are they similar to Little PU? What do self-driving cars do at 100m, 50m, 10m? Compare.