Case 10: Gesture-Controlled Robotic Arm
Case Introduction
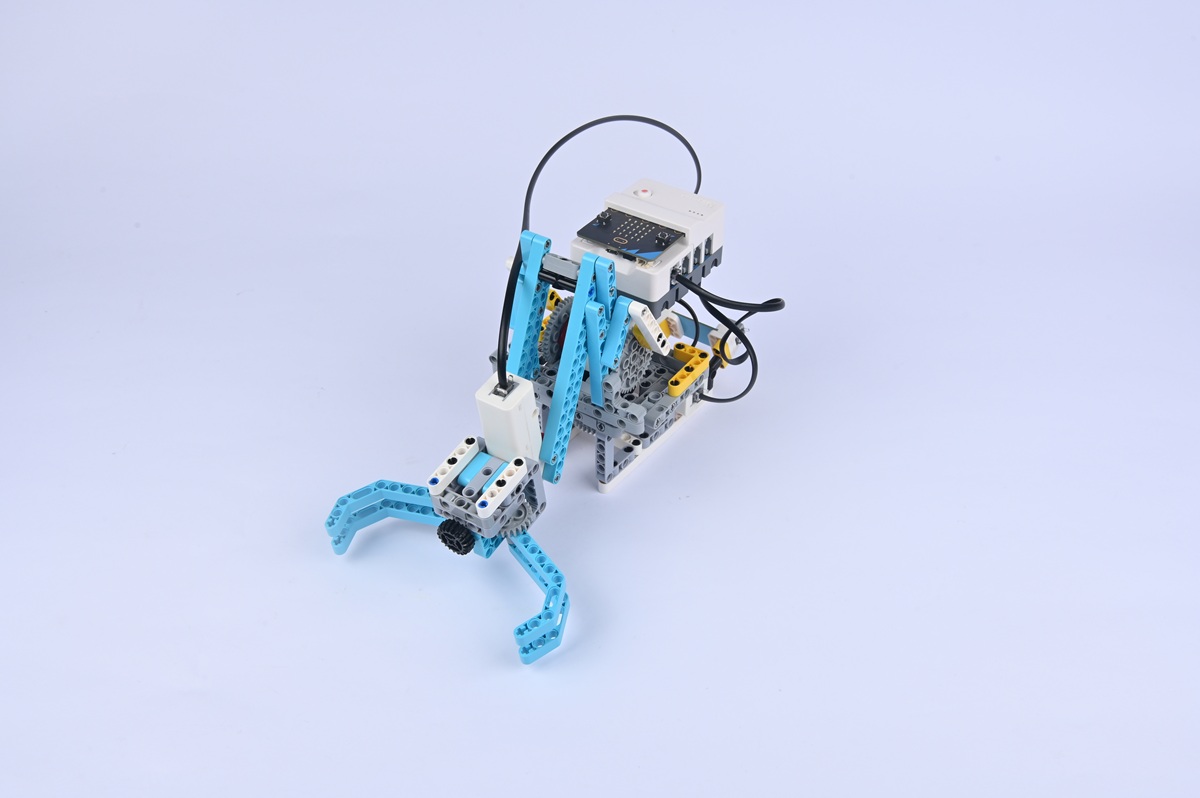
Build a gesture-controlled robotic arm and control the robotic arm's movements through gestures.
Teaching Preparation
| Name | Illustration |
|---|---|
| Nezha Pro AI Mechanical Power Kit |  |
Teaching Objectives
- Complete the assembly of the gesture-controlled robotic arm, master the assembly and connection methods of the robotic arm's joints (including servos), gripping components, and gesture recognition sensor, and realize the control of the robotic arm's joint rotation and gripping actions through gestures.
- Understand the "multi-joint collaboration" feature of the robotic arm, recognize the correspondence between gesture recognition and joint movements, and learn to program to set the rotation angles of different joints.
- During the process of debugging joint rotation ranges and gripping component tightness, cultivate hands-on ability, spatial logical thinking, and problem-solving ability, and learn to solve problems such as unstable gripping of the robotic arm and joint jamming.
- Stimulate interest in robotics technology, perceive the possibility of "robotic arms replacing human hands", and establish the cognition that "technology extends human capabilities".
Story Introduction
After cleaning up the gravel, everyone went to the damaged warehouse. Parts on the shelves were scattered all over the floor, and Qiaoshou (Skillful Hand), the robotic arm in charge of organizing, was standing with its arms hanging down, in a daze. "It was supposed to grab different parts according to gestures!" The warehouse manager sighed while holding a screw. "Now it can't even hold the lightest nut." Aji manipulated the joints of the robotic arm: "Look at these 3-degree-of-freedom joints—they’re just like the human shoulder, elbow, and wrist. You need to make it re-understand the gesture codes for 'grab' and 'release'."
Learning Exploration
- How many movable joints does the robotic arm have? Which component (e.g., servo) controls each joint? Try using different gestures (e.g., waving the left hand = controlling the upper arm, waving the right hand = controlling the forearm) to control different joints respectively. How to ensure no conflicting movements?
- What determines the gripping force of the robotic arm? (e.g., servo torque, material of the gripping component) If the gripping force is too strong, will it damage the "gripped object" (e.g., foam block)? How to adjust this through programming?
- If a certain joint of the robotic arm fails to reach the preset angle, what might be the causes? (e.g., insufficient servo power, jammed joint components)
- Compare the structures of the human arm and the robotic arm. Which parts of the human arm do the robotic arm's joints simulate (e.g., shoulder, elbow, wrist)? What are the differences in flexibility between the two?