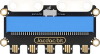
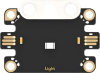
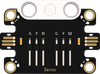
Micro:bit Related ProductsJacdac SeriesJacdac Energy Experiment KitCase 15: High-Altitude Wind TurbineOn this pageCase 15: High-Altitude Wind TurbineIntroductionUse the micro:bit V2 board's built-in light sensor to distinguish day and night — the wind turbine only starts when there is sufficient daylight (light value > 30). Once started, the rotational speed of the 360° building-block servo is controlled in real time by the sound level detected by the micro:bit V2's microphone — the louder the sound, the faster the rotation speed (0–100), simulating a wind turbine generating power by relying on airflow when there is sufficient light. When it is dim (light value ≤ 30), the servo automatically stops.Learning ObjectivesUnderstand dual-condition judgment — both "sufficient light" and "wind (sound)" conditions must be met simultaneously to generate power.Learn the combined use of light sensor and sound sensor — simulating real high-altitude wind turbine wind speed + light perception.Explore high-altitude wind energy — at 300–500 meters altitude, wind speeds are 2–3× higher than at ground level, making it one of the most promising renewable energy sources.Learn conditional nesting — first check light, then control speed based on sound.Required MaterialsItemImageQuantitymicro:bit V21Jacdac Expansion Board1Jacdac 10cm Connector Cable2Jacdac 25cm Connector Cable1Jacdac Light Sensor1Jacdac Servo Module1360° Building-Block Servo1USB Cable1Jacdac Energy Practice Kit Building Blocks1Sensor Principlemicro:bit V2 Built-in Light Sensor and MicrophoneThis case uses two types of sensors built into the micro:bit V2 board, requiring no external sensor modules:SensorMeasurementThreshold in This CaseDescriptionmicro:bit V2 Light SensorAmbient light intensity> 30 (start generation)Sufficient light → start servo, simulating wind turbine operationmicro:bit V2 MicrophoneSound level0–255 (mapped to 0–100 speed)Louder sound → faster servo speed, simulating wind speedNote: This case uses a light sensor to simulate "daytime" judgment for teaching simplification purposes only. Real high-altitude wind turbines can operate around the clock.Assembly StepsModel PrincipleHigh-Altitude Wind Turbine — Capturing Stronger WindsTraditional wind turbines are built on the ground or at sea, with tower heights typically not exceeding 160 meters. However, at altitudes of 300–500 meters, wind speeds are 2–3× higher than at ground level and more stable. High-Altitude Wind Energy (HAWE) is one of the hottest research areas in renewable energy in recent years.AltitudeTypical Wind SpeedWind Power DensityGround (10 m)~4–6 m/sBaselineTower top (100–160 m)~7–10 m/s~3–5×High altitude (300–500 m)~10–15 m/s~8–27×Wind power is proportional to the cube of wind speed — double the wind speed, and power increases eightfold. This is why engineers go to great lengths to send wind turbines to high altitudes.The 360° building-block servo drives the blades, simulating a high-altitude wind turbine continuously generating power in powerful airflow.Connection DiagramAs shown below, insert the micro:bit V2 board into the Jacdac expansion board, and use cables to connect the 360° building-block servo module and light sensor to the Jacdac expansion board's edge connector.Programming SoftwareMicrosoft MakeCodeMakeCode ProgrammingStep 1: Adding the Jacdac ExtensionGo to Microsoft MakeCode and click "New Project".Enter a project name in the pop-up window and click "Create".Click "Extensions" in the code drawer.In the pop-up interface, type "Jacdac" and click the search icon, then select the Jacdac software library as shown.Step 2: Connecting the HardwareUse a USB cable to connect the micro:bit V2 board to the computer.Note: If this is the first time running a Jacdac program on the micro:bit V2, please pre-load a blank Jacdac program onto the board first. Otherwise, skip this step.Connect the sensor. MakeCode will automatically detect and simulate it in the simulator area, where sensor status is displayed in real time.Click "ADD BLOCKS" to add the sensor extension module.Note: When connecting a new sensor, repeat the "click 'ADD BLOCKS'" workflow once.Write the Program as ShownReference Program Link📎https://makecode.microbit.org/_8jiRxMVJ93v1You can also download the program directly from the webpage below. Once downloaded, you can start running the program.ResultWhen there is sufficient light (light value > 30), speak loudly or clap toward the micro:bit V2 board, and the 360° building-block servo begins to rotate — the louder the sound, the faster the rotation (0–100), simulating a daytime wind turbine spinning with the wind. When it's quiet, the servo stops. After covering the LED matrix to simulate darkness or an overcast day (light value ≤ 30), no matter how loud the sound, the servo remains stationary — "insufficient light, no power generation."ThinkThis case uses sound to simulate wind speed. If you wanted to actually measure wind speed, what sensor would you need? (Hint: anemometer / wind cup)Why do high-altitude wind turbines choose an altitude of 300–500 meters? Why not fly even higher? (Hint: aviation safety, tether cable weight)Program LogicTrigger ConditionActionSourceLight value > 30 (daytime) AND sound detected360° building-block servo speed = sound value (0–255) → mapped (0–100); louder sound → faster rotationmicro:bit V2 Light Sensor + MicrophoneLight value > 30 (daytime) AND complete silenceServo stops (mapped value = 0)micro:bit V2 Light Sensor + MicrophoneLight value ≤ 30 (nighttime/dark)Servo stops rotatingmicro:bit V2 Light SensorKnowledge Extension: High-Altitude Wind Energy — The Next Generation of Clean EnergyI. Why Send Wind Turbines to High Altitudes?Ground-level wind is affected by terrain, buildings, and vegetation friction — it is slow and unstable. As altitude increases, surface friction decreases, and wind speed significantly increases. This phenomenon is called Wind Shear:AltitudeWind Speed Multiple (relative to 10 m)Power Multiple10 m (ground)×1.0×1100 m (tower top)×1.5–2.0×3–8300 m×2.0–2.5×8–16500 m×2.5–3.0×16–27II. High-Altitude Wind Energy Technology ApproachesMultiple companies and technology pathways worldwide are competing in the high-altitude wind energy space:Technology ApproachPrincipleRepresentative CompanyTethered kiteLarge kites fly in "figure-8" patterns in the air, pulling a ground-based generator via tether cableKitekraftTethered droneMulti-rotor drones carry small wind turbines aloft, transmitting power via cableAltaeros (aerostat balloon + turbine)High-altitude aerostatHelium airship lifts a wind turbine to 300–600 m altitudeAltaeros BATIt is estimated that the theoretical reserves of high-altitude wind energy far exceed those of ground-level wind energy. However, the technology is still in early stages — safely operating a tether system hundreds of meters long through thunderstorms, icing, and extreme winds is the greatest engineering challenge. Notably, real high-altitude wind turbines can operate around the clock (both day and night). This case's use of a light sensor to judge "sufficient light → generate power" is a simplified teaching design only.

.png)