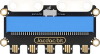
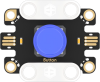
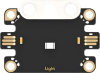
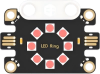
Micro:bit Related ProductsJacdac SeriesJacdac Energy Experiment KitCase 12: Smart Desk LampOn this pageCase 12: Smart Desk LampIntroductionUse the Jacdac light sensor to detect ambient light intensity in real time. When the environment becomes dark, press the Jacdac external button module, and the LED ring lights up red — the lamp turns on. Press the button again, and the LED turns off — the lamp turns off. The button only works when light is insufficient — pressing it during the day has no effect, simulating the smart lamp logic of "only need light when it's dark."Learning ObjectivesLearn about the light sensor — an electronic component that precisely detects ambient light intensity.Understand automatic feedback control — the closed-loop logic of sensor (eyes) → program (brain) → actuator (hands).Learn condition-triggered state toggling — the lamp only toggles on/off when both conditions (dark environment + button pressed) are met simultaneously.Explore the applications and energy-saving significance of smart lighting in modern life.Required MaterialsItemImageQuantitymicro:bit V21Jacdac Expansion Board1Jacdac 10cm Connector Cable2Jacdac 25cm Connector Cable1Jacdac Button Sensor1Jacdac Light Sensor1Jacdac LED Ring1USB Cable1Assembly StepsModel PrincipleButton Module and LED Ring — Light On When Dark, Auto Off When BrightIn this case, the external button module and LED ring work together under the conditional judgment of the light sensor:ComponentFunctionControl MethodLight SensorDetermines day/night (ambient brightness)Continuously reads light value (threshold: 30)Button ModuleToggles the lamp on/offPress once → on (Count=1); press again → off (Count=2→reset to 0)LED RingProvides illumination (red)When Count=1, lights red at 100% brightness; otherwise offWorkflow: The light sensor acts like a "gatekeeper" — it only allows the button to take effect when it's dark. The button acts like a "switch" — in a dark environment, press once to turn on, press again to turn off. But if it becomes bright, the light turns off automatically, the counter resets, and everything starts anew.The program uses a Count variable to track how many times the button has been pressed — Count=1 represents the on state, Count=2 represents the off state and auto-resets to zero. This method of using a variable to record state is called a State Machine — one of the most fundamental and important design patterns in programming.Sensor PrincipleThis case uses the Jacdac Light Sensor and Jacdac Button Module as input sensors, and the Jacdac LED Ring as the output actuator.Light Sensor Working Principle: The light sensor contains a light-dependent resistor (LDR) or photodiode. Its resistance value (or reverse leakage current) changes with ambient light intensity — stronger light → smaller resistance (larger current); weaker light → larger resistance (smaller current). The sensor converts the optical signal into an analog voltage, which is then converted by an ADC (Analog-to-Digital Converter) into a digital signal (0–255) for the program to read.Condition-Triggered State Toggle Logic: The core of this case lies in "dual-condition judgment" — the LED ring only toggles its on/off state when both light value < 30 (dark) AND button pressed are simultaneously satisfied. If either condition is not met (e.g., daytime or button not pressed), the system performs no action. This "AND logic" ensures the smart lamp only lights up when truly needed, preventing energy waste from accidentally turning it on during the day.Connection DiagramAs shown below, insert the micro:bit V2 board into the Jacdac expansion board, and use cables to connect the light sensor, button module, and LED ring to the Jacdac expansion board's edge connector via daisy-chaining.Programming SoftwareMicrosoft MakeCodeMakeCode ProgrammingStep 1: Adding the Jacdac ExtensionGo to Microsoft MakeCode and click "New Project".Enter a project name in the pop-up window and click "Create".Click "Extensions" in the code drawer.In the pop-up interface, type "Jacdac" and click the search icon, then select the Jacdac software library as shown.Step 2: Connecting the HardwareUse a USB cable to connect the micro:bit V2 board to the computer.Note: If this is the first time running a Jacdac program on the micro:bit V2, please pre-load a blank Jacdac program onto the board first. Otherwise, skip this step.Connect the sensors. MakeCode will automatically detect and simulate them in the simulator area, where sensor status is displayed in real time.Click "ADD BLOCKS" to add the sensor extension module.Note: When connecting a new sensor, repeat the "click 'ADD BLOCKS'" workflow once.Write the Program as ShownReference Program Linkhttps://makecode.microbit.org/_VLgXsR1WpKbbYou can also download the program directly from the webpage below. Once downloaded, you can start running the program.ResultWhen there is sufficient light (light value ≥ 30), pressing the button has no effect — "no need for light during the day." After covering the light sensor with your hand to simulate darkness (light value < 30), press the button: first press — LED ring lights up red (brightness 100), lamp on; second press — LED ring turns off (brightness 0), lamp off.ThinkBoth the smart desk lamp and the solar tracking case from earlier use a light sensor — how do their usage patterns differ?If you wanted the lamp to only turn on when detecting "someone nearby" (not just based on brightness), what additional sensor would you need?Program LogicTrigger ConditionActionSourceLight value < 30 (dark) AND button pressed → Count=1LED ring lights red at 100% brightness — lamp onJacdac Light Sensor + Jacdac Button ModuleLight value < 30 (dark) AND button pressed → Count=2LED ring turns off (brightness 0), Count resets to 0 — lamp offJacdac Light Sensor + Jacdac Button ModuleLight value ≥ 30 (daylight)Button has no effect; LED stays off — no need for light during the dayJacdac Light SensorKnowledge Extension: Smart Lighting — Making Every Kilowatt-Hour CountI. Lighting and Energy — Numbers You May Not KnowLighting is a significant component of global electricity consumption:Key Data PointValueGlobal lighting share of electricity~15% (roughly equal to global nuclear power output)Global lighting share of carbon emissions~5%LED vs. incandescent energy savingsLED saves 80%–90% compared to incandescentLED lifespan15,000–50,000 hours (incandescent: only ~1,000 hours)If the whole world switched to LEDCould reduce CO₂ emissions by ~1.4 billion tons annuallyThe simple act of "changing a lightbulb" has made a huge contribution to global emissions reduction. And smart lighting can save an additional 30%–50% of energy on top of that — because lights only turn on when they are actually needed.II. The Evolutionary Ladder of Smart LightingEraLighting MethodControl MethodIntelligence LevelAncientTorches, oil lampsManual ignitionZero1879Incandescent (Edison)Manual switchZero1938Fluorescent lampsManual switchZero1960sSound-activated lights (hallways)Sound trigger★1990sInfrared sensor lightsHuman body detection★★2000sLED + timer switchTimer control★★★2010sSmart bulbs (Wi-Fi/Bluetooth)Phone app + voice★★★★2020sAI smart lighting systemsSensor fusion + machine learning★★★★★The smart desk lamp you built today — using a light sensor to detect brightness and automatically switch — stands at the third tier of this evolutionary chain. In just forty years, humanity has traversed the complete evolution from "manual switch" to "automatic sensing" to "AI control."III. Sensor Fusion Behind the Smart Desk LampReal smart lighting systems typically don't rely on just one sensor — they fuse multiple sensors for joint decision-making:SensorWhat It DetectsRole in Smart LightingLight sensorAmbient brightnessDetermines whether light is neededPIR infrared sensorHuman body movementDetects "is anyone there?" — auto-off when unoccupiedmmWave radarHuman presence (even when stationary)More precise than PIR; common in offices/classroomsIlluminance sensorPrecise illuminance (lux)Ensures work surfaces meet national standard illuminance levelsClock moduleDate and timeAutomatically adjusts lighting schedules based on sunrise/sunset timesReflection: You used just one light sensor today to achieve automatic on/off for the smart desk lamp. Add a PIR human body sensor and a clock module, and your lamp becomes "smarter" — knowing when someone is there and when it will get dark. The art of engineering design lies in combining multiple simple sensors to create a system far "smarter" than any single sensor alone.

.png)