PlanetX Series Electromagnet
Overview
This electromagnet is specially designed for STEAM education, featuring an exquisite structure and stable performance. It helps students explore the mysteries of electromagnetism, understand scientific principles through practice, and embark on a learning journey that integrates creativity and knowledge.

Features
Equipped with an RJ11 port design to prevent incorrect insertion, ensuring easy use.
Technical Specifications
| Item | Parameter |
|---|---|
| SKU | EF05072 |
| Interface | RJ11 |
| Interface Type | IIC |
| Operating Voltage | 3.3V |
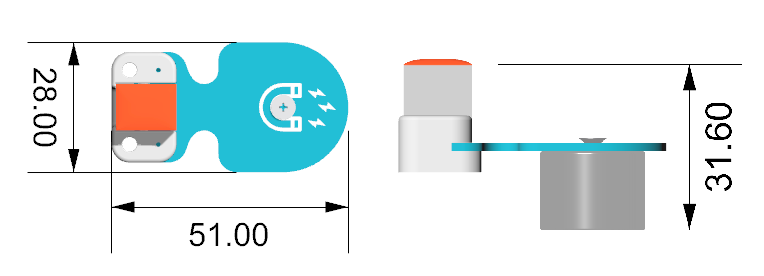
| Product Dimensions | Length 51mm x Width 28mm x Height 31.6mm |
| Product Weight | 32.7g (excluding packaging) |
| Effective Range | 8~16 mm |
| Vertical Load-Bearing Capacity | 1kg |
External and Positioning Dimensions
Quick Start
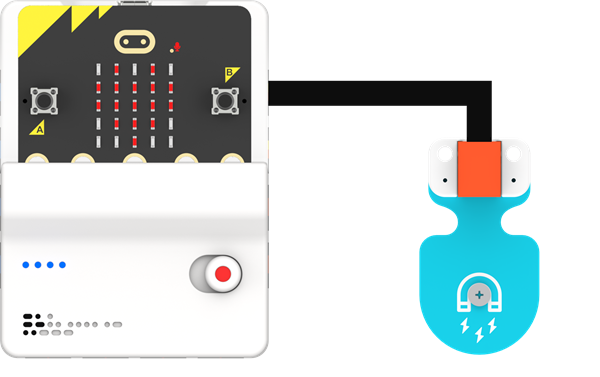
Connection Diagram
As shown in the figure below, connect the electromagnet to the J1 port of the Nezha Pro Multi-Functional Expansion Box.
MakeCode Programming
Step 1
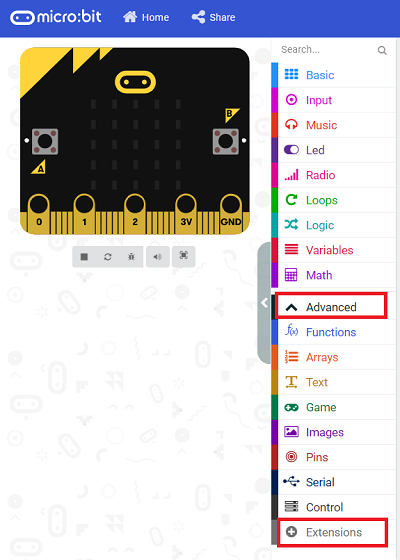
In MakeCode, click "Advanced" in the code drawer to view more code options.
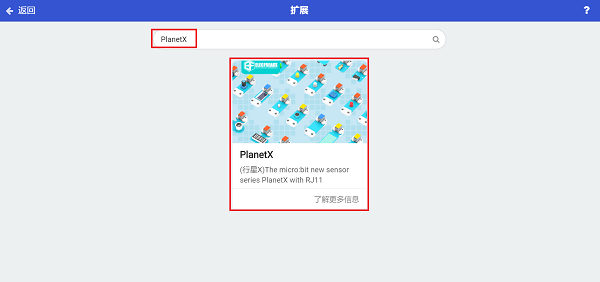
To program the 4-channel line-tracking sensor, we need to add an extension library. Find "Extensions" at the bottom of the code drawer and click it. A dialog box will pop up; search for "PlanetX" and then click to download this code library.
Note: If you receive a prompt stating that some code libraries will be deleted due to incompatibility, you can proceed as prompted or create a new project in the Project Menu Bar.
Step 2
Write the Program as Shown in the Figure

Reference Program
Please refer to the program link: https://makecode.microbit.org/_8AW5PC63LiXj
You can also download the program directly through the following webpage. After the download is complete, you can start running the program.
Result
After pressing the A button, the electromagnet attracts the iron sheet; after pressing the B button, the electromagnet releases the iron sheet.