PS2 Joystick Kit
Introduction
The PS2 controller is a versatile controller suitable for various devices with different types and structures, such as remote-controlled robots, smart cars, and robotic arms. We can use the controller's joysticks, buttons, and other components to control robots to perform corresponding actions.

Note: The controller kit includes one controller and one receiver, and their communication is pre-paired by default. They cannot be paired with other controllers or receivers. The receiver is used by connecting it to the Nezha Pro Expansion board. Install two AAA batteries on the back of the controller, then toggle the power button (located between the two joysticks) to the left to turn it on. Without pairing, the controller will enter sleep mode after 30 seconds; after turning on and completing pairing, if no buttons are pressed for 5 minutes, it will automatically enter sleep mode. Press the START button to wake up the controller.
Features
- RJ11 port design prevents incorrect insertion and ensures easy use.
- The controller is bound to the receiver, so multiple controllers used simultaneously will not interfere with each other.
Technical Specifications
| Item | Specification |
|---|---|
| SKU | EF05068 |
| Interface | RJ11 |
| Interface Type | IIC (also known as I2C) |
| Operating Voltage | 3.3V |
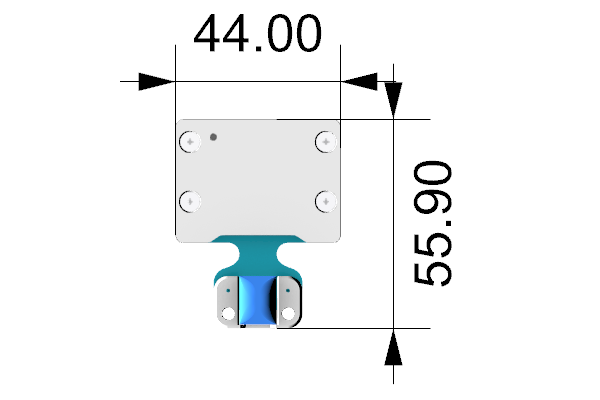
External and Positioning Dimensions
Quick Start
Required Equipment and Connection Diagram
As shown in the figure below, connect the PS2 controller adapter to the IIC port of the Nezha Pro Expansion board.
MakeCode Programming
Step 1
Click "Advanced" in the MakeCode to see more choices.
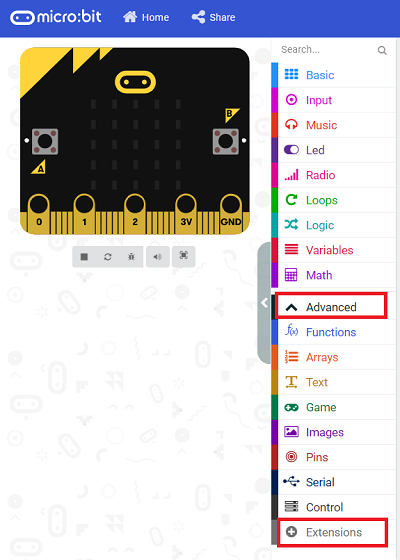
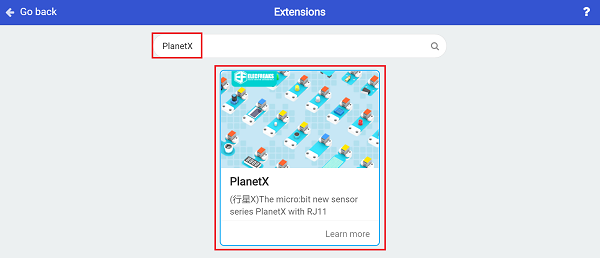
For programming, we need to add a package: click "Extensions" at the bottom of the MakeCode drawer and search with "PlanetX" in the dialogue box to download it.
Note: If you receive a prompt that some code libraries will be deleted due to incompatibility, you can proceed as prompted or create a new project in the project menu bar.
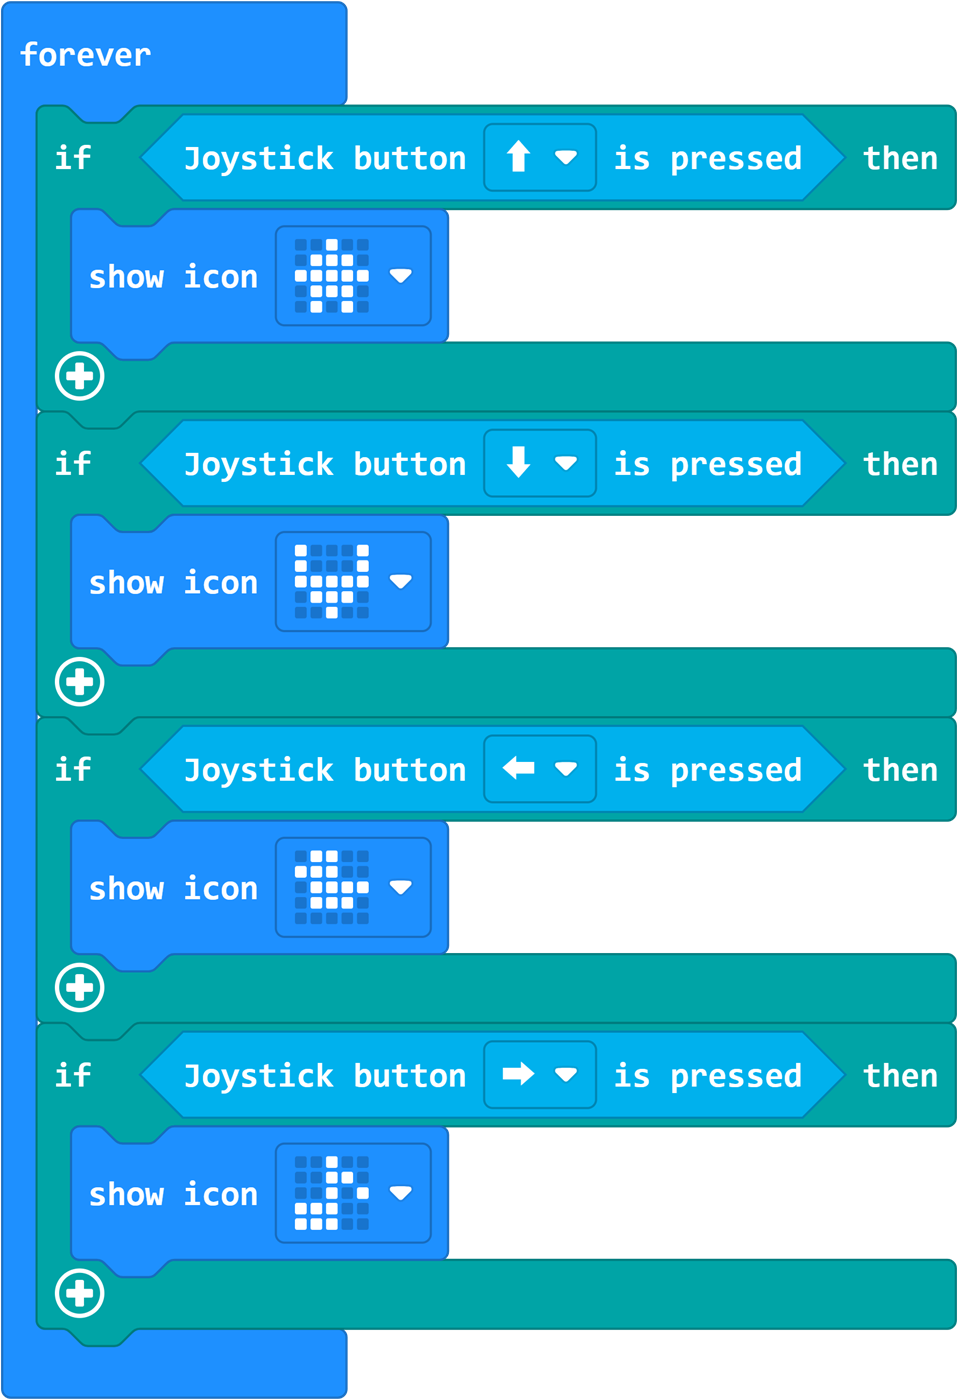
Step 2
Write the Program as Shown in the Figure
Reference Program
Please refer to the program link: https://makecode.microbit.org/_Ma4PDshtPXJf
You can also download the program directly through the following webpage; after downloading, you can start running the program.
---Result
The controller can control the content displayed on the LED matrix of the micro:bit.