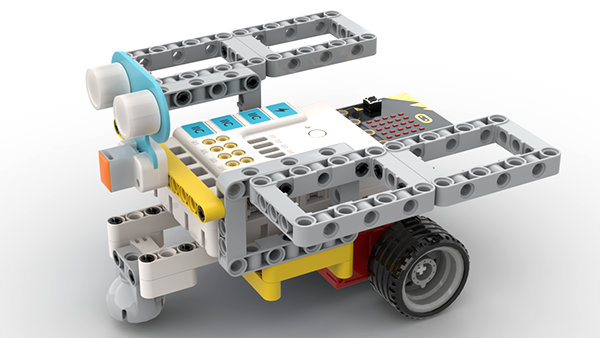
Case 53: The Lunar Exploration Vehicle
Introduction
Since ancient times we have never stopped exploring the Moon, and before the development of spacecraft, we could only see it with the naked eye and with telescopes, but now we want to know more about the Moon. We have built lunar spacecraft and lunar rovers and brought back lunar soil samples, which have allowed us to learn more specific information about the Moon. In this lesson, let's build a simple lunar exploration rover and make a preliminary foray into the great interstellar journey of exploring the Moon.
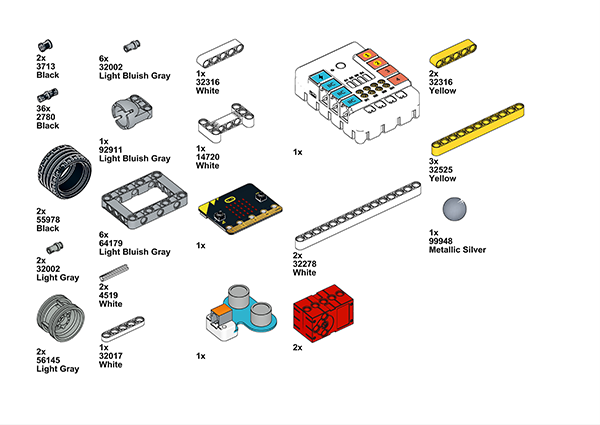
Materials Required
Nezha expansion board × 1
micro:bit V2 × 1
Ultrasonic sensors × 1
RJ11 cable × 1
Bricks × n
Note: If you want all of the above components, you may purchase the Nezha 48 IN 1 Inventor's Kit.
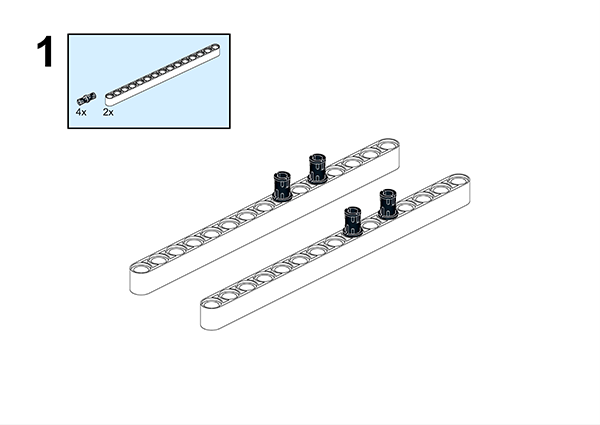
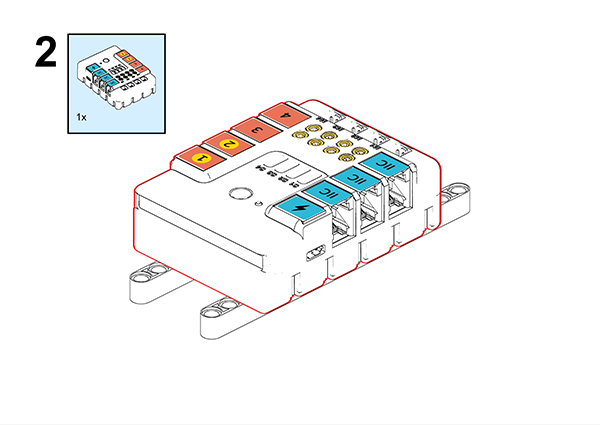
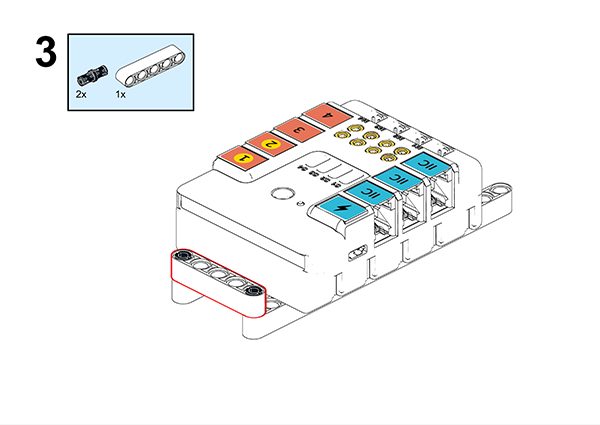
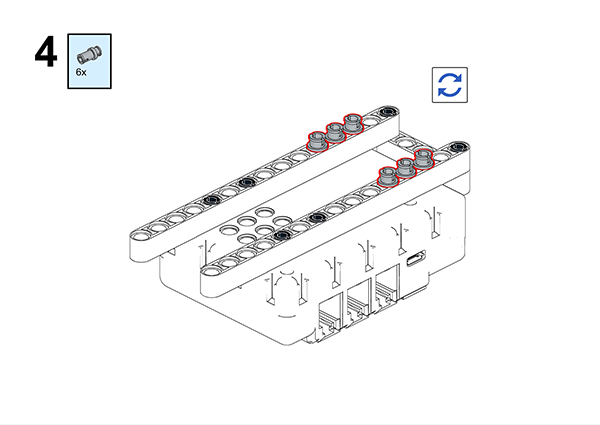
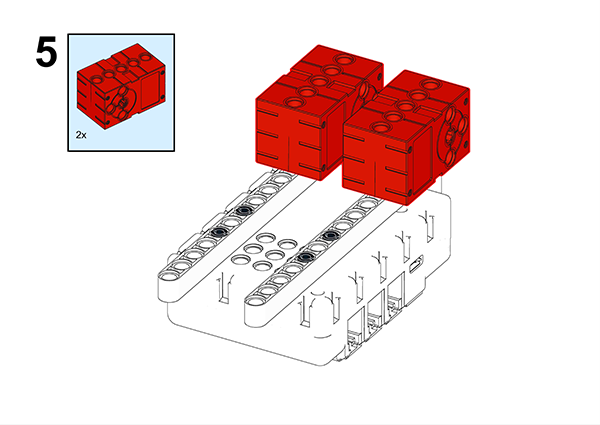
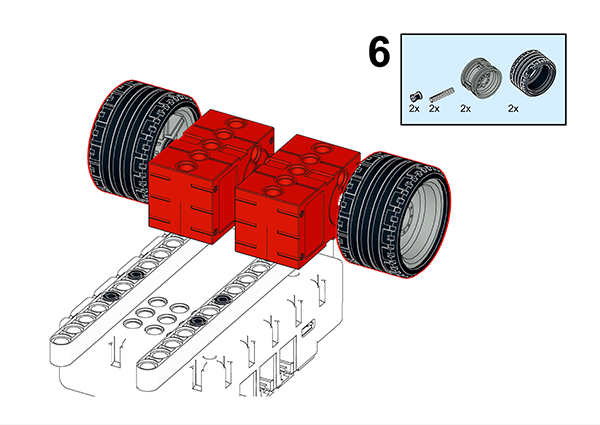
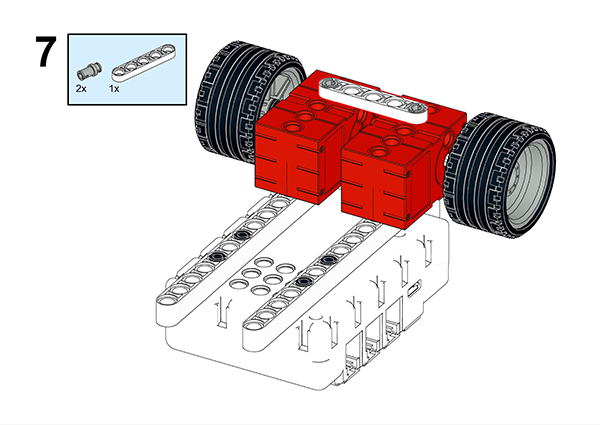
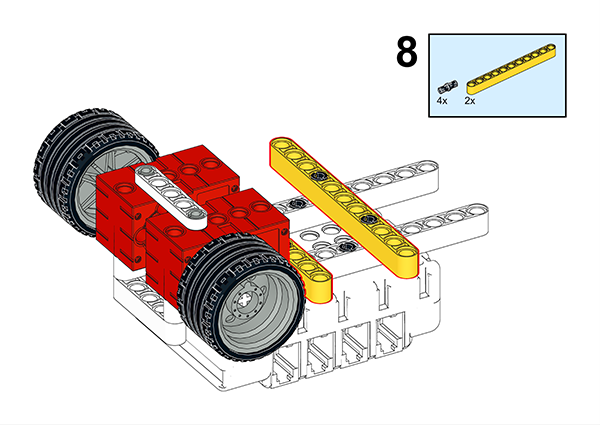
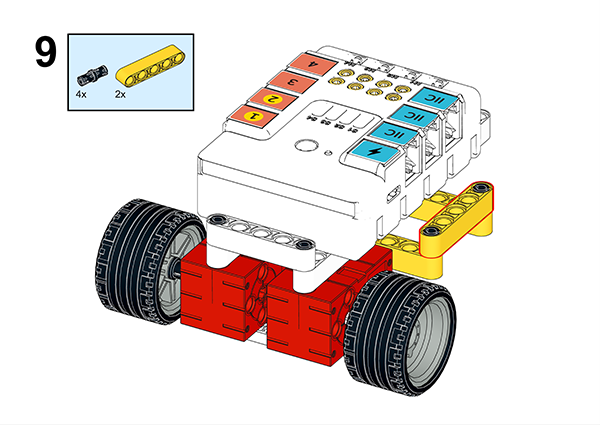
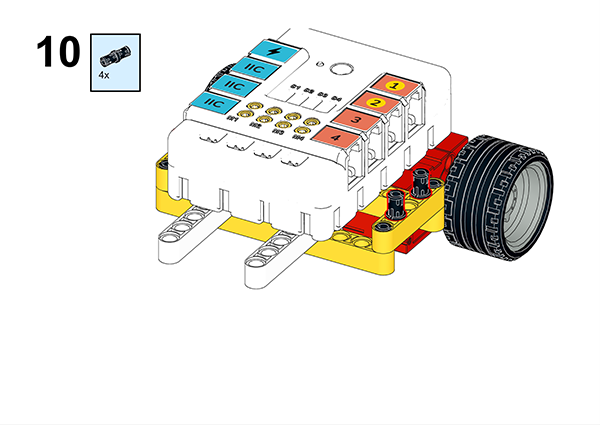
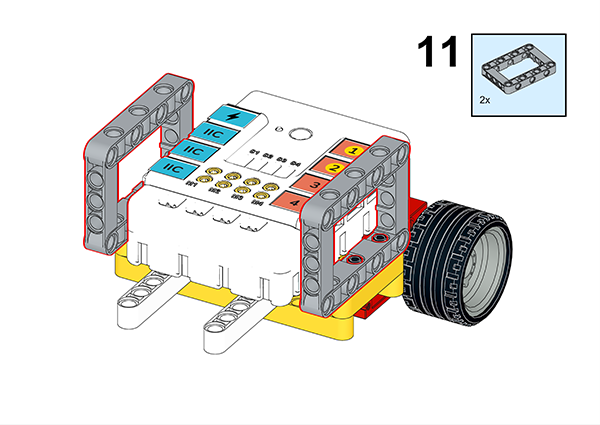
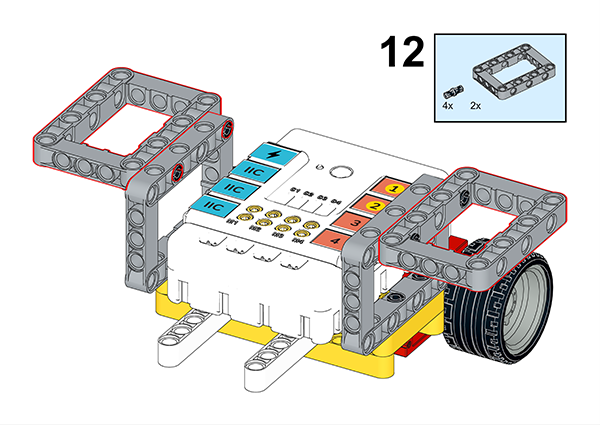
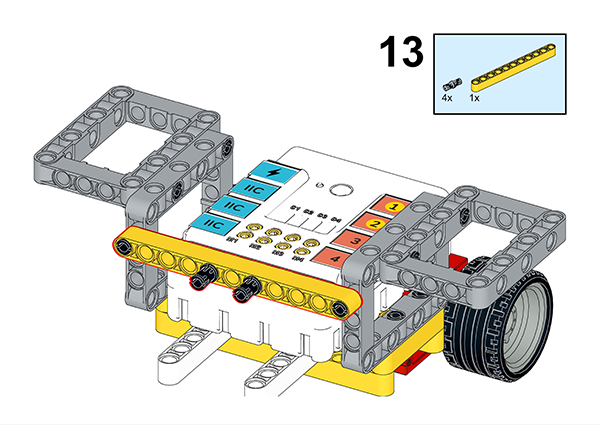
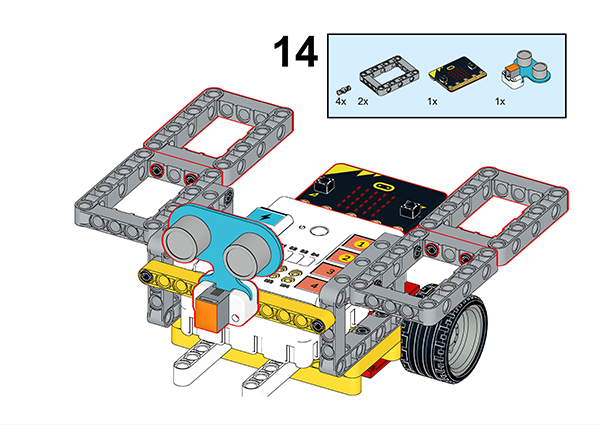
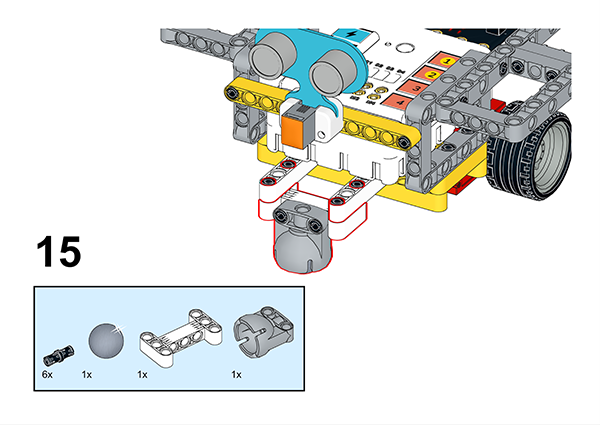
Assembly Steps
Component Details
Build it as the assembly steps suggest:
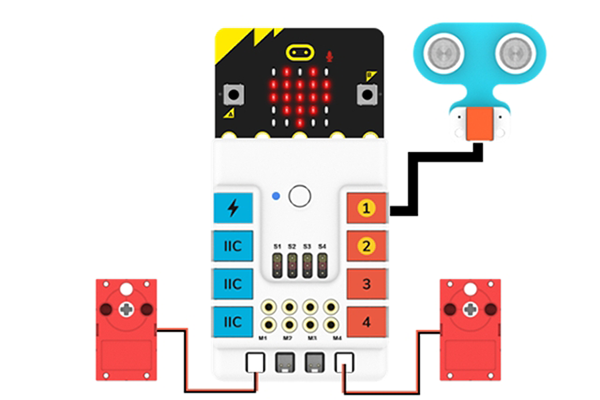
Connection Diagram
Connect the four motors to the M1, M4, and the ultrasonic sensor to the J1as the picture suggests.
MakeCode Programming
Step 1
Click “Advanced” in the MakeCode drawer to see more choices.
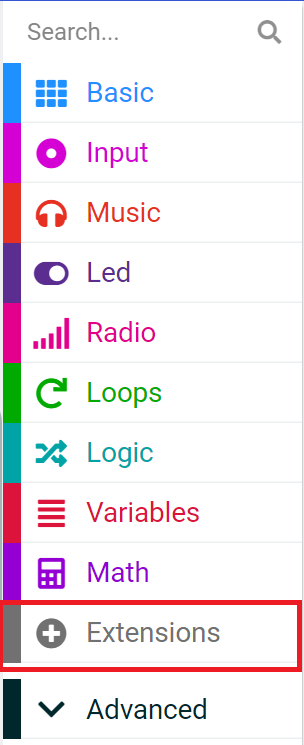
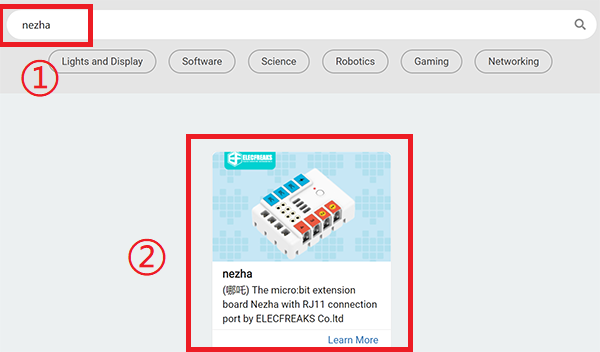
For programming the servo, we need to add a package. Click “Extensions” at the bottom of the drawer and search with “nezha” to download it.
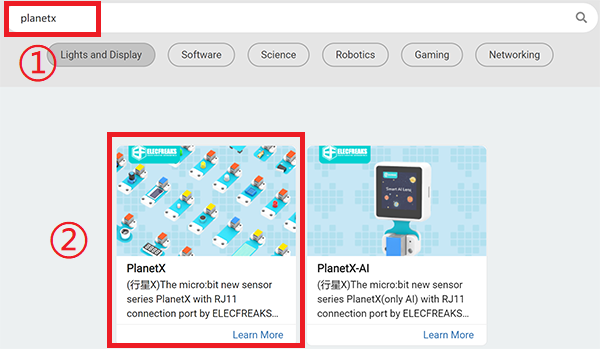
For programming the PIR sensor, we need to add a package. Search with “PlanetX” in the dialogue box and click to download it.
Notice: If you met a tip indicating that some codebases would be deleted due to incompatibility, you may continue as the tips say or create a new project in the menu.
Reference
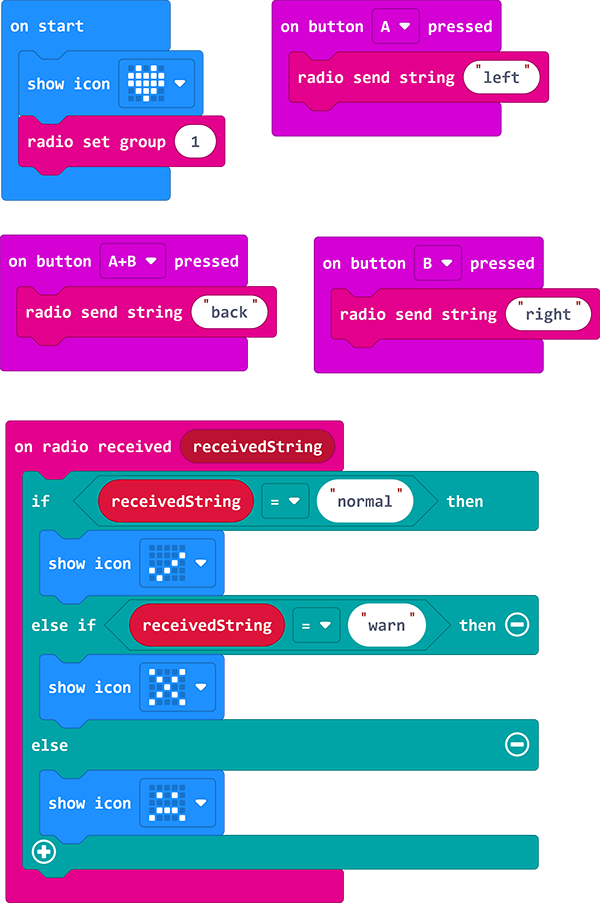
Lunar exploration vehicle remote control program:
Link: https://makecode.microbit.org/_LDD7oafxoHup
You may also download it directly:
Lunar exploration vehicle remote control program:

Link: https://makecode.microbit.org/_EP6do6JC67tj
Result
As you can see, the lunar rover can turn left and right, stop and back up when we press different buttons of the remote control.