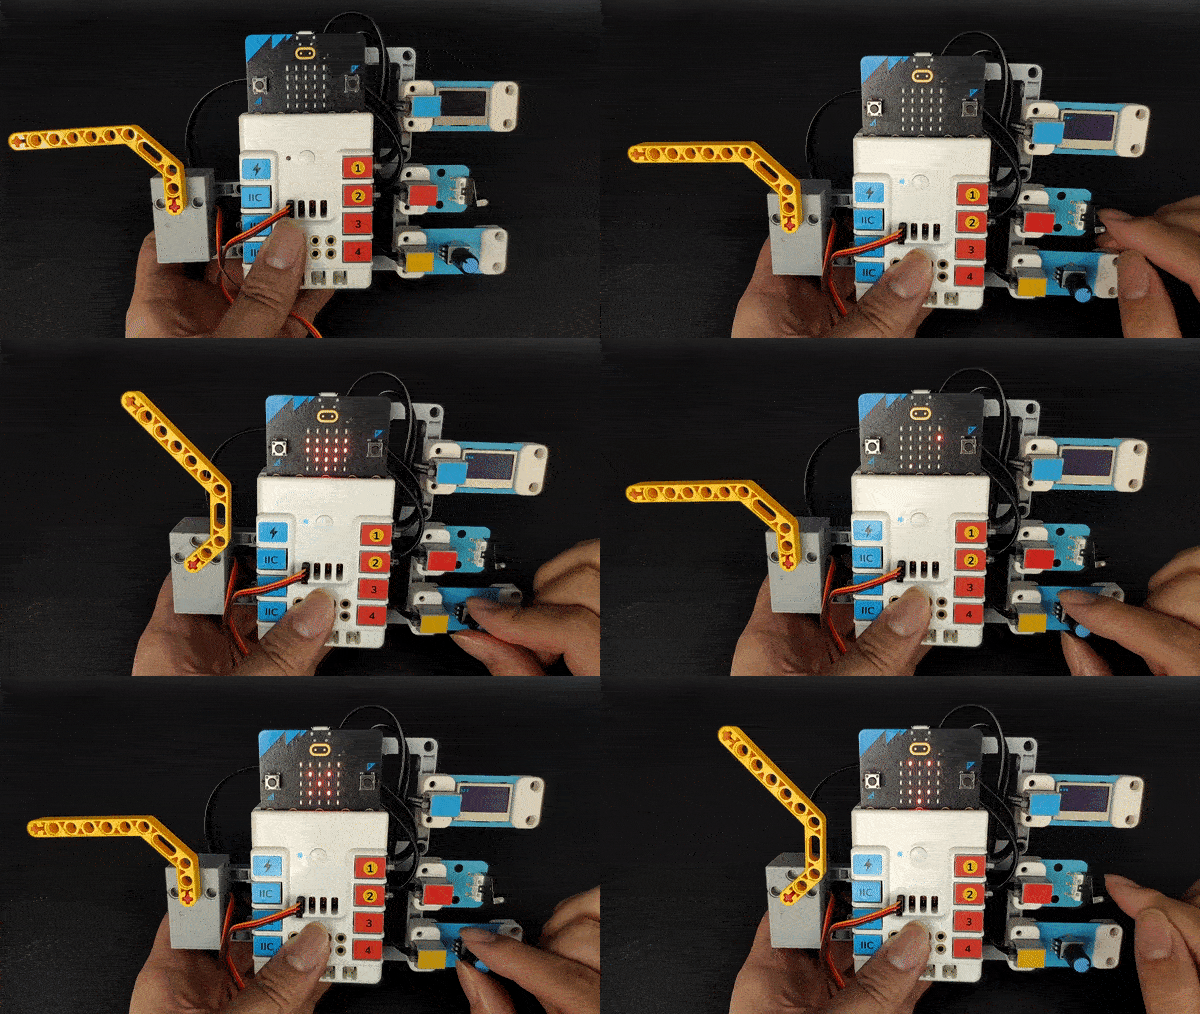
Case 31: The Rotary Password Door
Introduction
The selected password can be adjusted by the potentiometer and confirmed by the crash sensor. If two consecutive passwords are entered within the correct range, the password door will open. Perhaps we can use this device to make some decryption plots to make the game more interesting.
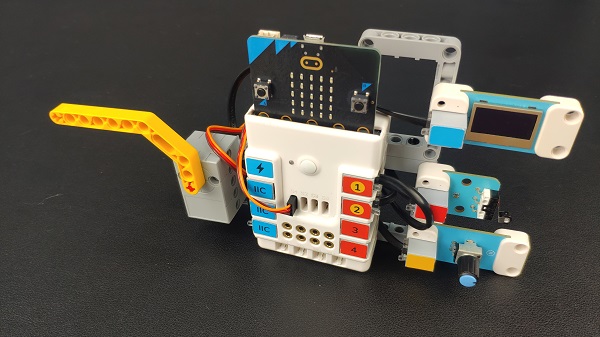
Quick Start
Materials Required
Nezha expansion board × 1
micro:bit V2 × 1
Trimpot × 1
Servo × 1
Crash sensor × 1
OLED display × 1 (It requires to be purchased as standalones.)
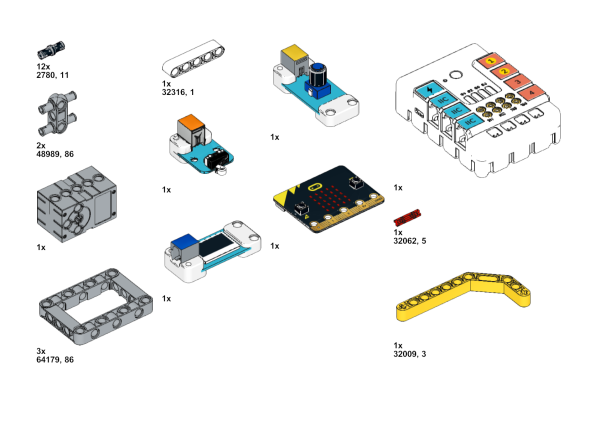
Bricks × n
Tips: You may need to purchase Nezha Inventor's Kit and Purchase Interactive coding accessories pack here. if you want all the above components.
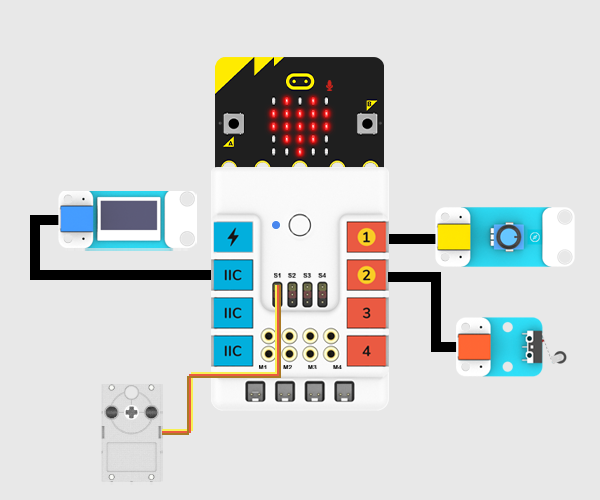
Connection Diagram
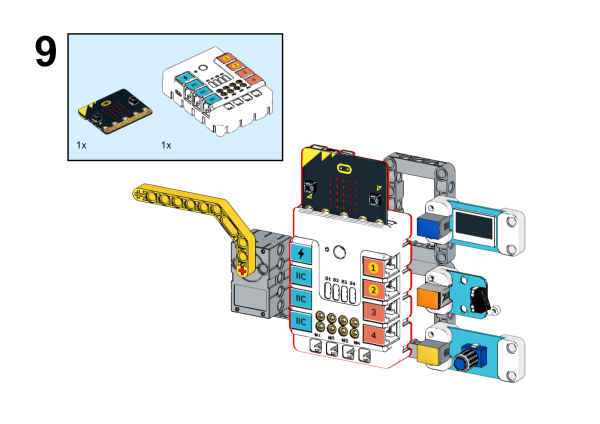
Inset the micro:bit, connect the OLED display to IIC port, the servo to S1, the trimpot to J1and the crash sensor to J2 on Nezha expansion board.
Assembly Video
Video link: https://youtu.be/eniQAfqXym0
Assembly Steps
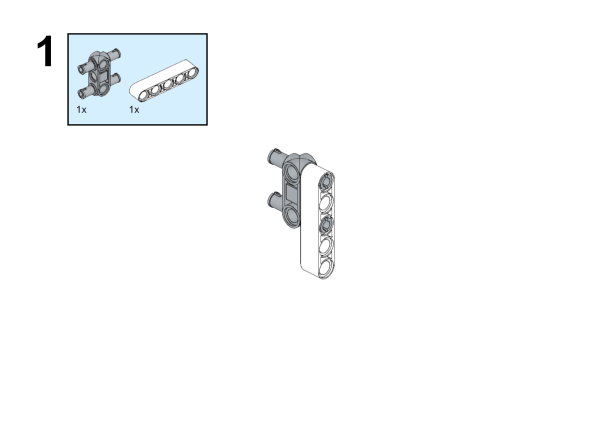
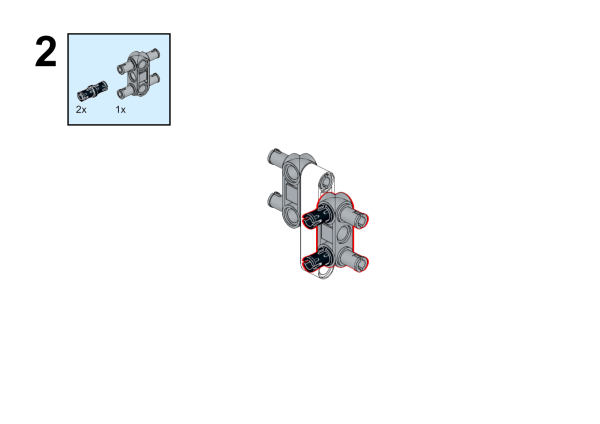
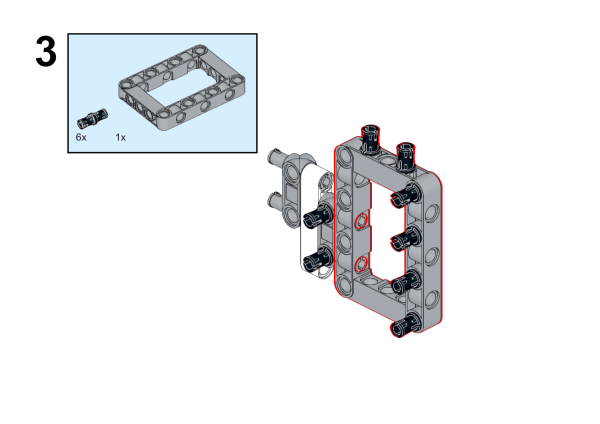
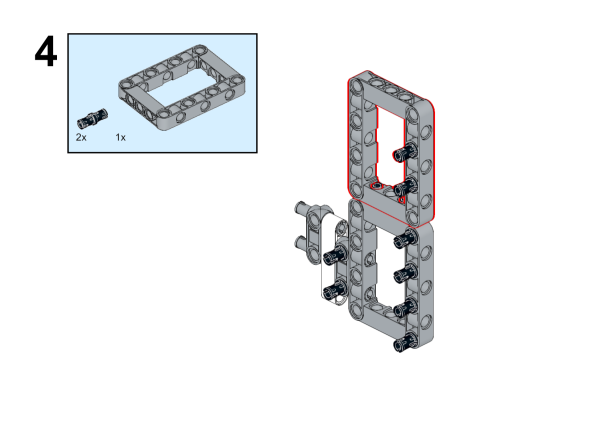
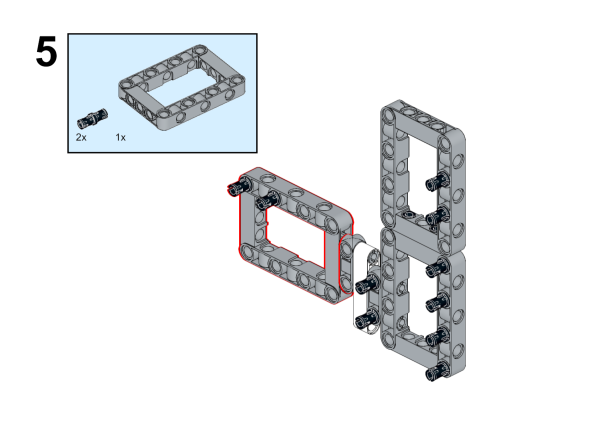
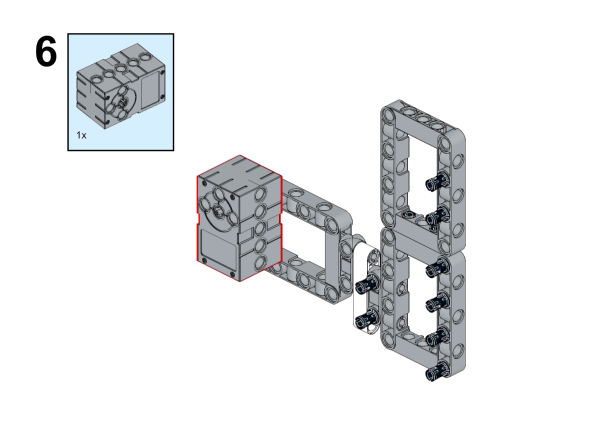
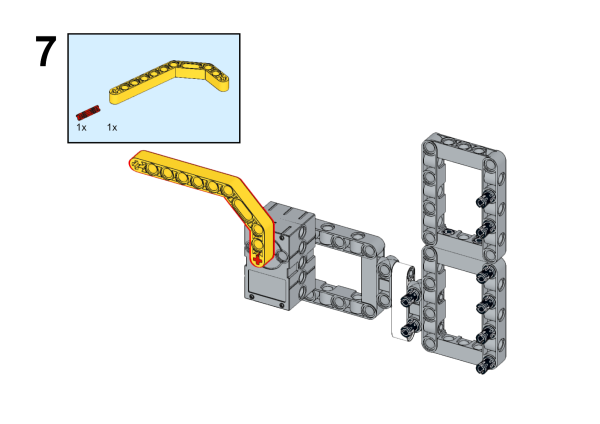
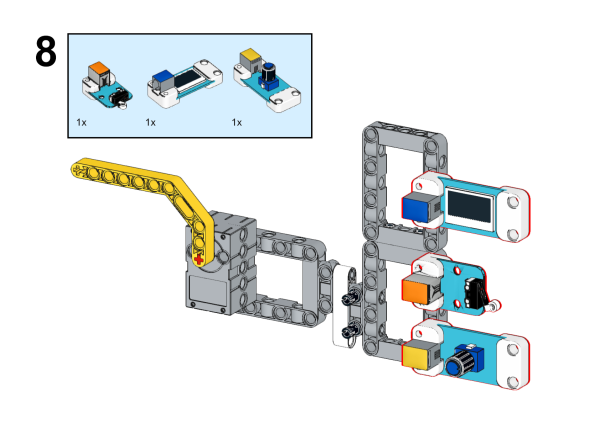
MakeCode Programming
Step 1
Click "Advanced" in the MakeCode drawer to see more choices.
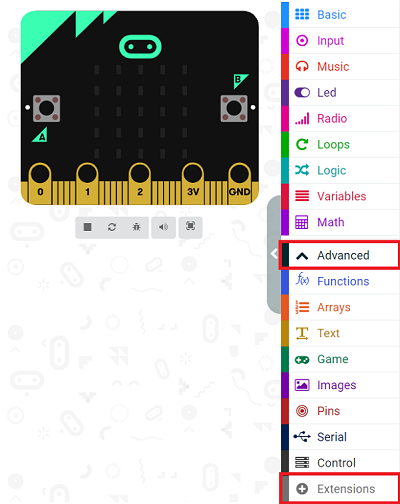
We need to add a package for programming. Click "Extensions" in the bottom of the drawer and search with "nezha" to download it.
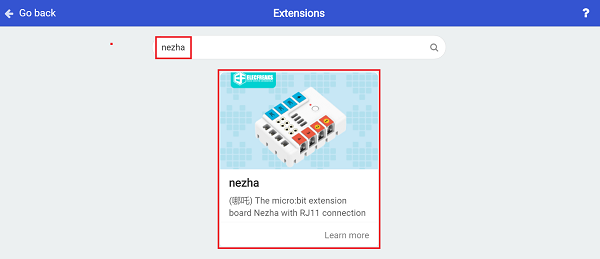
Note: If you met a tip indicating the codebase might be deleted due to incompatibility, you may continue as the tips say or create a new project in the menu.
Step 2
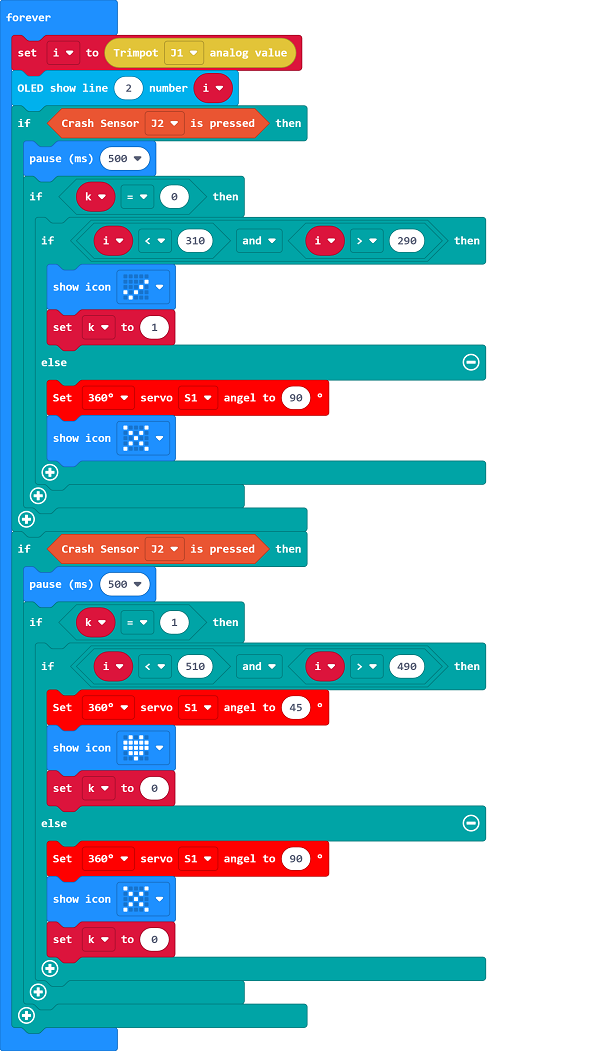
Programme as the pictures indicate
Reference
Link: https://makecode.microbit.org/_Hc8CCTAUFXv9
You may download it directly below:
Result
Adjust the numbers by rotating the trimpot, press the crash sensor after you choose the numbers ready, the door would open if the two passwords are in the correct ranges or the micro:bit displays "x" and the program reruns.
