Case 29: The Dazzling Car
Introduction
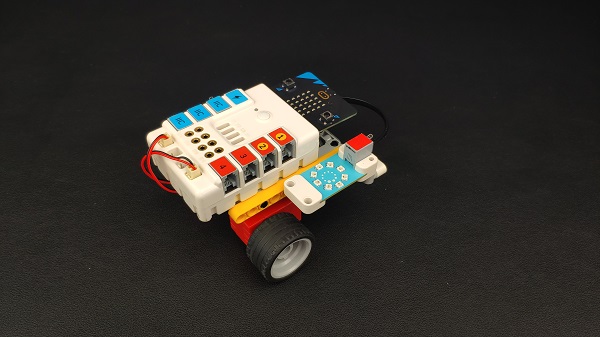
This is a simple car. I installed a cool rainbow light ring on the car, and we can display different lighting effects through this light ring.
Quick Start
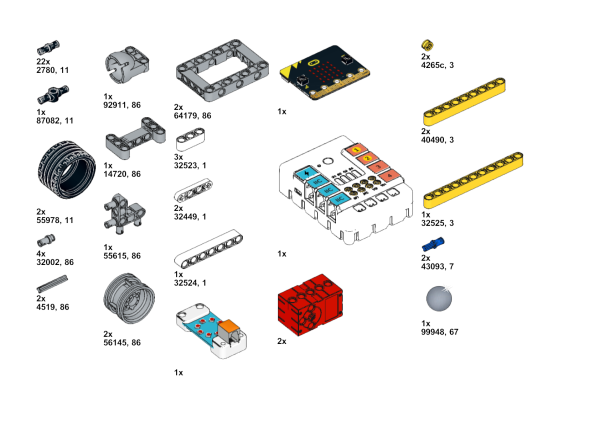
Materials Required
Nezha expansion board × 1
micro:bit V2 × 1
motors × 2
Color sensor × 1
Rainbow LED ring × 1
Bricks × n
Tips: You may need to purchase Nezha Inventor's Kit and Purchase Interactive coding accessories pack here. if you want all the above components.
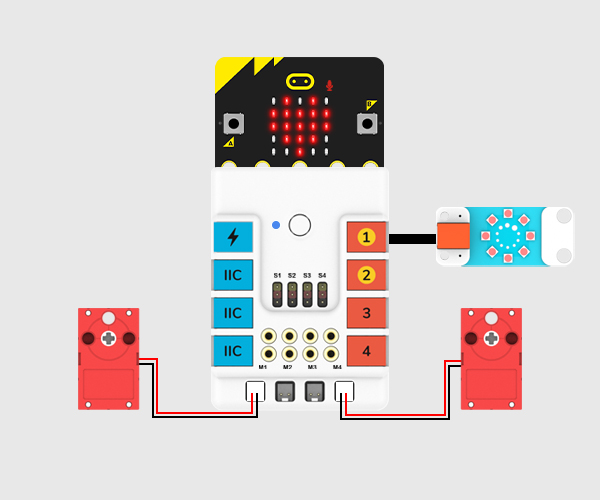
Connection Diagram
Insert the micro:bit, connect the motors to M1and M4, the color sensor to IIC port and the rainbow LED ring to J1 on the Nezha expansion board as the picture shows.
Assembly Video
Link: https://youtu.be/Am1ZEq1CqnY
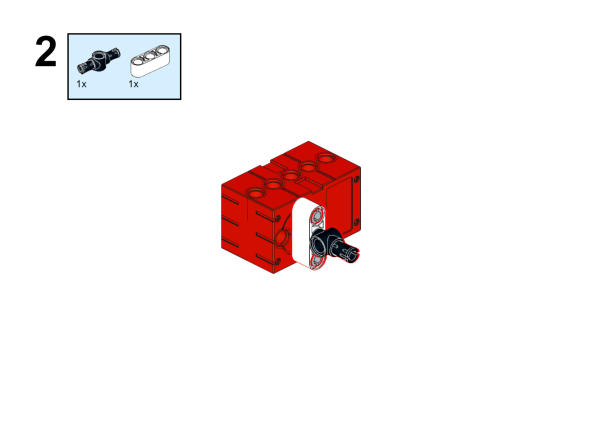
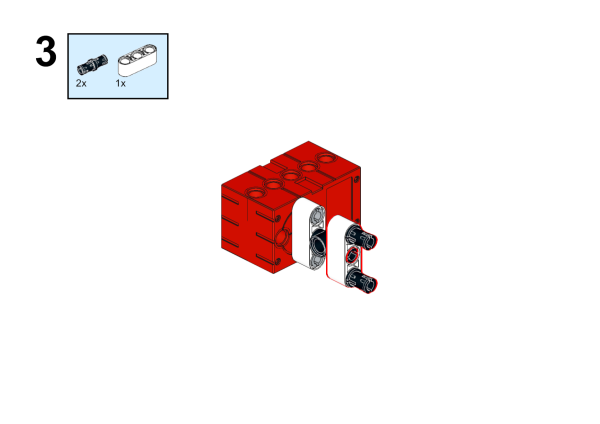
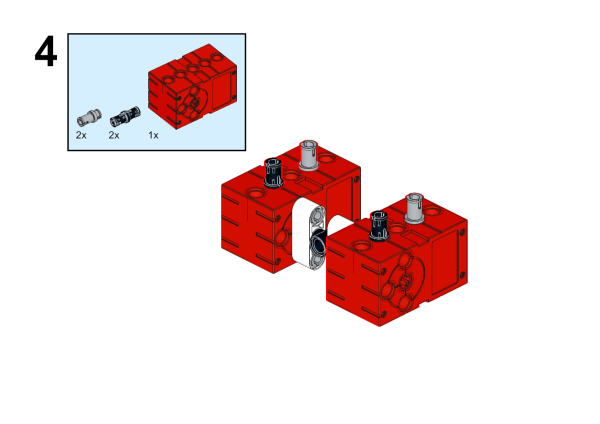
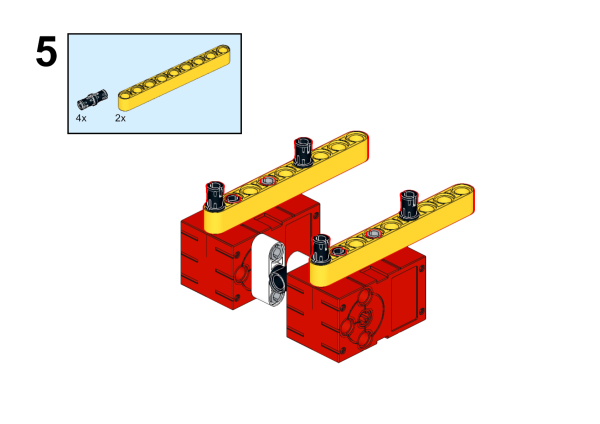
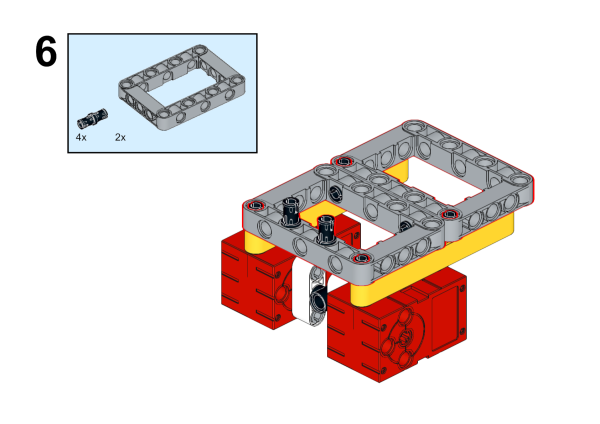
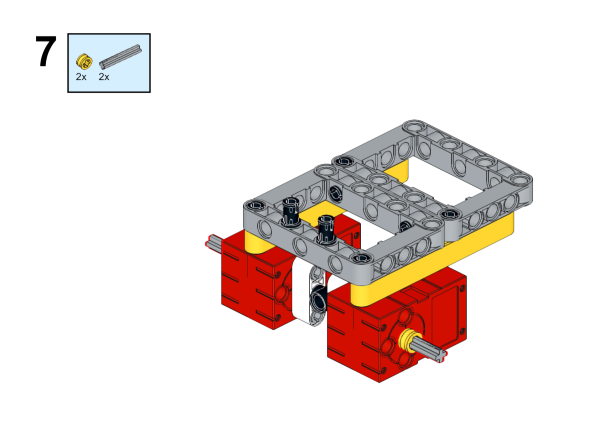
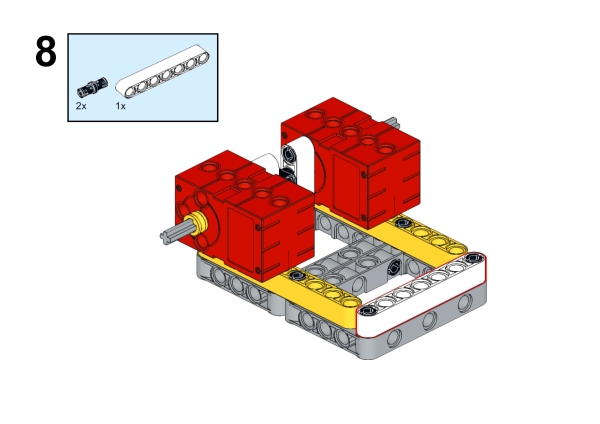
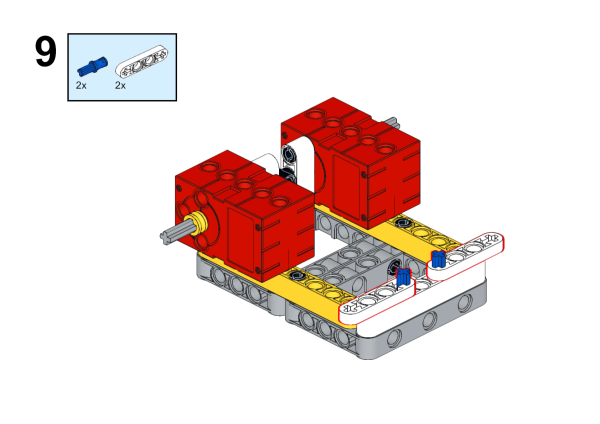
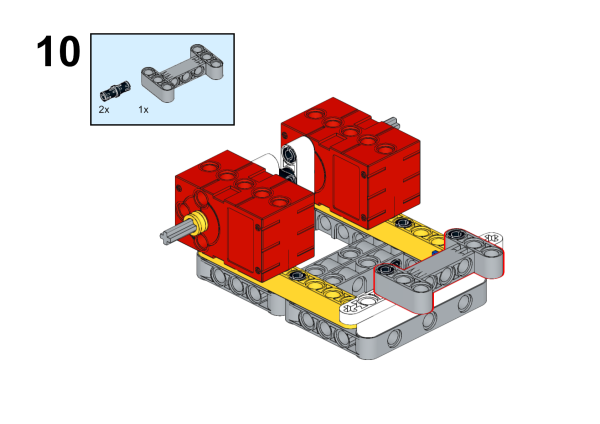
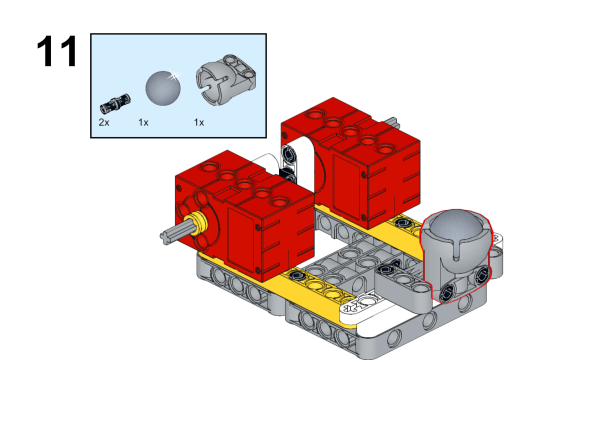
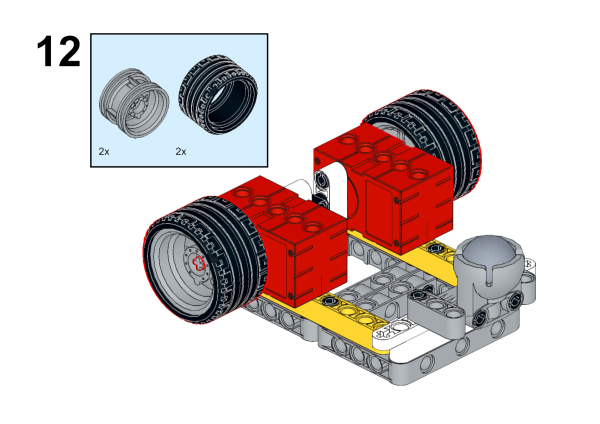
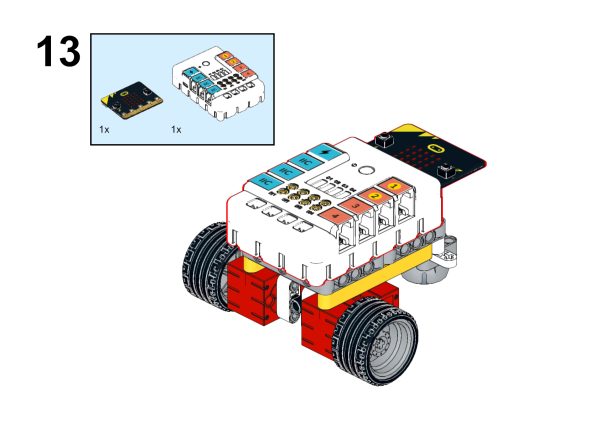
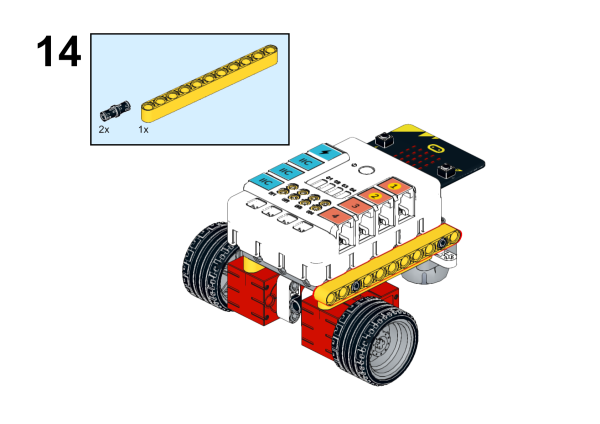
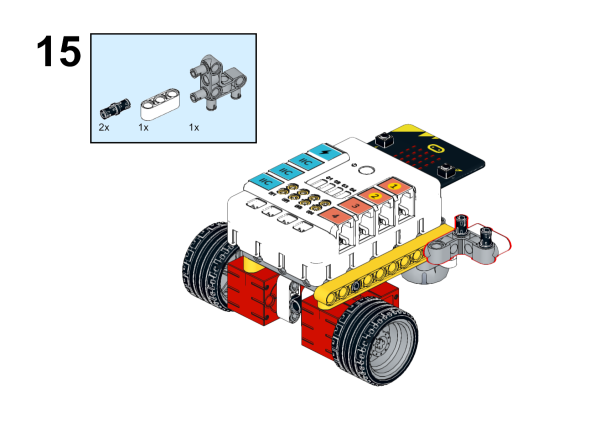
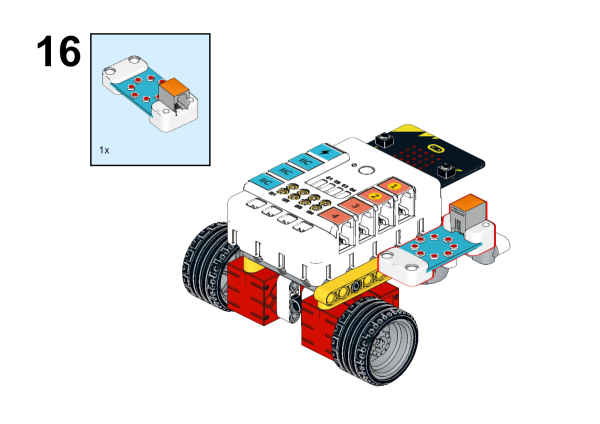
Assembly Steps
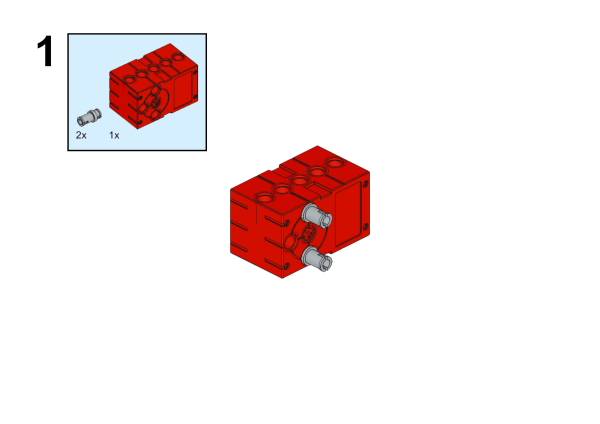
MakeCode Programming
Step 1
Click "Advanced" in the MakeCode to see more choices.
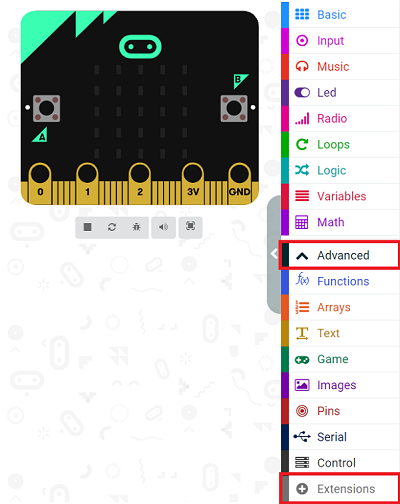
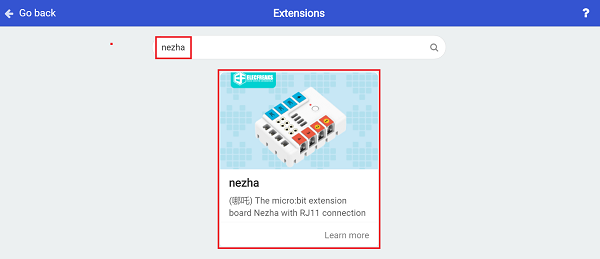
For programming, we need to add a package, click "Extensions" at the bottom of the MakeCode drawer and search with "nezha" in the dialogue box to download it
Notice: If you met a tip indicating that some codebases would be deleted due to incompatibility, you may continue as the tips say or create a new project in the menu.
Step 2
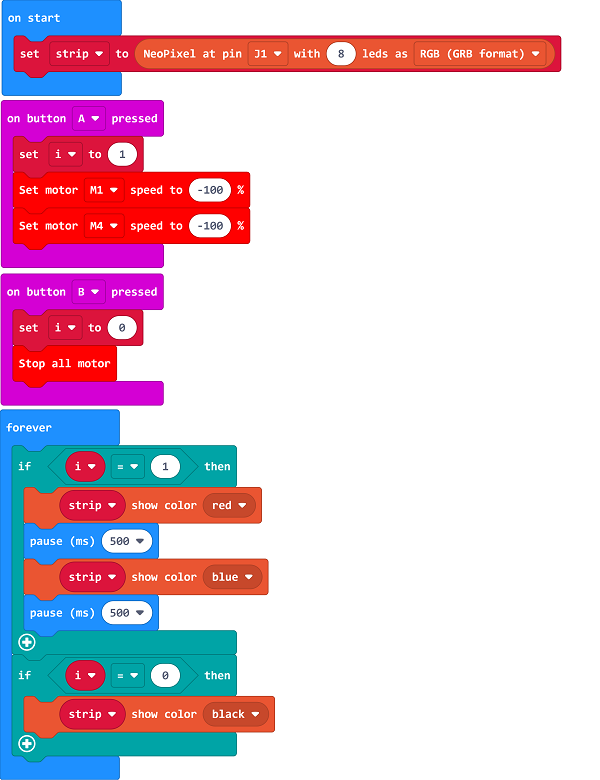
Code as below:
Reference
Link: https://makecode.microbit.org/_JtKg7ffF1YK7
You may also download it directly below:
Result
After powering on, press button A to drive the car foward and the LEDs light up in red and blue, press button B to stop the car and the LEDs light off.