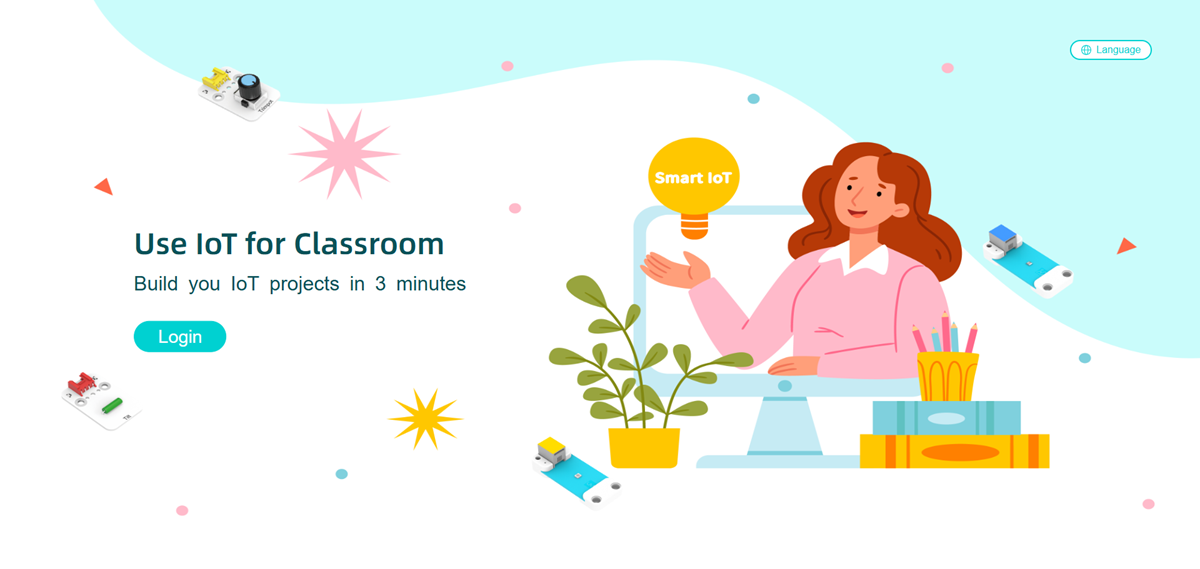
Case 6: Smart Weather Station & SmartIoT
Introduction
This course builds on the existing smart climate kit cases and adds IoT data upload and AI analysis modules. It guides students to build a smart weather station to collect environmental data (temperature, humidity, wind speed, UV intensity, dust concentration), upload the data to the SmartIoT platform in real time for visualization, and then export the data from the platform to send to an AI assistant (e.g., Doubao) for in-depth analysis. The course aims to help students integrate "sensor technology + IoT platform + AI tools", establish a complete thinking chain of "data collection - visualization - intelligent analysis", further understand the technical path of climate change monitoring, and cultivate the ability to solve environmental problems using technology.
Teaching Objectives
Knowledge Objectives
- Consolidate knowledge about the impact of climate change on the environment and humans, and master the operating principles of the smart climate kit;
- Understand the core functions of the SmartIoT platform (device management, data upload, visualization) and the basic logic of IoT data transmission;
- Comprehend the full process of "sensor collection → platform upload → AI analysis".
Skill Objectives
- Independently build the hardware of a smart weather station and realize multi-sensor data collection;
- Master the operations of device creation, API configuration, and real-time data upload on the SmartIoT platform;
- Learn to export data from SmartIoT and use an AI assistant to conduct data trend analysis and correlation exploration;
- Comprehensively present climate data conclusions by combining OLED display, platform visualization, and AI analysis results.
Attitude Objectives
- Deepen attention to climate change and develop a scientific inquiry awareness of "speaking with data";
- Cultivate the ability to solve technical problems (e.g., WiFi connection failure, abnormal data upload) through teamwork;
- Stimulate innovative thinking in using "IoT + AI" technology to address environmental challenges.
Extended Objectives
- Understand practical application scenarios of IoT platform and AI tool collaboration (e.g., smart agriculture, urban environmental monitoring);
- Attempt to independently design data collection schemes (e.g., increasing collection frequency, expanding sensor types) to optimize AI analysis dimensions.
Teaching Preparation
Before starting the teaching, please ensure you have prepared the following necessary materials:
| Image | Name |
|---|---|
 | Smart Climate Kit |
 | micro:bit V2 |
 | Personal Computer (PC) |
 | USB Data Cable |
 | ELECFREAKS Smart Home Material Pack |
These materials will provide you with a complete experience and ensure the smooth progress of subsequent operations and learning. If you have prepared the above content, we can move on to the next step.
Teaching Process
Course Introduction
Welcome, everyone! Today we will dive into a fascinating topic — climate change. Have you ever wondered what climate change means for our lives and the environment? Do you want to know how to use technology to explore and solve this global challenge? Today, we will work together to build an exciting smart weather station. Using the sensors and devices in the smart climate kit, we will explore and analyze environmental data such as temperature, humidity, and air quality. Not only will we understand the importance of climate change, but we will also learn how to take measures to address this global challenge. Let's explore the mysteries of climate change together, cultivate environmental awareness, and become a force for changing the world! Are you ready? Let's get started!
Inquiry Activities
- Group Discussion: "To realize the process of 'data collection → cloud upload → AI analysis', what key problems do we need to solve?" (Guide students to mention: How to connect hardware to WiFi, how to transmit data to the platform, how to export data from the platform, and how to analyze data with AI);
- Task Breakdown: Each group takes on one key problem, infers solutions based on existing knowledge (e.g., sensor connection), and the teacher summarizes and clarifies the implementation steps of this course.
Hardware Connection
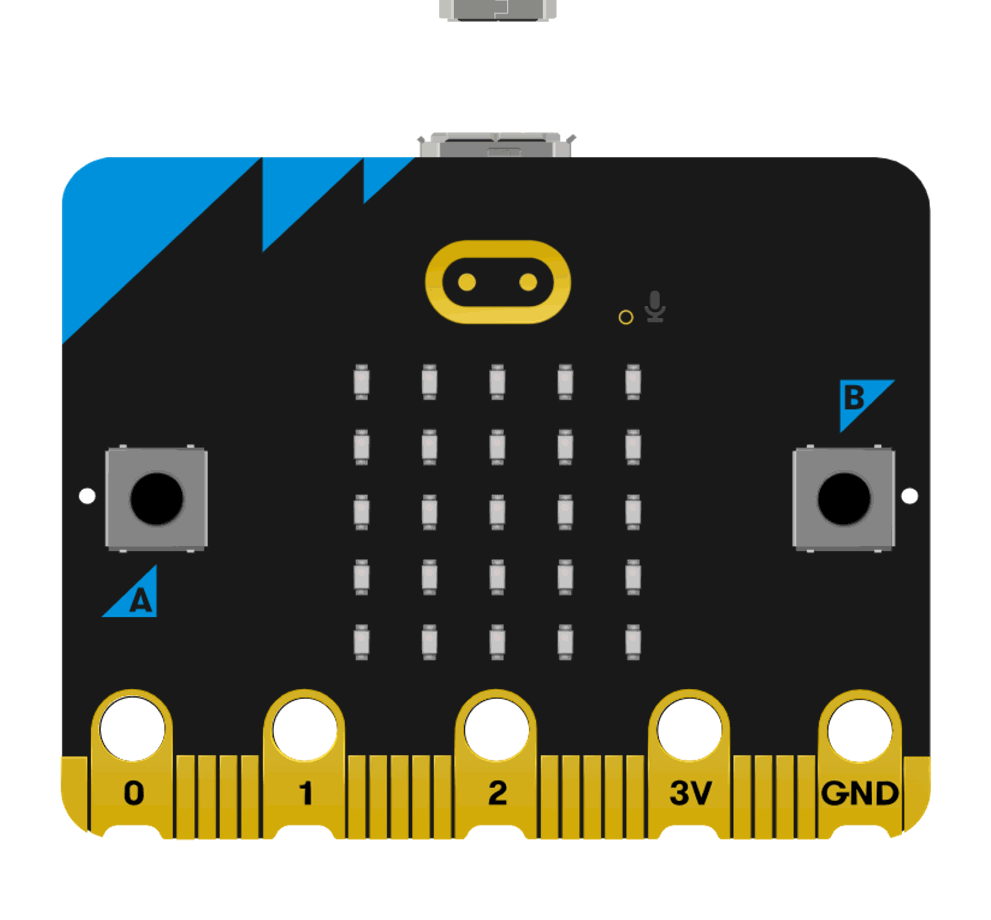
Connect the wind speed sensor to the P1 pin, the UV sensor to the P2 pin, the LED of the dust sensor to the P3 pin, the "out" terminal of the dust sensor to the P4 pin, the DHT11 temperature and humidity sensor to the P10 pin, and install the OLED display on the IoT:bit.
SmartIoT Platform Settings
Platform Link: https://www.smartiot.space/
Language Switching
The SmartIoT platform supports multiple languages (machine translation), and users can select the corresponding language by themselves.
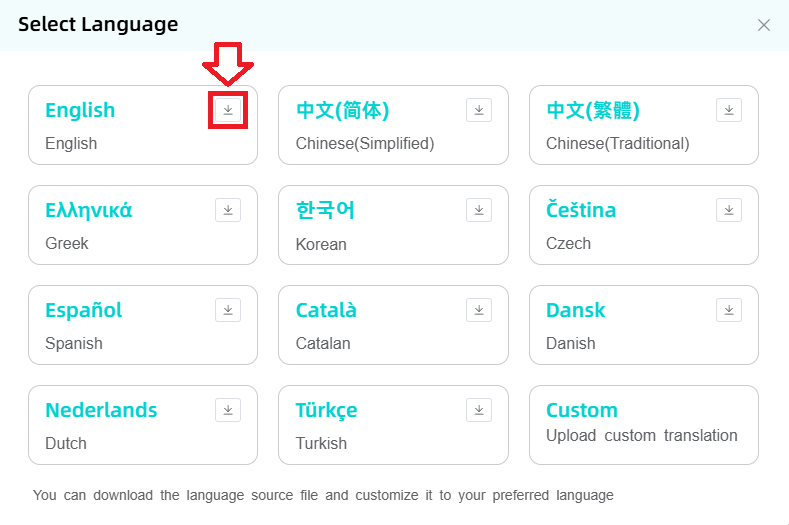
Click the language switch button in the upper right corner.

Select a language to switch.
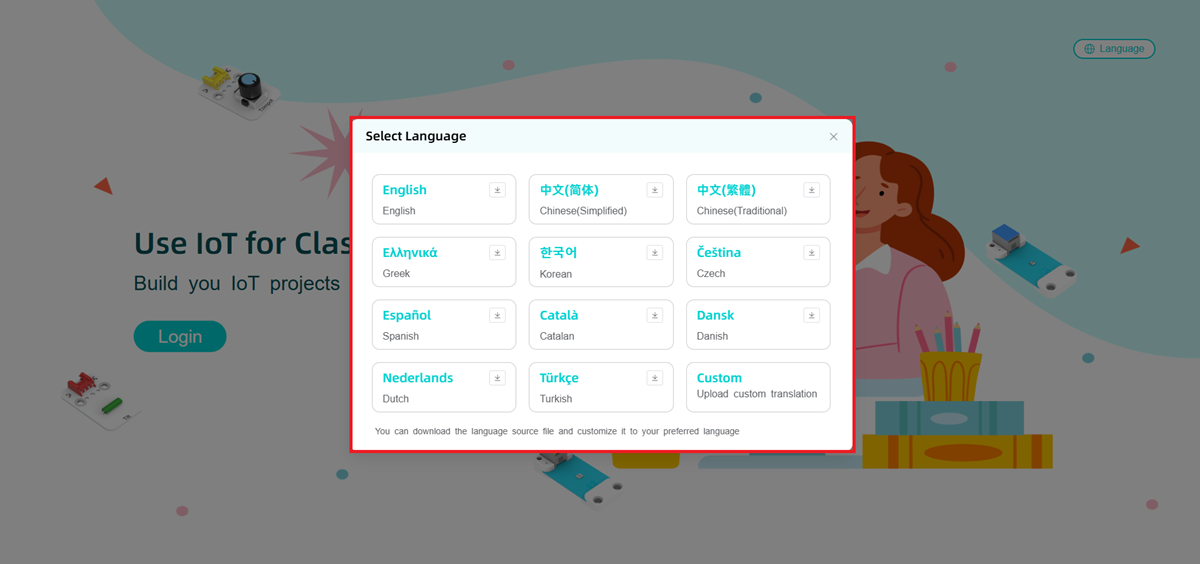
If the available languages cannot meet your needs or there are translation errors, you can click "Download Template" to translate by yourself.
After completing the translation, click "Upload" to upload the translation file. This translation function can only be applied to the local device.

SmartIoT Account Registration
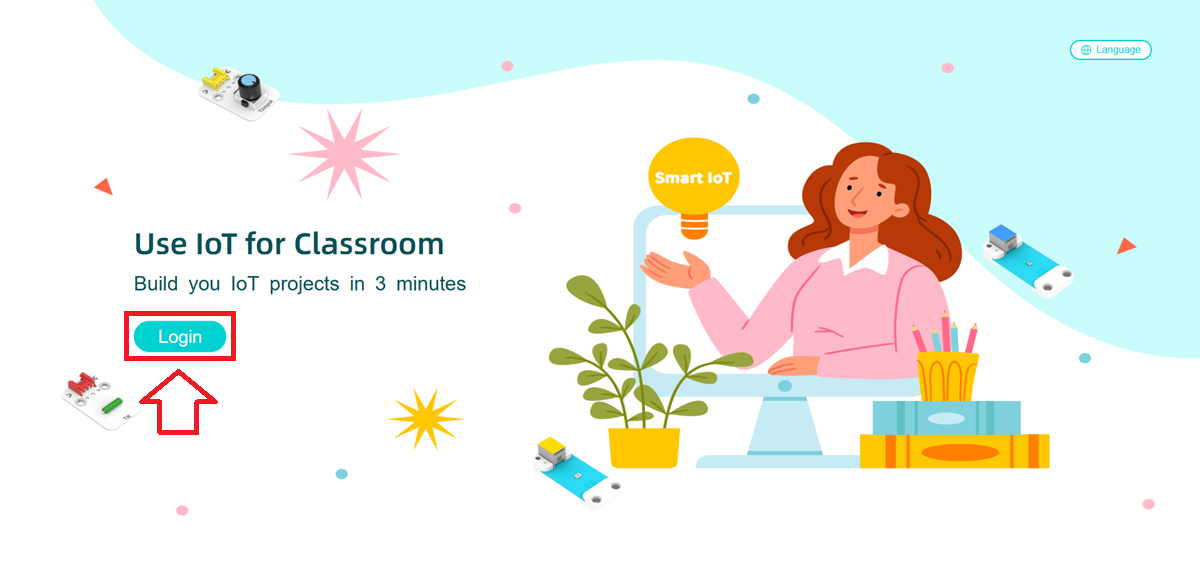
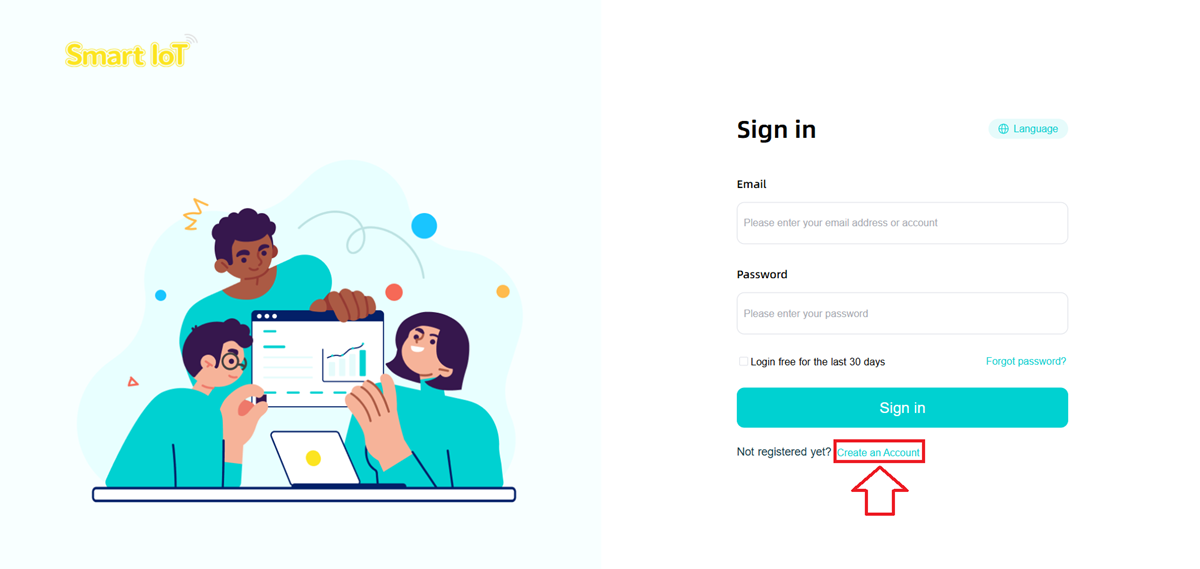
Access the SmartIoT official website and click "Login" to enter the account login page.
Click "Create an Account" to enter the new account registration page.
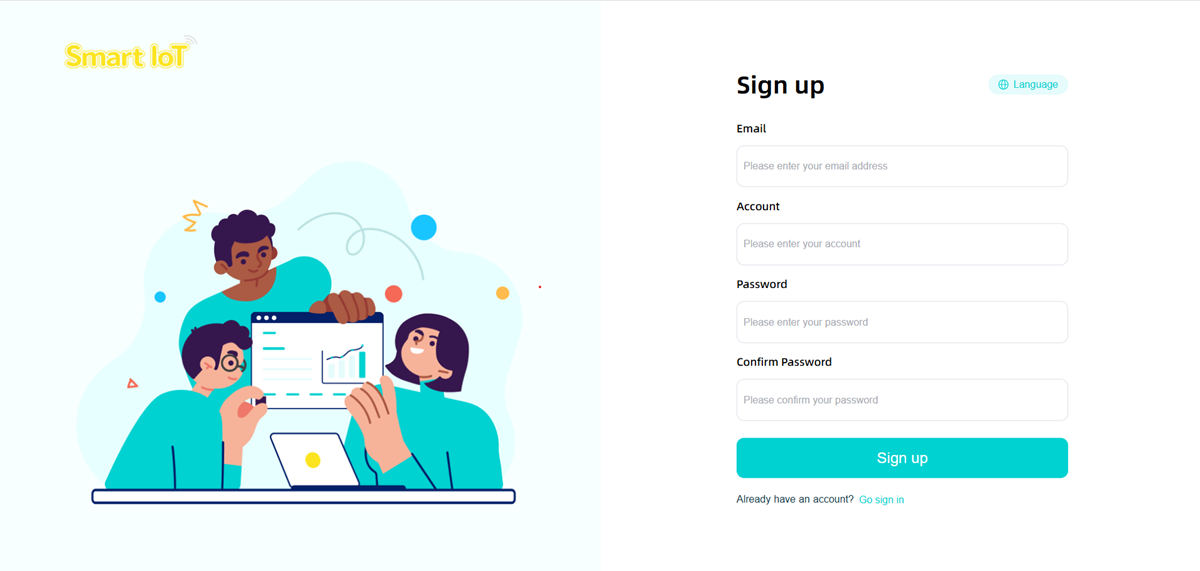
Fill in the registration information (email, username, password) and click "Sign Up".
Click "Sign Up" to register, and an email will be sent to the email address you provided.
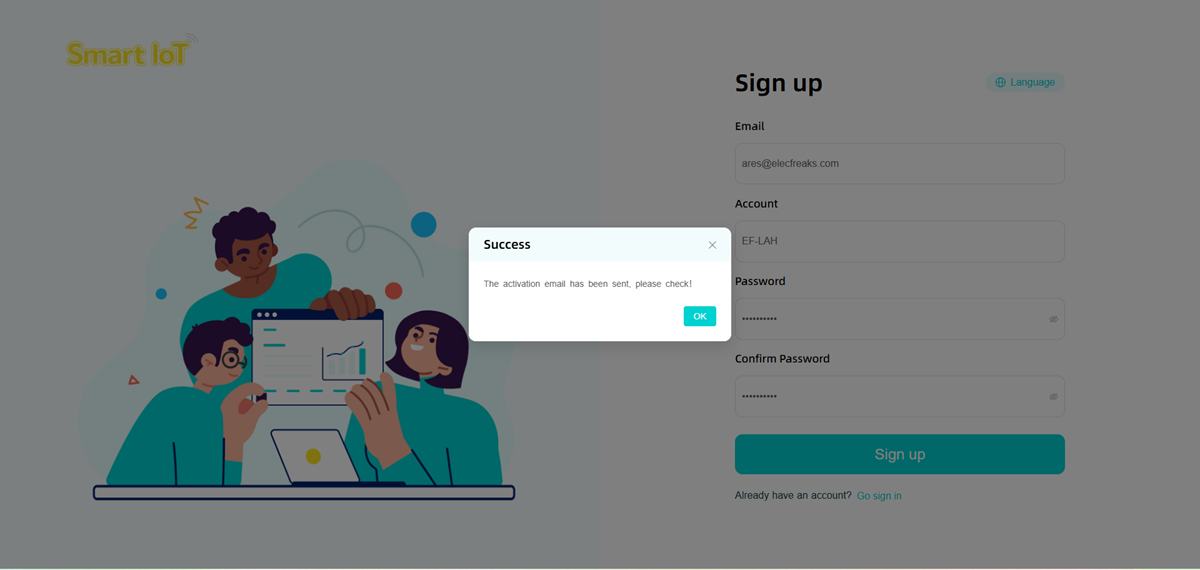
Check the inbox or spam folder of your email (it may be identified as spam), and open the link in the email to activate your account.

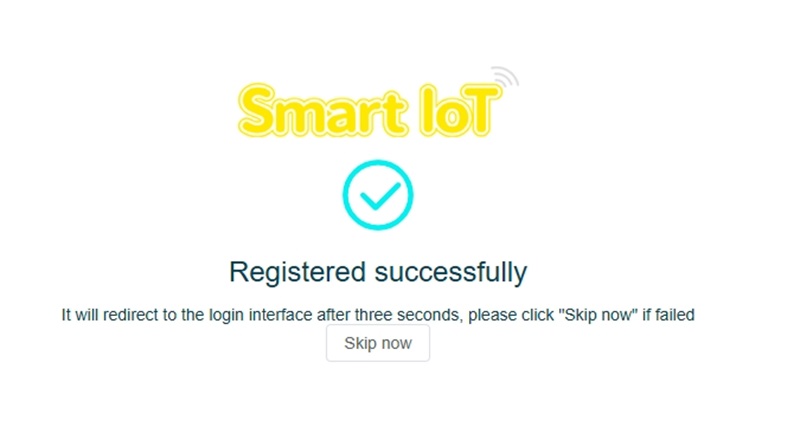
Registration is successful.
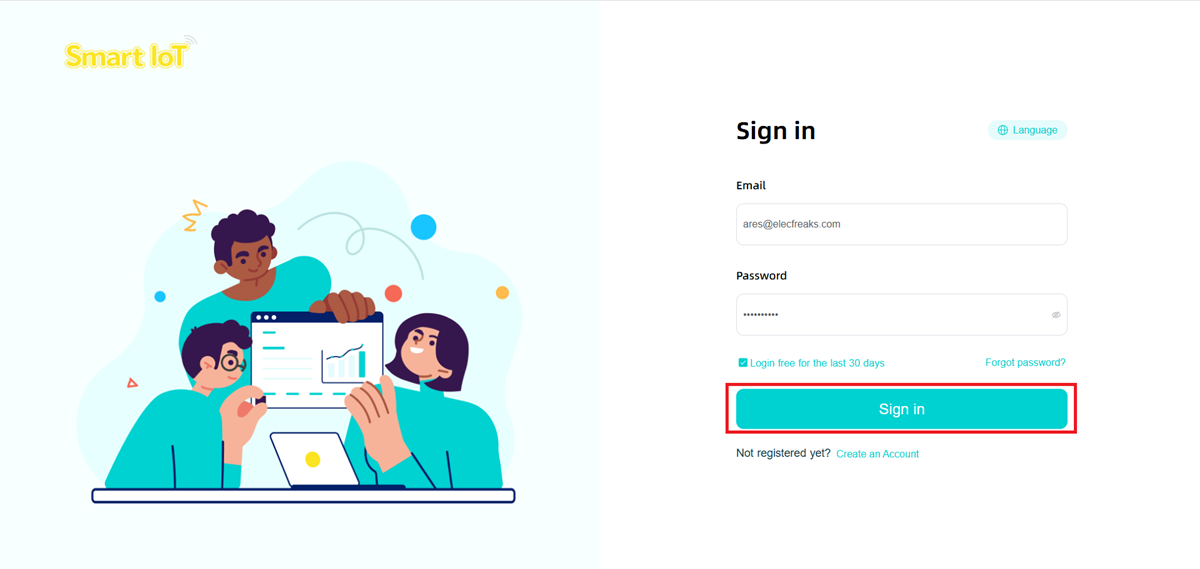
Logging into SmartIoT
Enter your account and password under "Log in", then select "Log in".
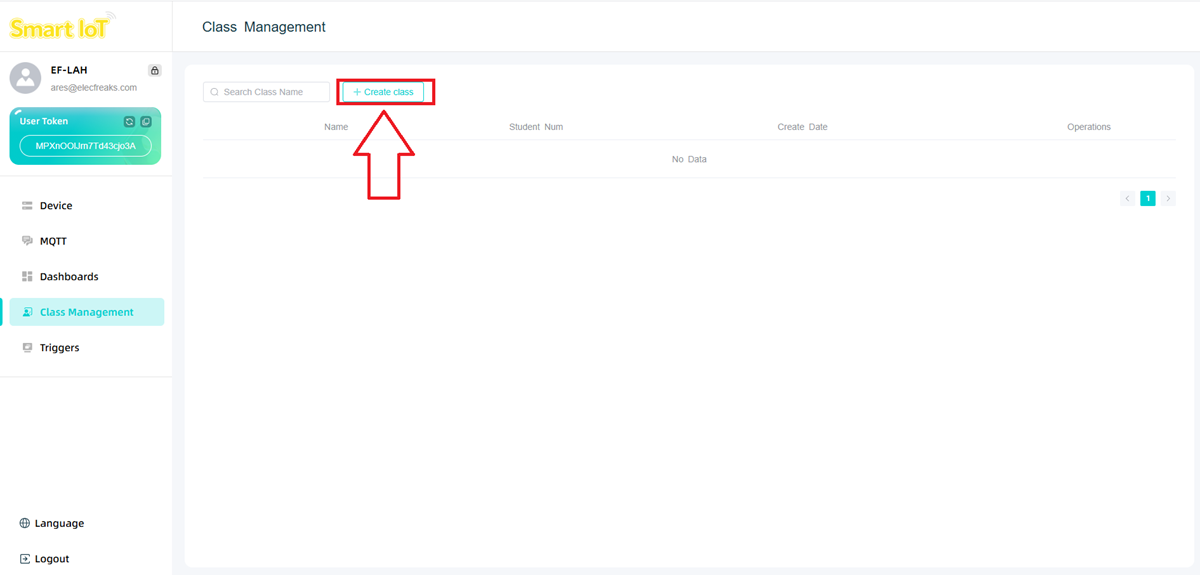
SmartIoT Platform Class Management
The class management function allows you to create student accounts.
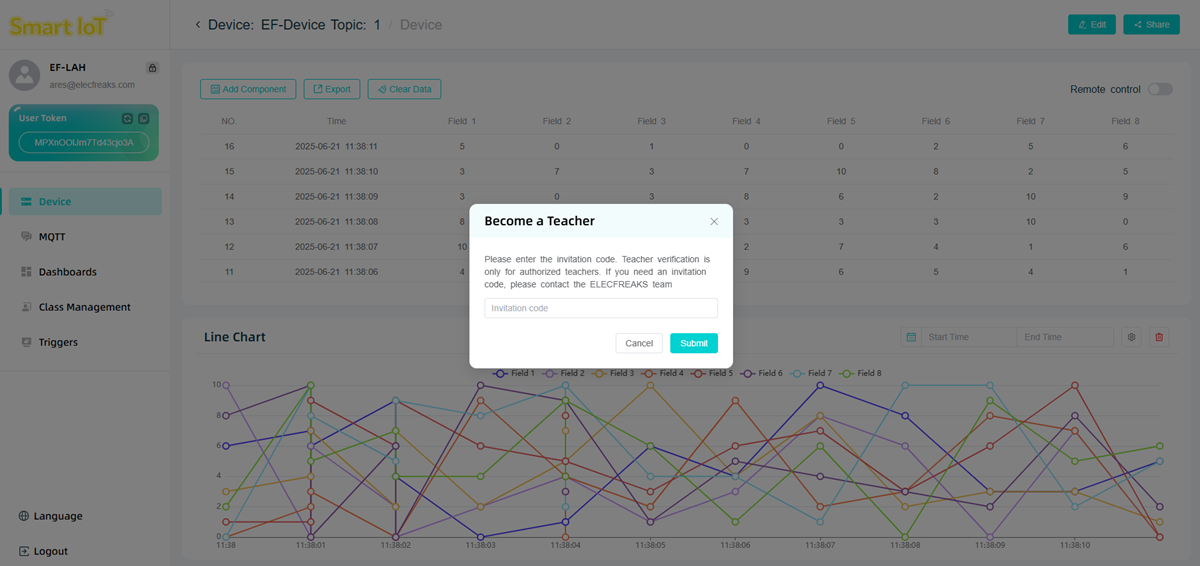
Click the "Class Management" option to enter the class management interface. If a teacher account activation code is required, please contact ELECFREAKS official staff via email: support@elecfreaks.com.
Click "Create Class" to create a class.
In the pop-up window, enter the class name and student names.
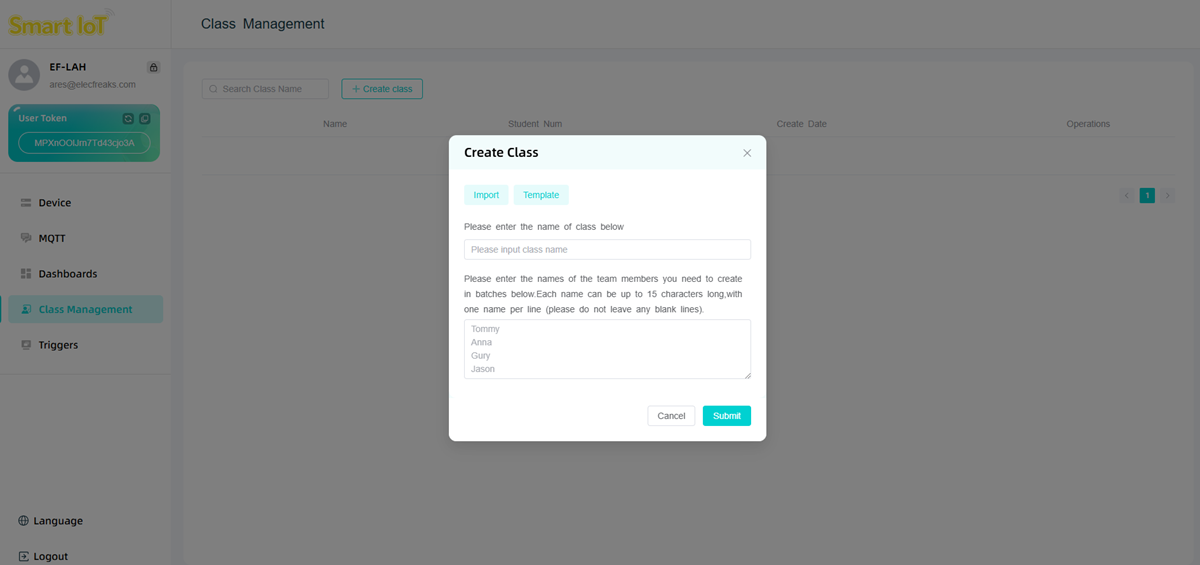
Note: Each name can contain a maximum of 15 characters, with one name per line (do not leave any blank lines).
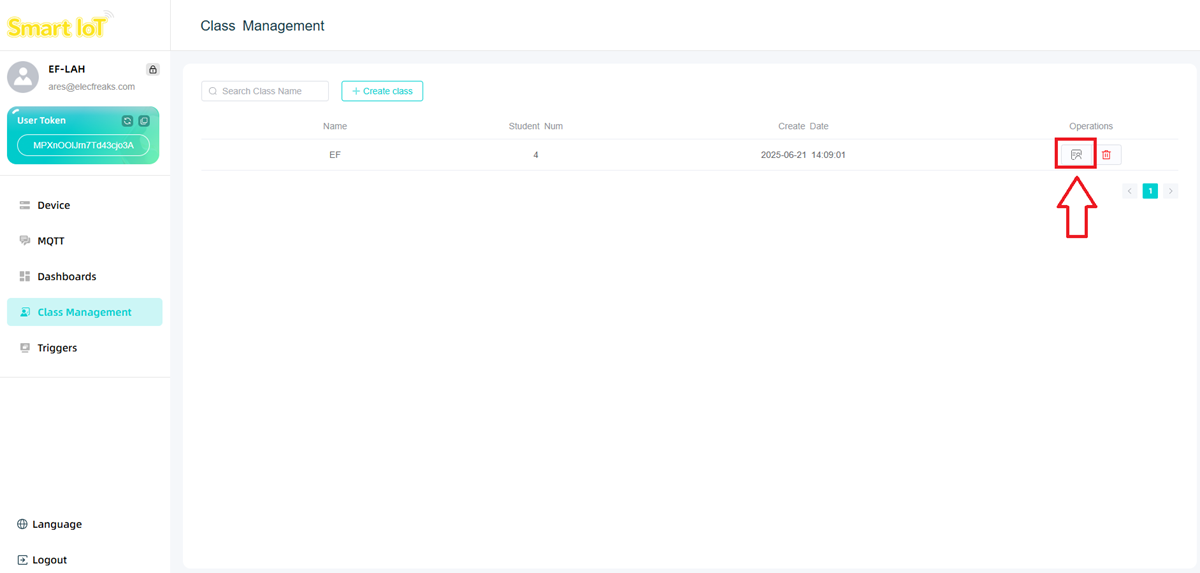
After creating the class, click the icon to enter the student information management interface.
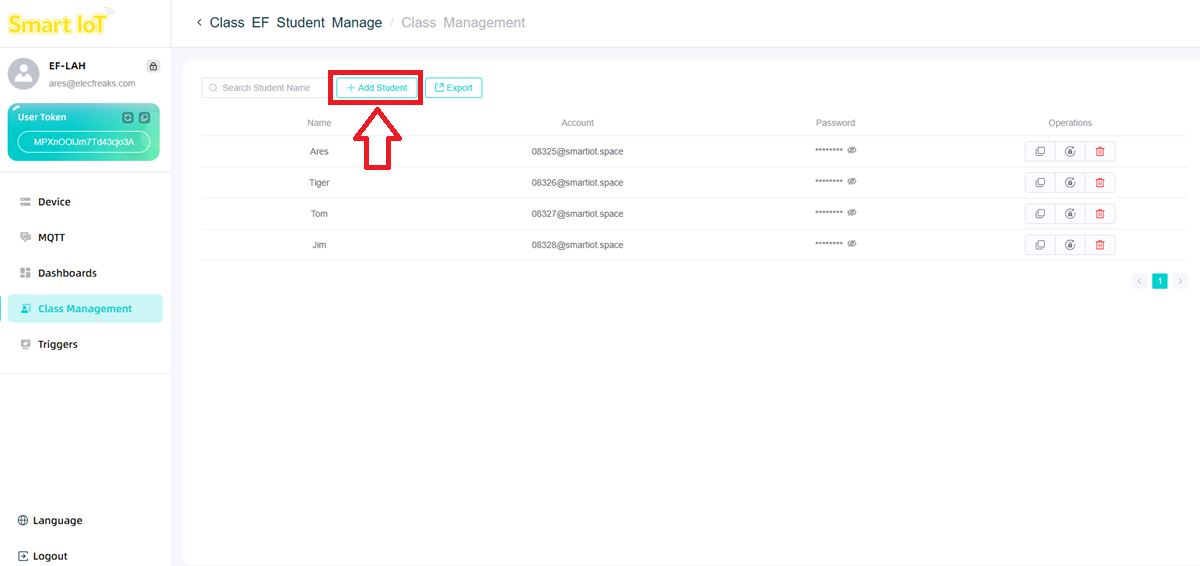
Click "Add Student" to fill in student information.
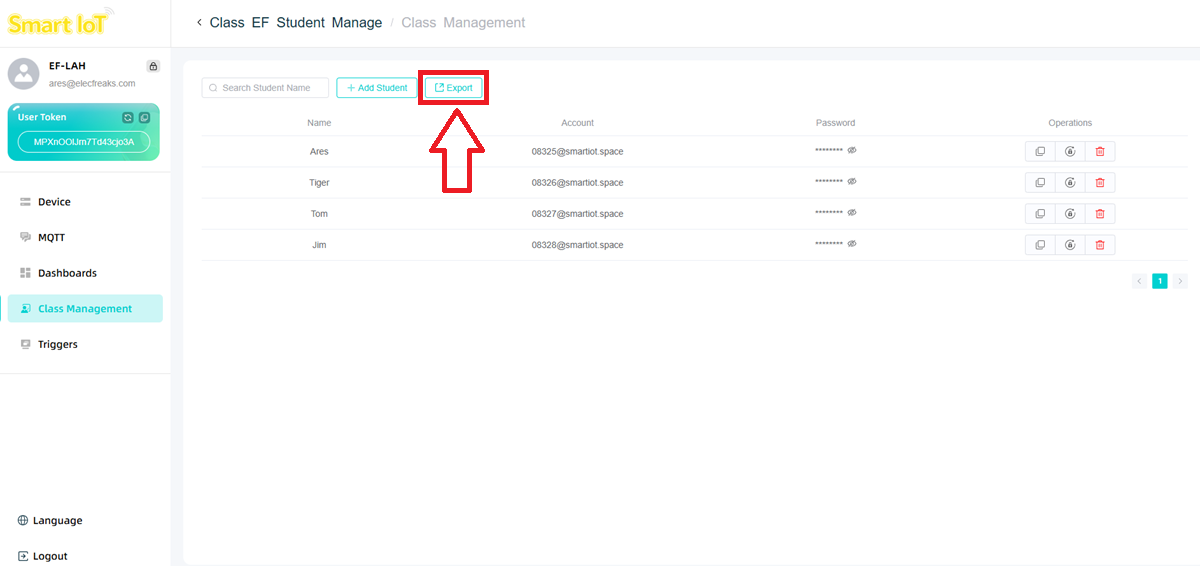
Click "Export" to export all student data.
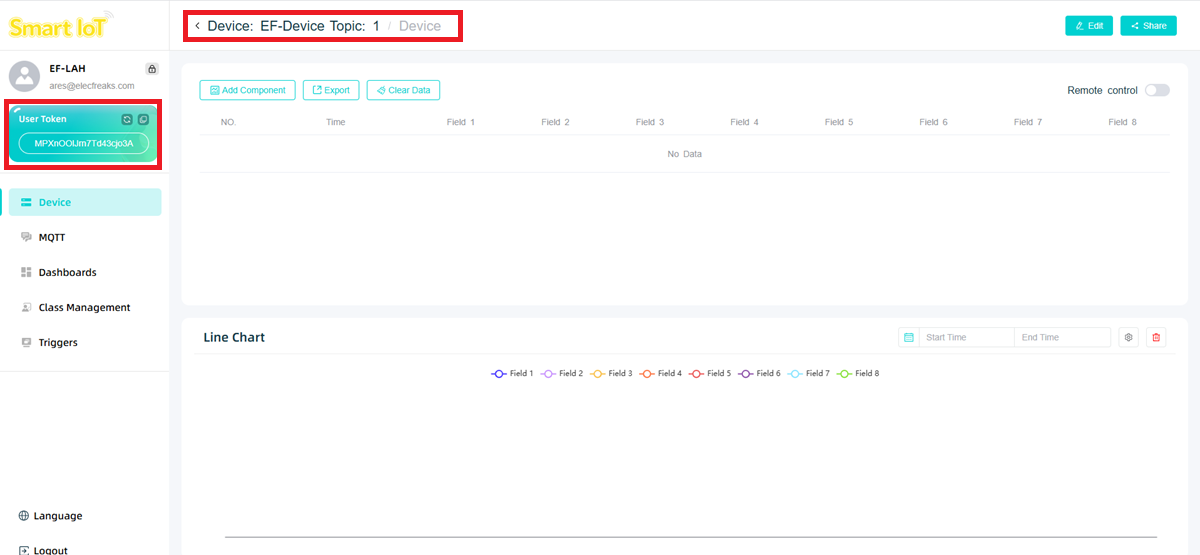
User Token and Topic
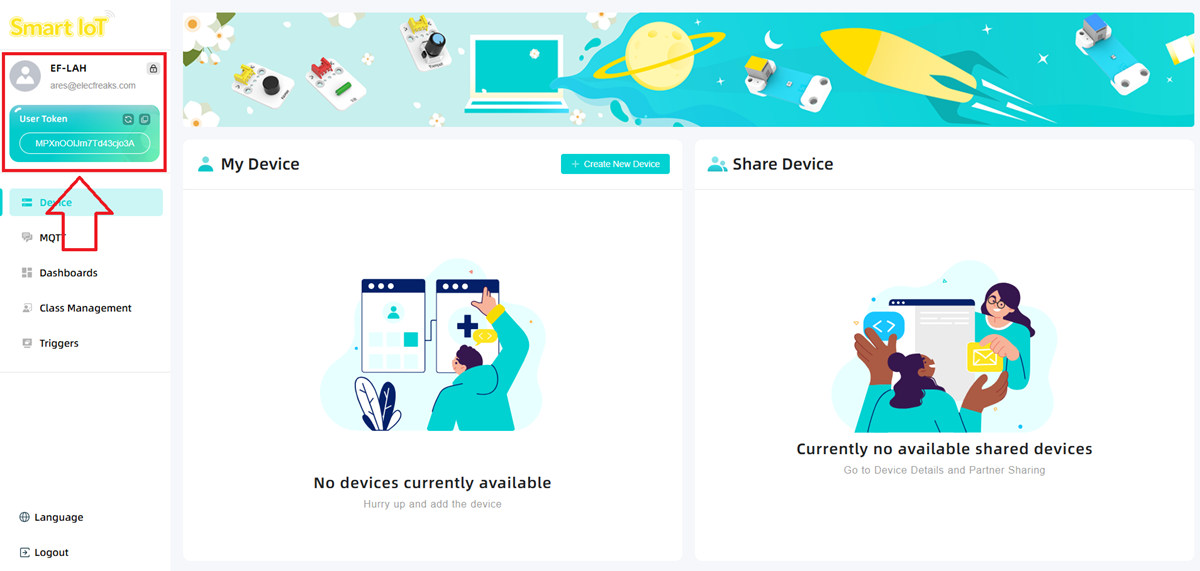
Click "Log in" to enter the device management page. The username and personal email are displayed in the upper left corner. The User Token is a unique identification code of the platform, bound to your account. It is unique globally and will not be duplicated.
Note: The User Token will be used in subsequent programming.
Code Programming
Adding Software Libraries
Access "makecode.microbit.org" and click "New Project".

Enter the project name in the pop-up window and click "Create".

Click "Extensions" in the code drawer.
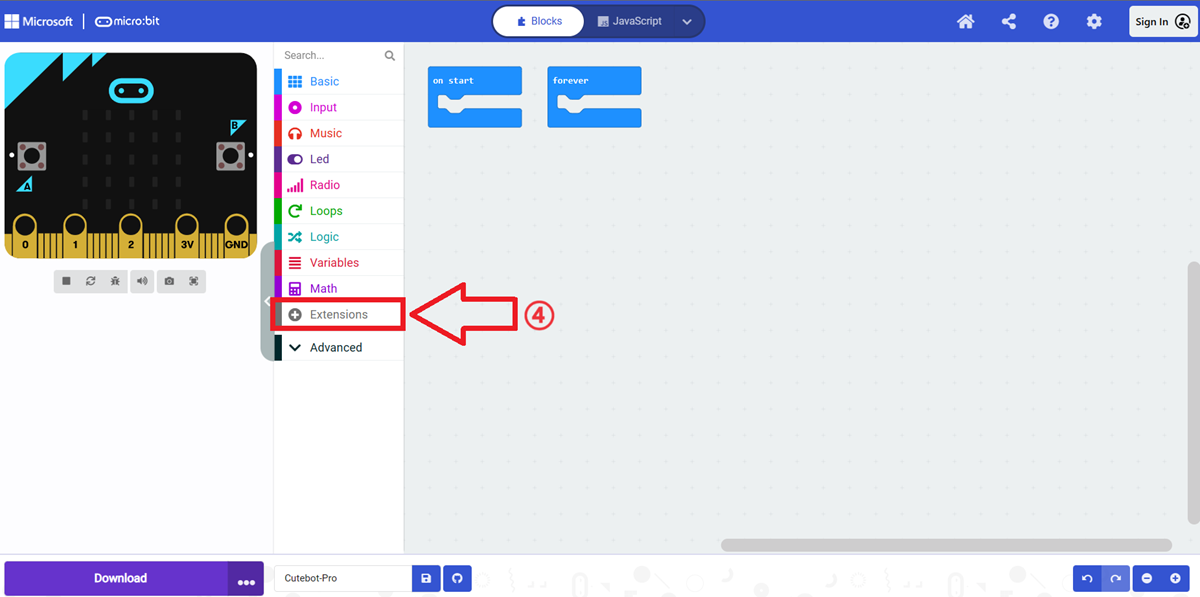
Enter "IOT" in the pop-up interface, press the Enter key to search, and select to load the IOT software library.

Code Explanation
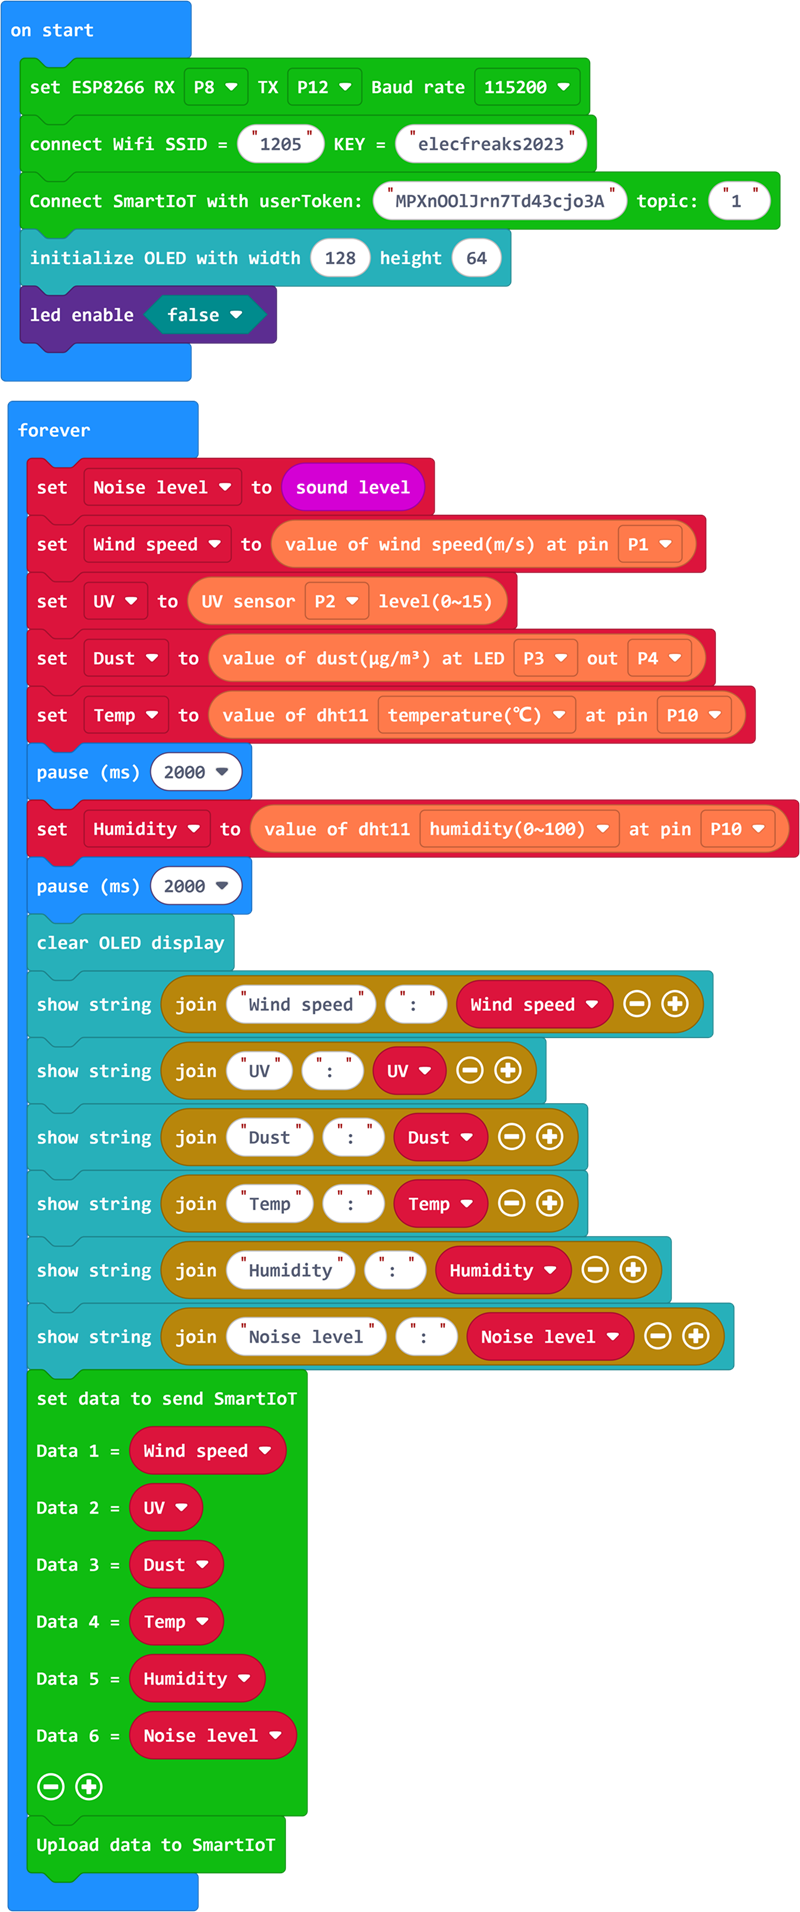
Connect to the SmartIoT platform: The User Token is a unique account identification code, bound to the account and cannot be modified. The Topic is a unique device identification code, and the device to be uploaded must be specified during connection. Device numbers (Topics) are arranged in sequence.

Obtain these two pieces of data on the SmartIoT platform.
Determine whether the platform connection is successful (returns True if successful, False if failed).

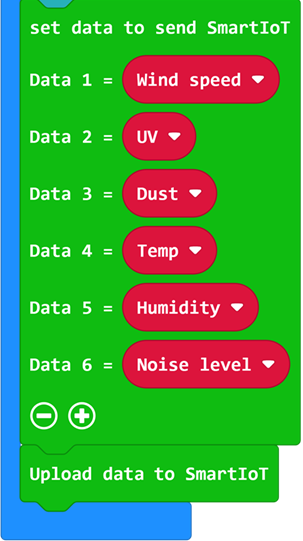
Click the "+" below the block to add data for upload. A maximum of 8 sets of data can be uploaded simultaneously.

Example Code
Initialize the WiFi module and connect to WiFi.
Note: When connecting to a Wi-Fi network, ensure your Wi-Fi network is operating in 2.4GHz mode.
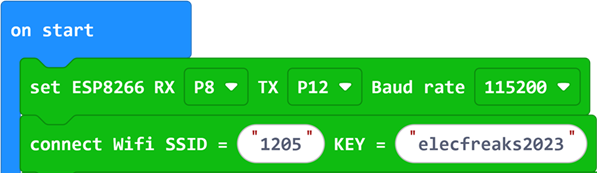
Connect to the SmartIoT platform and fill in the
userTokenandTopic.
Initialize the OLED display.

Since the shared pins of the LED matrix screen on the micro:bit are used, the LEDs need to be disabled.

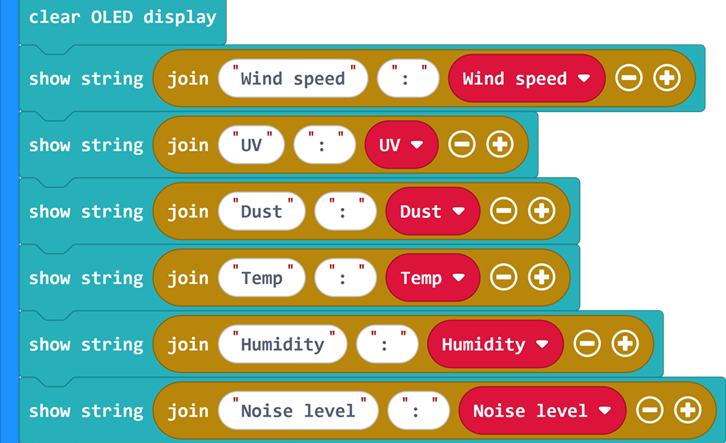
Collect data such as noise intensity, wind speed, UV intensity, dust concentration, temperature, and humidity.
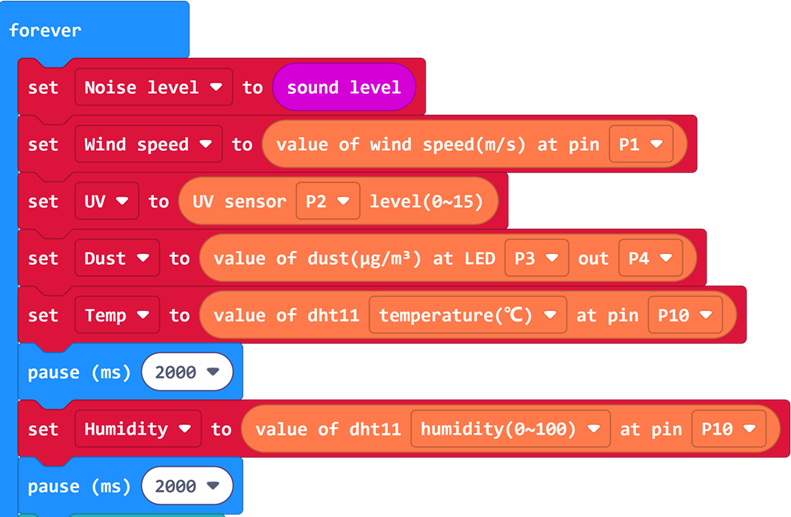
Display the data on the OLED display.
Upload the data to the SmartIoT platform.
Complete Program
You can refer to the program via the link: https://makecode.microbit.org/_Fc3d3q9mKMsK
You can also download the program directly through the following webpage:
Downloading the Program
Connect the PC to the micro:bit V2 using a USB cable.
After a successful connection, a drive named
MICROBITwill be recognized on the computer.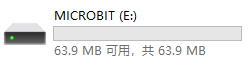
Click
 in the lower left corner and select
 Connect Device.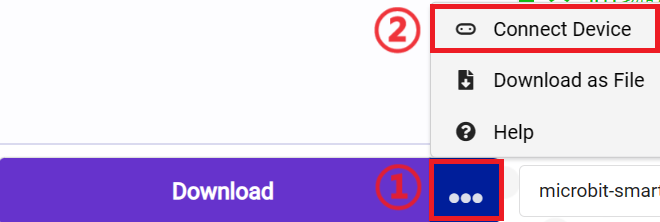
Click
 .
.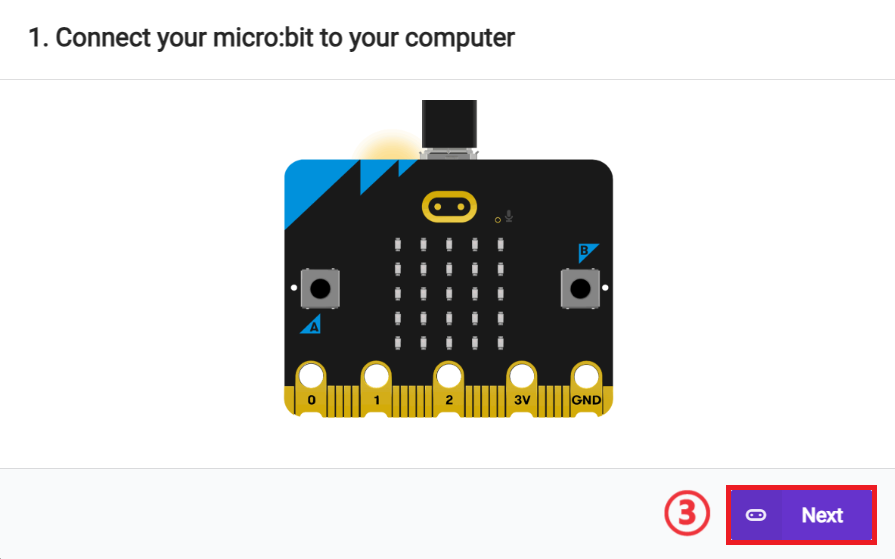
Click
 .
.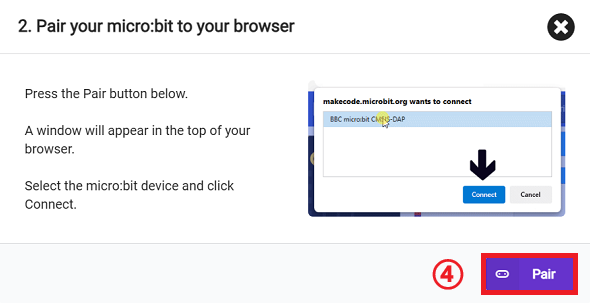
Select
BBC micro:bit CMSIS-DAPin the pop-up window and click "Connect". The micro:bit is now successfully connected.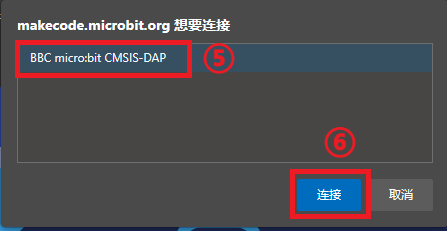
Click to download the program.

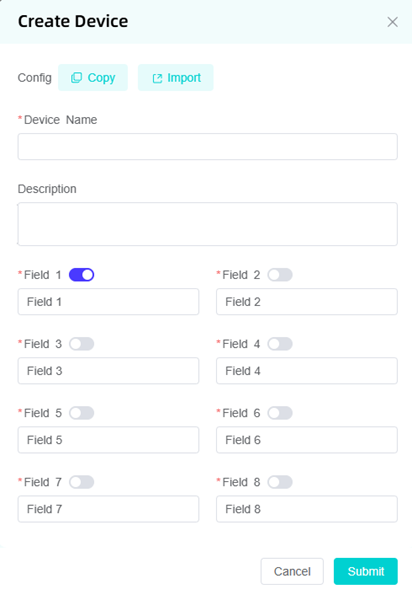
Adding a Device
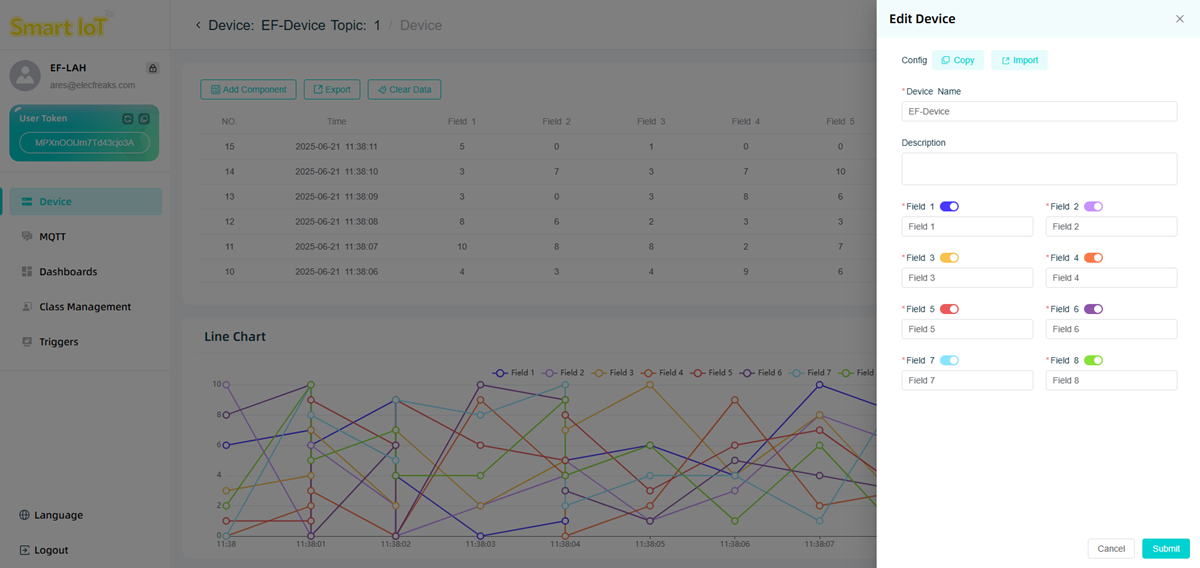
Add a new device (Create new device). The Topic is the unique identification code of your device (unique to your account).
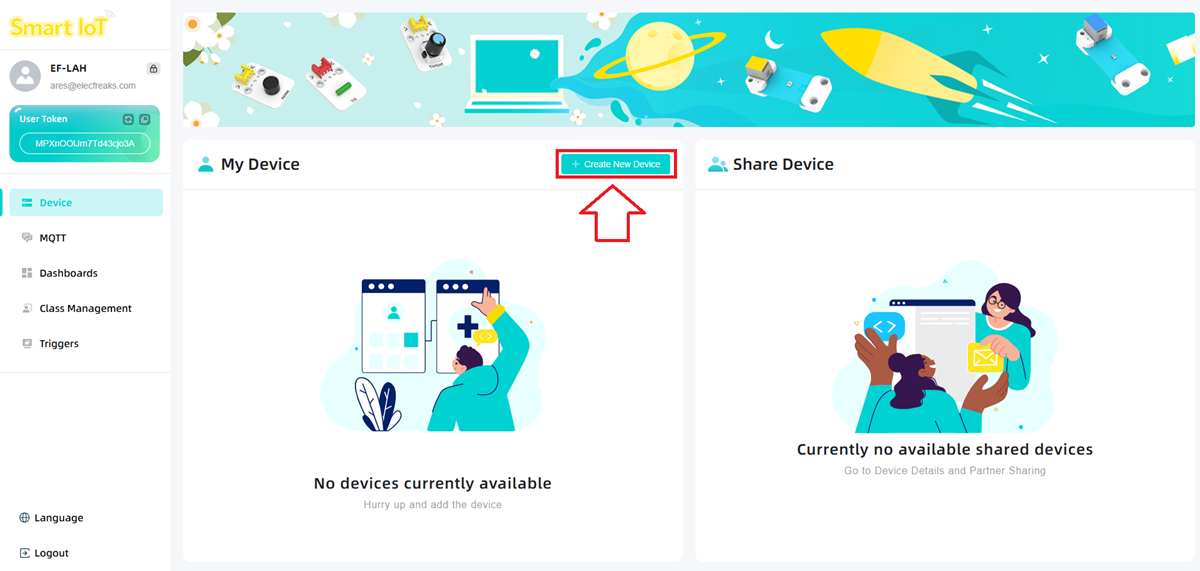
You can modify the device name and configure the device (you can have a maximum of 10 devices).
Device Page Component Management
Click "Add Component" in the upper left corner.
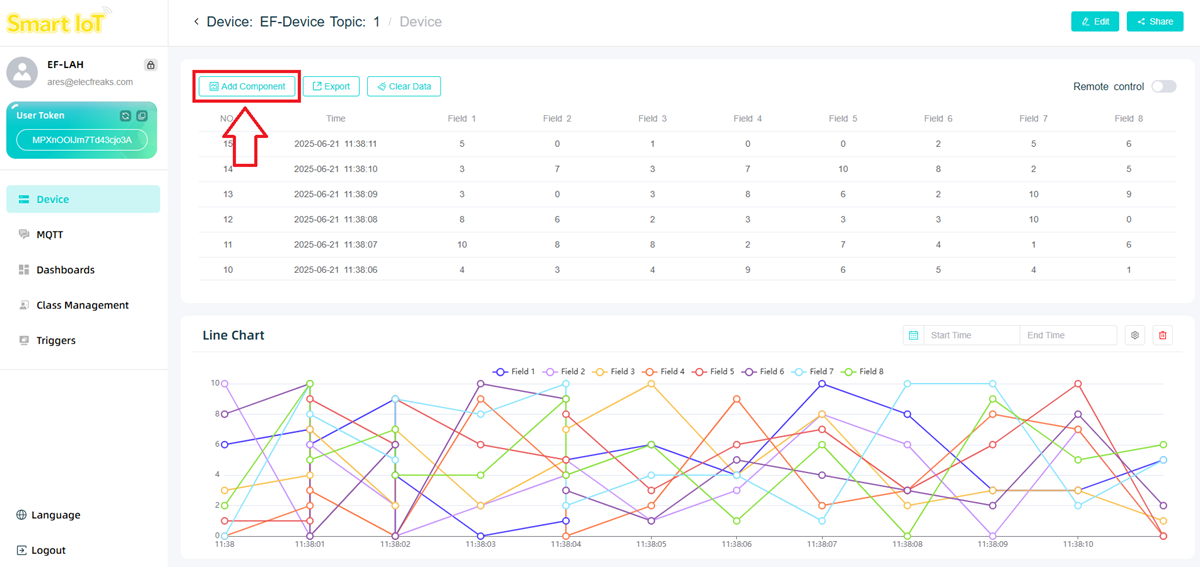
Select the component and size in the pop-up window.
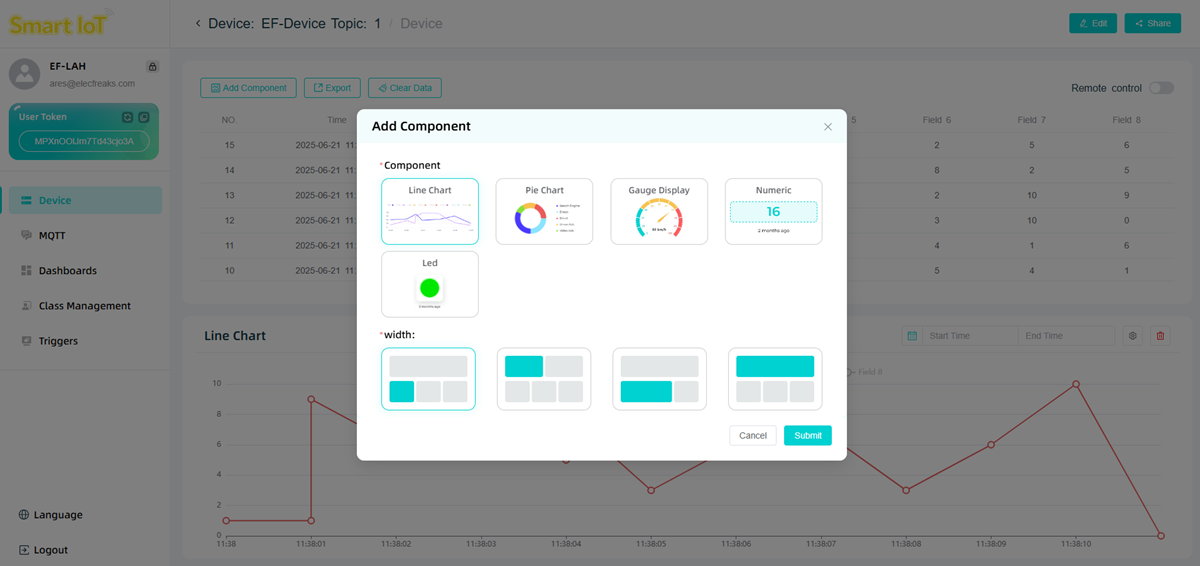
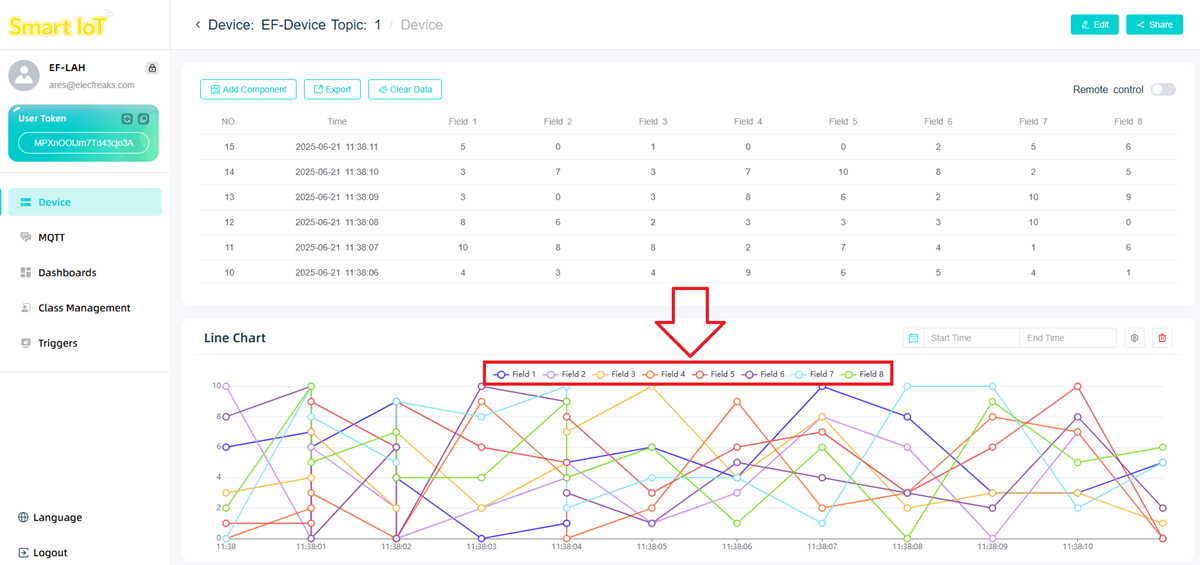
Line Chart
A maximum of 8 sets of data can be displayed, which is suitable for showing data change trends.
You can set the data range displayed in the chart through
Start TimeandEnd Time.
Or select the data to be displayed in the chart through data labels.
Or click
Editto enter the settings interface.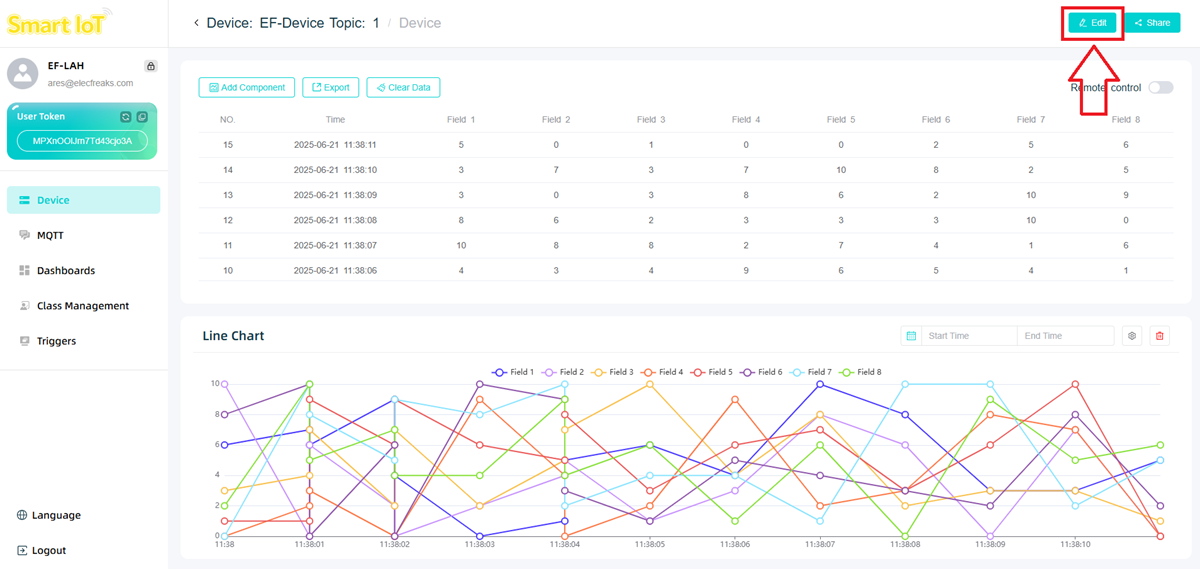
Select the data information to be displayed by checking the labels.
Teamwork and Presentation
- Divide students into groups to jointly complete the production of the case and program writing.
- Encourage students to cooperate, communicate, and share experiences with each other.
- Each group has the opportunity to present their completed case to other groups and give a demonstration.
Expected Result: After connecting the power supply, the current wind speed, UV intensity, dust amount, temperature, humidity, and noise intensity will be displayed on SmartIoT.

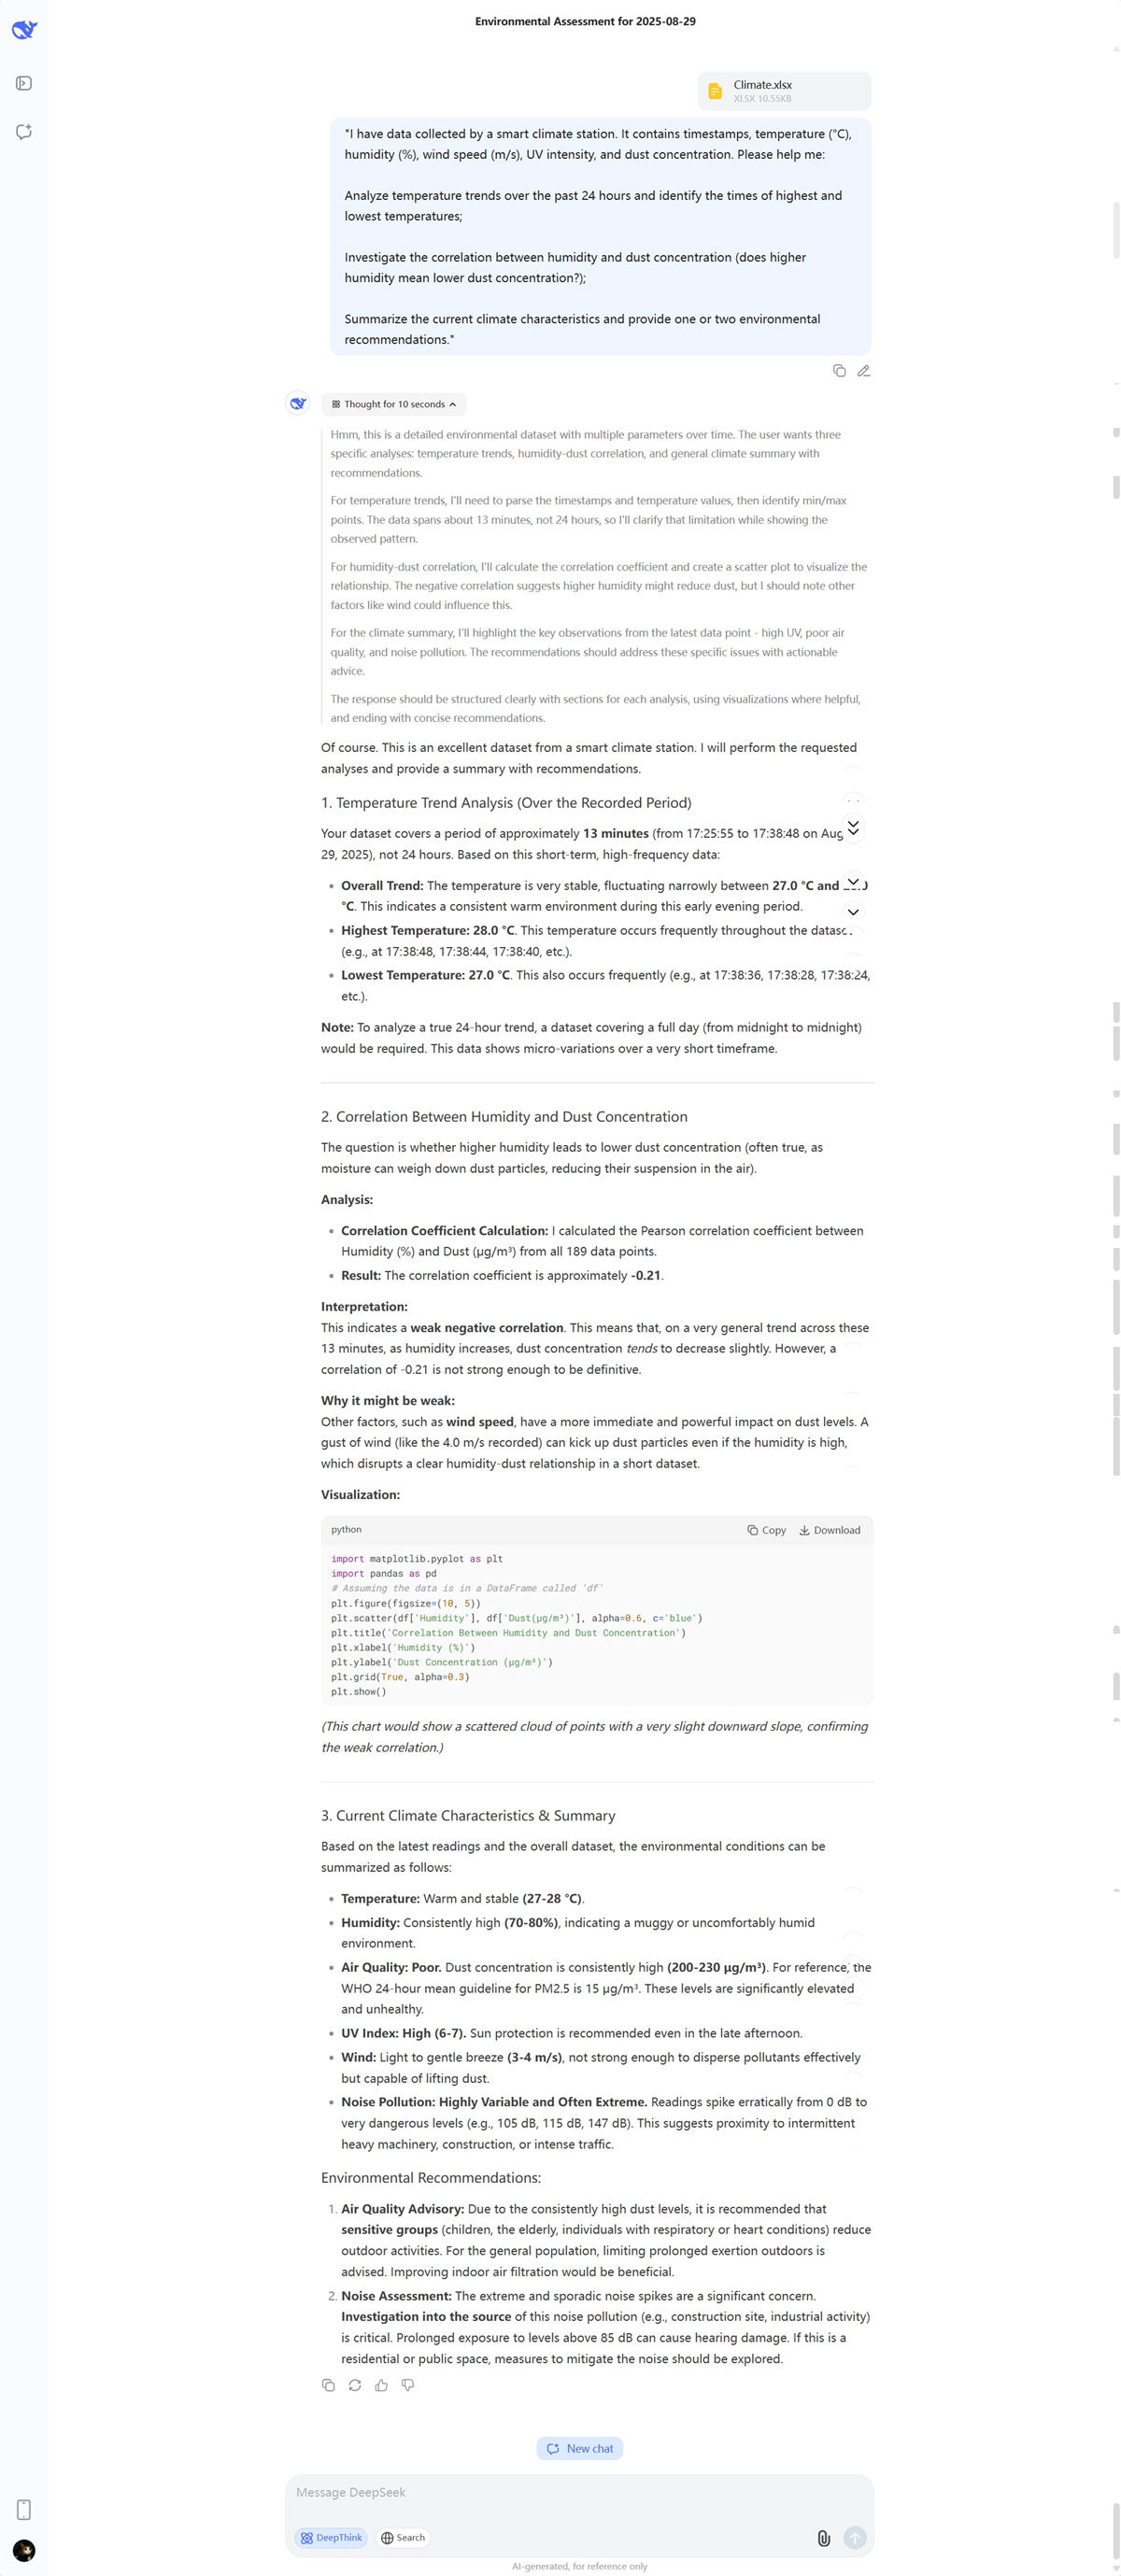
After uploading the data to SmartIoT, export the uploaded data as an EXCEL spreadsheet via the data export button.

Conduct simple data analysis using Deepseek:
Open Deepseek
Upload the data to Deepseek via the file upload button.
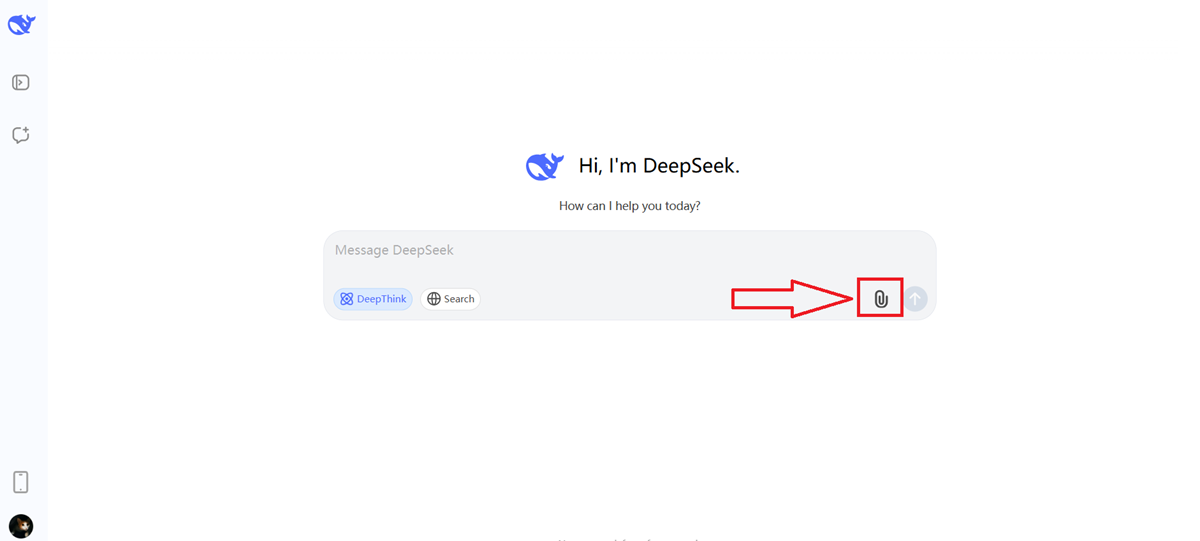
Enter a prompt to let Deepseek analyze based on the file data.
Summary and Reflection
- Each group organizes and analyzes the conclusions: Combine the trend chart descriptions and correlation conclusions provided by AI with the visualization charts of SmartIoT to form a group analysis report.
- Explain the full process of "data from collection to analysis", and share the problems encountered (e.g., WiFi debugging, data format errors) and their solutions.
- Focus on the success rate of data upload and the rationality of AI analysis conclusions, and encourage innovative ideas (e.g., adjusting the collection frequency to optimize analysis accuracy).
- Knowledge Review: Sort out the technical chain of "sensor collection → WiFi transmission → SmartIoT storage and visualization → AI analysis", and emphasize the key nodes of each step (e.g., data format, API key).
- Problem Reflection: "What links can we optimize to make AI analysis more accurate?" (e.g., extending data collection time, increasing sample size, calibrating sensor accuracy).
- Action Extension: Encourage students to use the weather station to monitor the home/campus environment after class, feed back the AI analysis conclusions to the school's environmental protection club, and propose specific environmental protection suggestions (e.g., "UV intensity is high at noon, it is recommended to wear a sun hat for outdoor activities").