Case 16 The Seesaw
Introduction
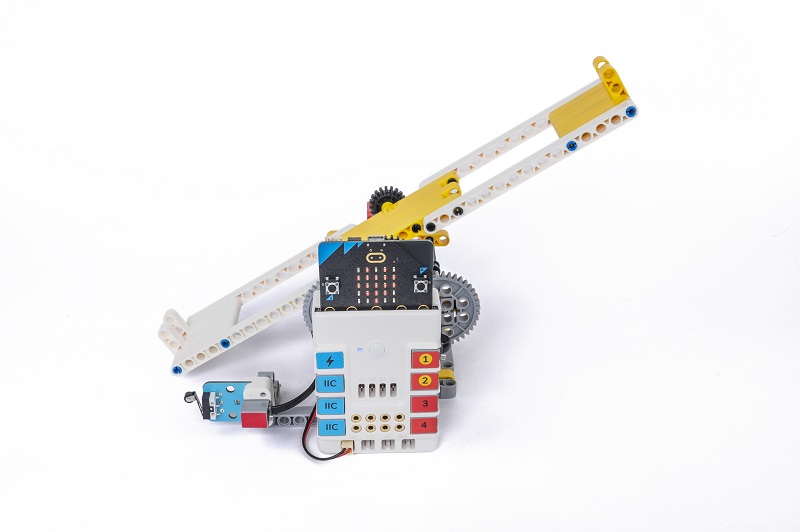
A seesaw is a classic amusement ride that is able to use the principle of leverage to achieve balance at both ends. In this lesson we will learn how a seesaw works and use Nezha Inventor's Kit V2 to create a seesaw that can swing.
Teaching Objectives
- Understand the basic principles and applications of seesaws.
- Learn how gearing works and its applications.
- Learn how to use gearing to balance a seesaw.
- Design and build suitable mechanical structures to support the movement of a seesaw.
- Develop teamwork, problem solving and creative thinking skills.
Teaching Preparation
Teaching Process
Introduce
Introduce students to the background and objectives of making a seesaw to stimulate their interest and curiosity.
You must all have played with a seesaw! A seesaw is a very interesting plaything that allows us to feel the wonders of the leverage principle. Do you know how a seesaw achieves balance? In this lesson, we will explore the principle of a seesaw together and make a special seesaw with the Nezha Inventor Kit V2.
Exploration
Discuss in groups and get students thinking about how to make a seesaw out of block materials.
- What is a see-saw? What are its features and applications?
- How does a seesaw achieve balance? What role does the principle of leverage play in this?
- What is the gear train? What is its role in the making of a seesaw?
- How can you use Nezha Inventor's Kit V2 to create a seesaw that balances itself?
- How does the design and mechanics of the teeter totter affect the balance? How do you adjust the balance point of a seesaw?
Practice
Work in groups to create a see-saw using block materials according to your own design.
Make a seesaw out of blocks according to your own design.
Examples
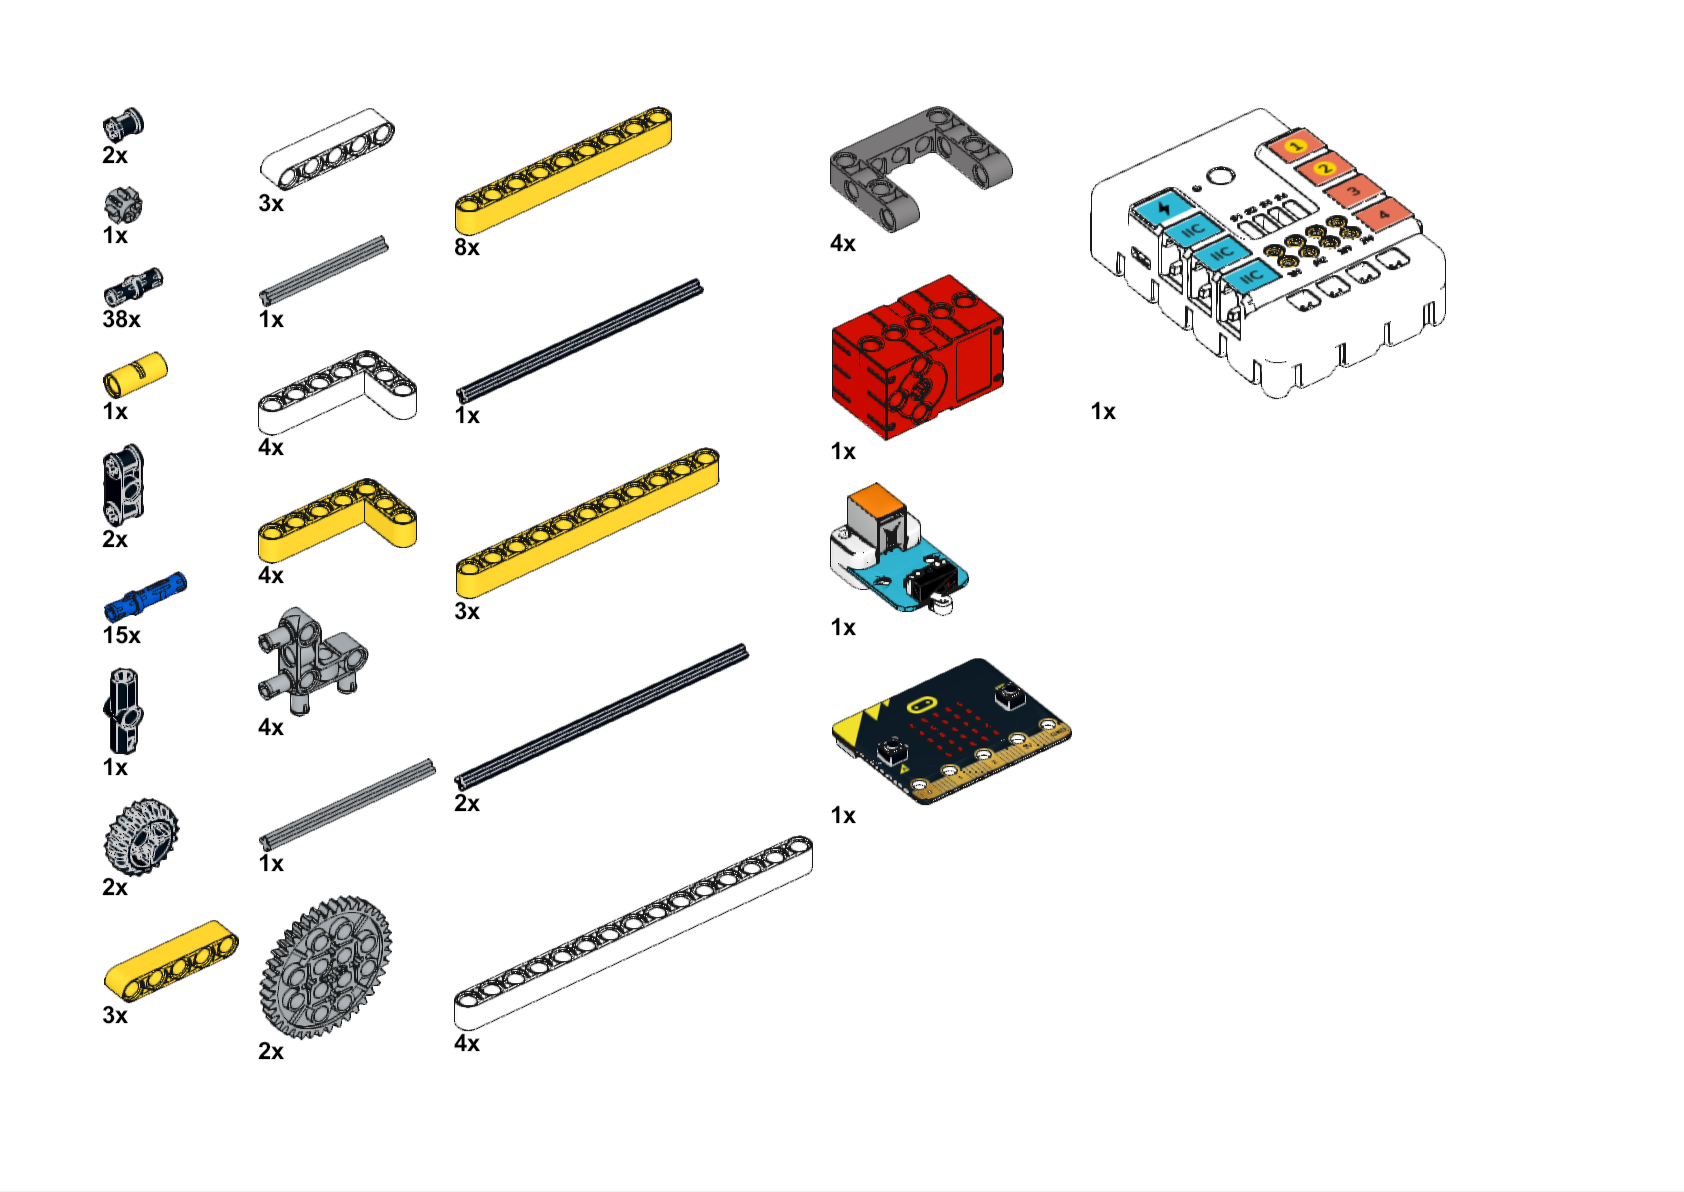
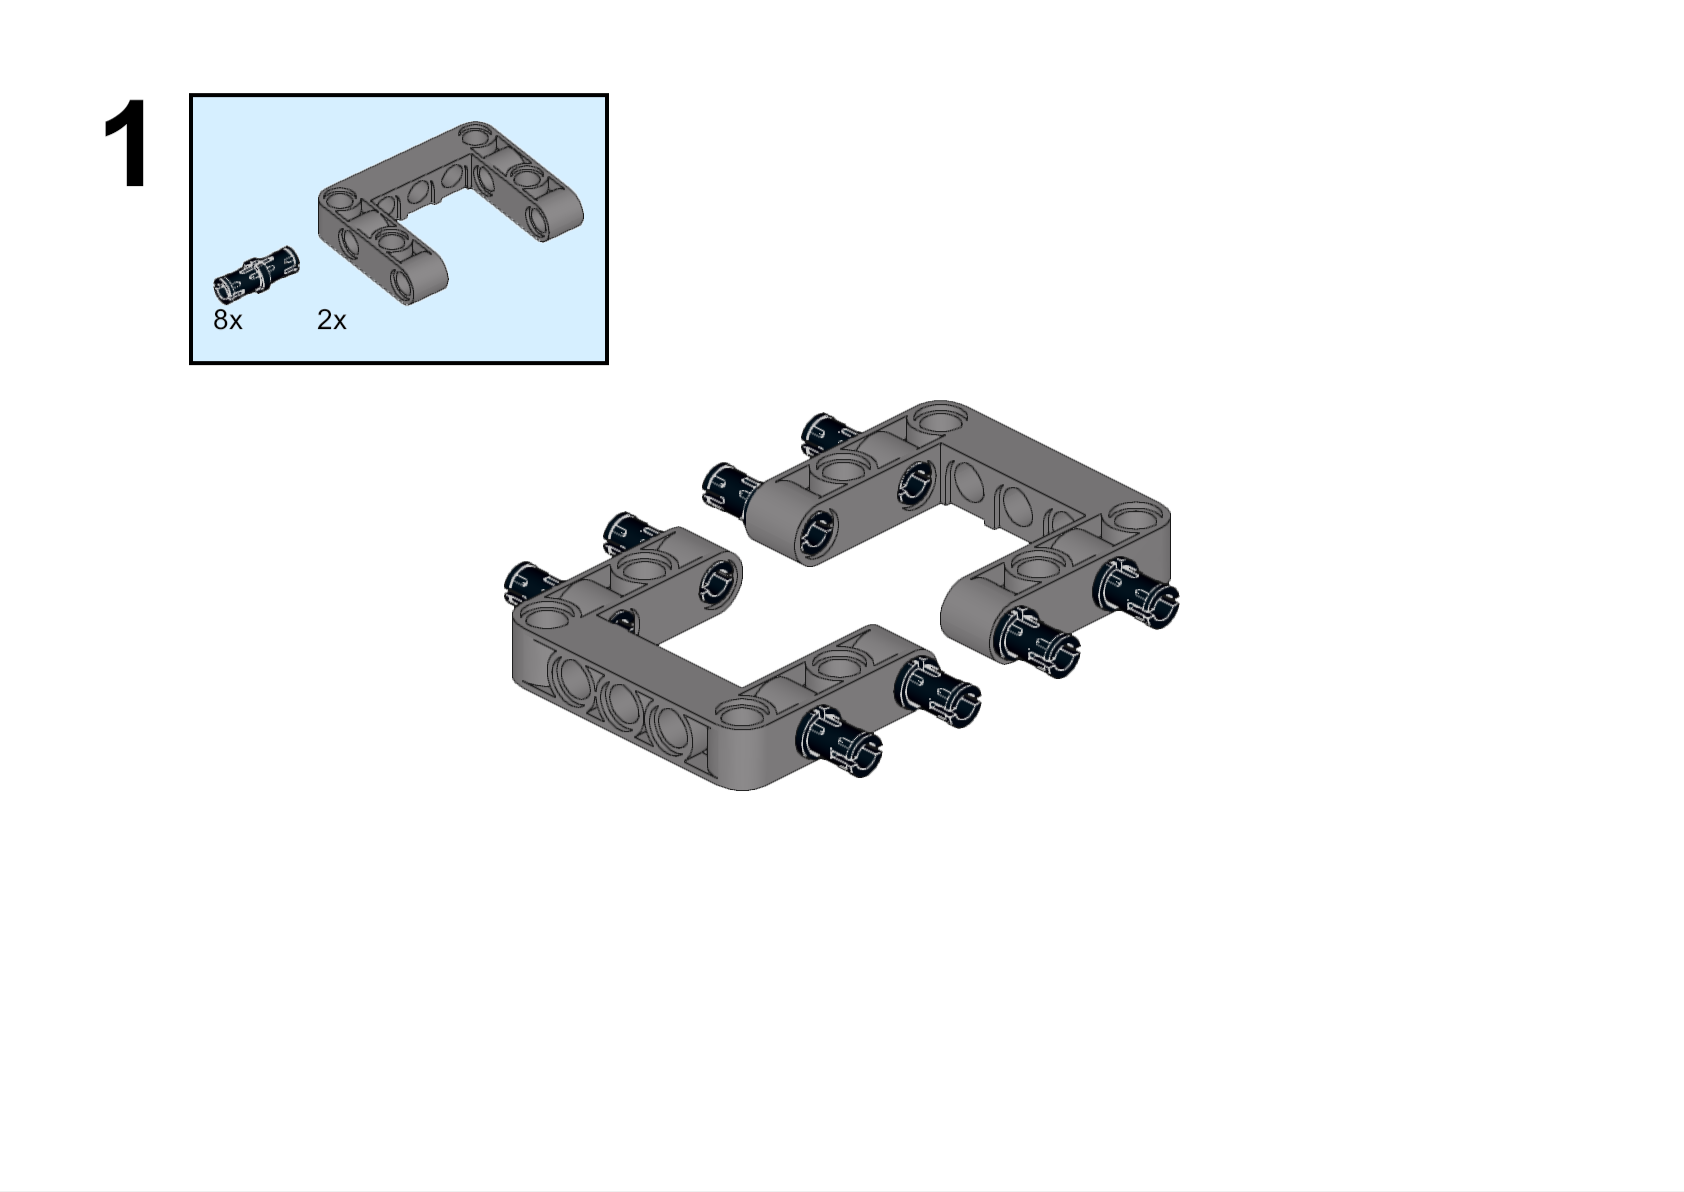
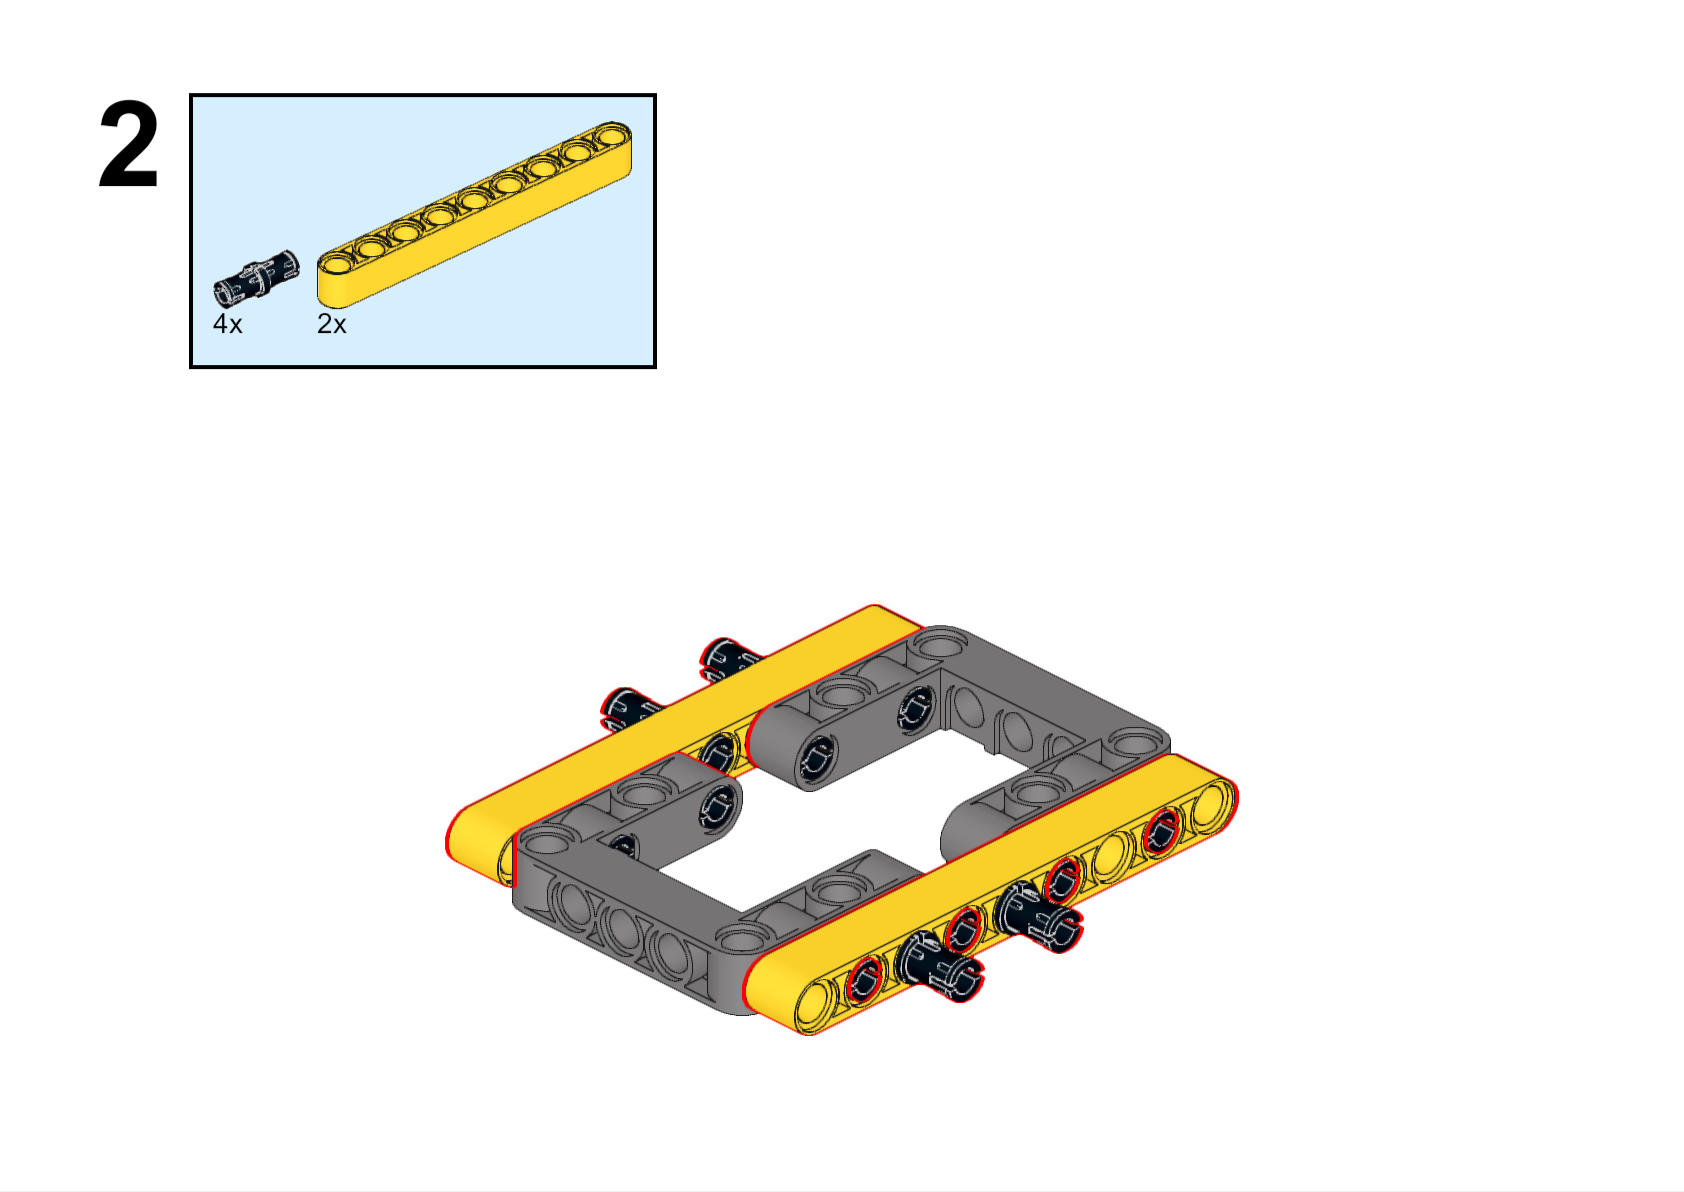
Assembly Steps
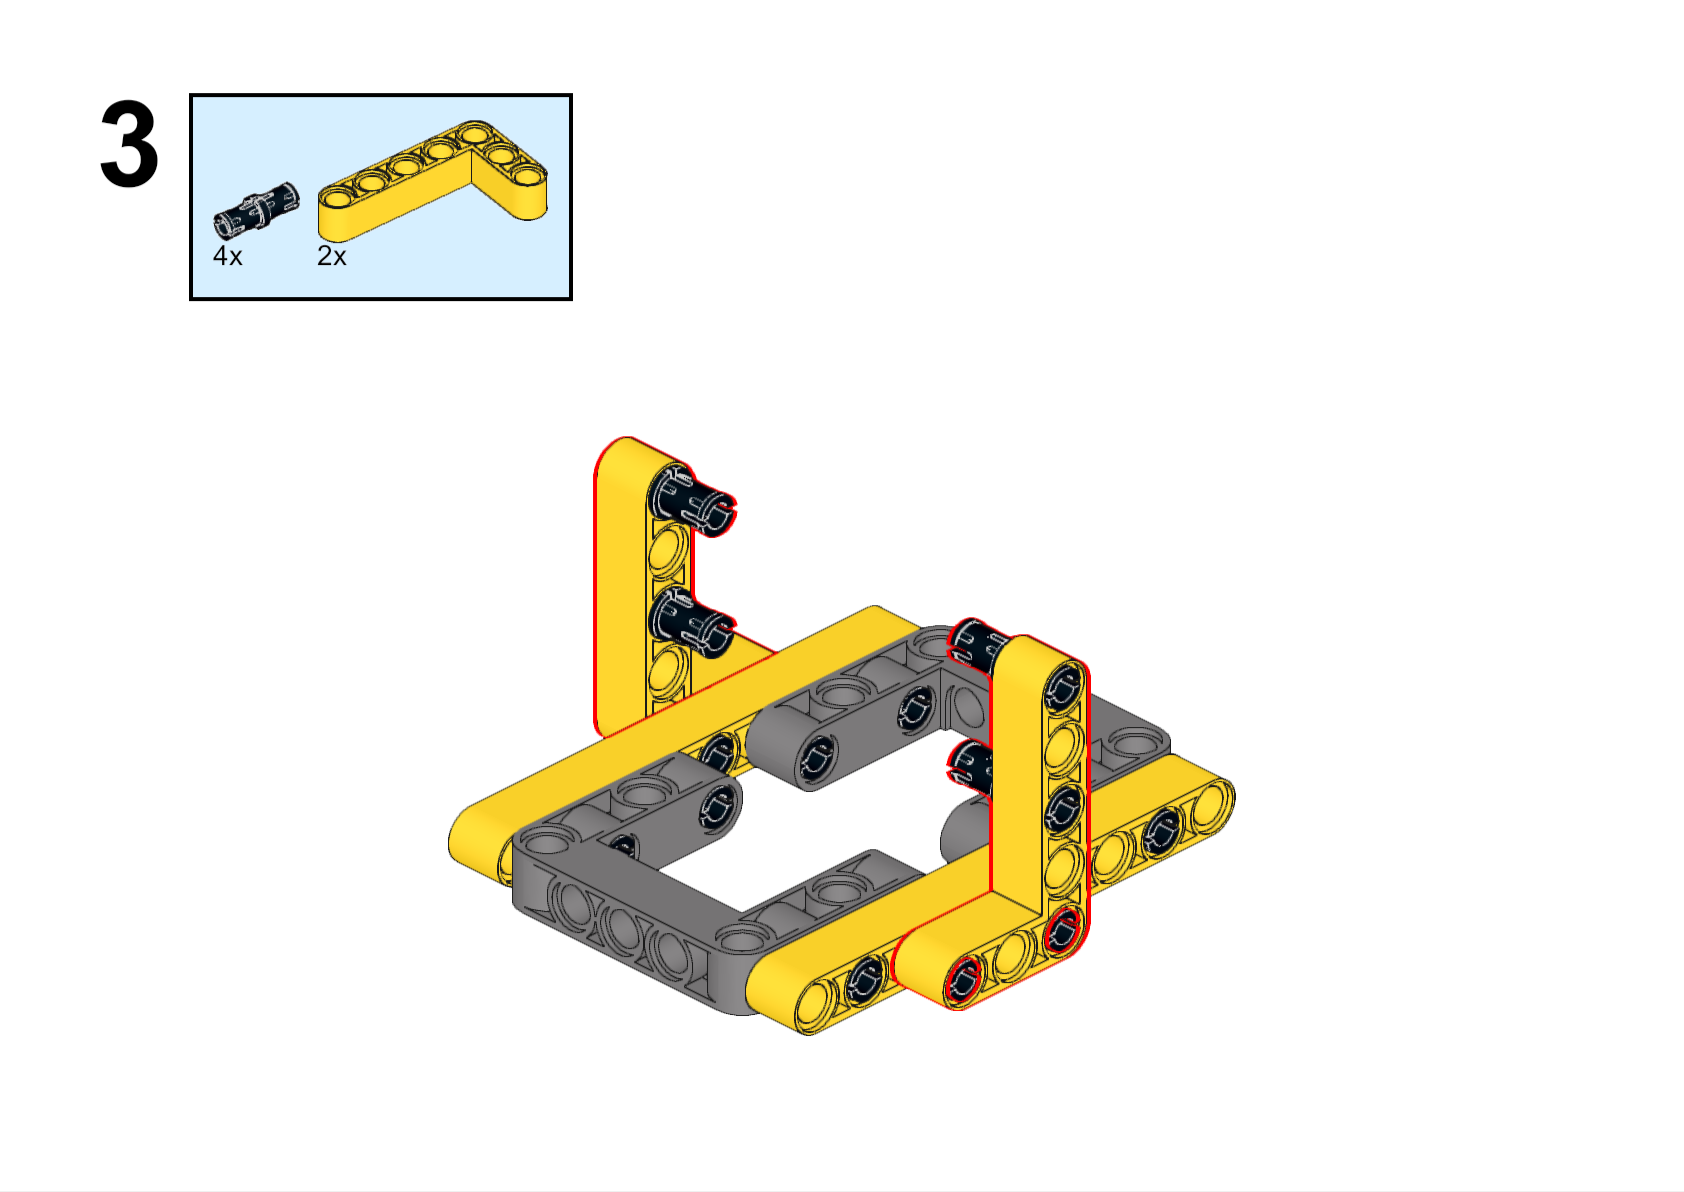
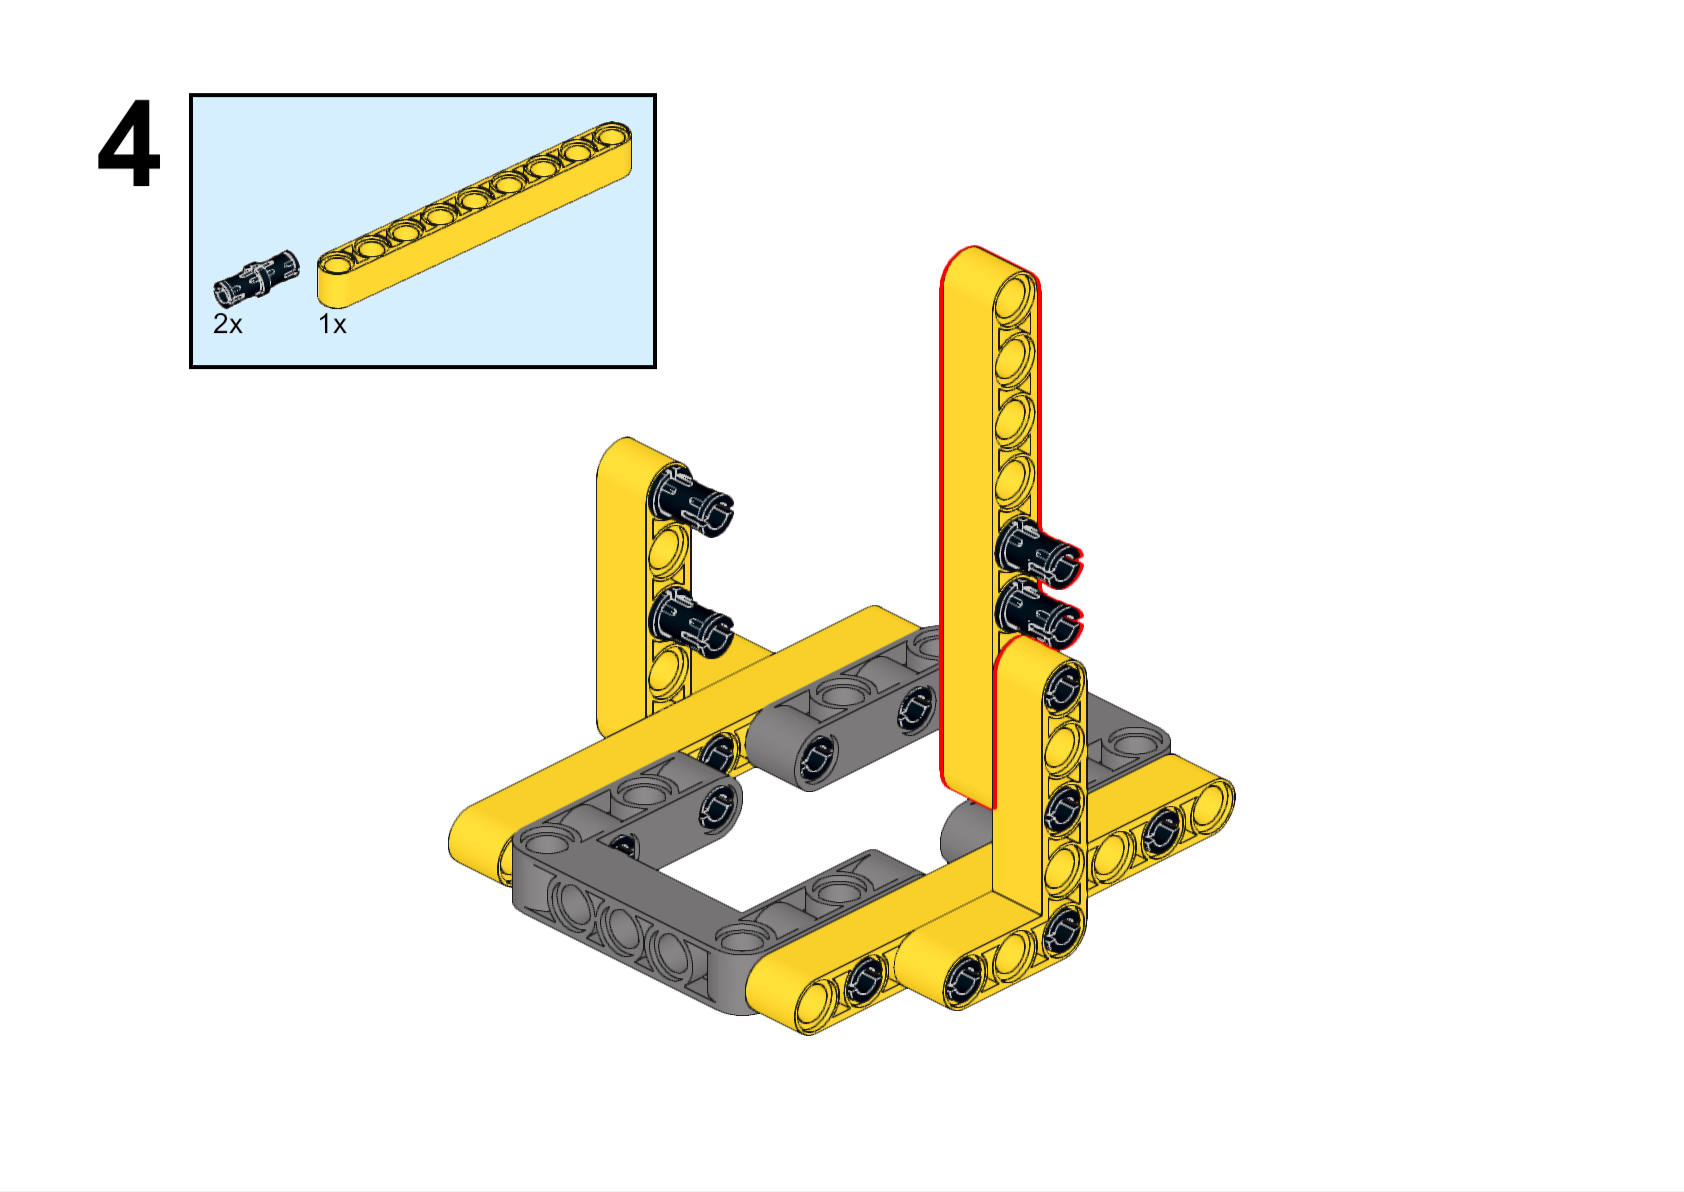
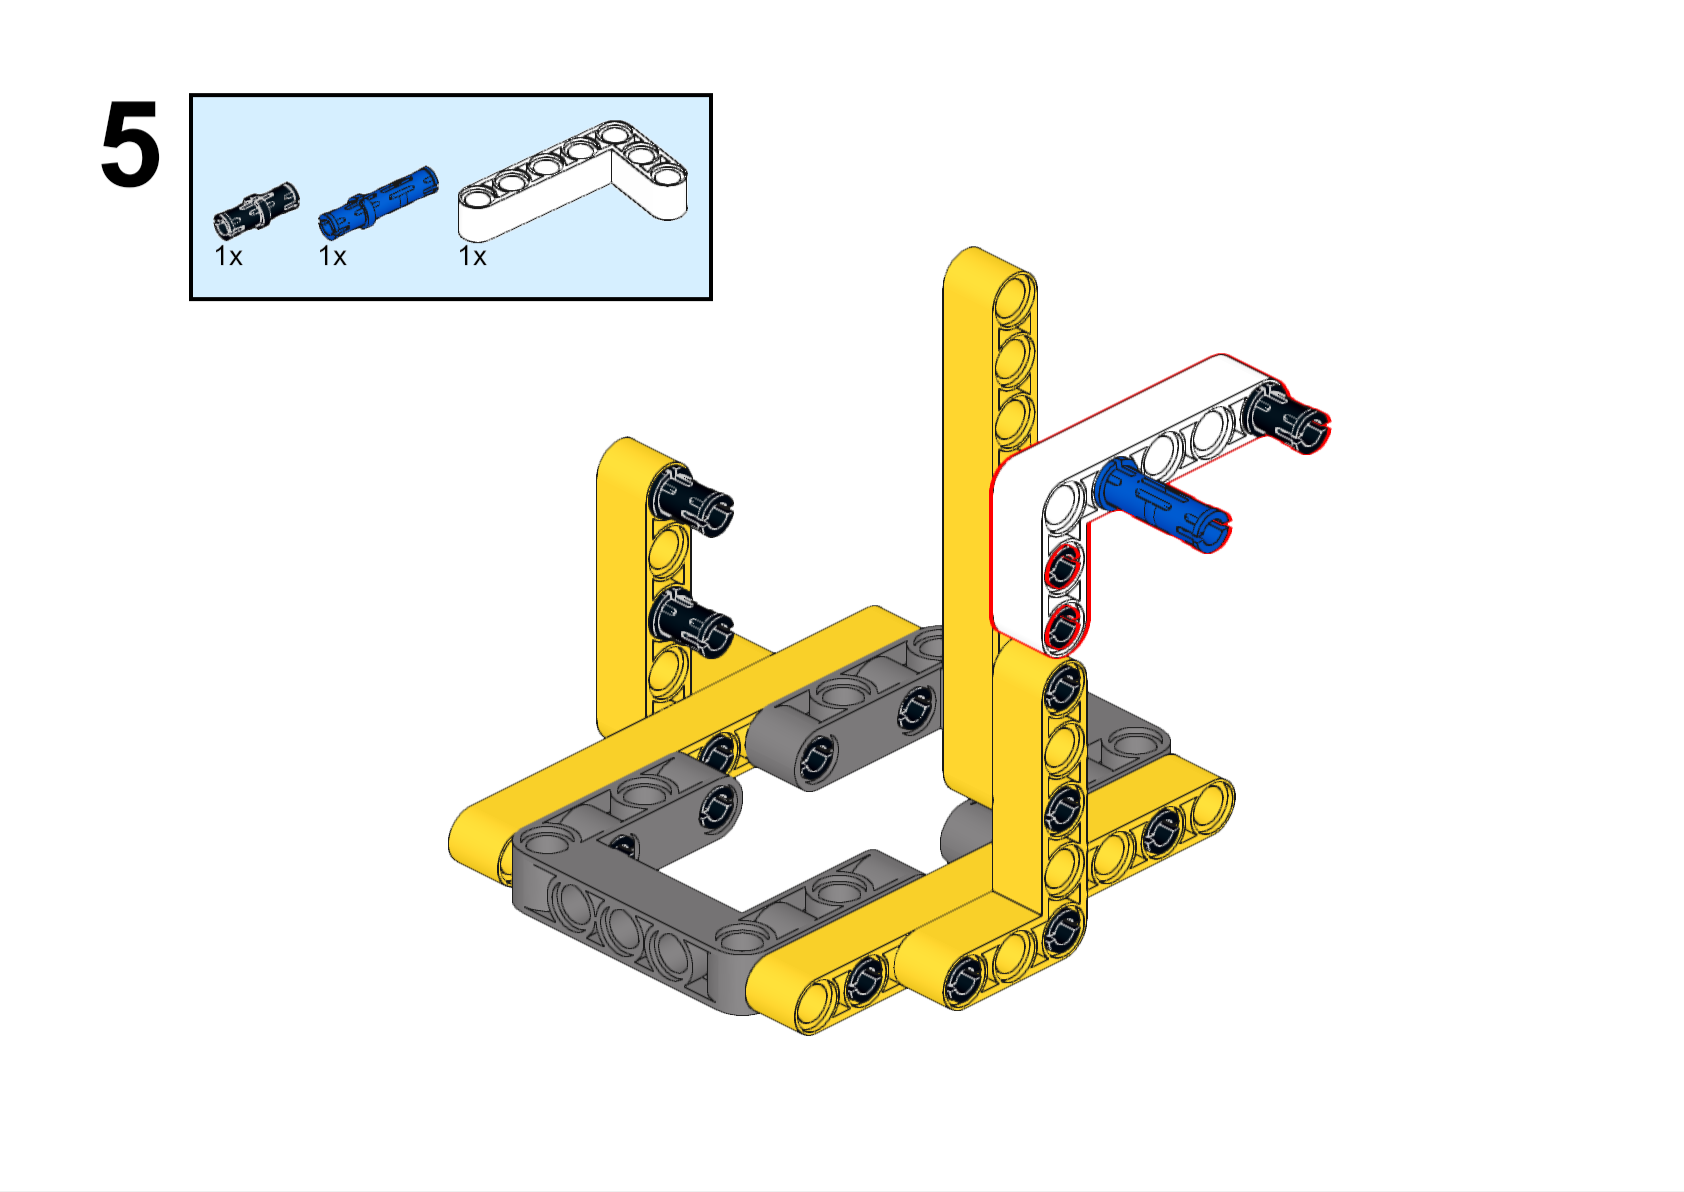
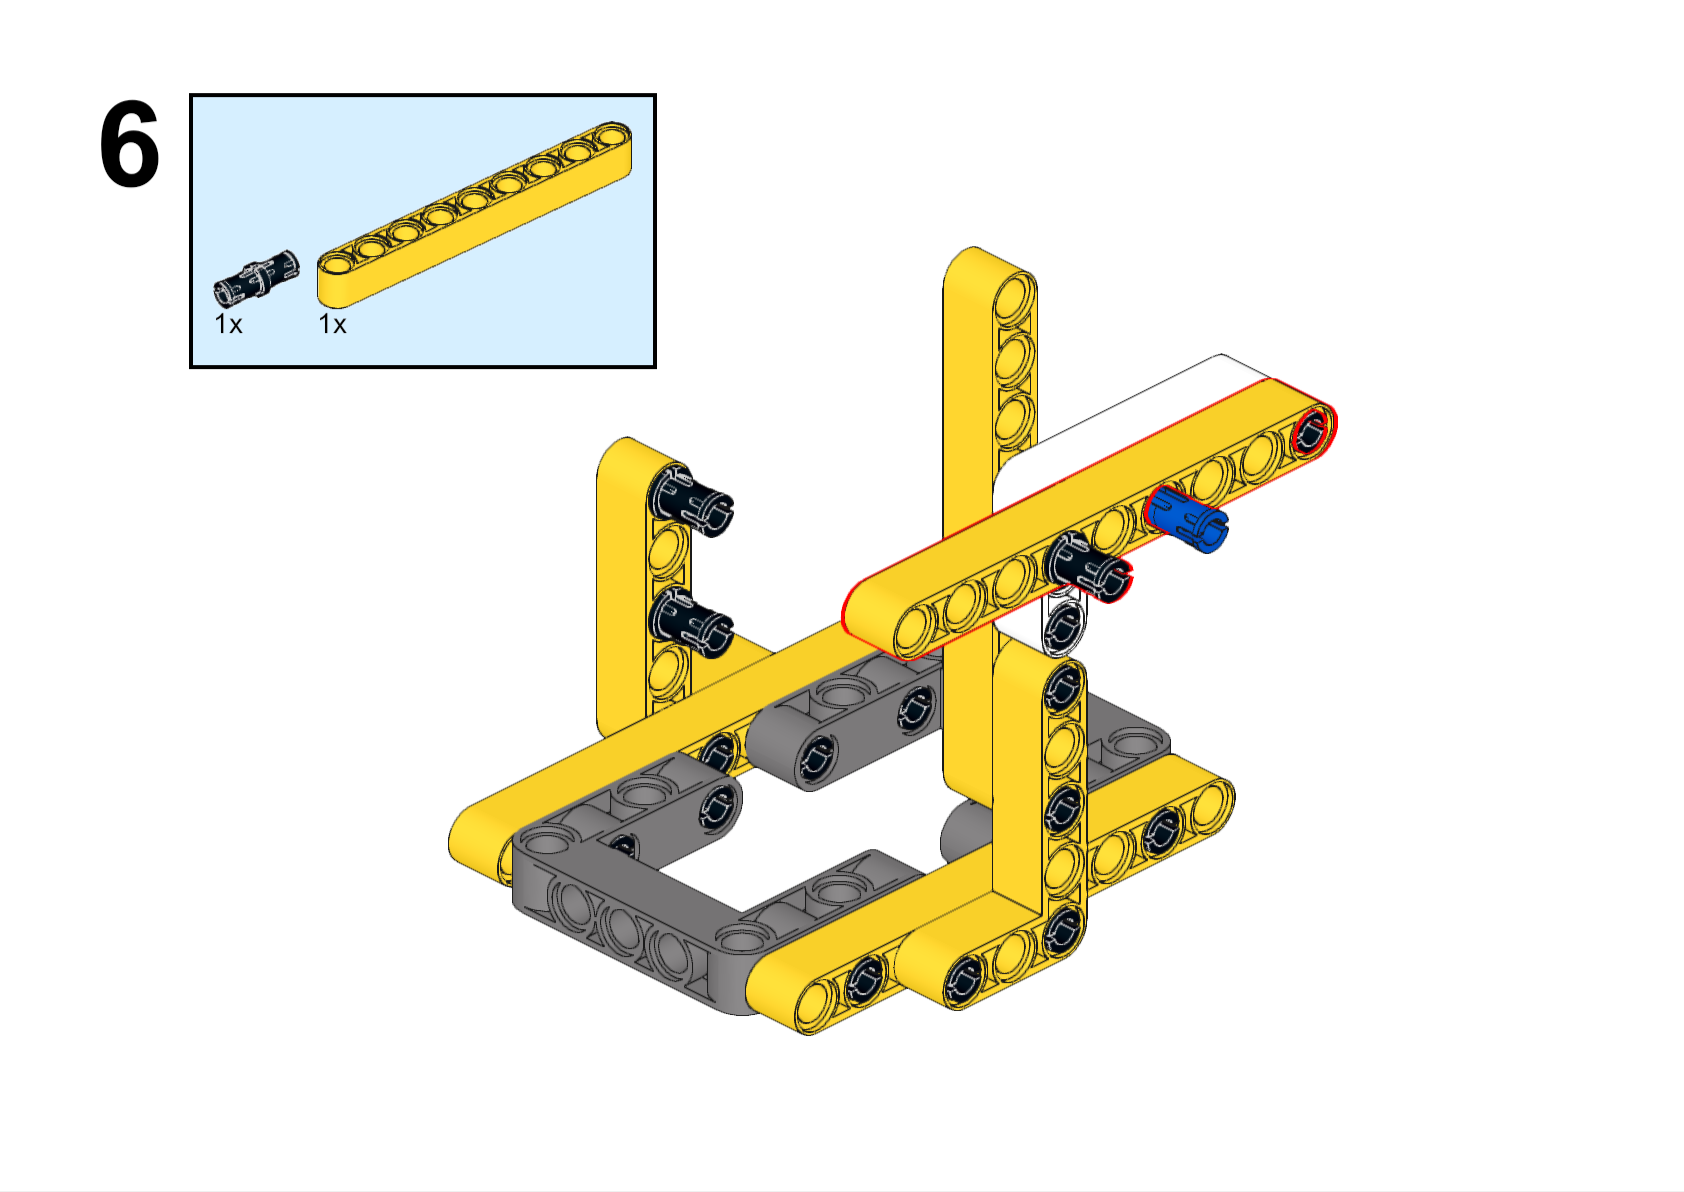
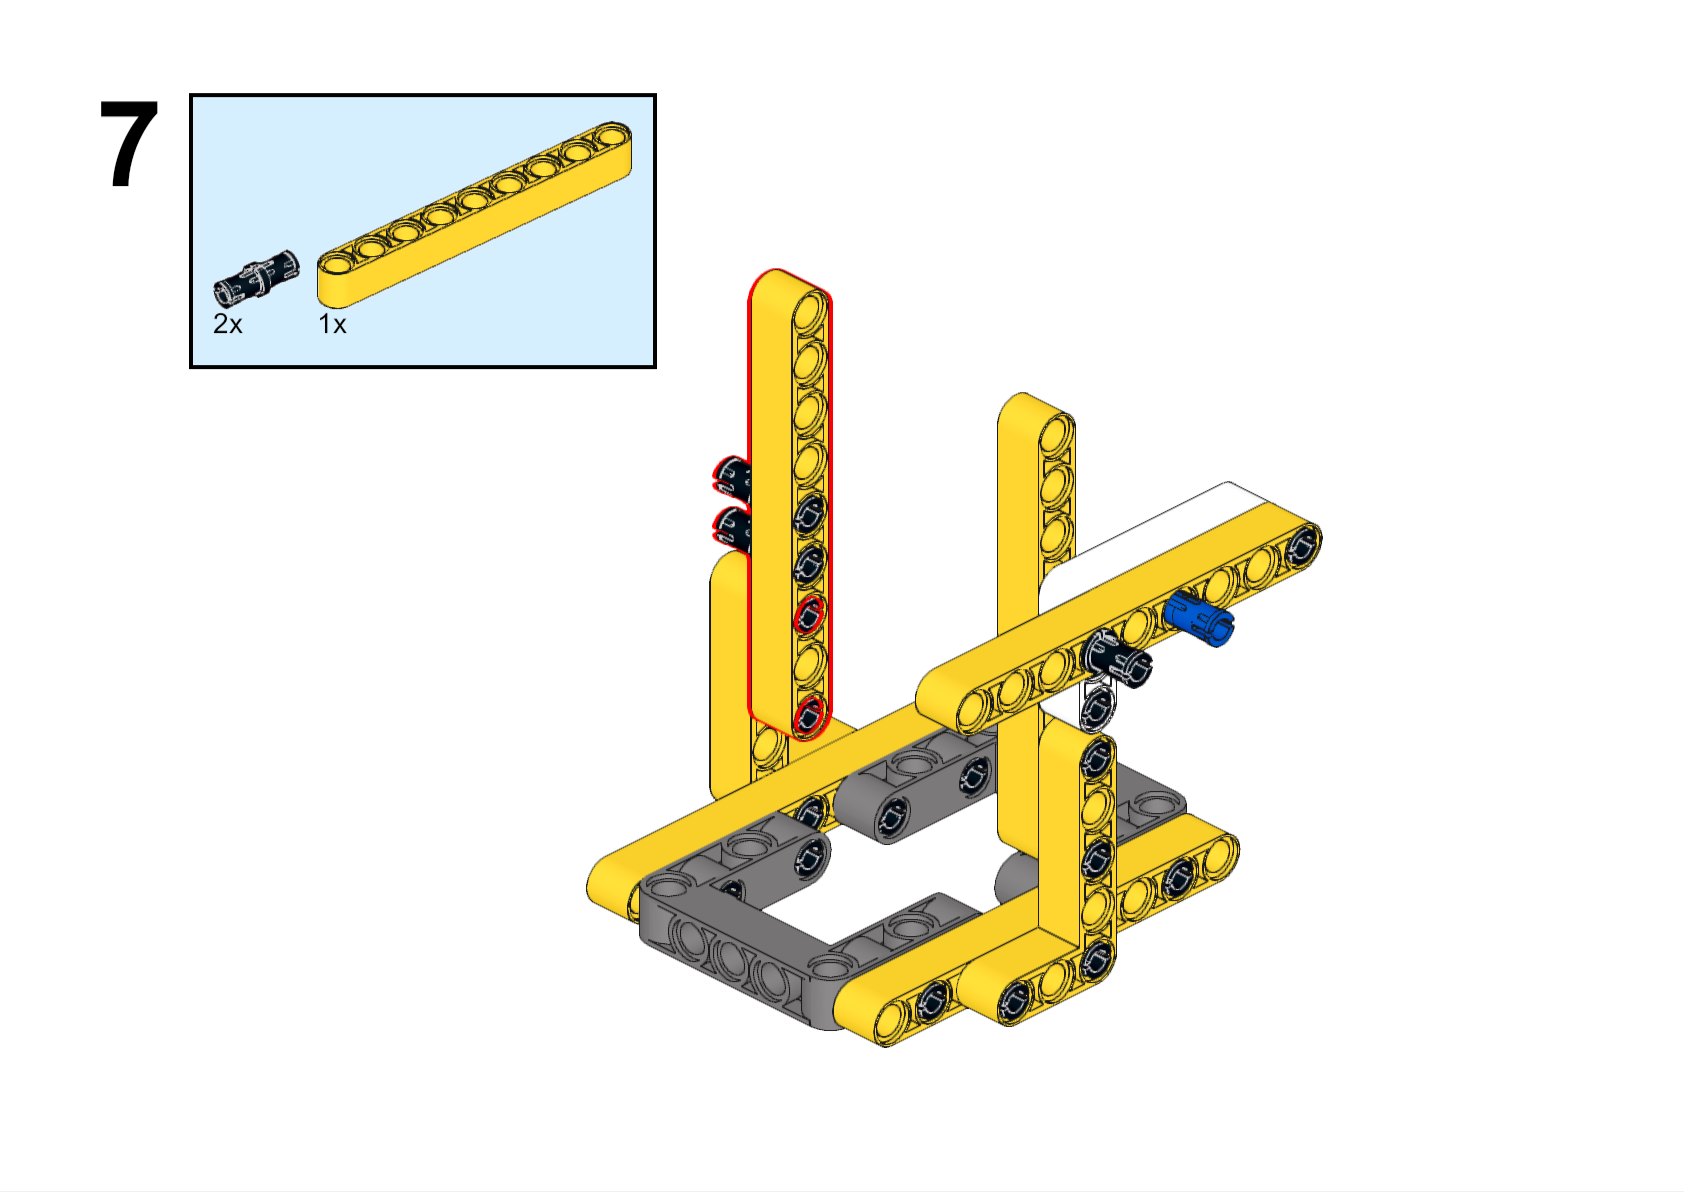
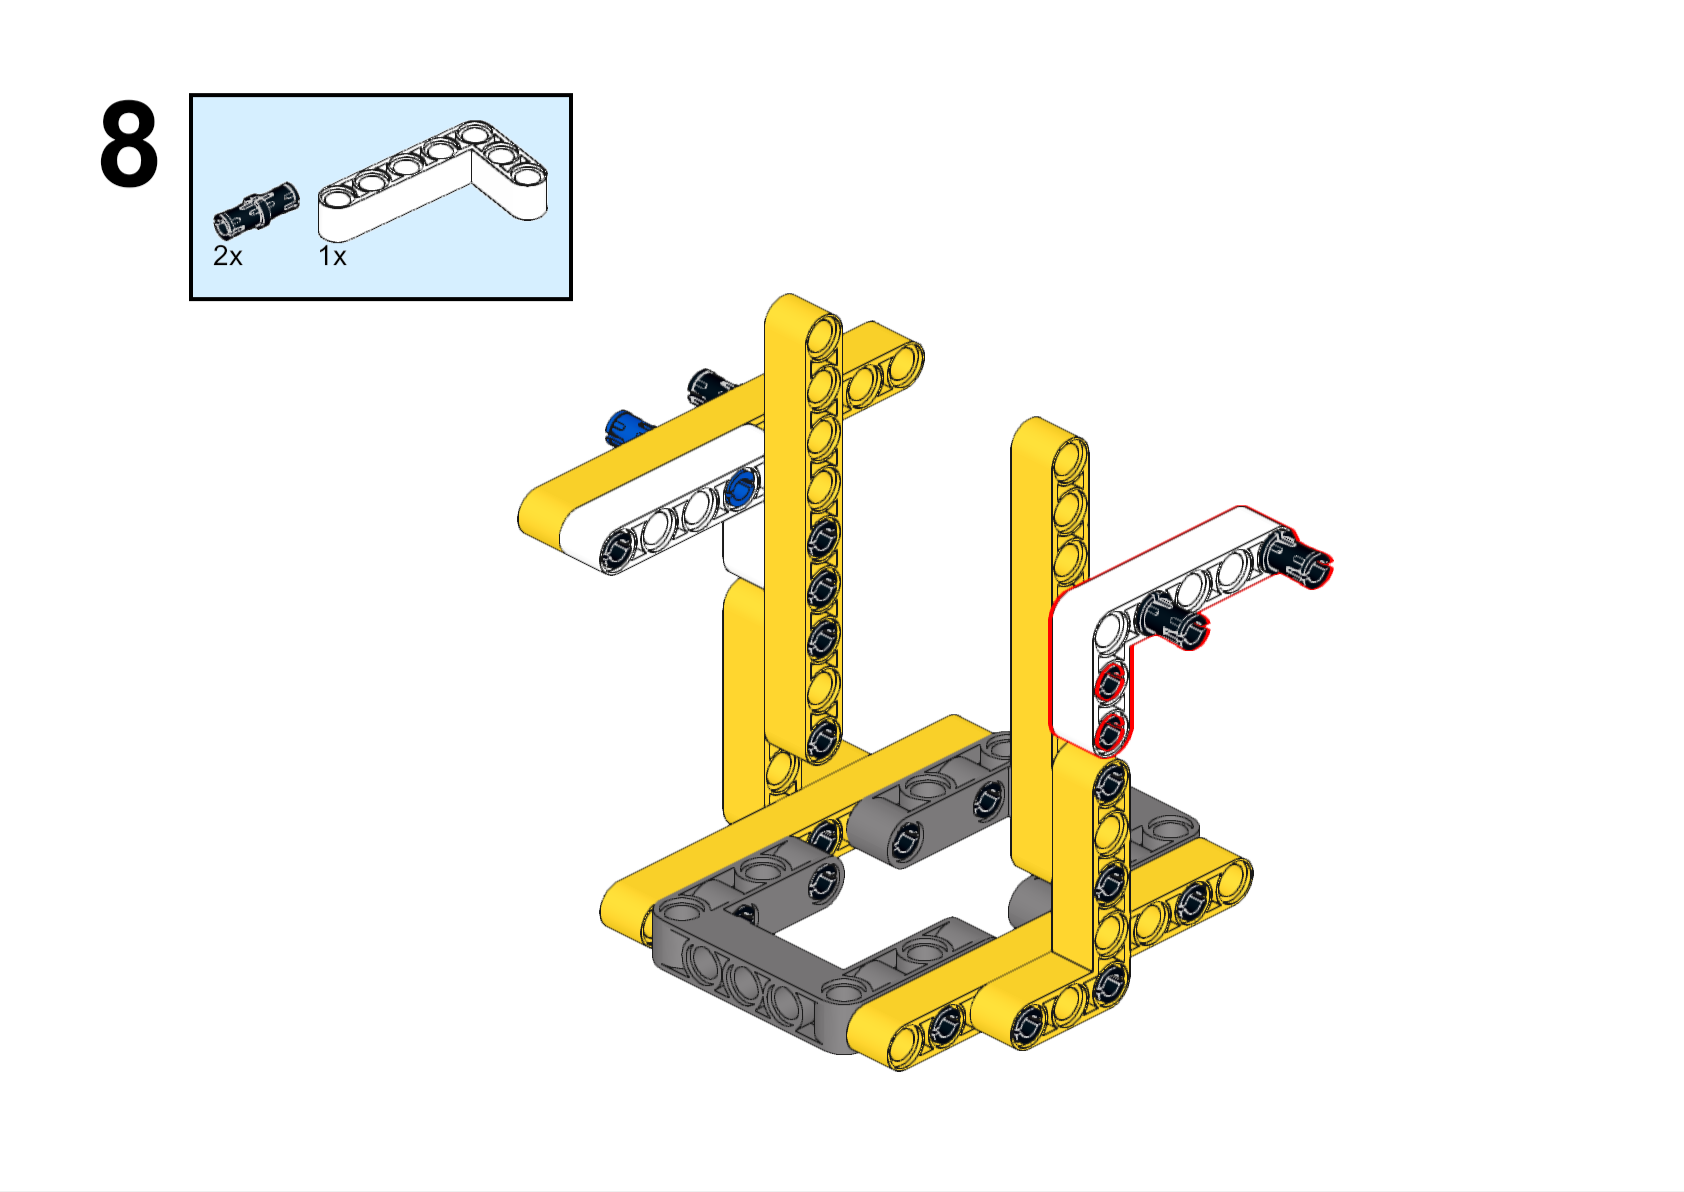
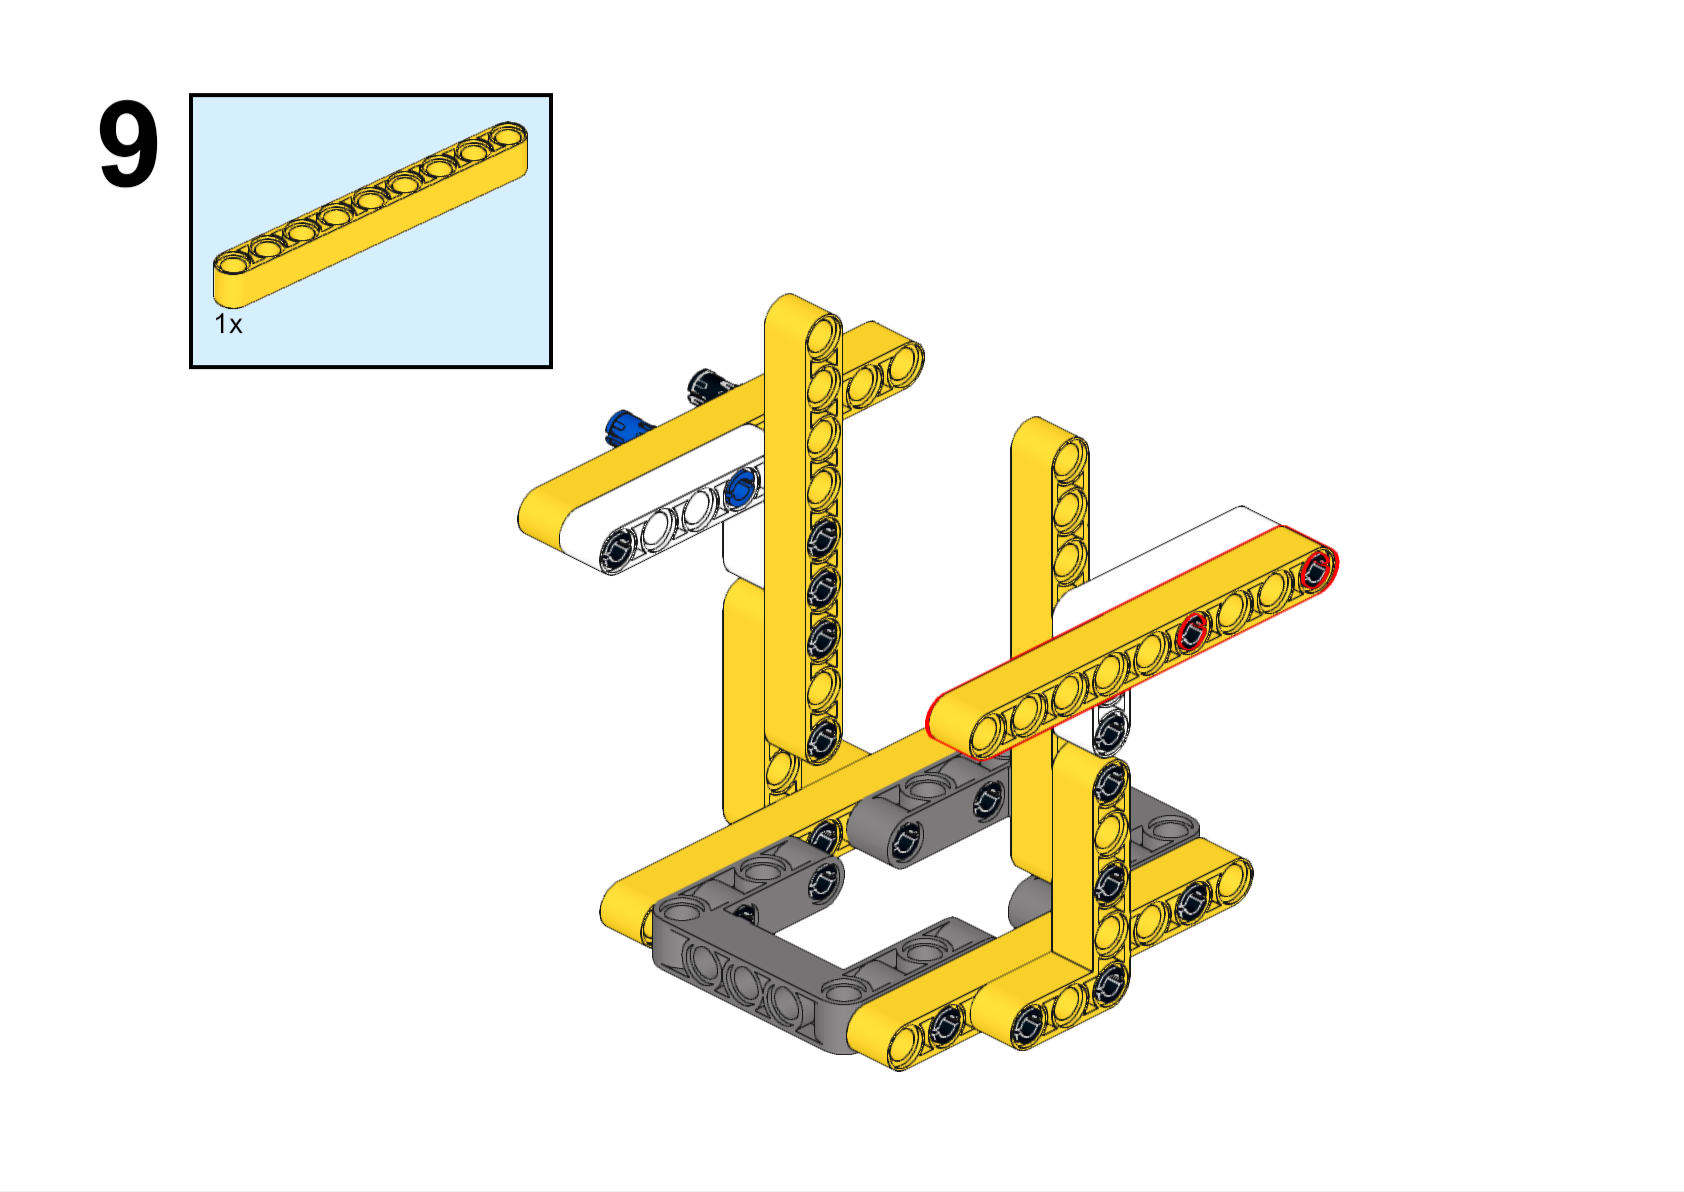
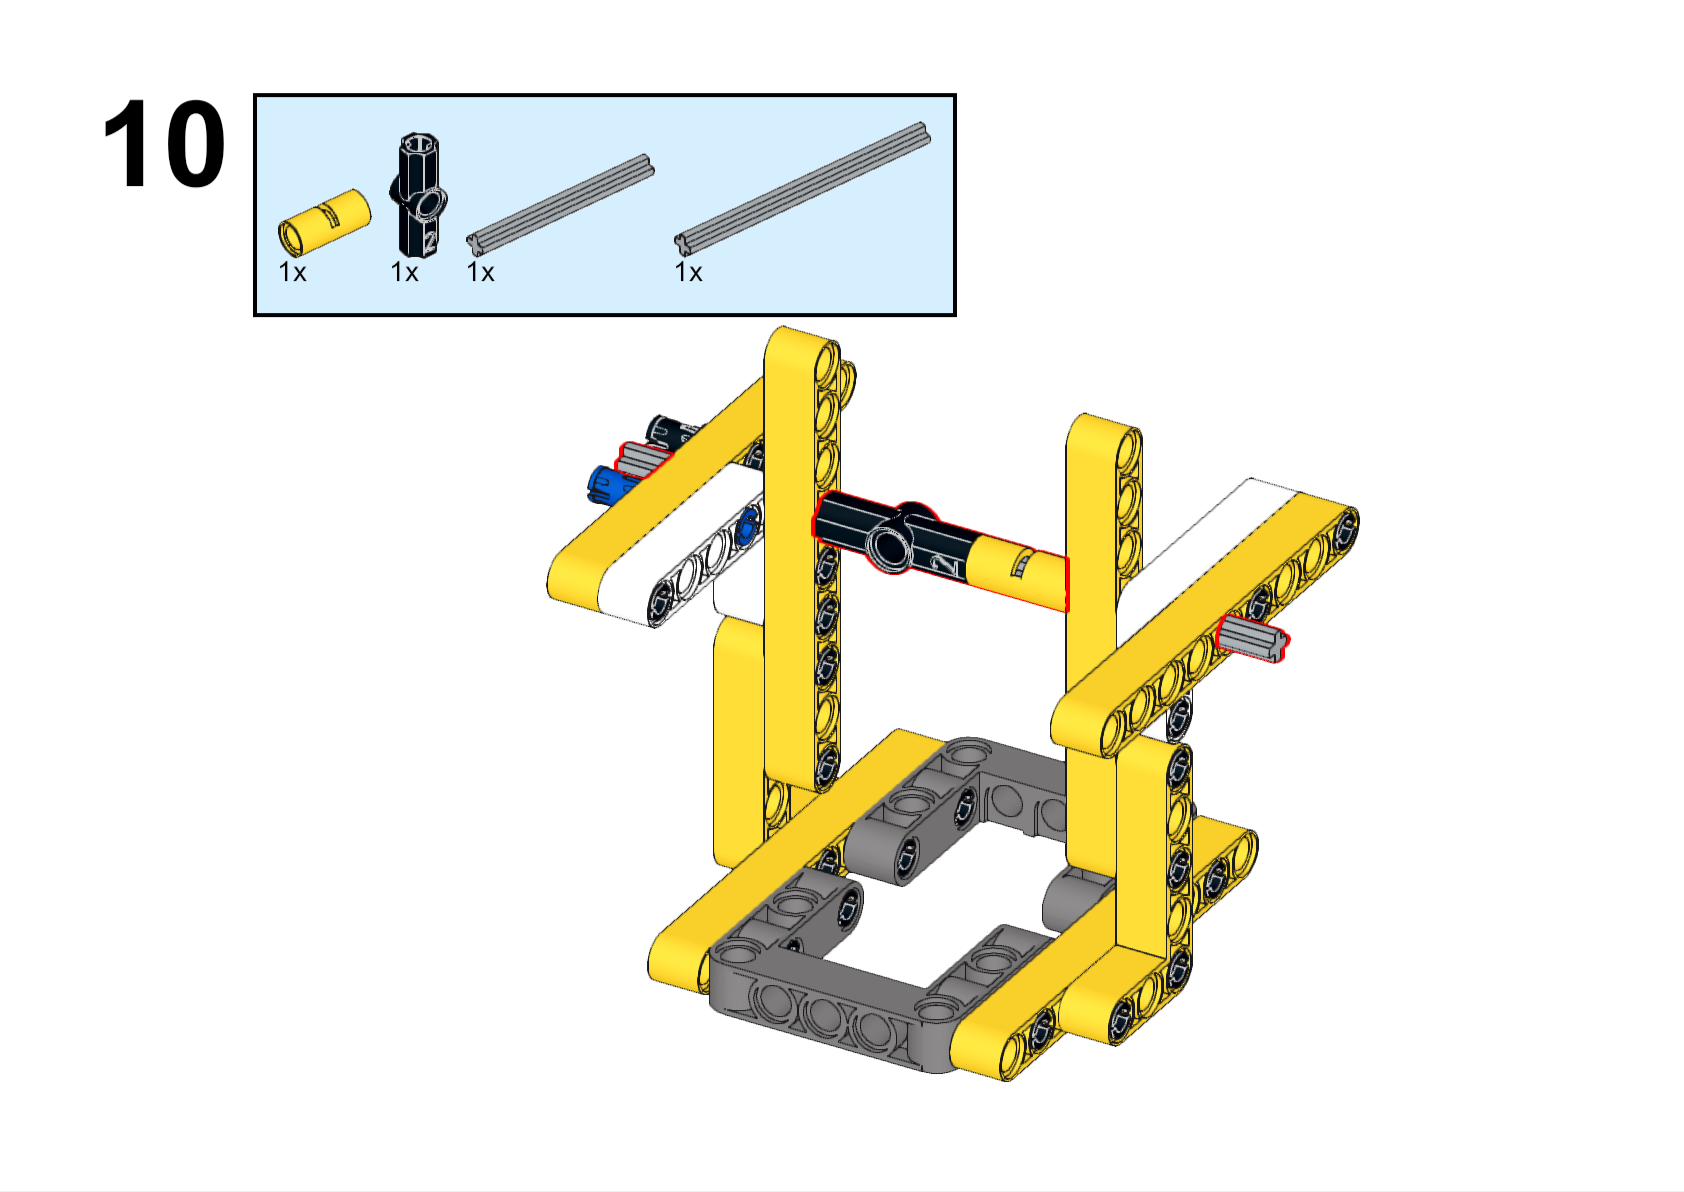
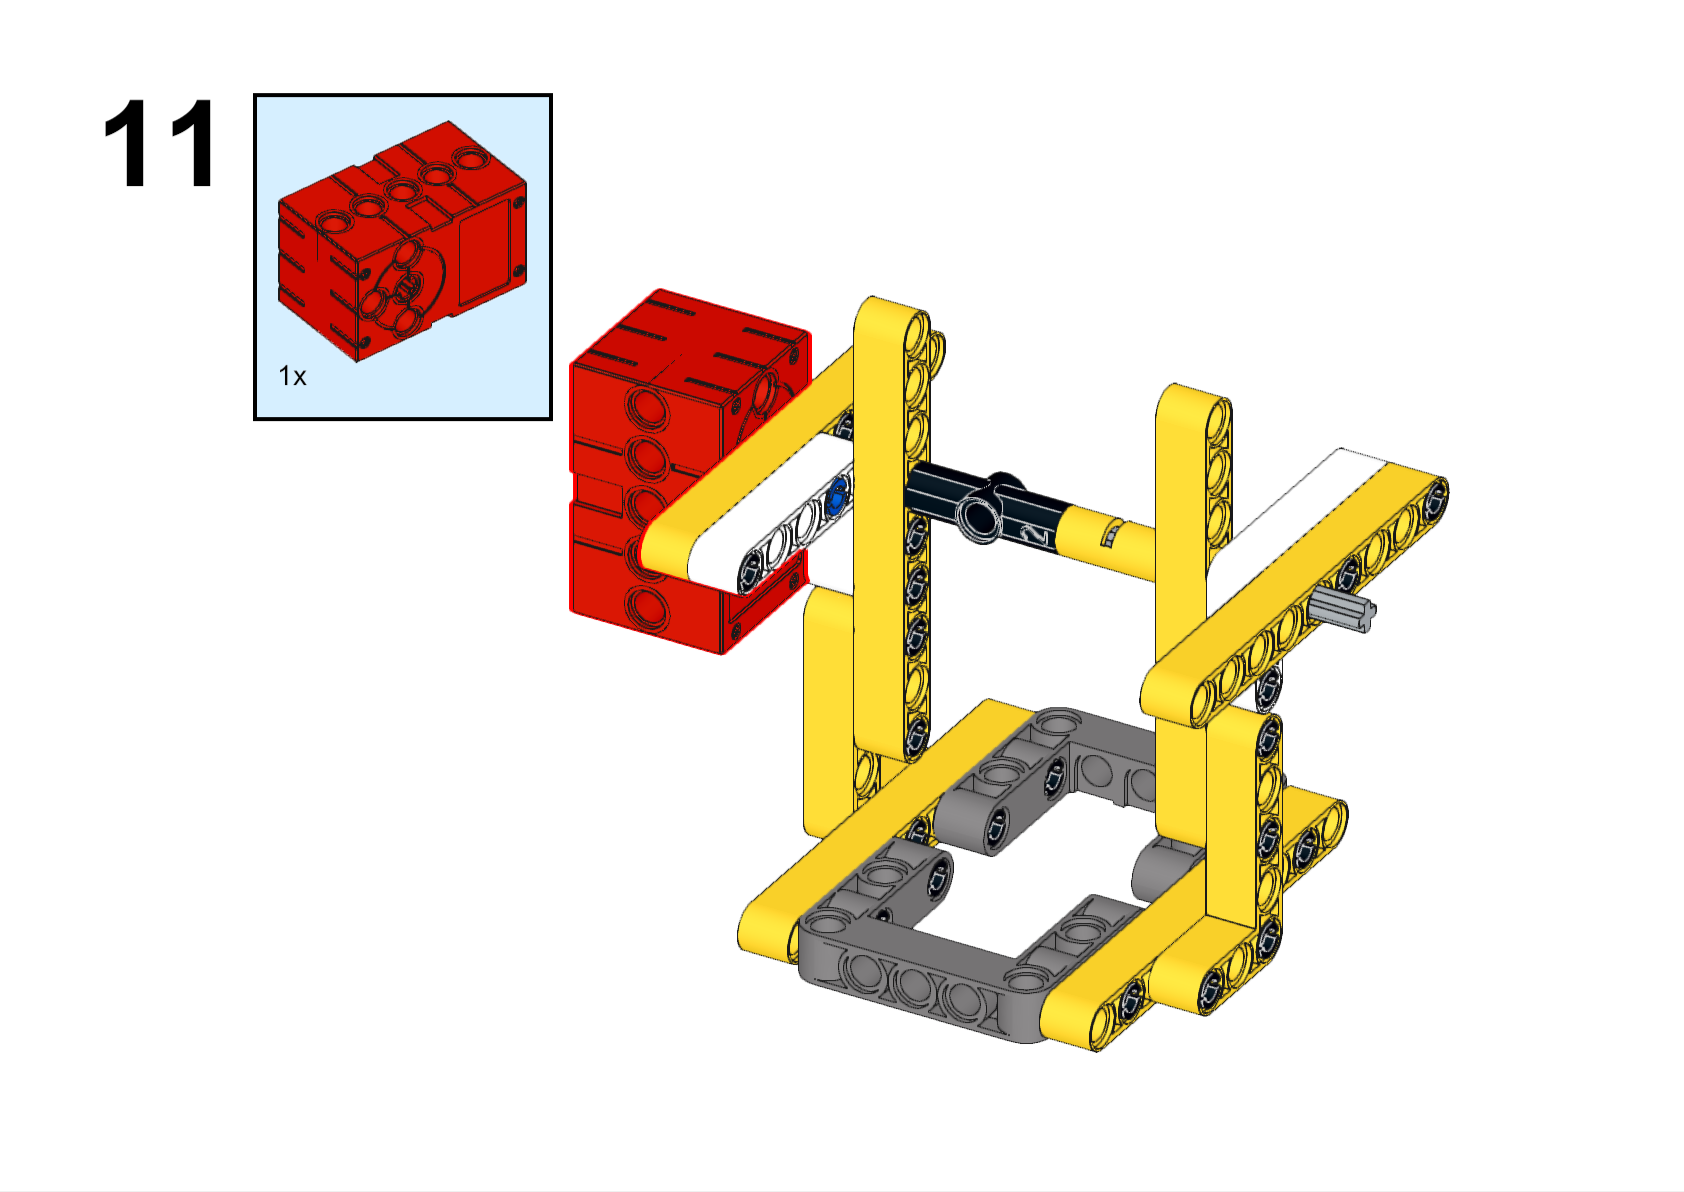
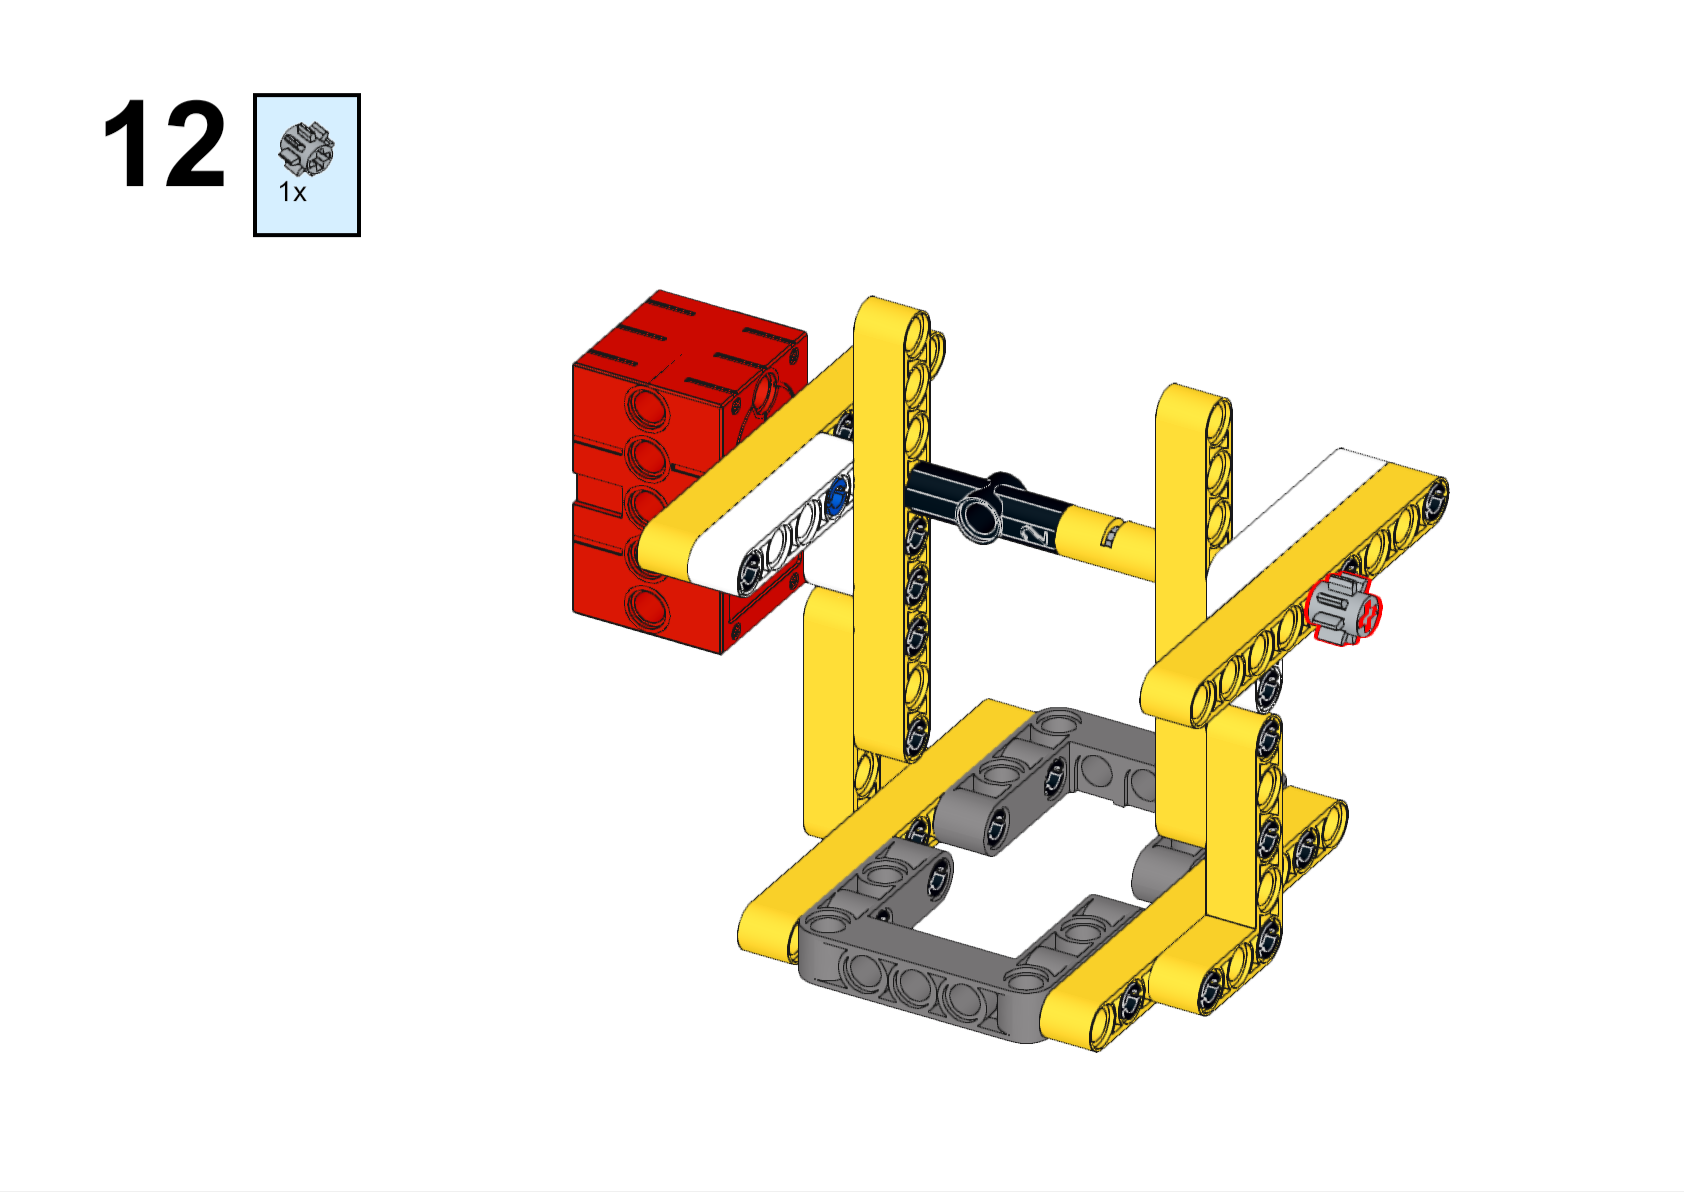
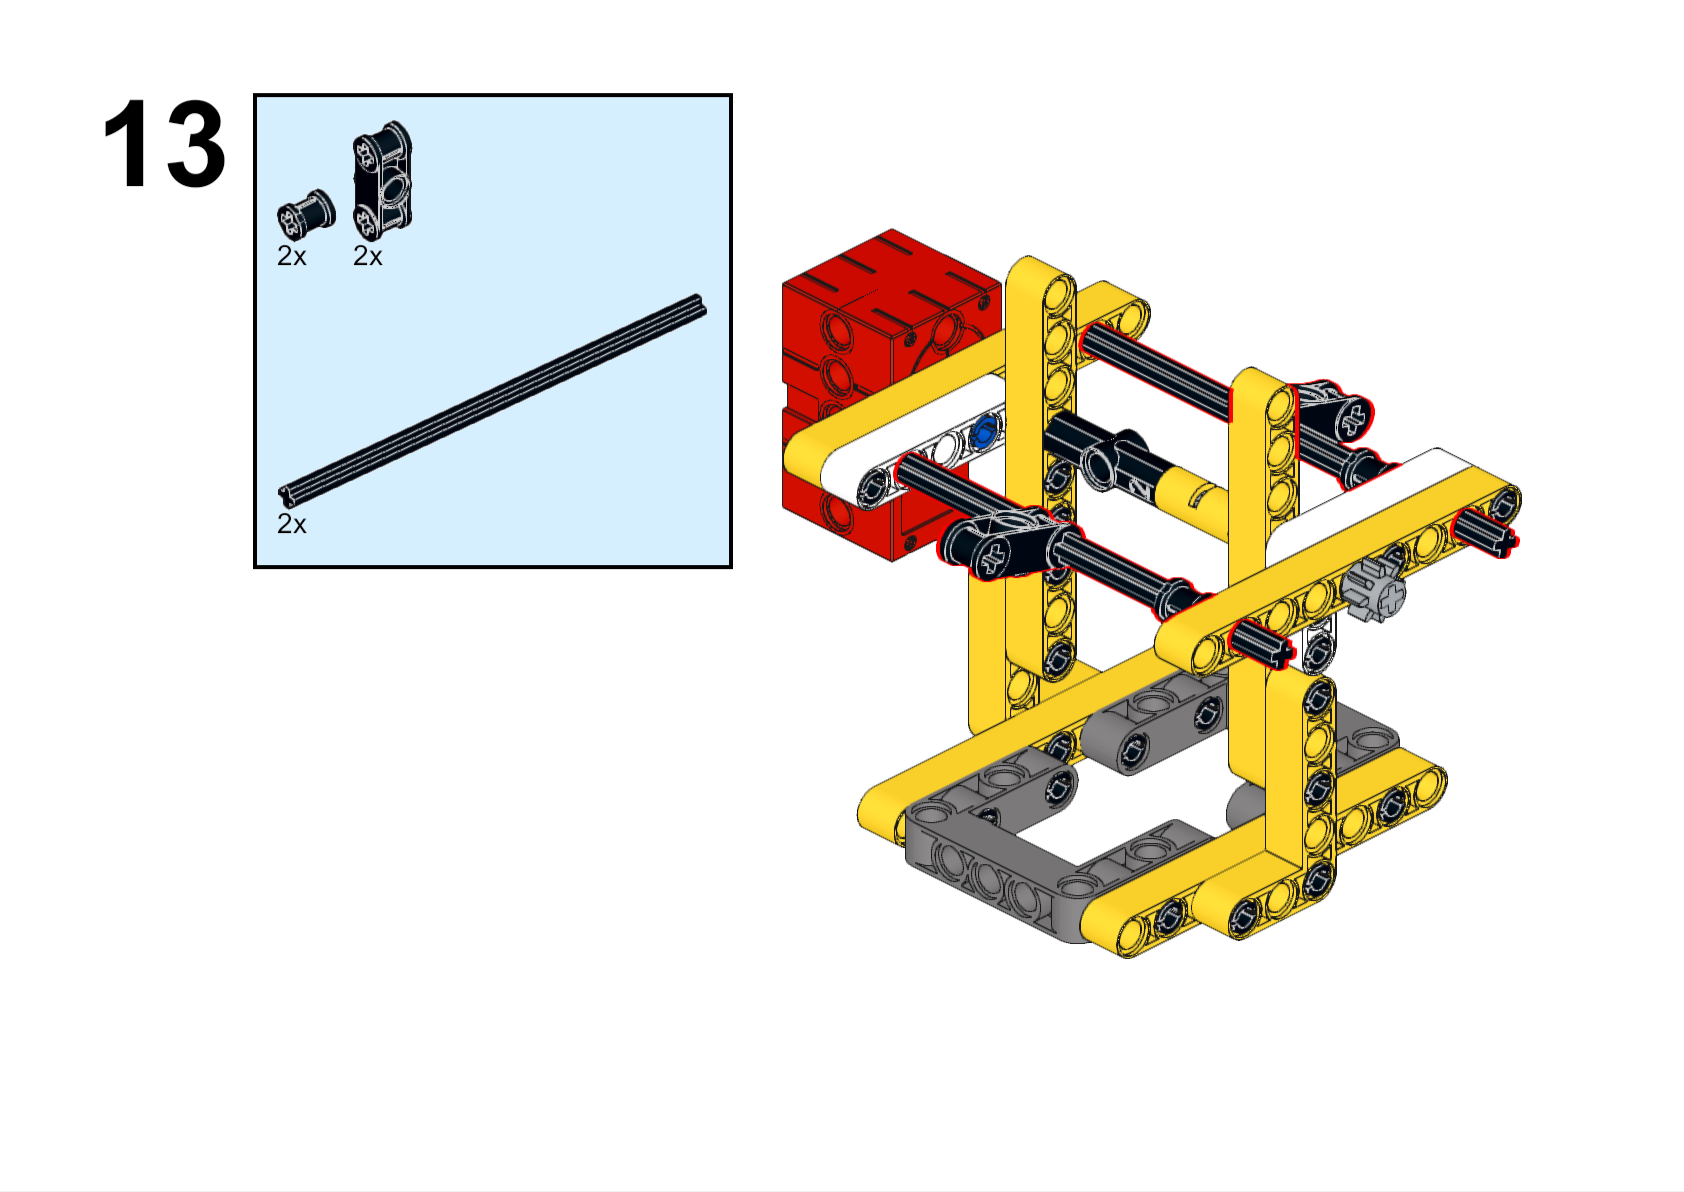
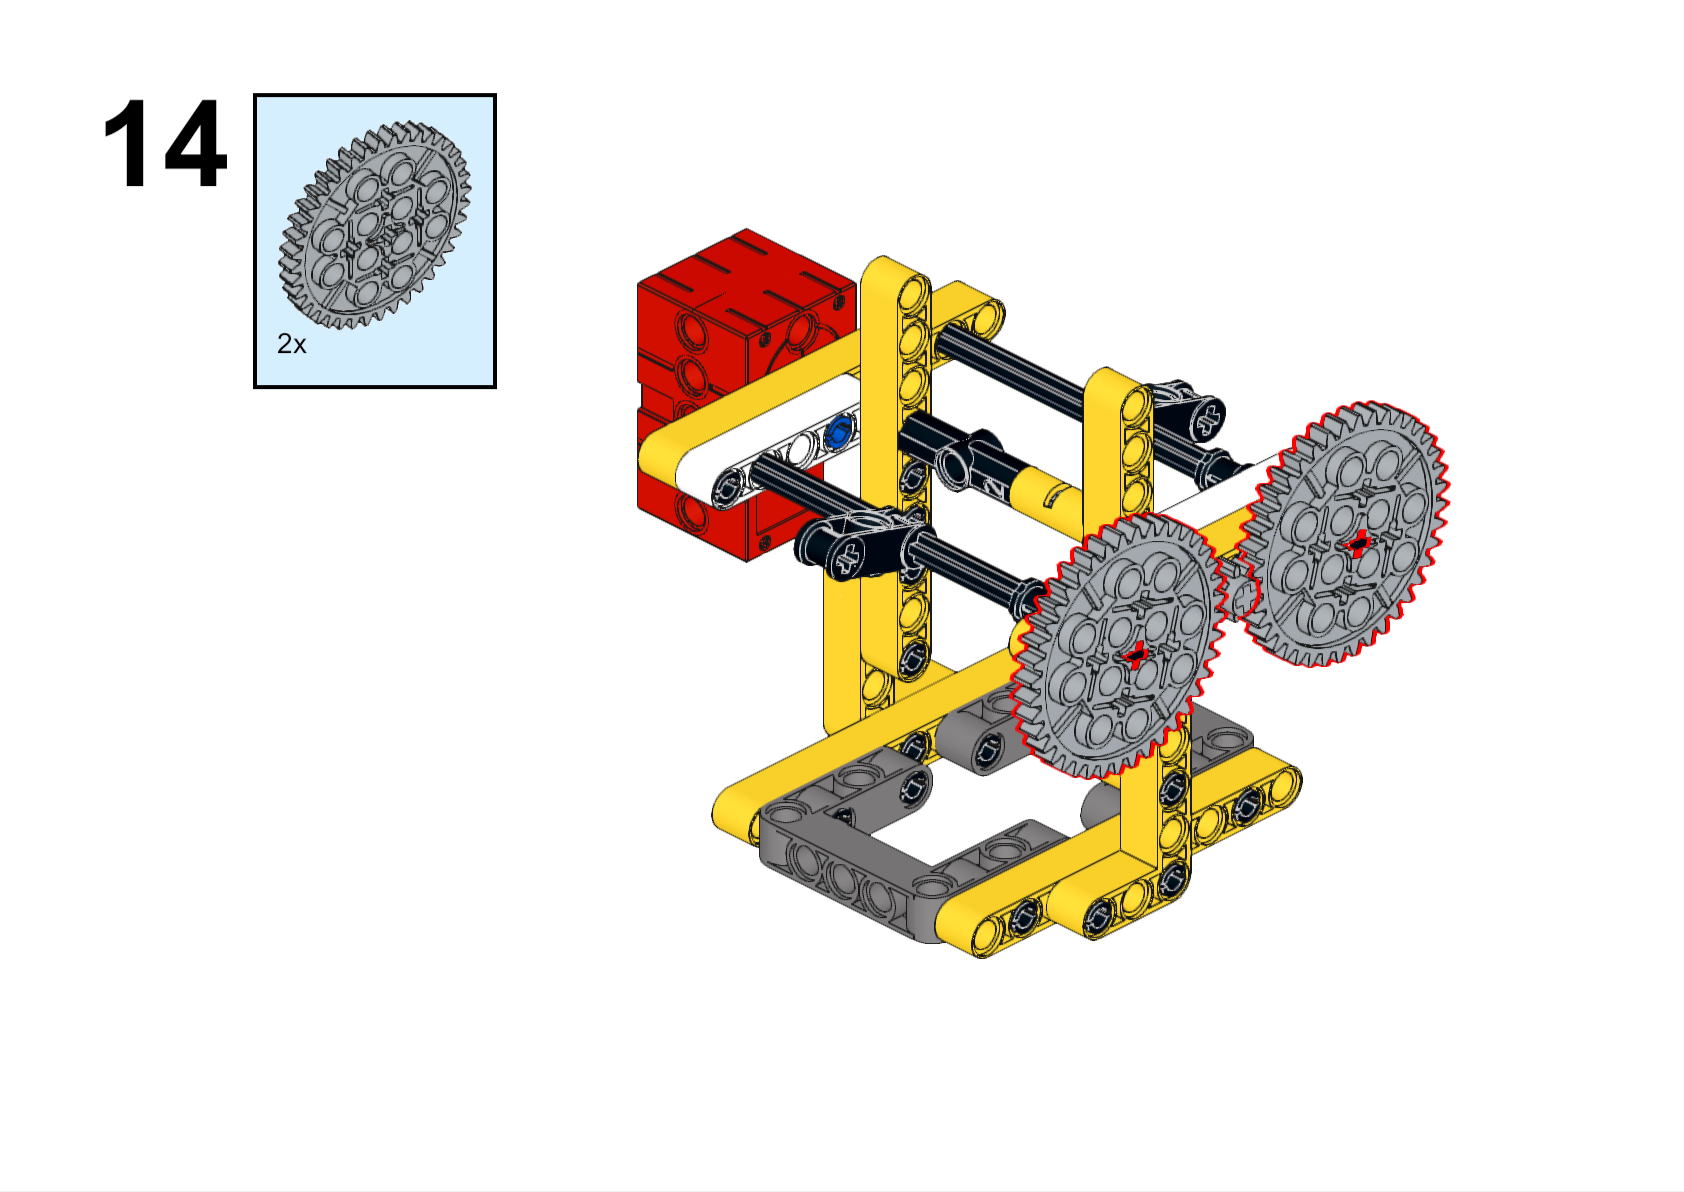
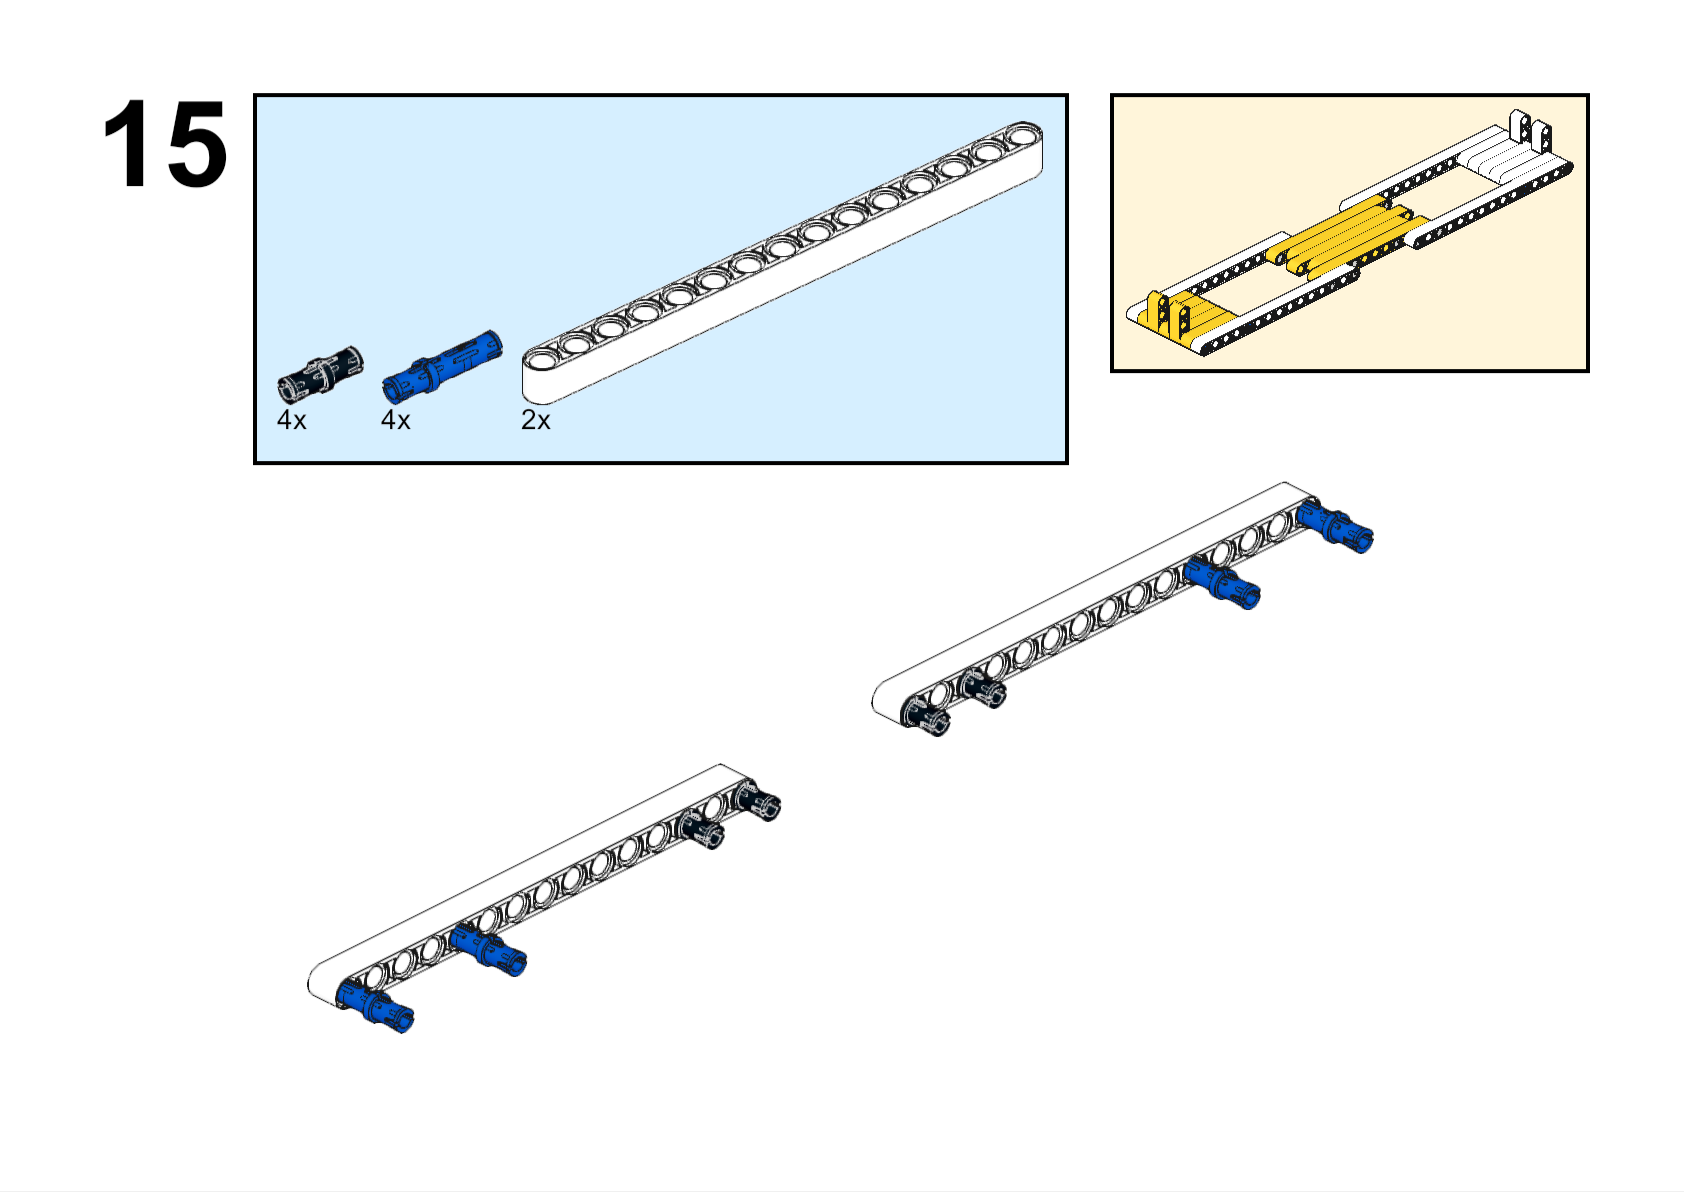
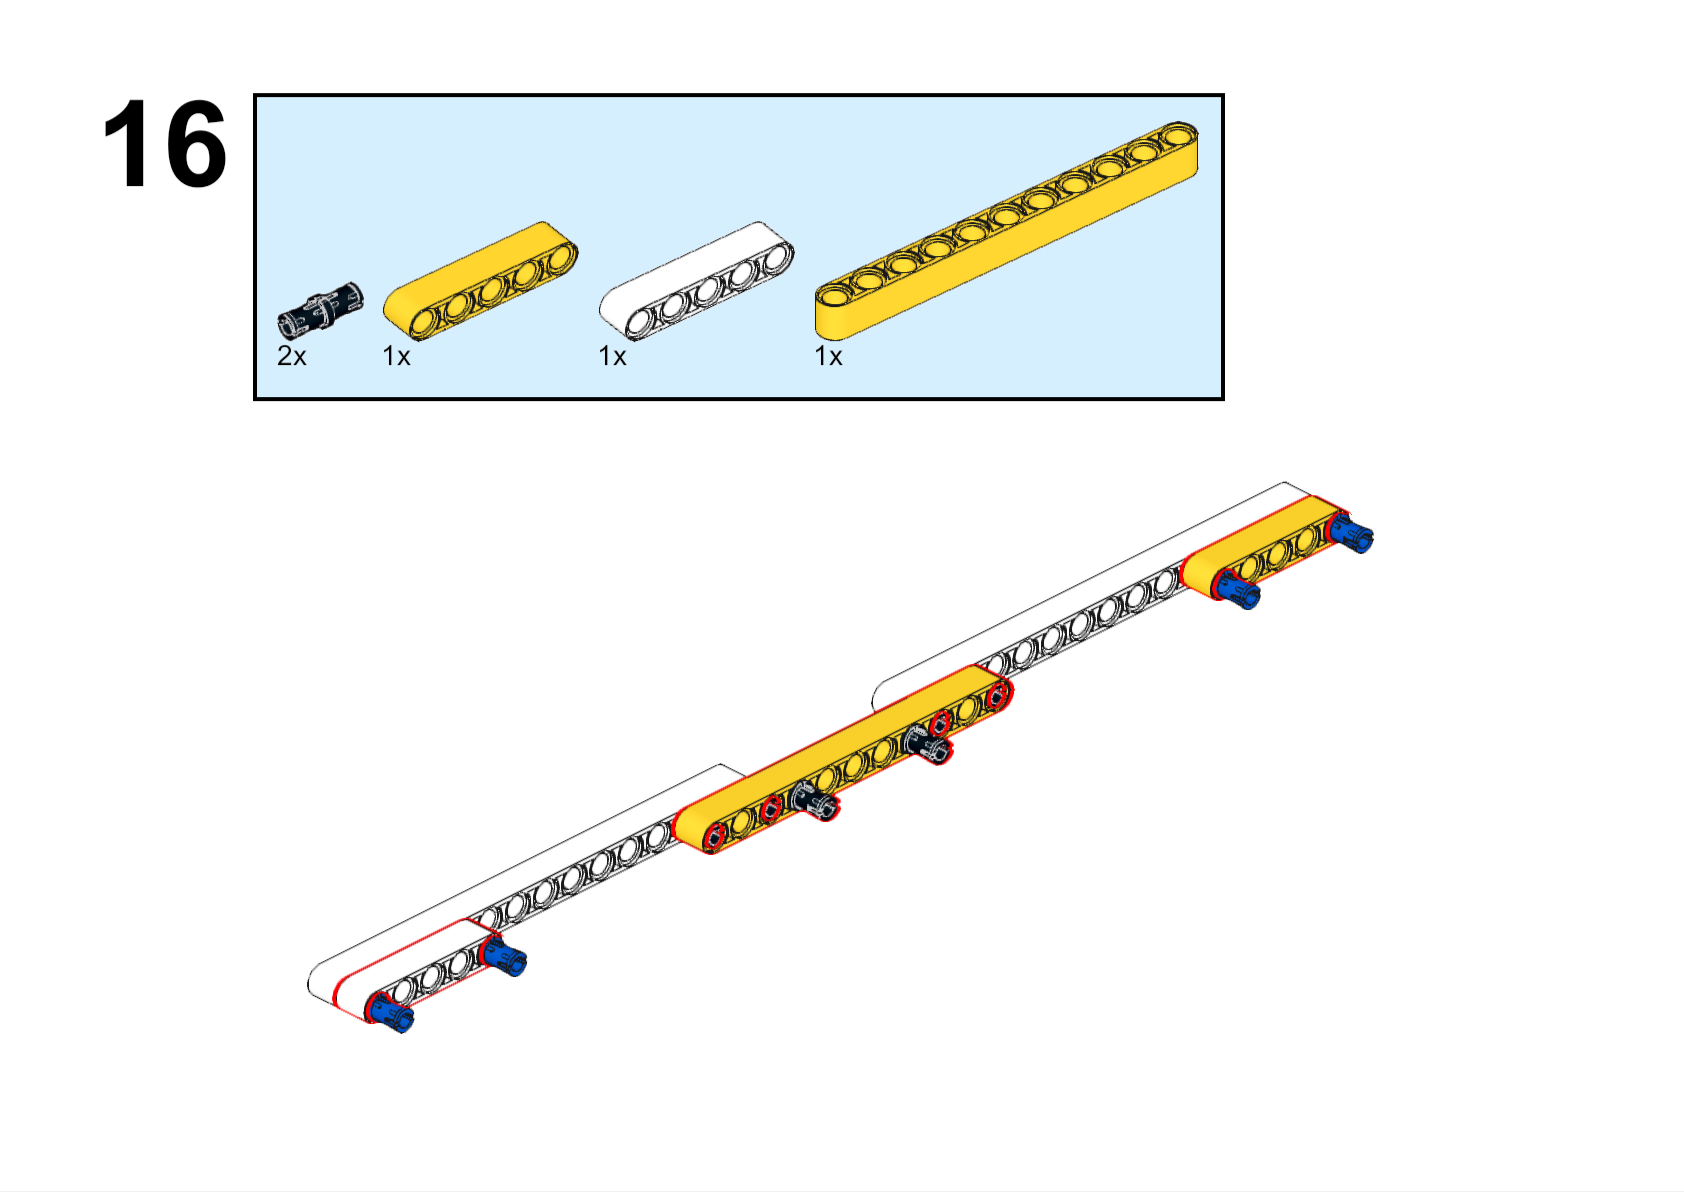
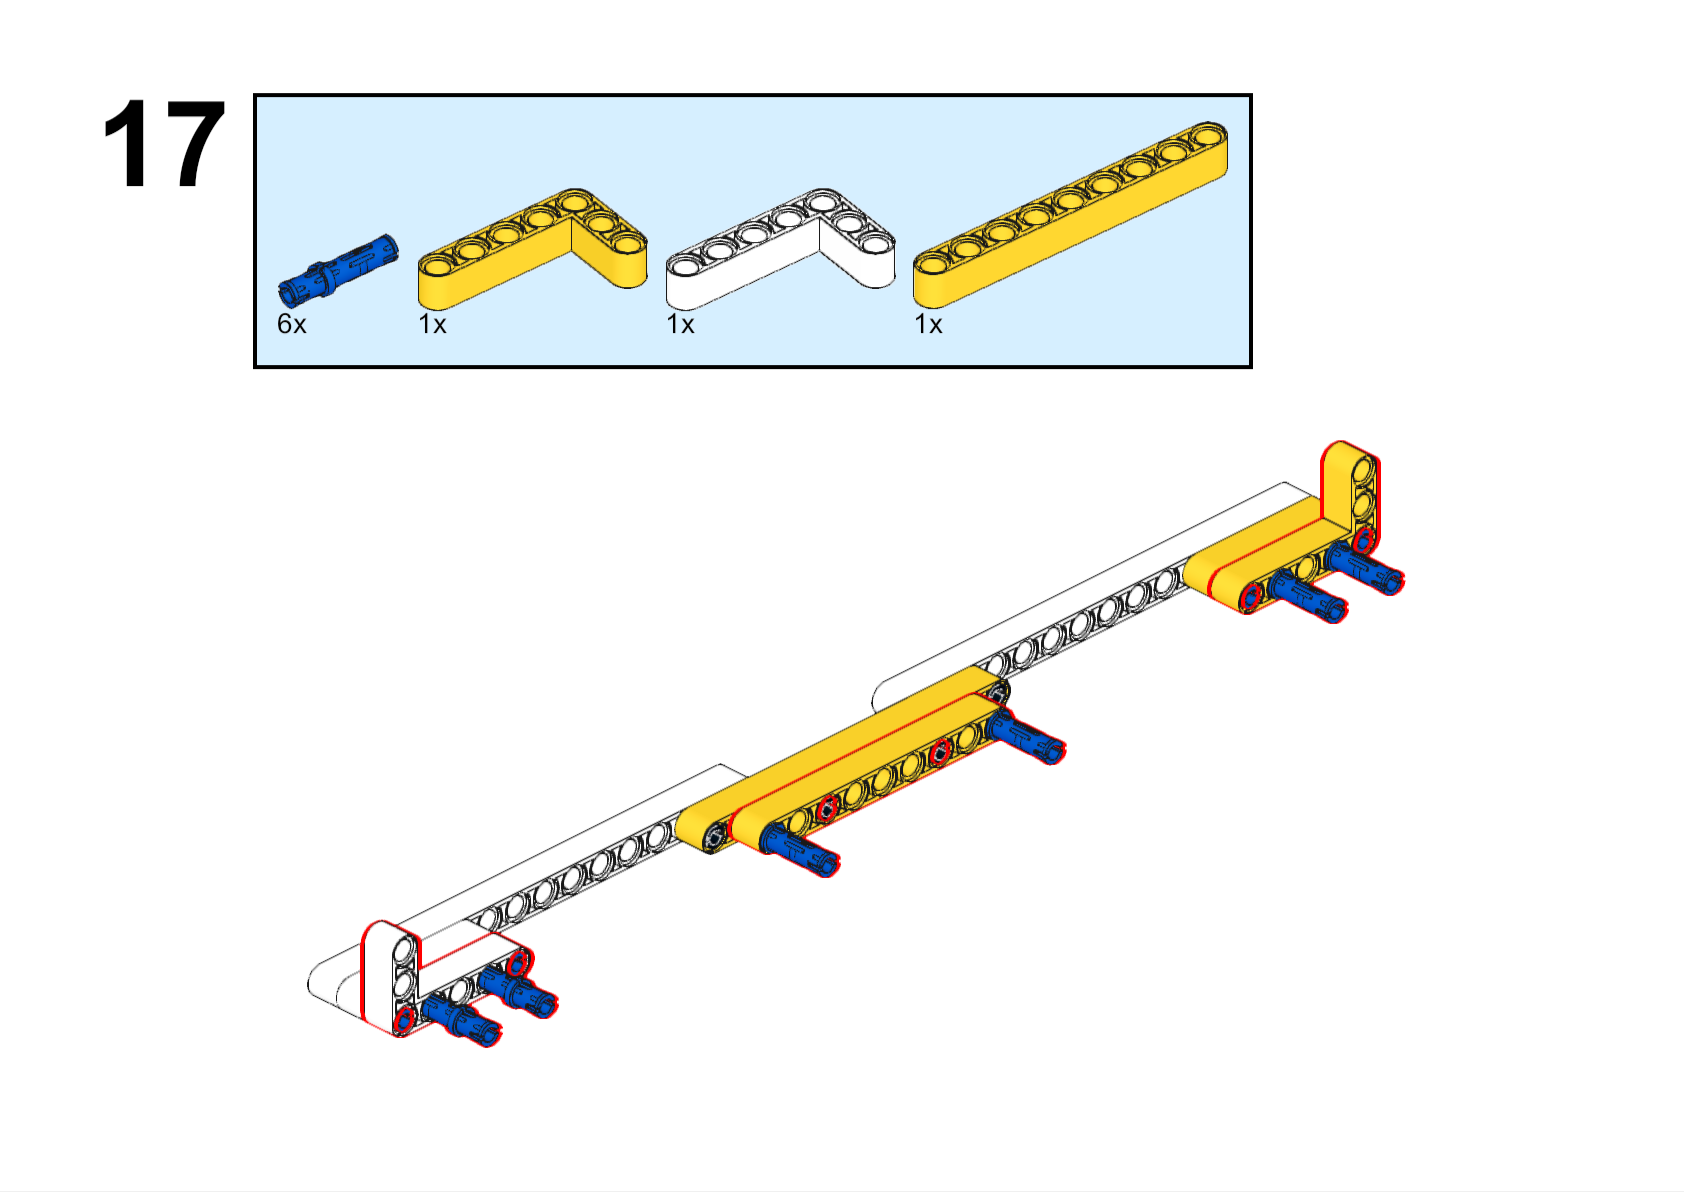
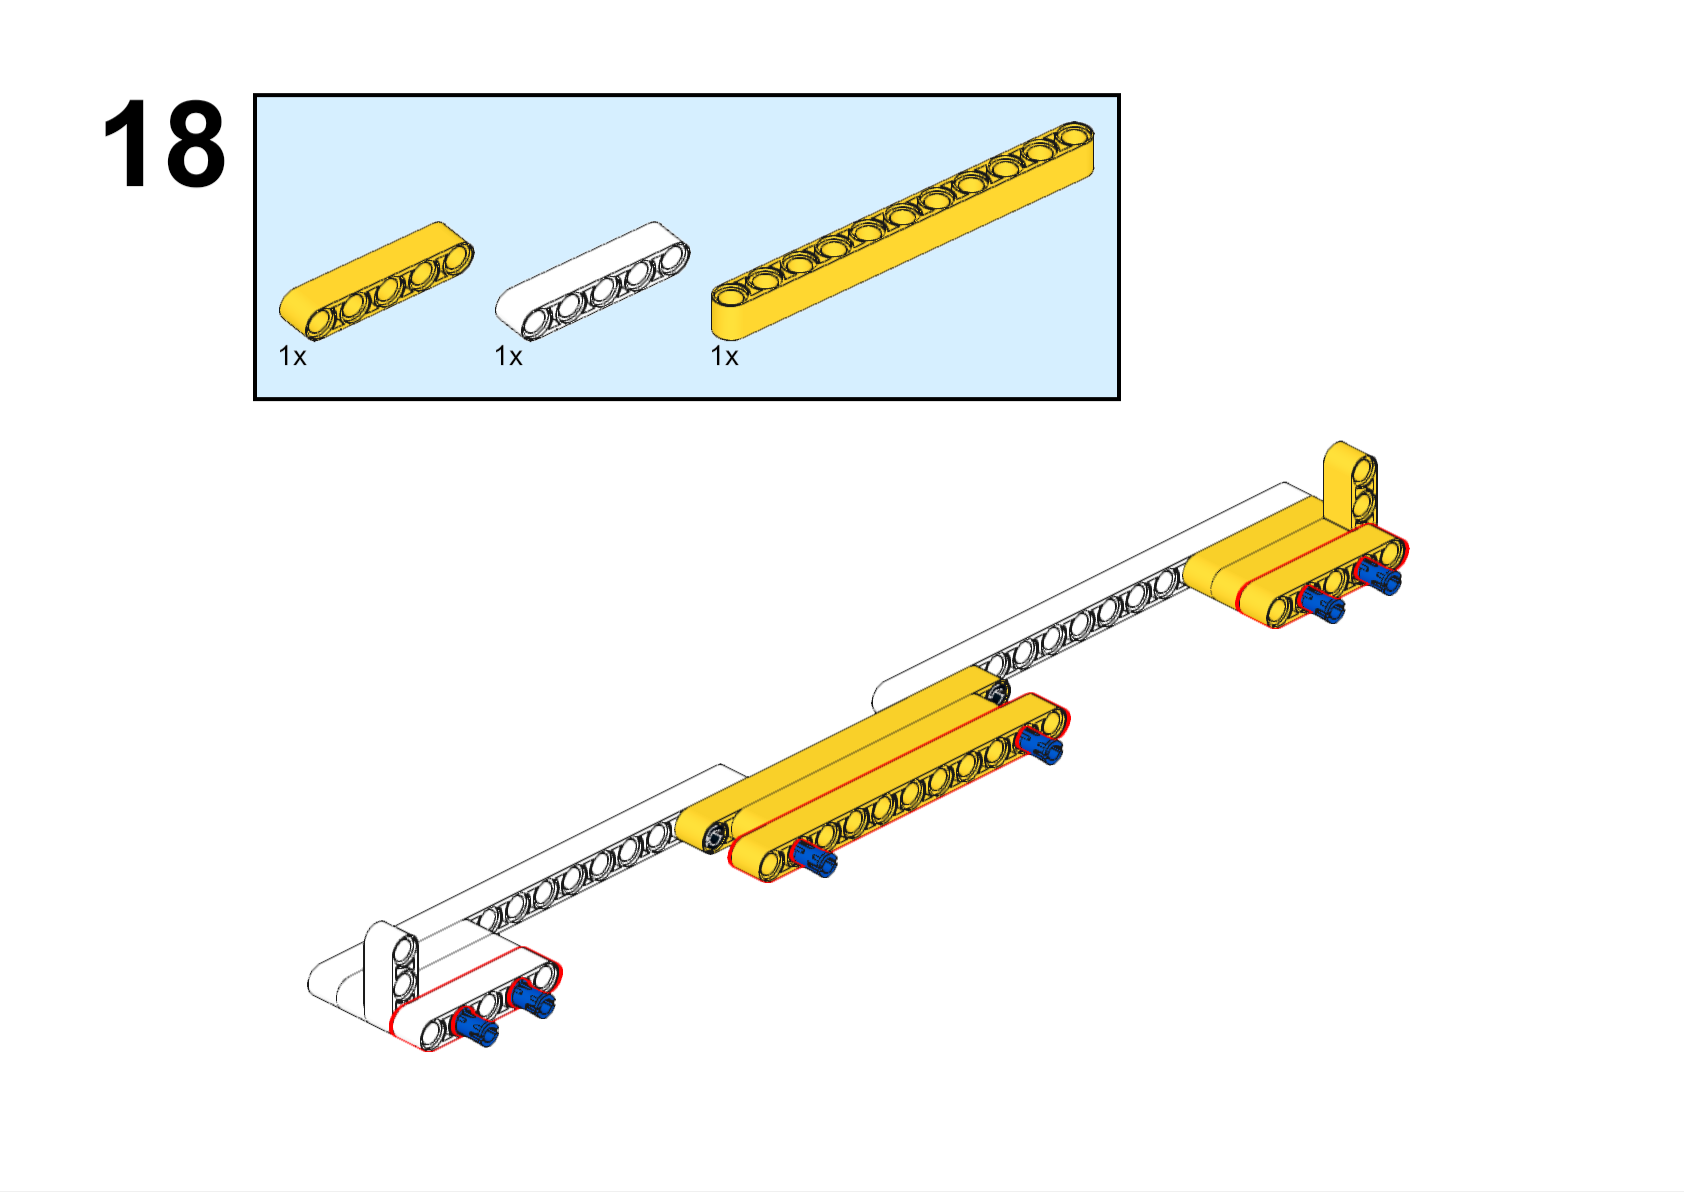
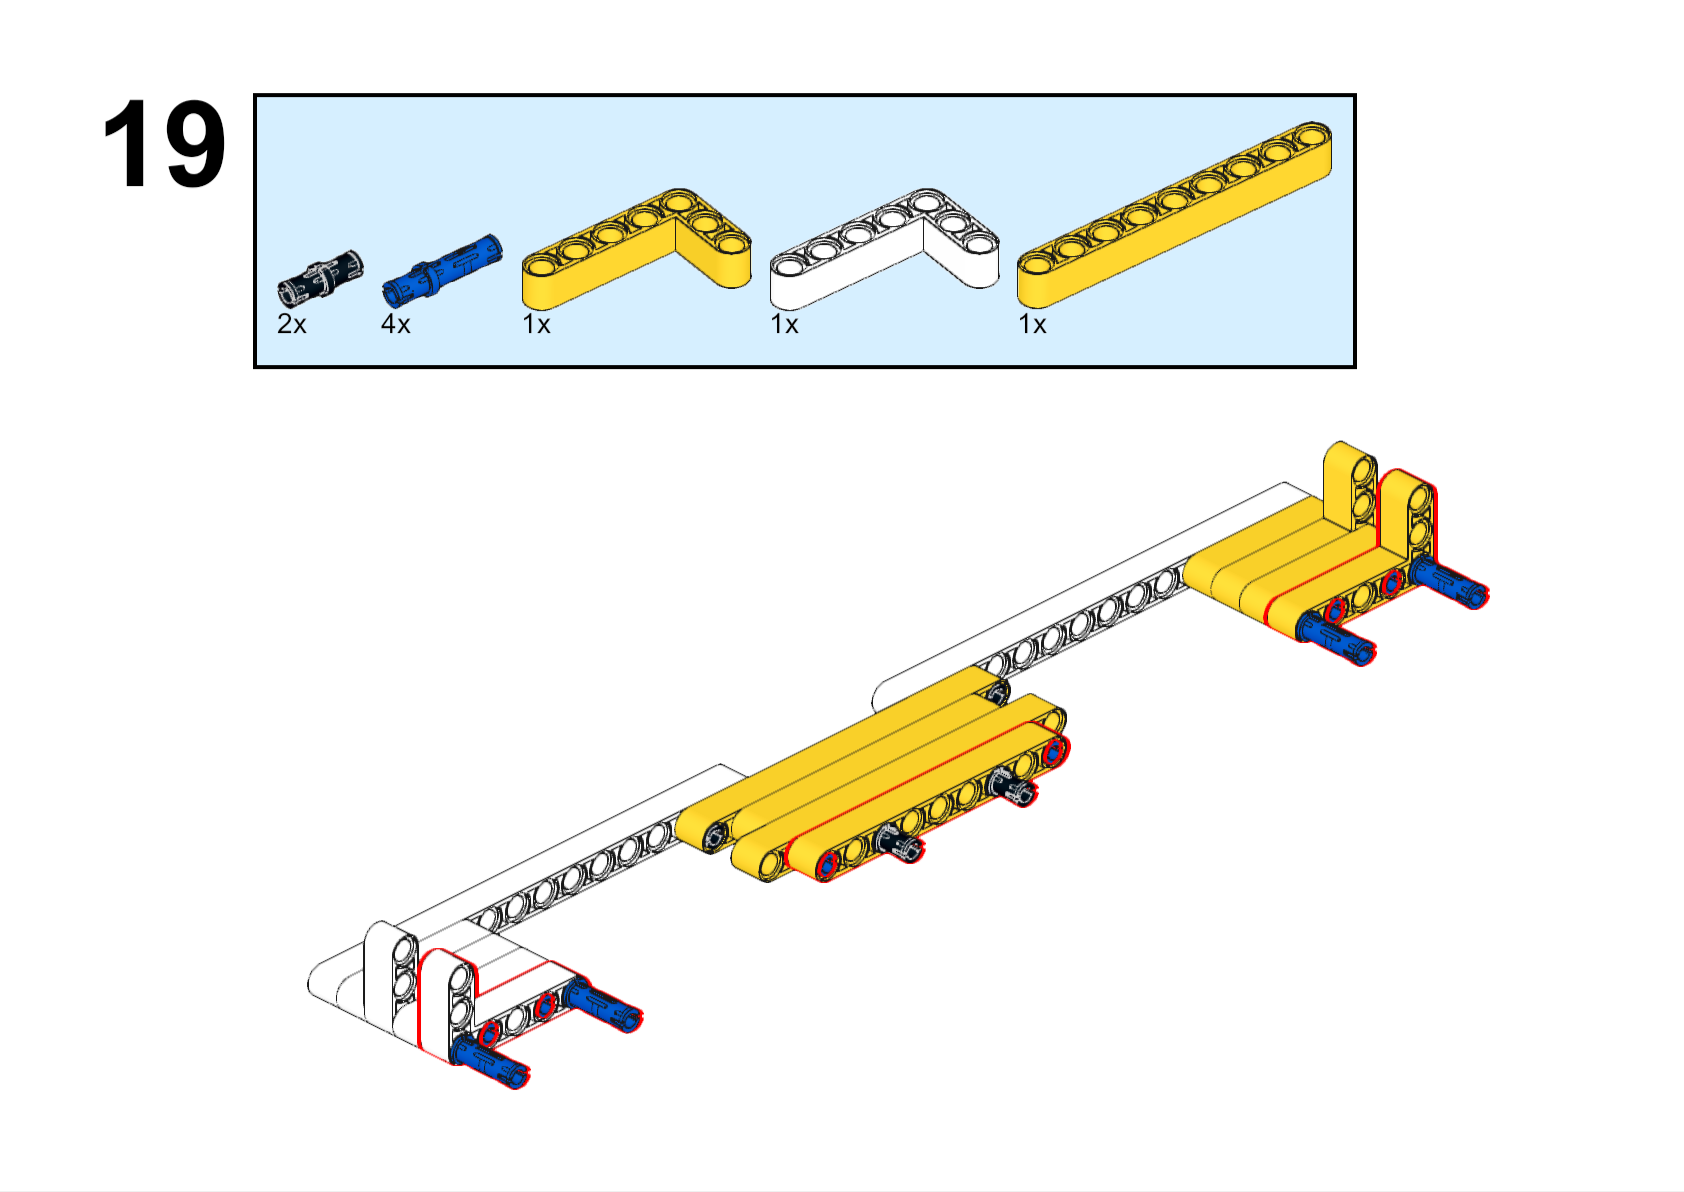
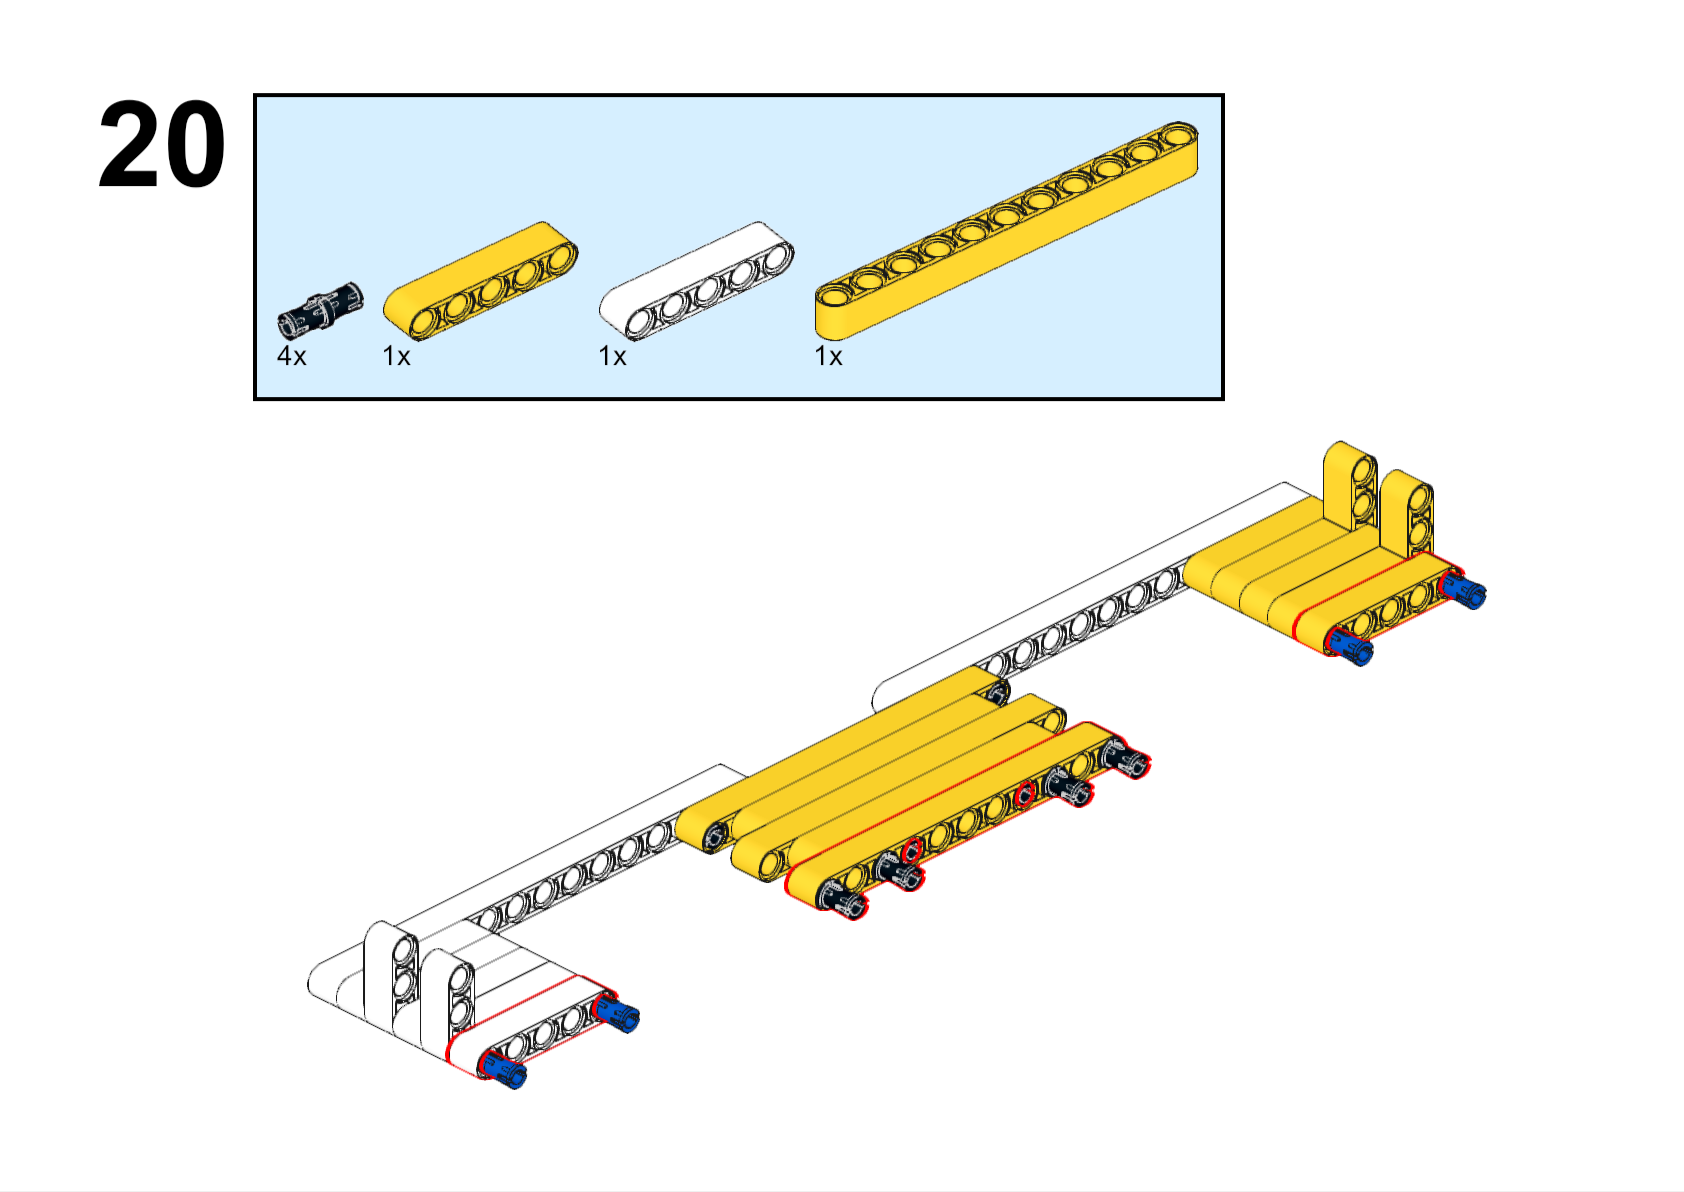
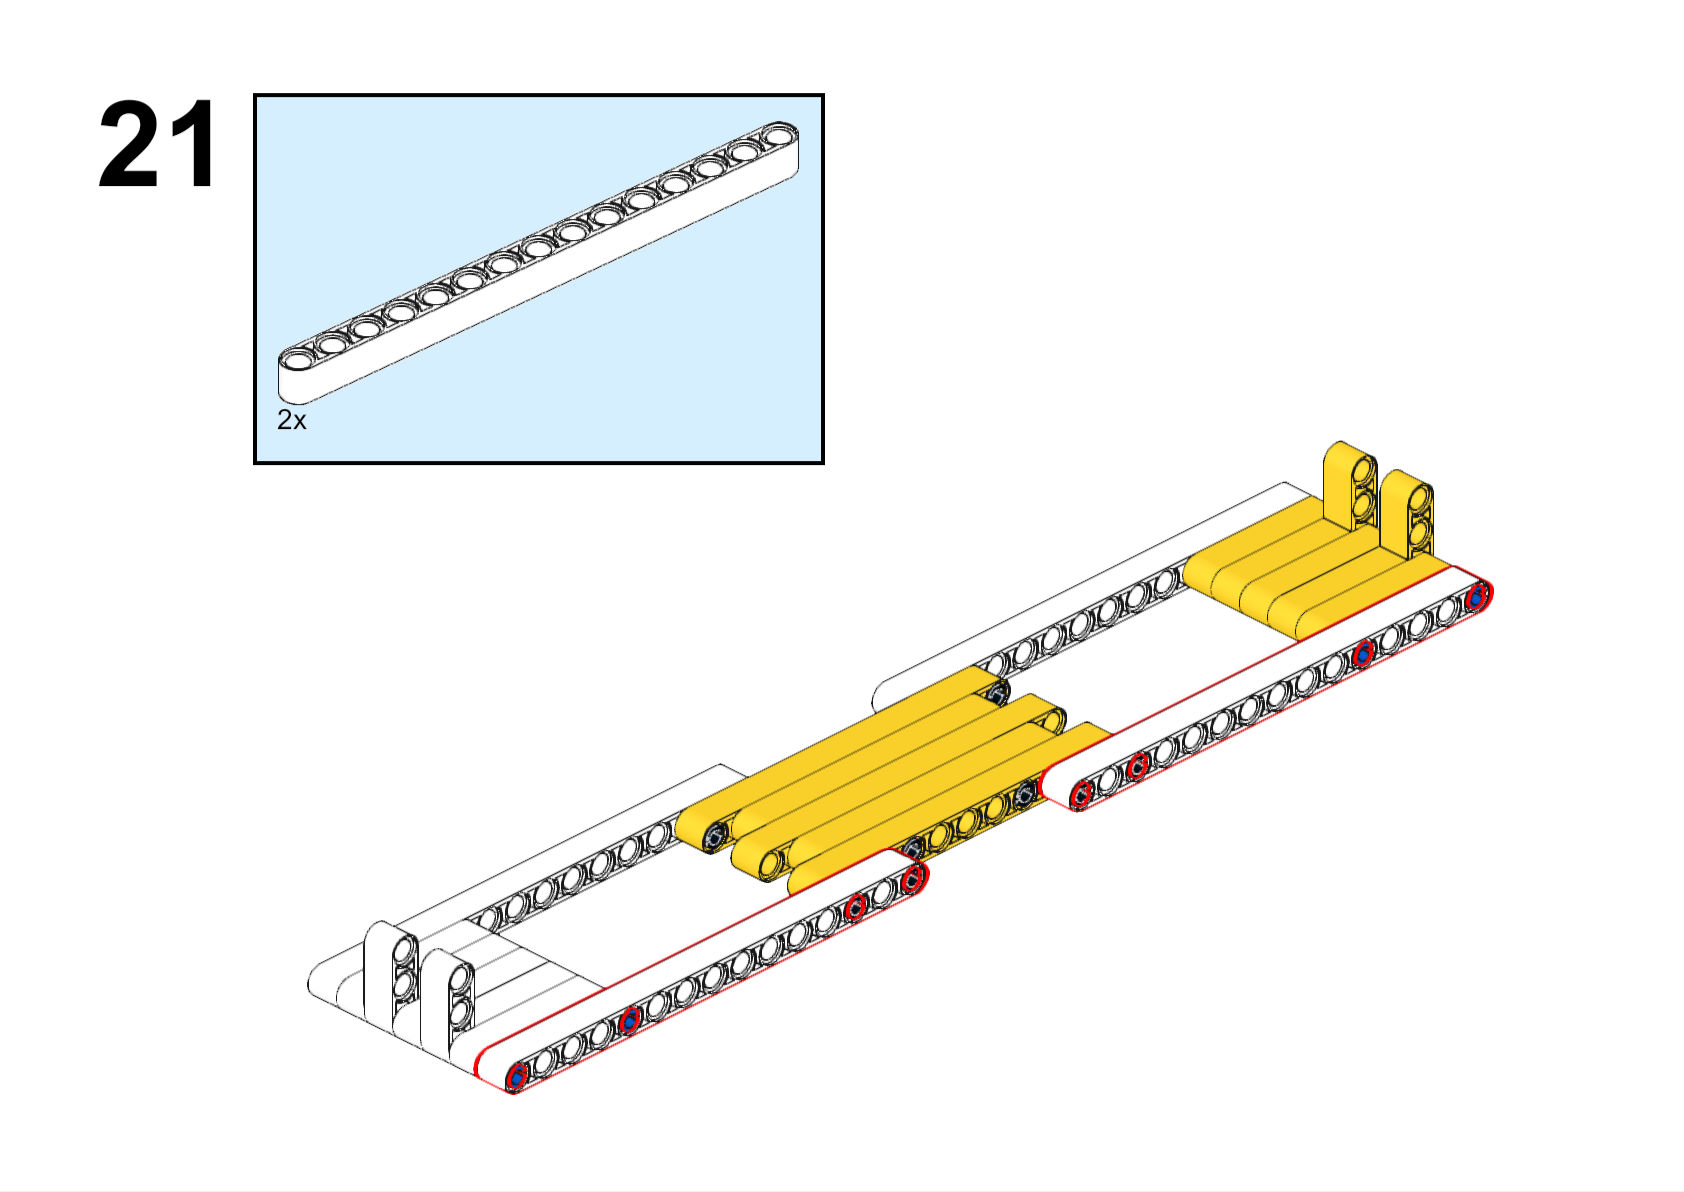
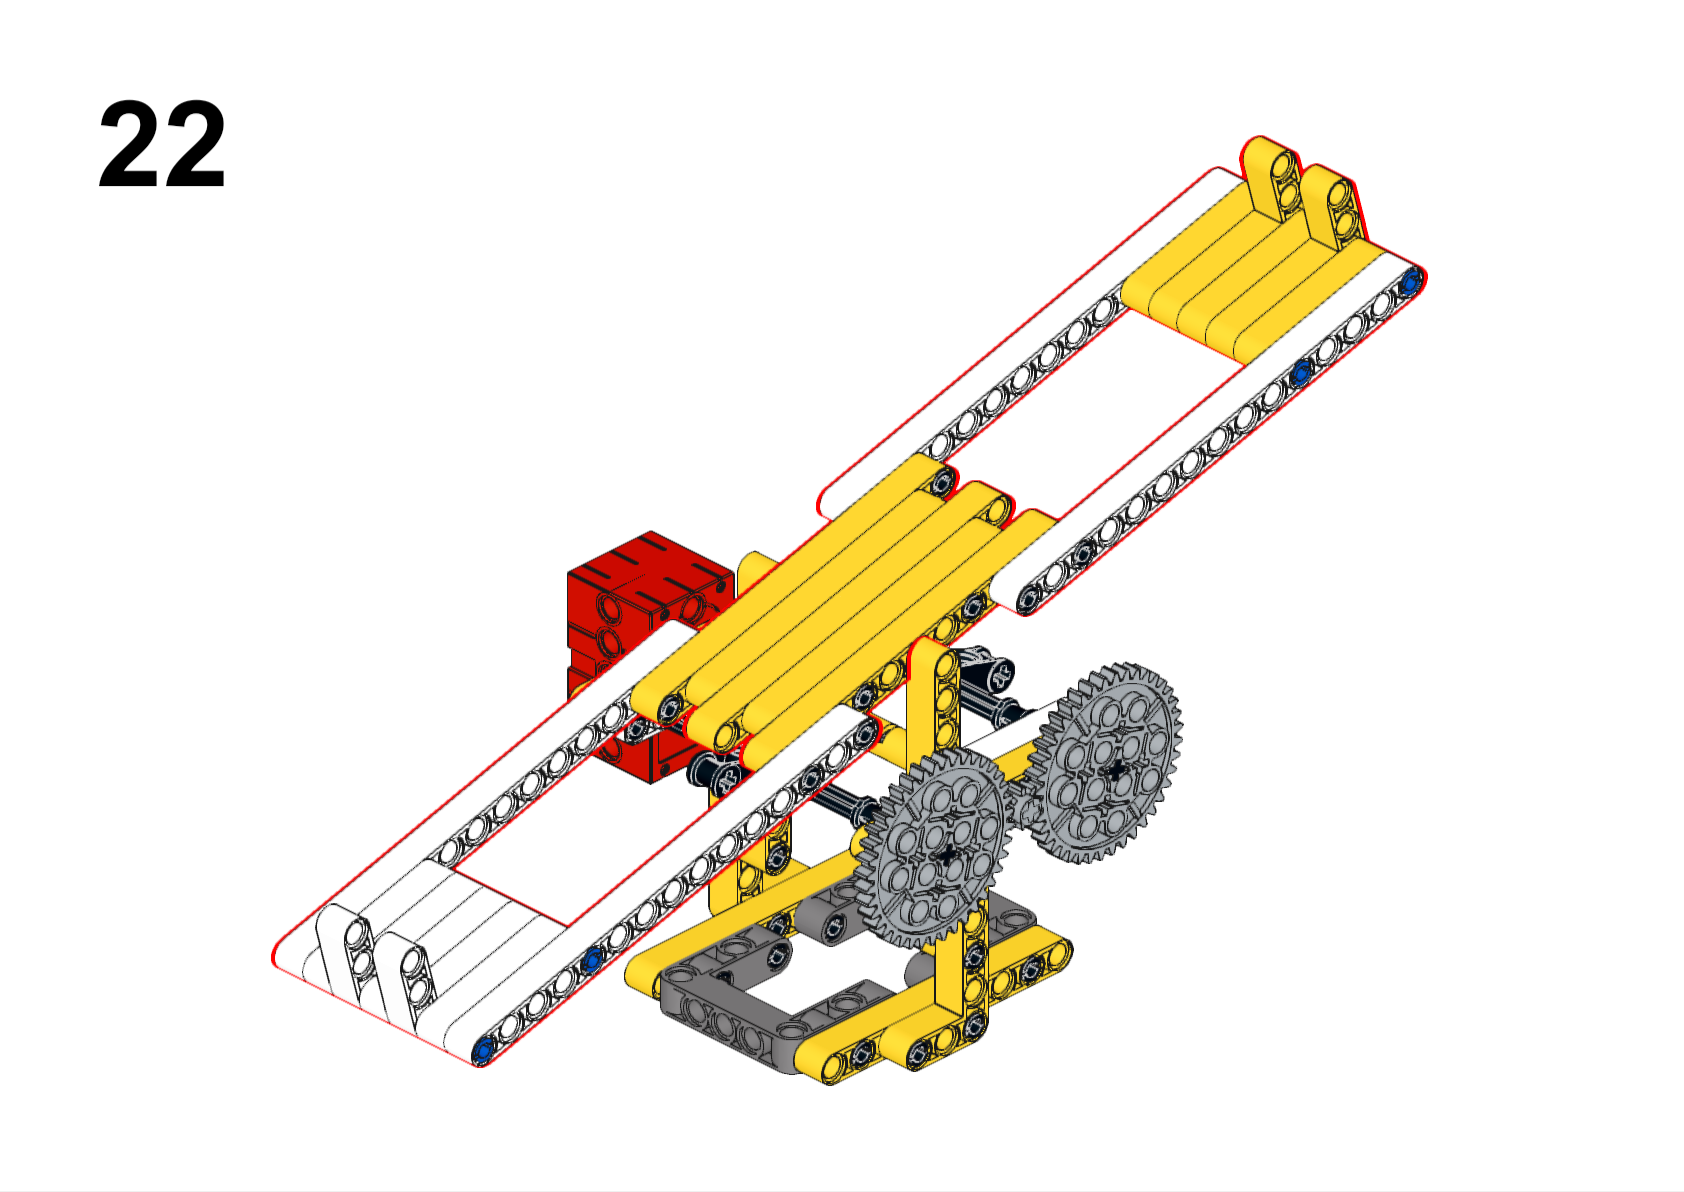
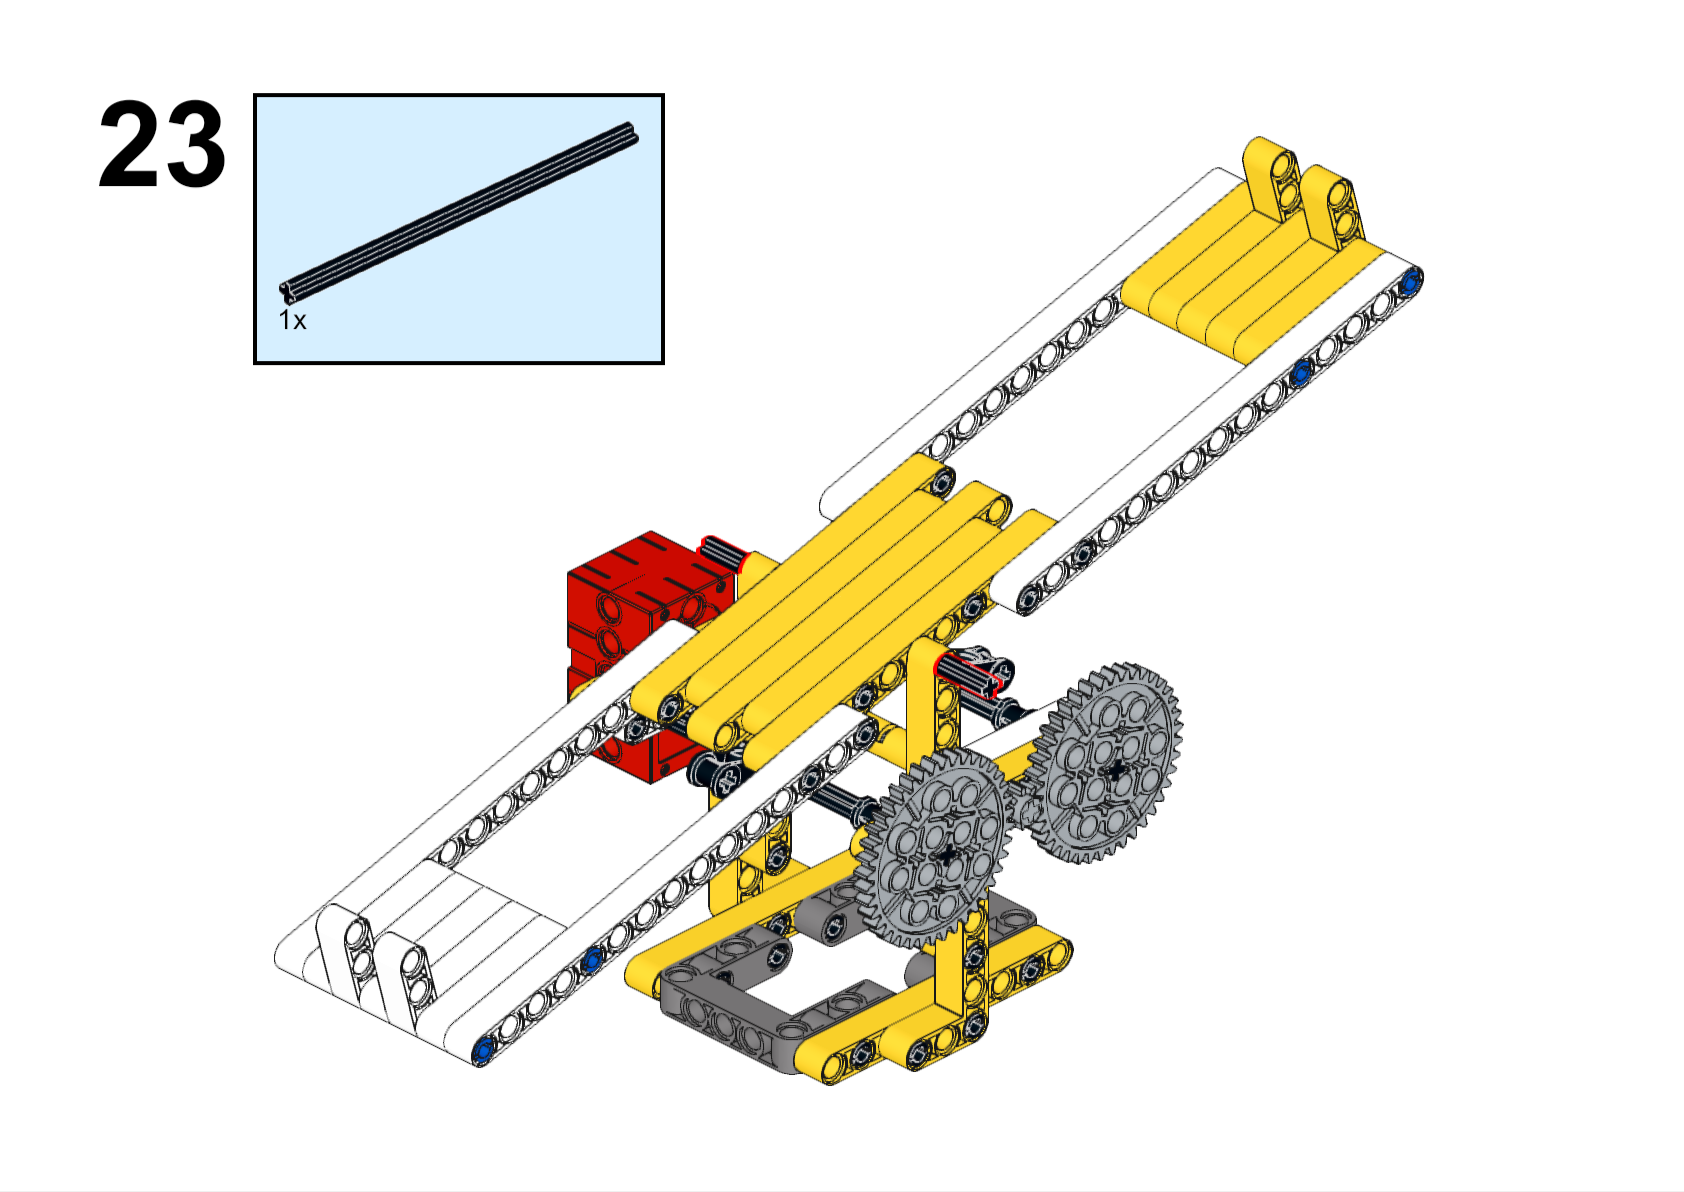
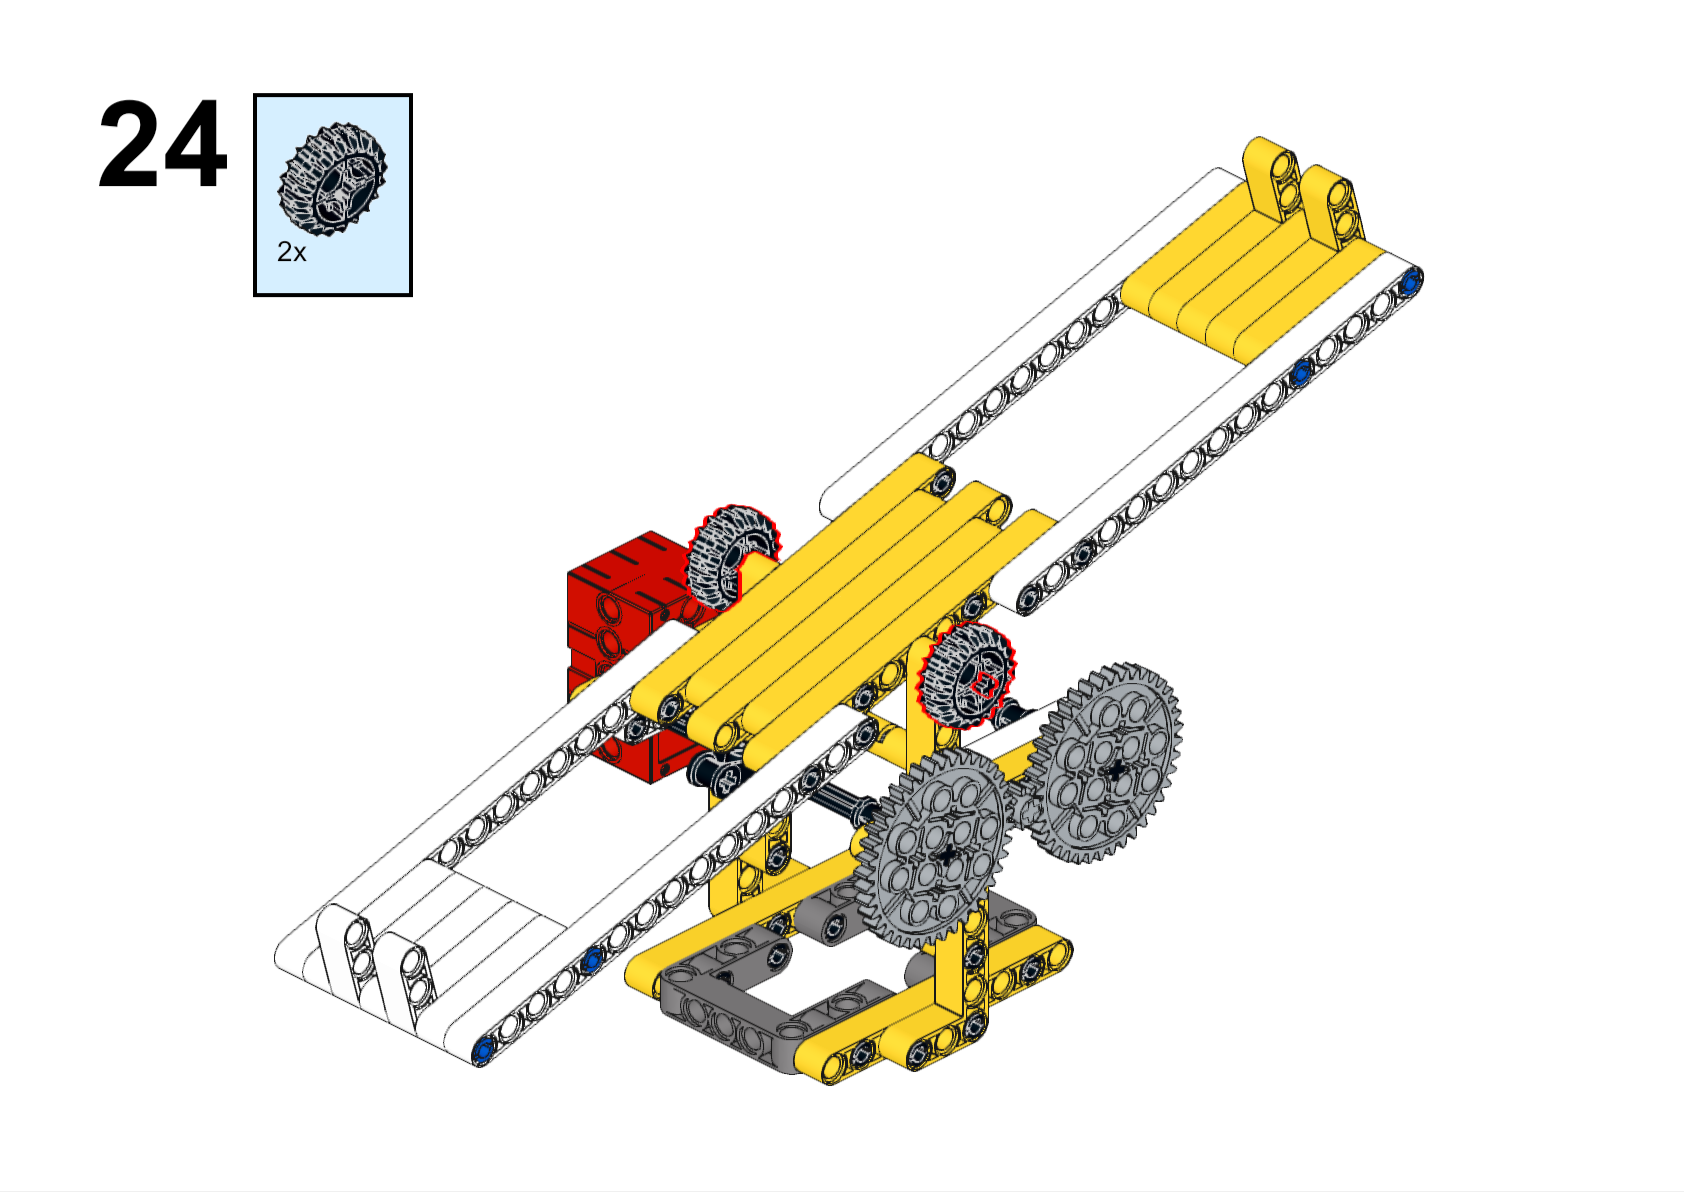
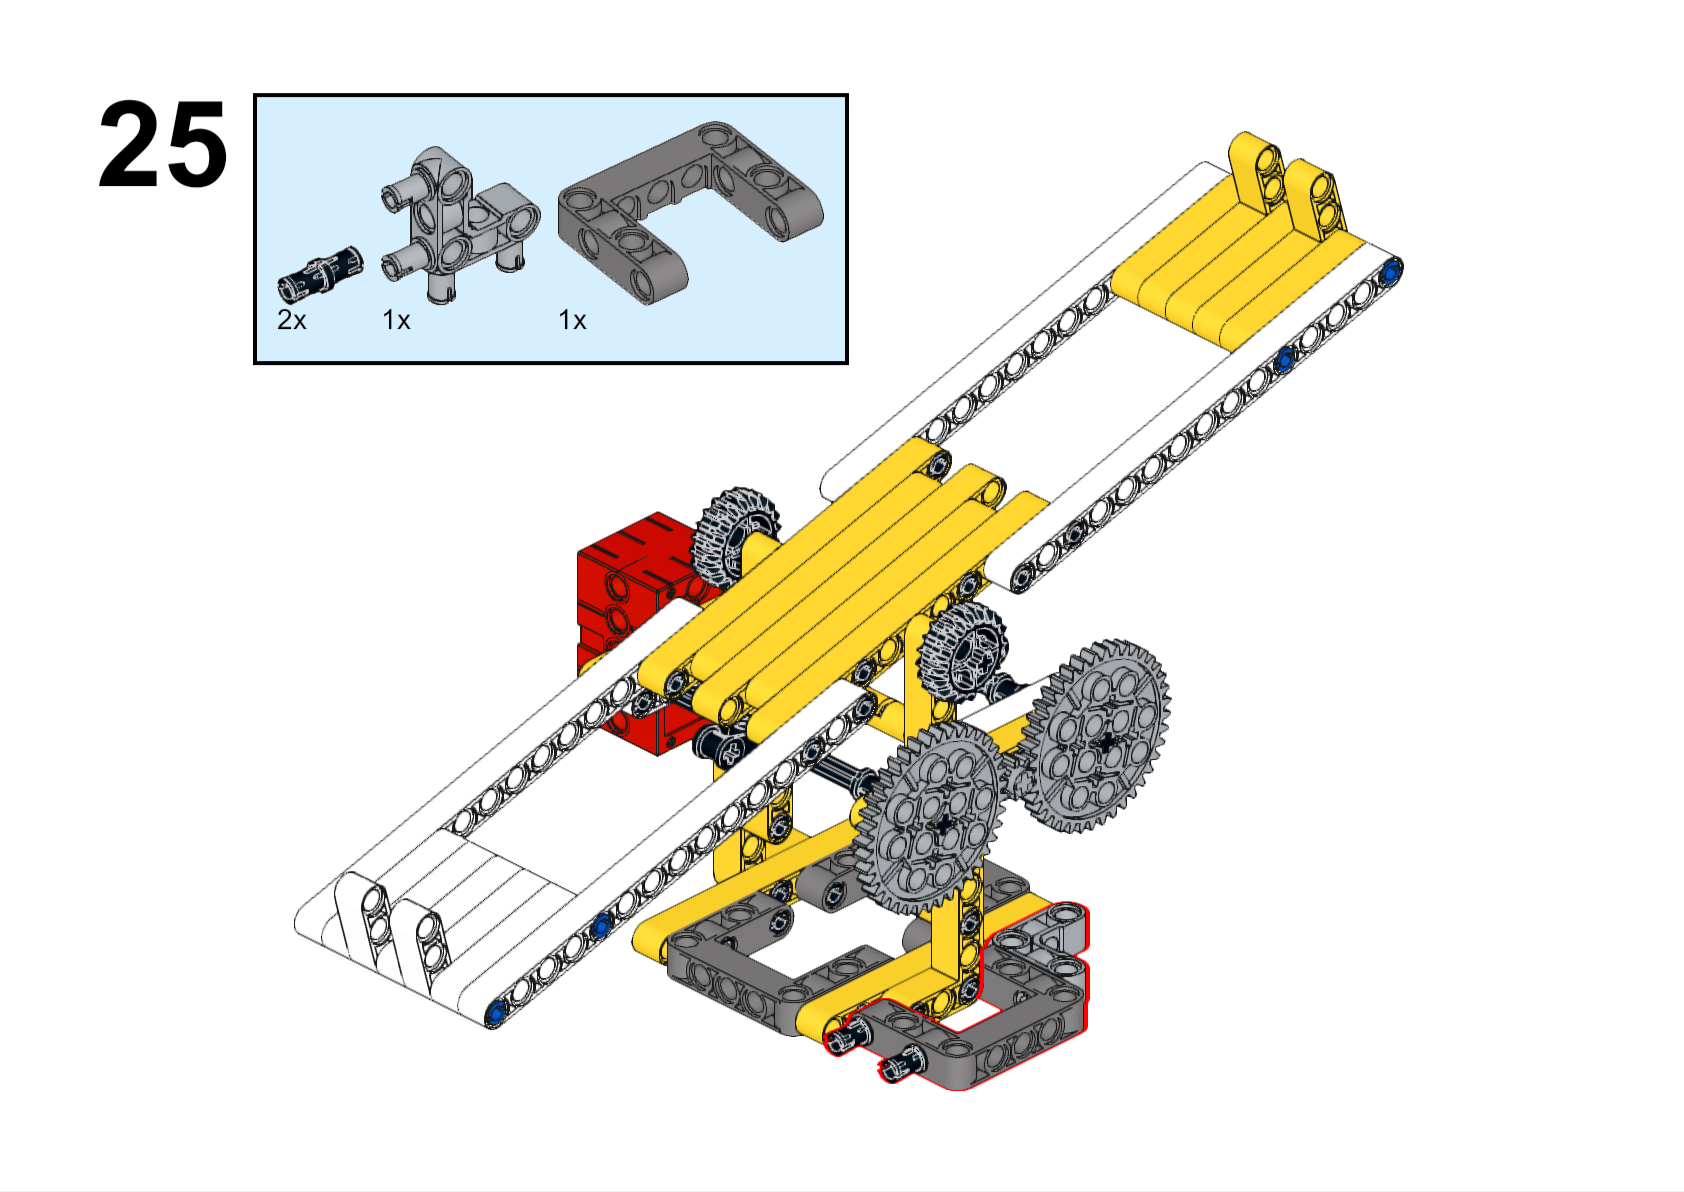
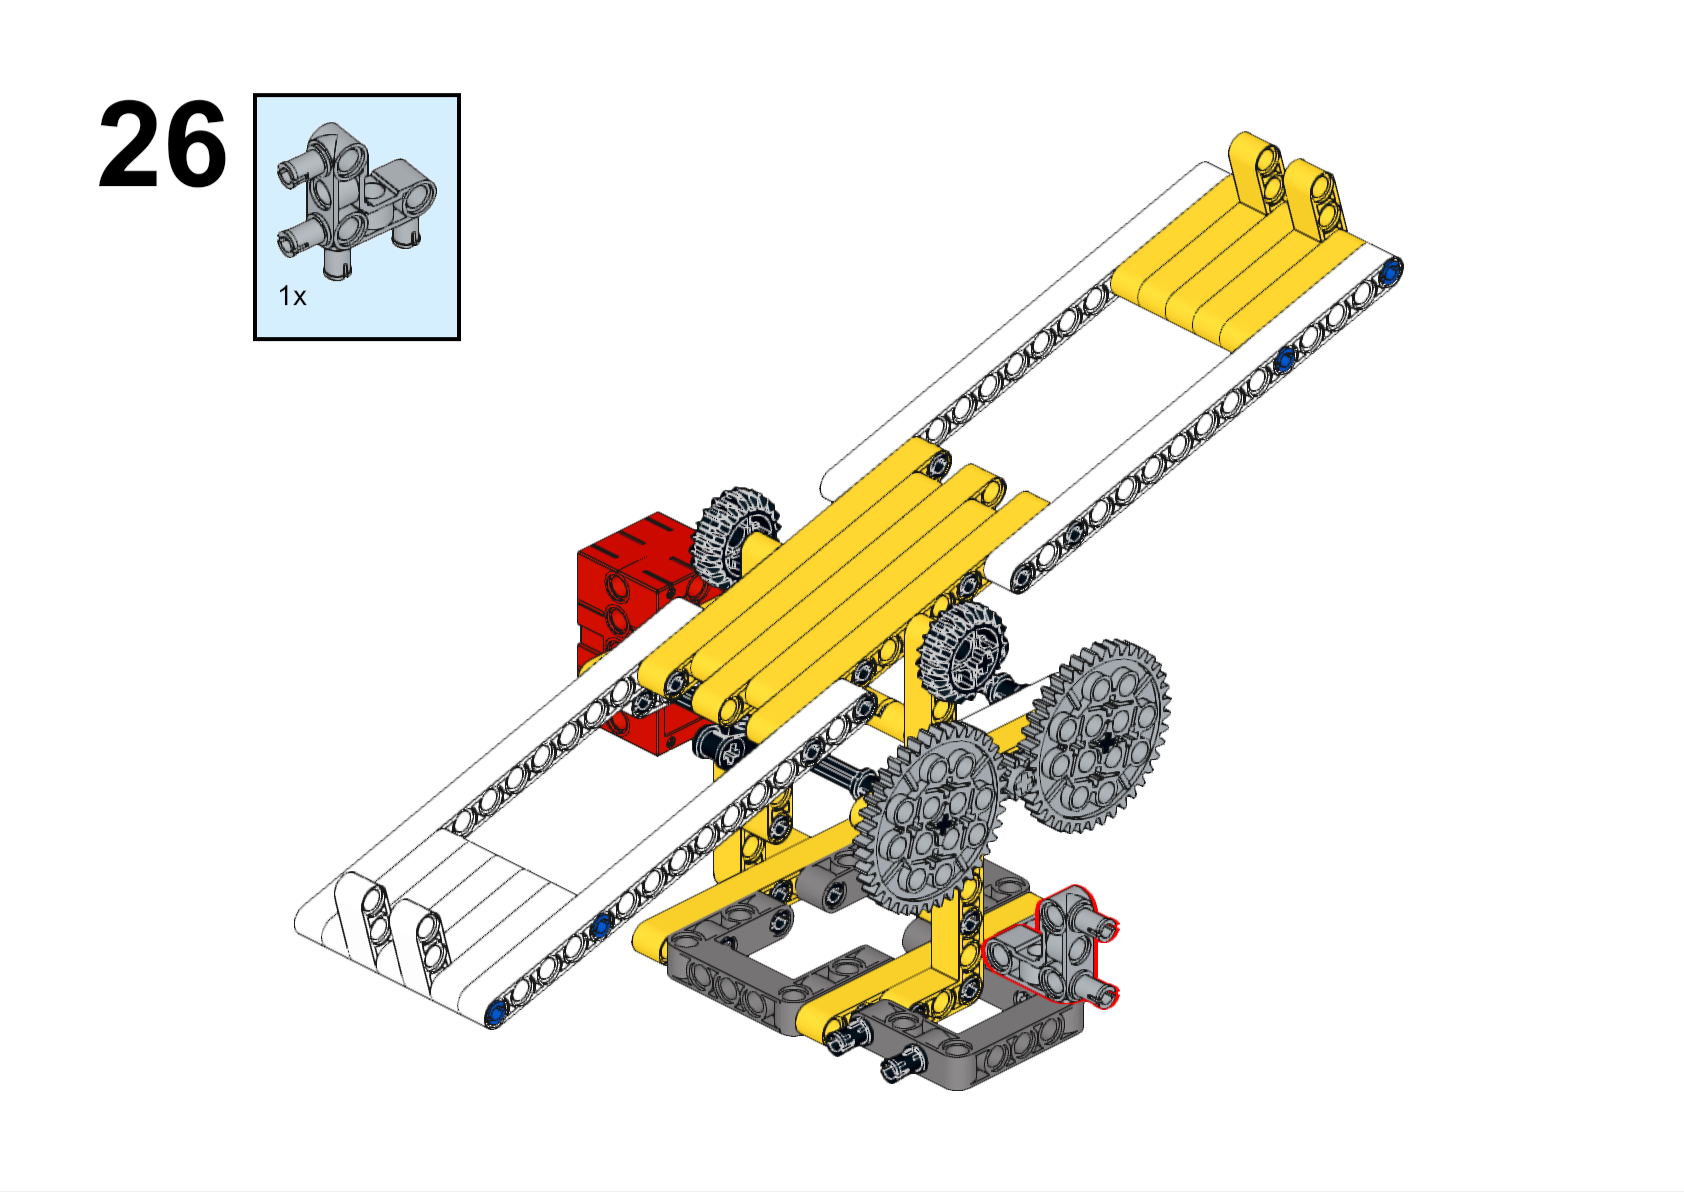
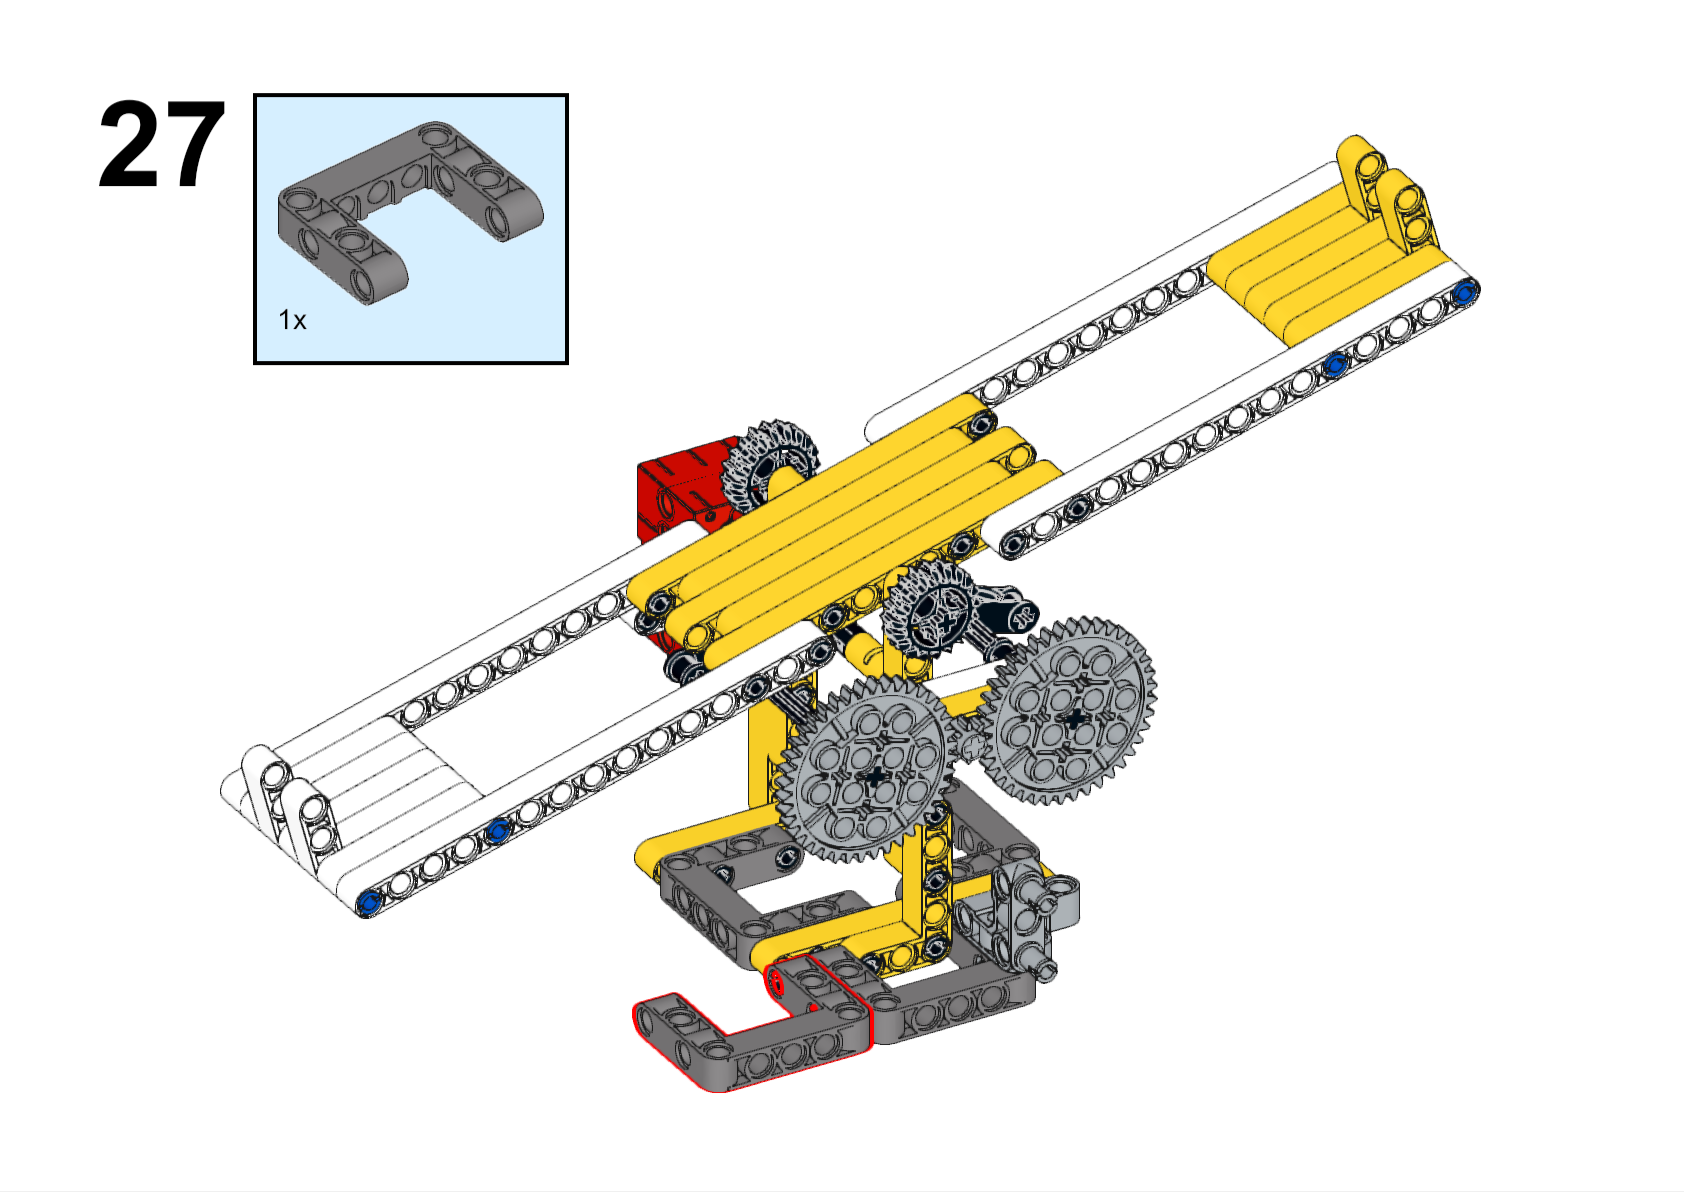
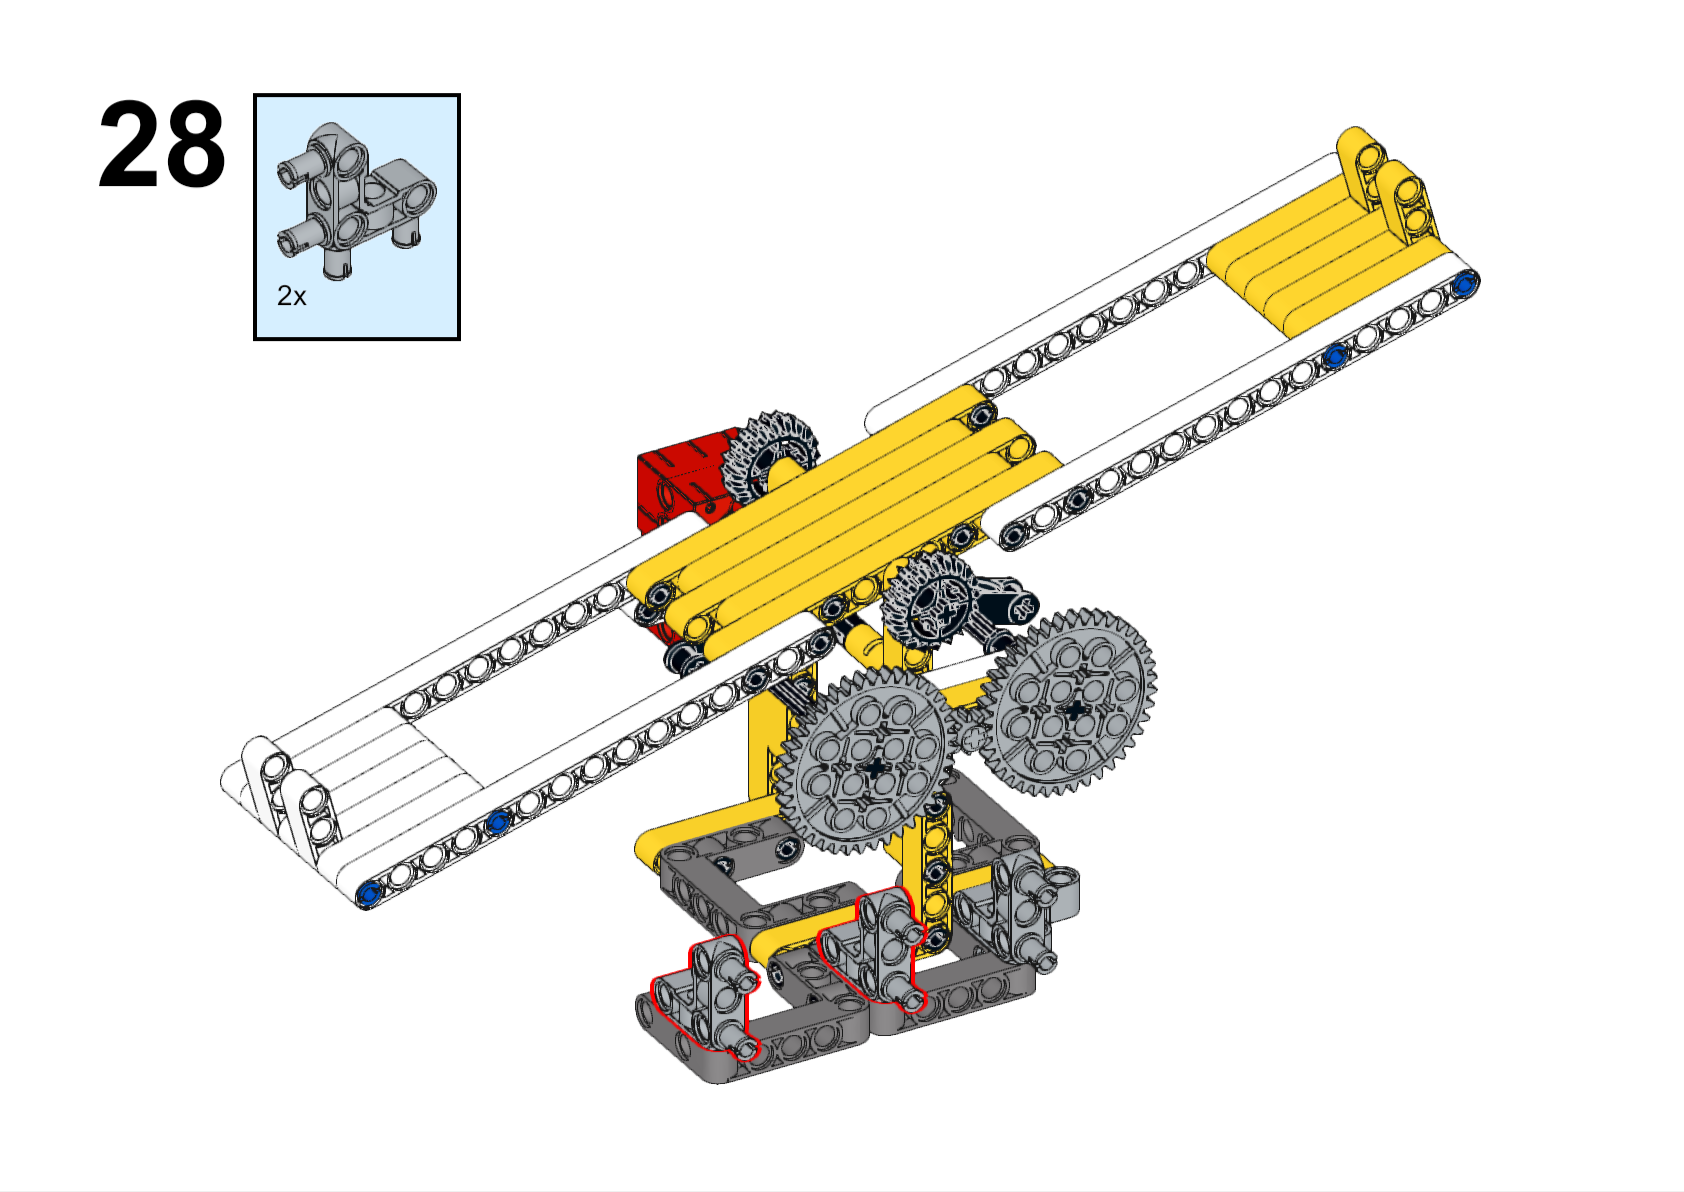
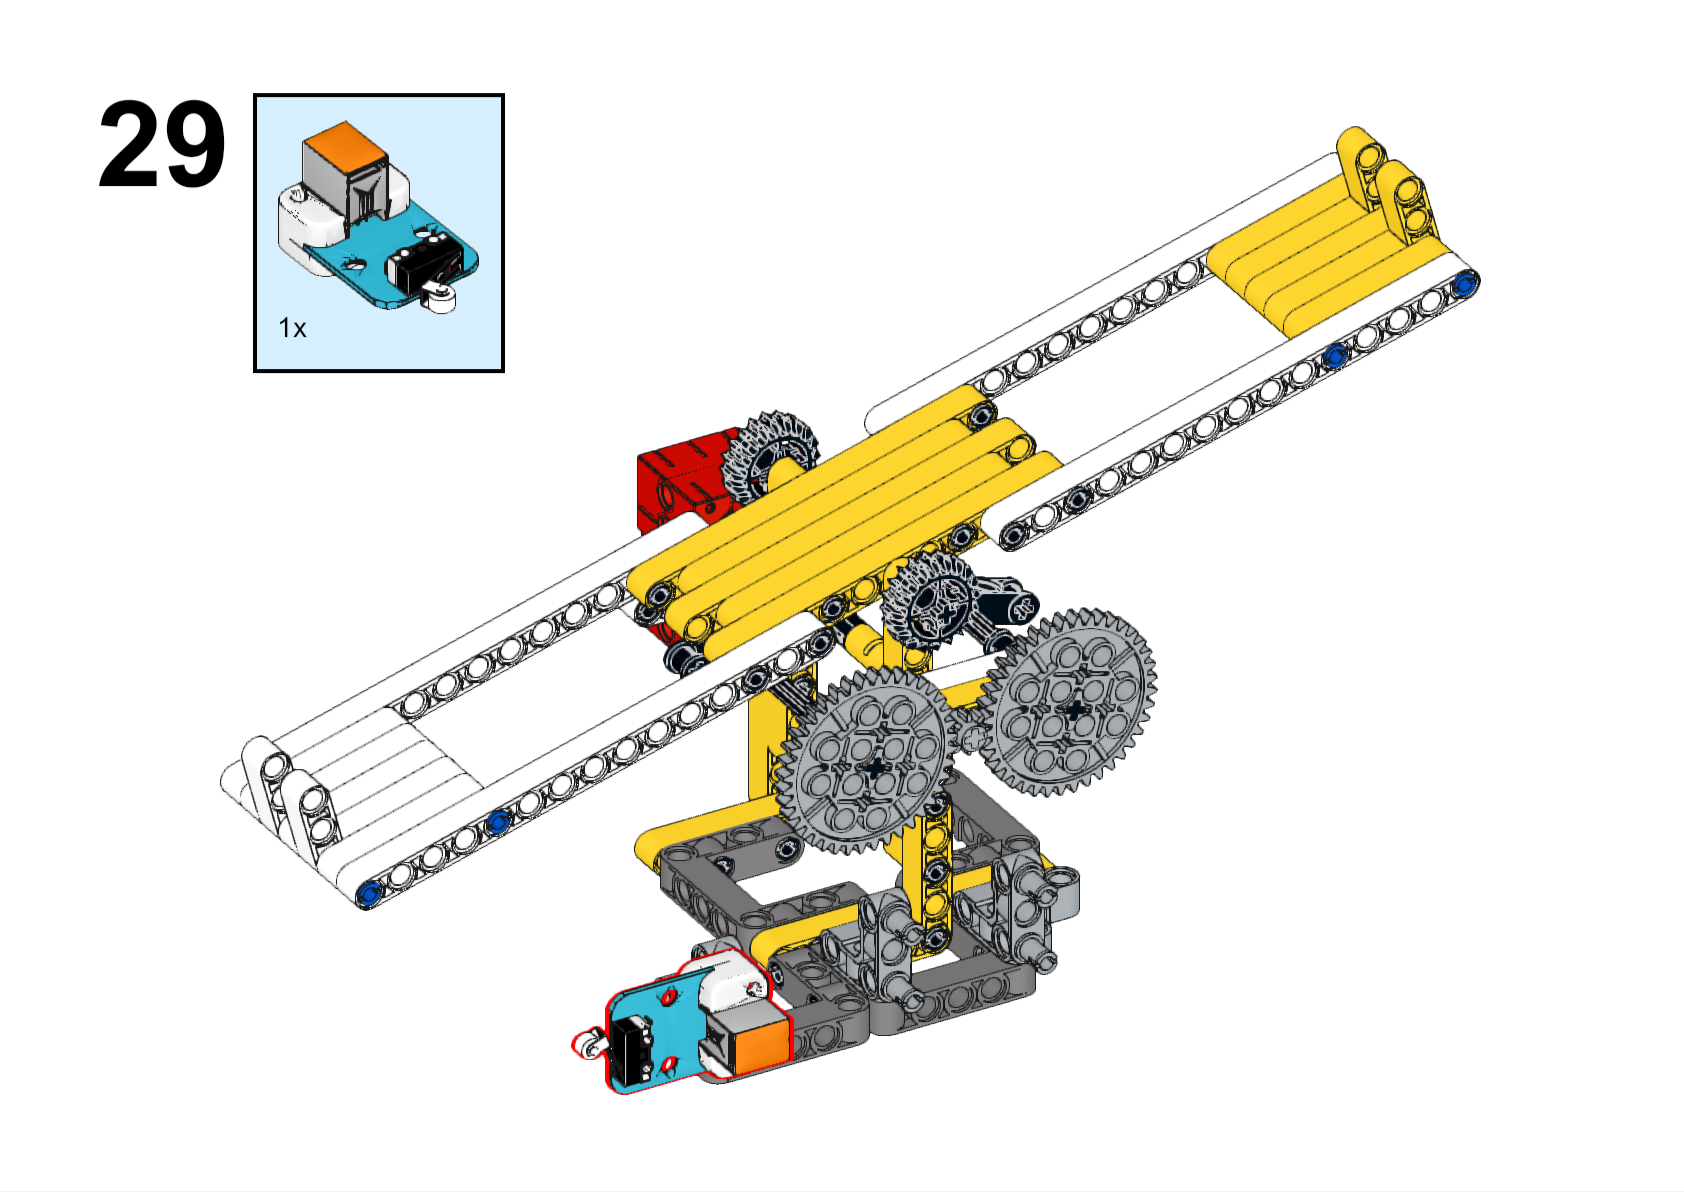
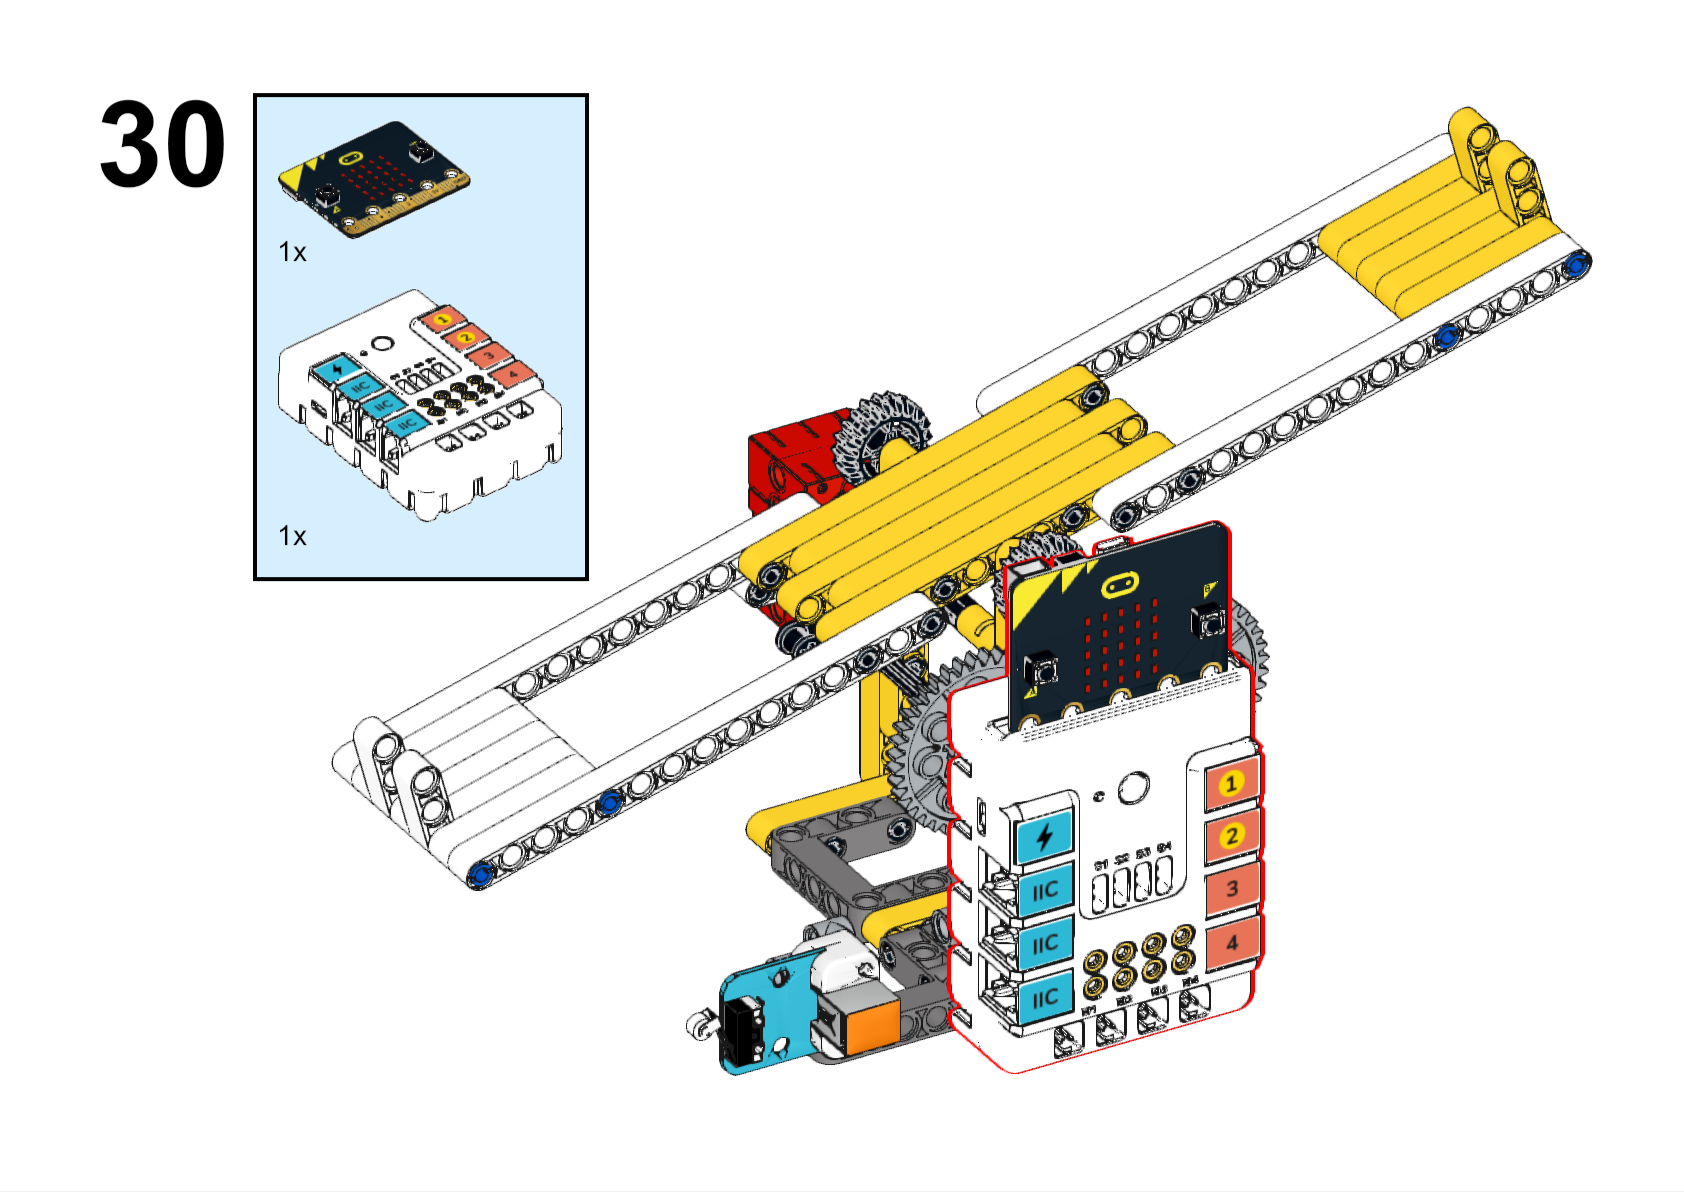
Completed

Hardware Connection
Connect the crash sensor to the J1 and the motor to the M1 of the Nezha expansion board.
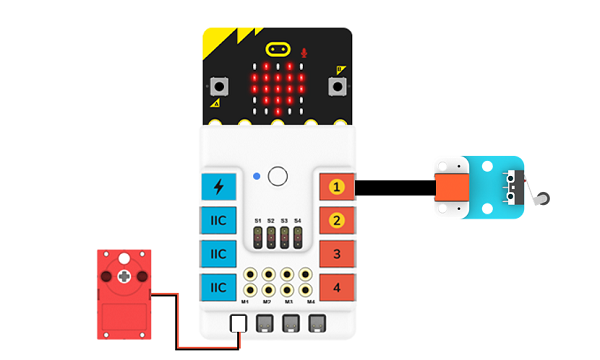
Programming
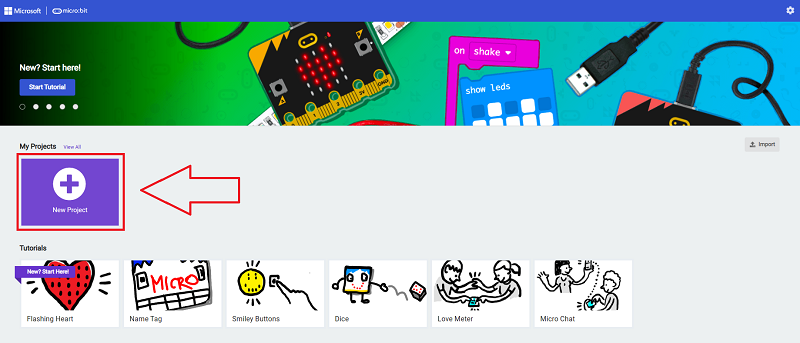
Go to makecode
Create new projects
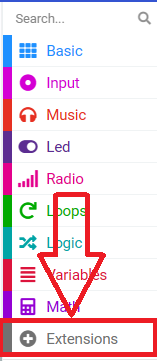
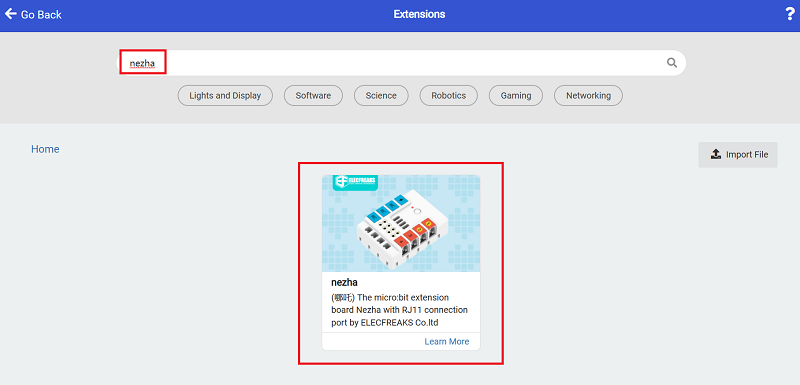
Click extensions
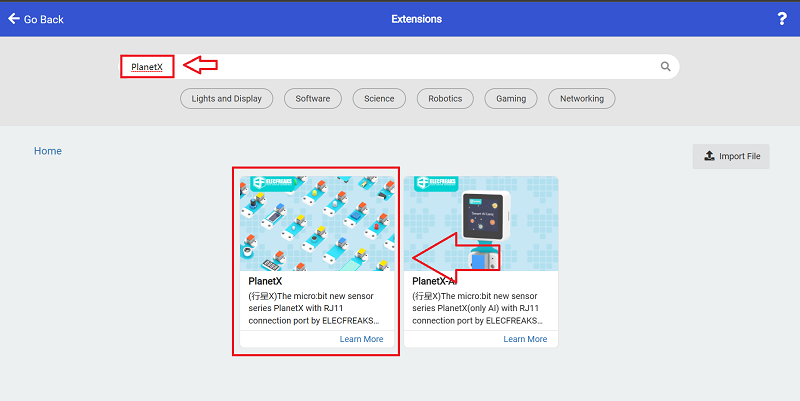
Search with PlanetX to download the package.
Search with nezha to download the package.
Code
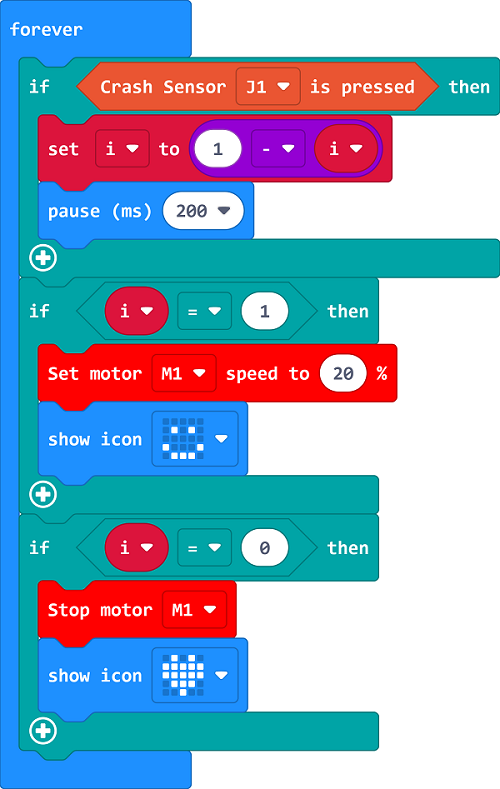
Link: https://makecode.microbit.org/_C7R6bL6m63rC
You may download it directly below:
Demonstration
Present in groups and compare the results and effectiveness of each group.
Result
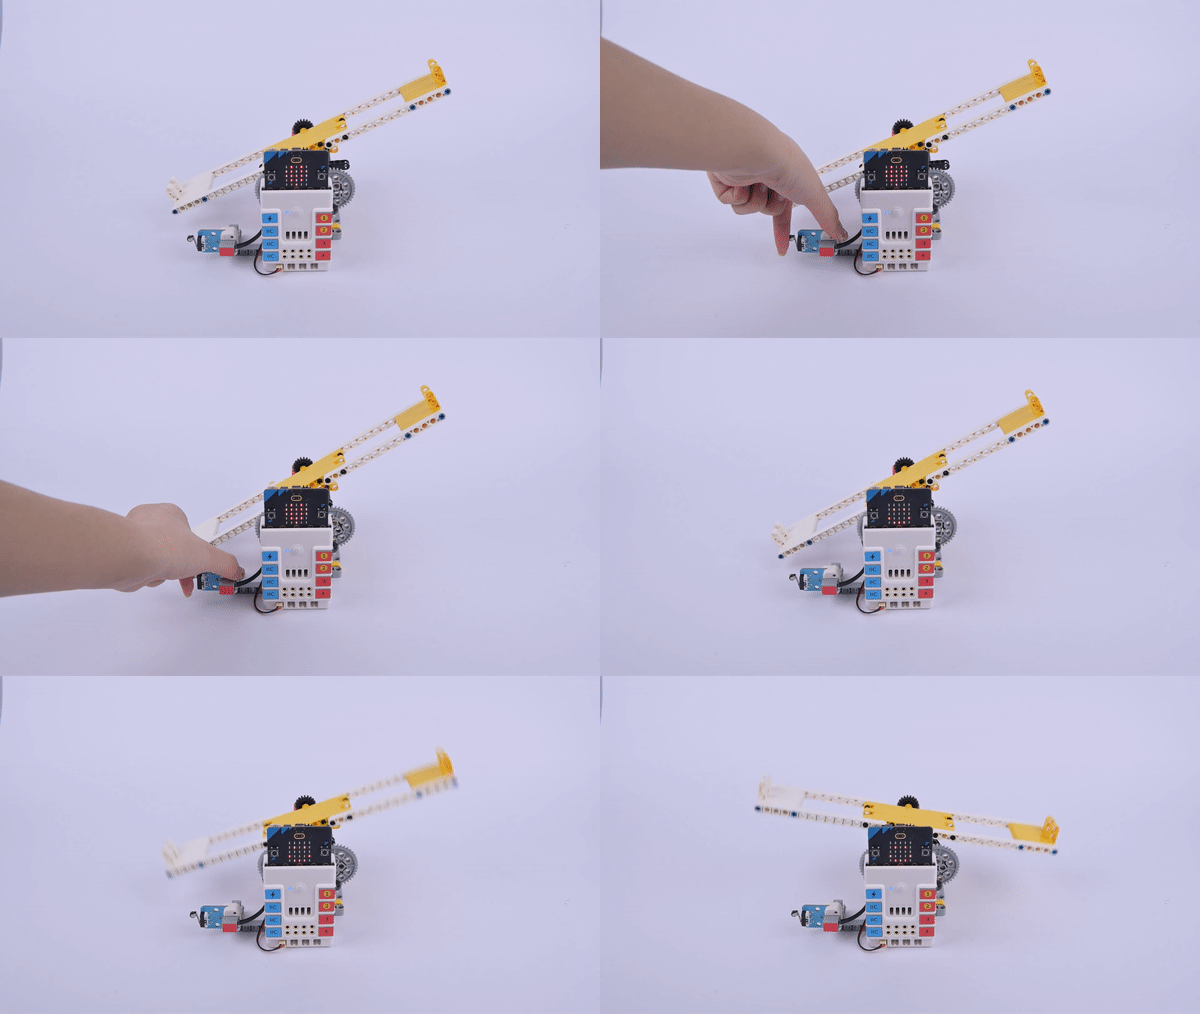
Press the crash sensor to start the seesaw, press the crash sensor again to stop the seesaw.
Reflection
Share in groups so that students in each group can share their production process and insights, summarise the problems and solutions they encountered, and evaluate their strengths and weaknesses.