Chapter 1: User Guide for SmartIoT Platform
SmartIot is a simple and easy-to-use IoT platform from ELECFREAKS, it is able to connect to IoT in 3 minutes, upload data at any time, and implement remote control with the micro:bit.(Chinese/English switching is not available now)
Platform link: SmartIot platform: https://www.smartiot.space/
Please note when connecting to a Wi-Fi network using IoT:bit, make sure that your Wi-Fi network is running in 2.4GHz mode
Account Registration for SmartIoT Platform
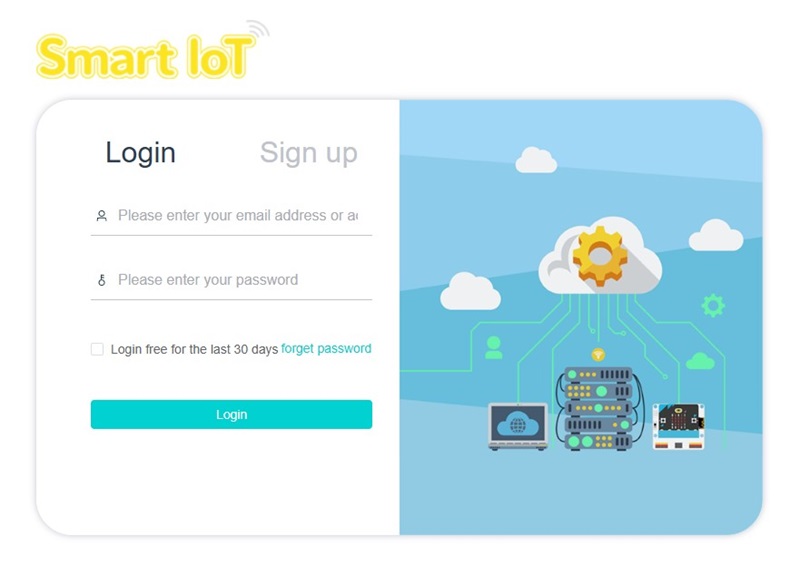
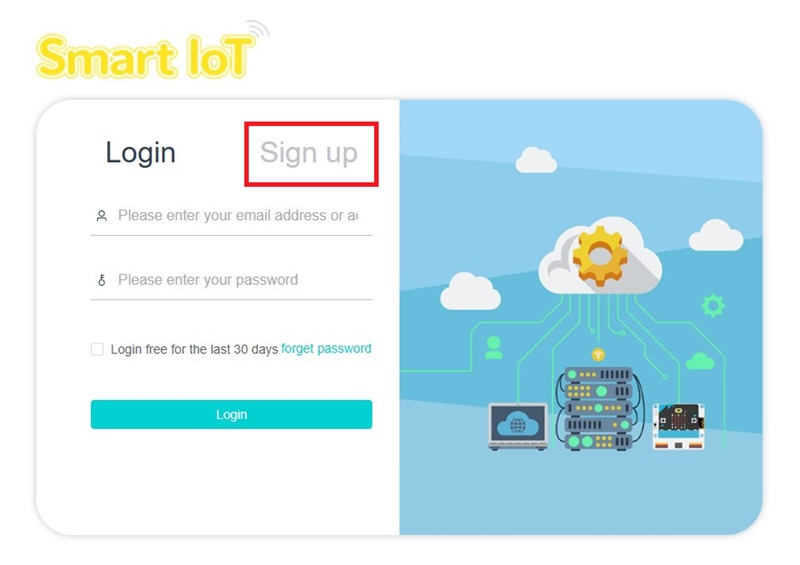
Go to the SmartIot website and click Sign up to register a new account.
Fill in the registration information (email, password) and click Sign Up.
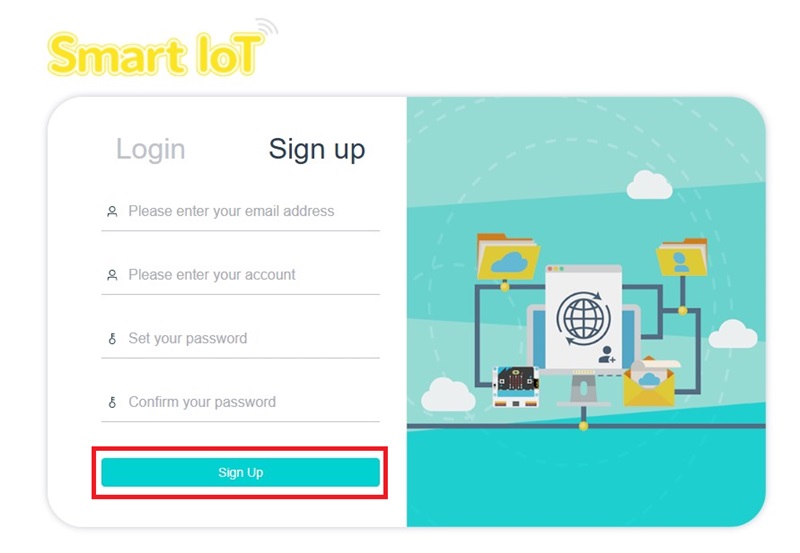
Click Sign Up to register and an email will be sent to your email address.
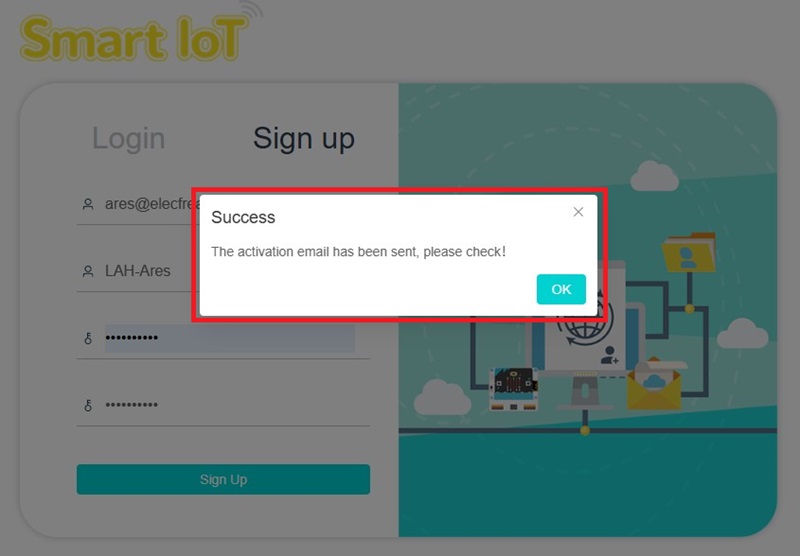
Check your email inbox or spam folder (it may be recognised as spam) and open the URL in the email to activate your account.

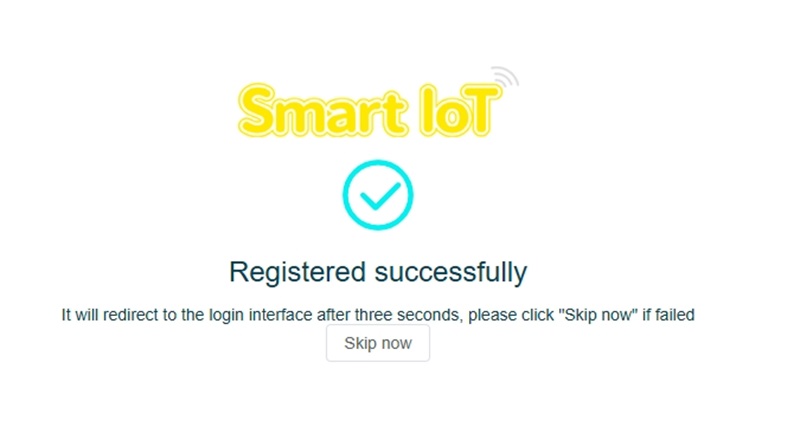
Registration Successfully!
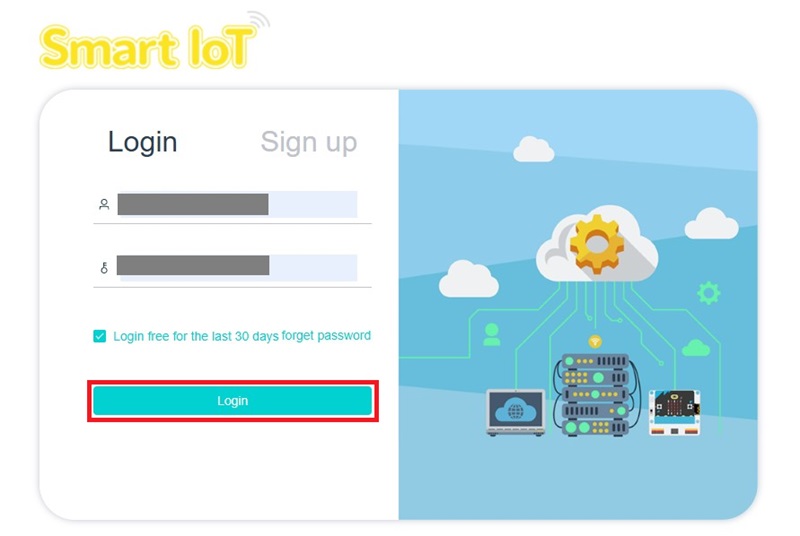
SmartIot Log In
Enter your account password and select Login.
SmartIot Platform Device Management
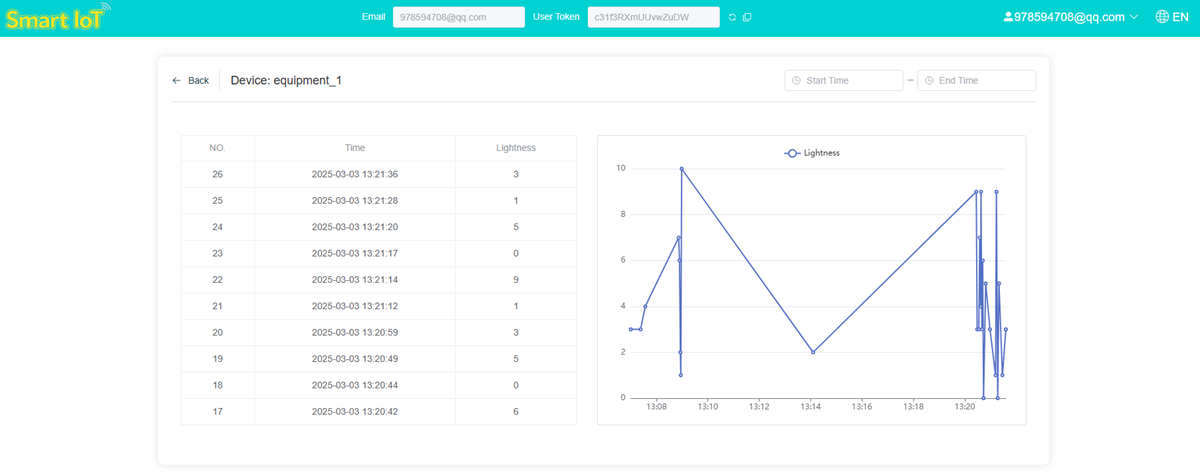
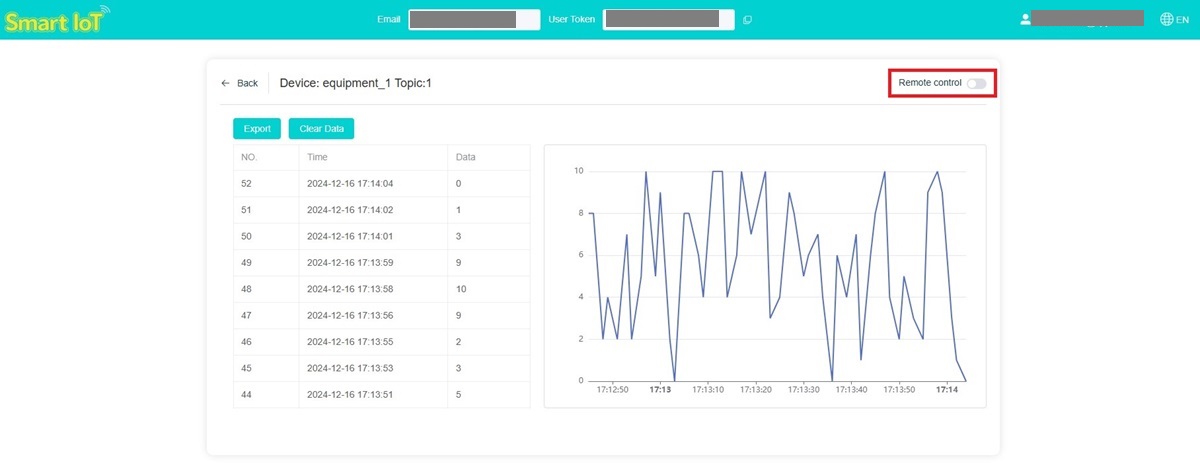
Click Log in to enter the device management page, the upper left corner is Email for your mailbox, the upper right corner User Token is the platform's unique identification code, corresponding to your account. It is unique in the whole network and will not be repeated.

Add a new device (Create new device), topic is your device identification number (unique device in the account) can change the device name (you can only have 10 devices)

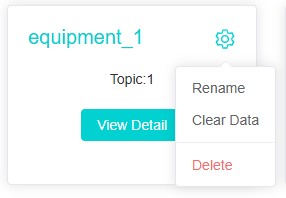
Click the small gear in the upper-right corner to rename, clear data and delete the device; click View Details to view information.
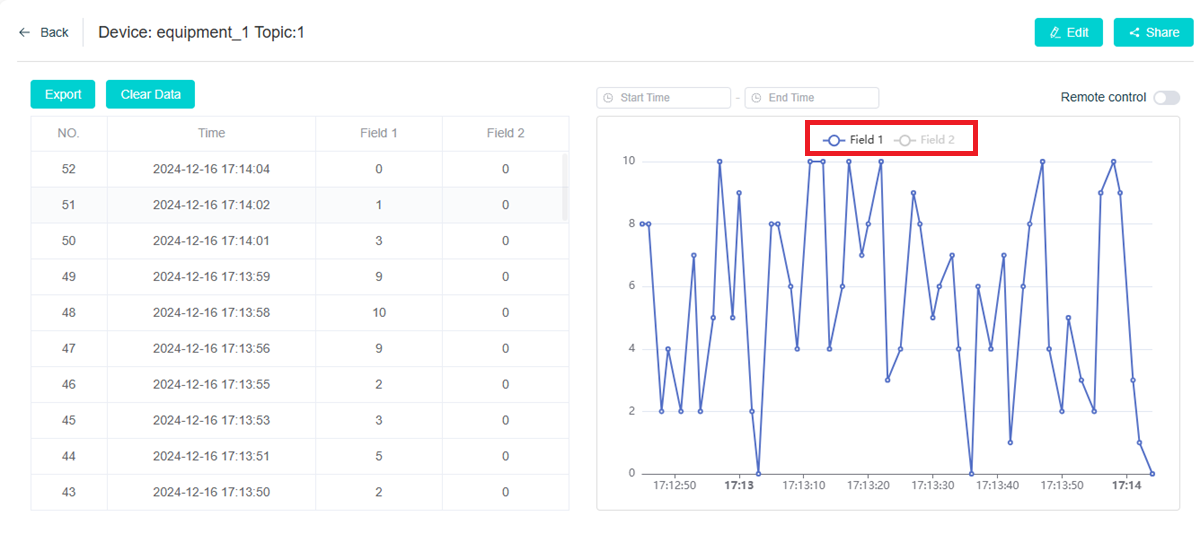
SmartIot Platform Data Upload and Sample Code
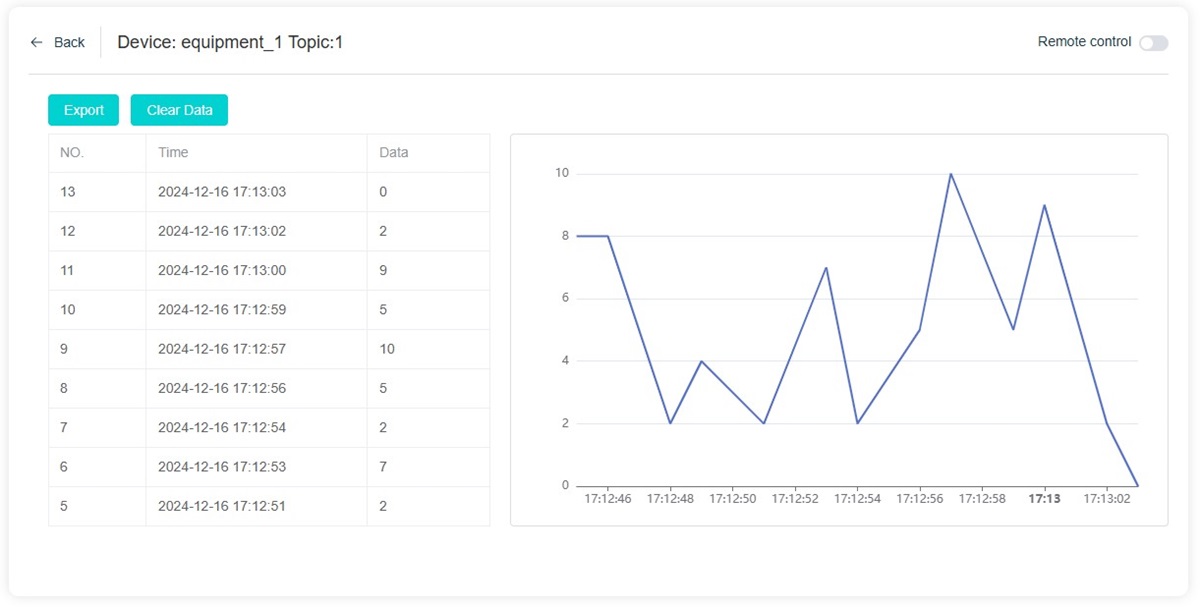
The left side of the device interface shows the uploaded data, and the right side consists of a two-dimensional line graph of data and time.
Programming
Coding
Go to "makecode.microbit.org", click to "create new project".

Enter the project name in the pop-up window and click "Create".

Click "extensions" in the code drawer.
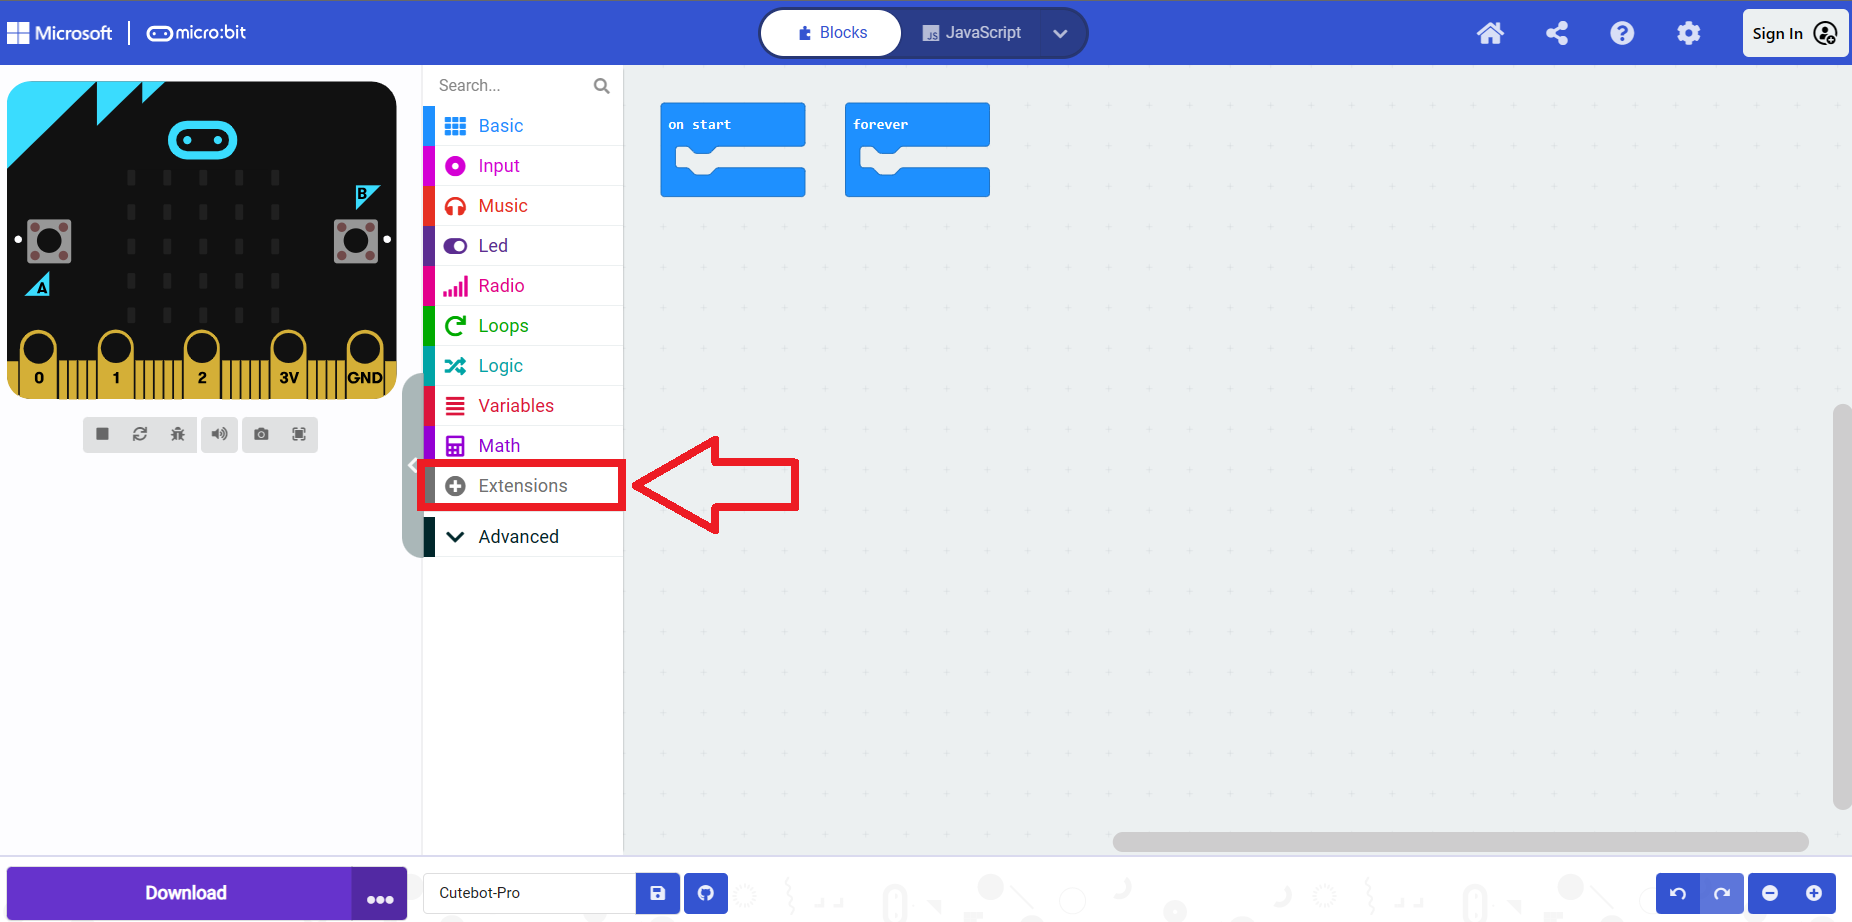
In the pop-up page, type "IoT", press the Enter key to search, and choose to load the IoT software library.

Note: If you get a prompt that some codebase will be removed for incompatibility reasons, you can either follow the prompt and continue, or create a new project.
Code Explanation
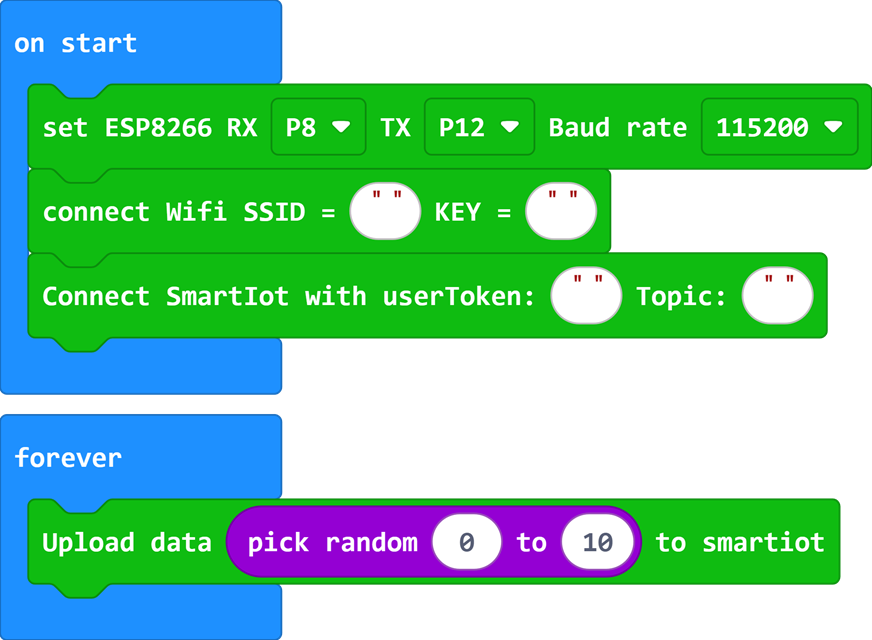
To connect to SmartIoT platform, User Token is the unique identification code of the account, which is bound to the account and cannot be modified. TOPIC is the unique identification code of the device, you need to specify the uploaded device when connecting. The device number (Topic) is sequential.

Get both datas on the SmartIoT platform.

Determines whether the platform connection status is successful or not, success (True), failure (False).

Disconnect from the SmartIoT platform.

Upload data to the SmartIot platform, click + underneath the blocks to add uploaded data, up to 8 data can be uploaded at the same time.

Test the Result
Remotely control the blocks, run the specified progra when a switch on the platform is triggered. .
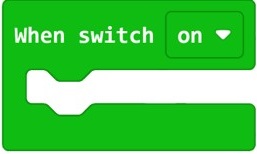
When the platform is successfully connected, you can click this switch to execute the two blocks.
Reference Program
Note: Please fill in the wifi information, user token and Topic by yourself.
Reference link: https://makecode.microbit.org/_Dvx2VuYHxRep
You can also modify the programme via the following web page:
Result
The device connects to wifi and SmartIoT when power on automatically , and it randomly uploads 0~10 integers to SmartIoT.
SmartIot Platform Classroom Management
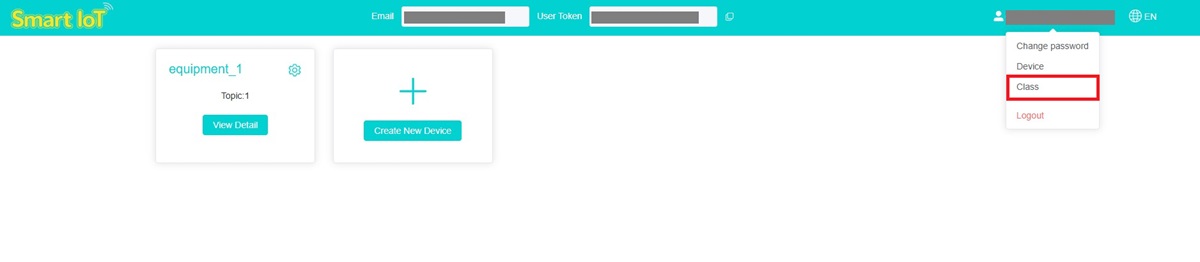
Hover your mouse pointer over your username in the upper right corner, a drop down box will pop up, click on the CLASS option in it to go to the class management screen.
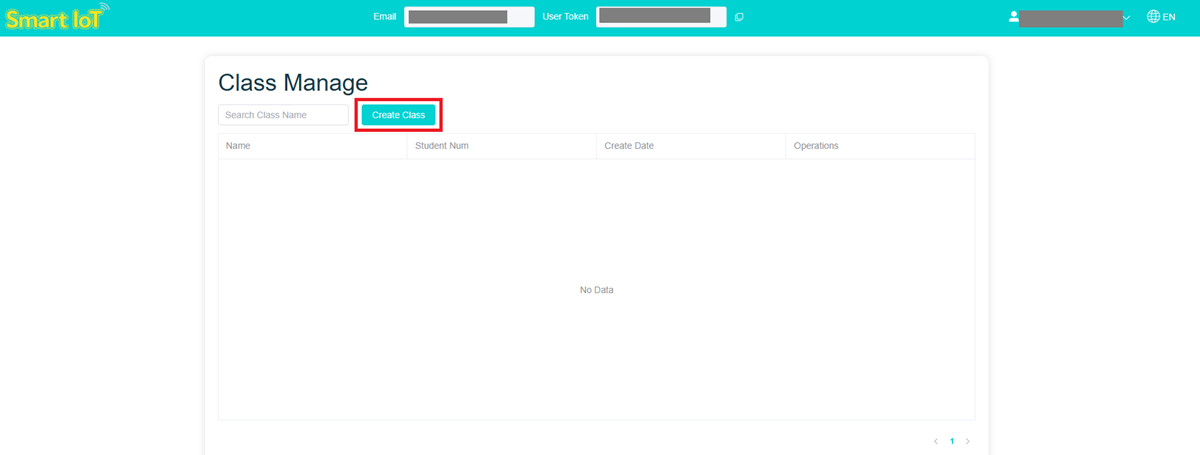
Click "Create Class" to create classrooms.
Enter the name of the classroom and the students in the pop-up page.
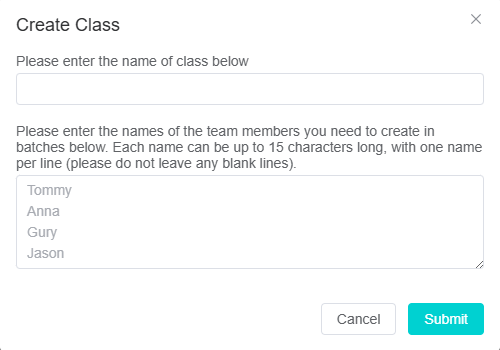
Note: Each name can contain up to 15 characters, one name per line (please do not leave any blank lines).
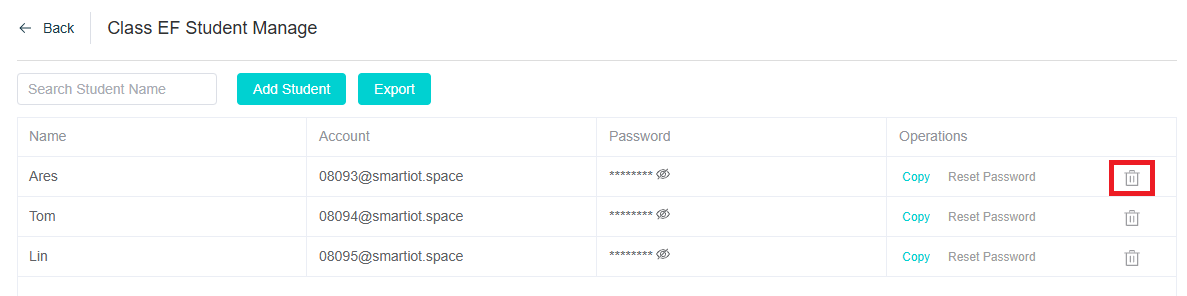
Once you have created your class, click on “Students” to access the Student Information Management page.

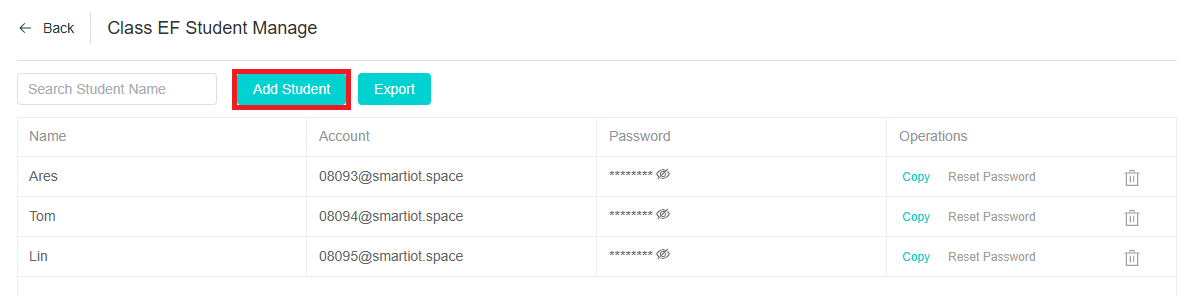
Click “Add Student” to fill in student information
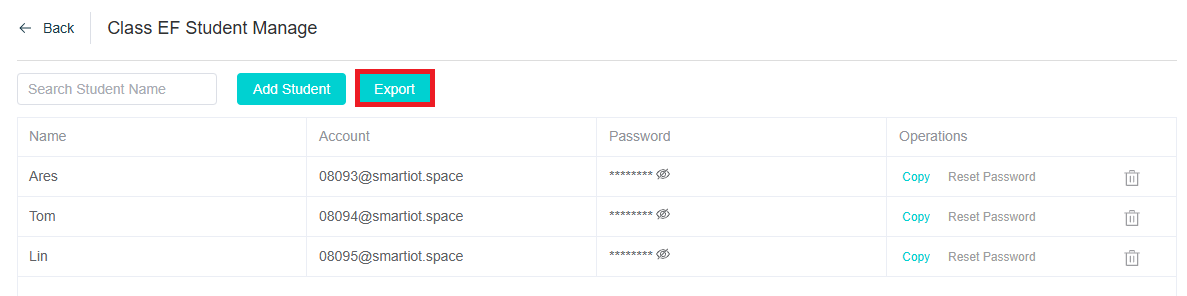
Click “Export” to export all student data
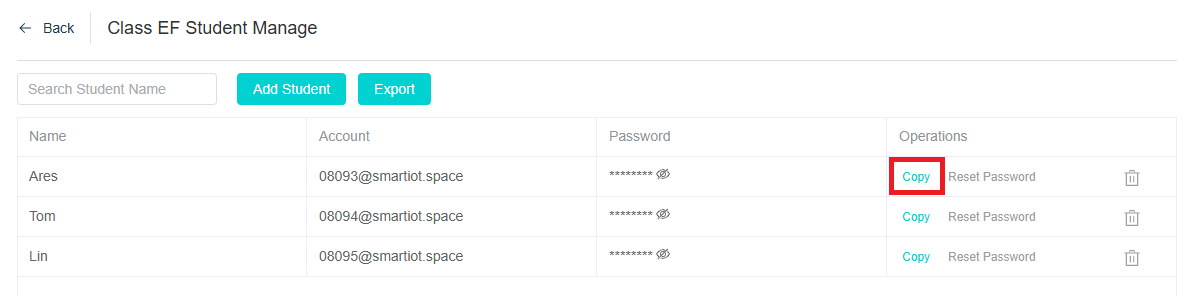
Click “Copy" to copy single student data
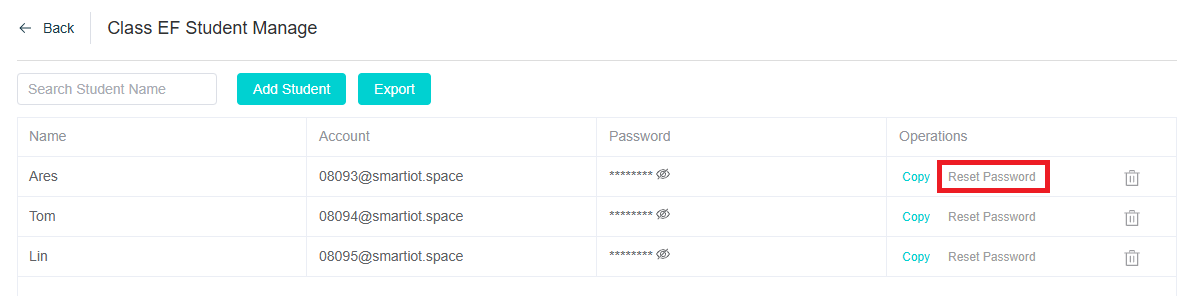
Click "Reset Password" to reset your student account password to prevent students from forgetting it.
Click "Delete" to remove student information
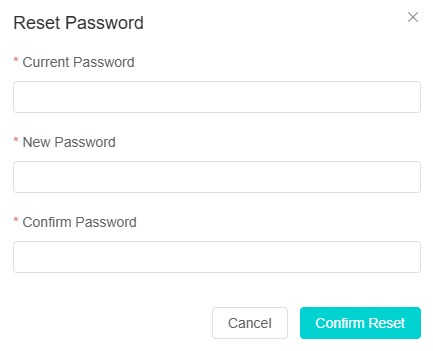
SmartIot Platform Reset Password
Click "Change password" to enter the password reset page.

Enter the old and new passwords to change your password.
SmartIot Data Filtering
You can set the range of data to be displayed on the chart using "Start Time" and "End Time".

Or select the data to be displayed for the chart via the Data tab.
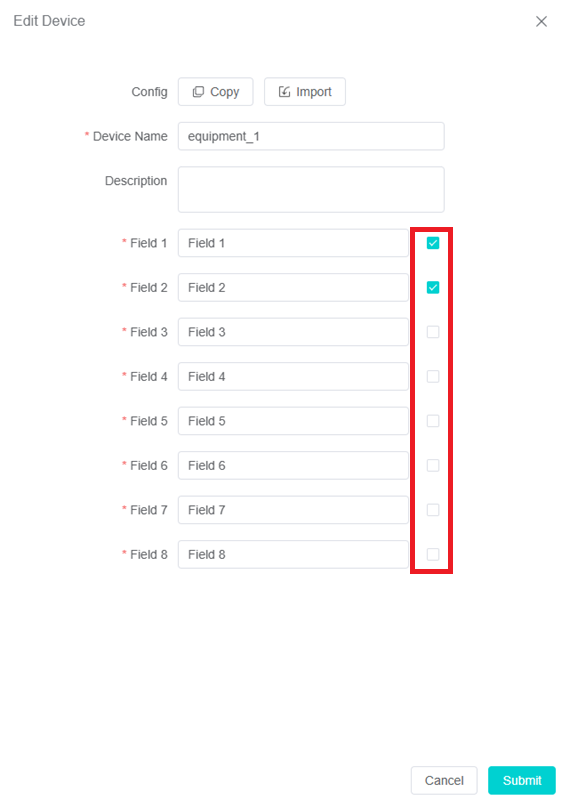
Or click "Edit" to enter the settings page.

Choose to display data information by ticking the tabs.
SmartIot Configuration Sharing
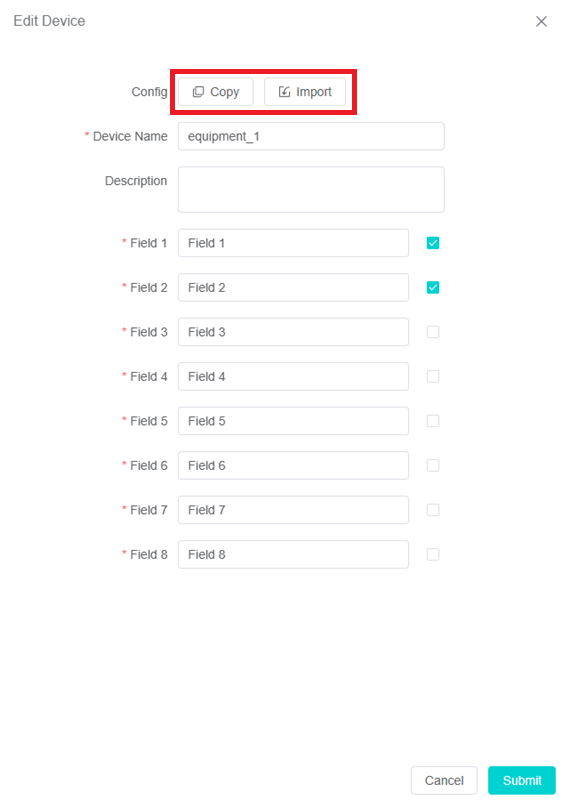
Click "Edit" to enter the settings page.
Click Copy or Import to export or import the device configuration.
SmartIot Device Sharing
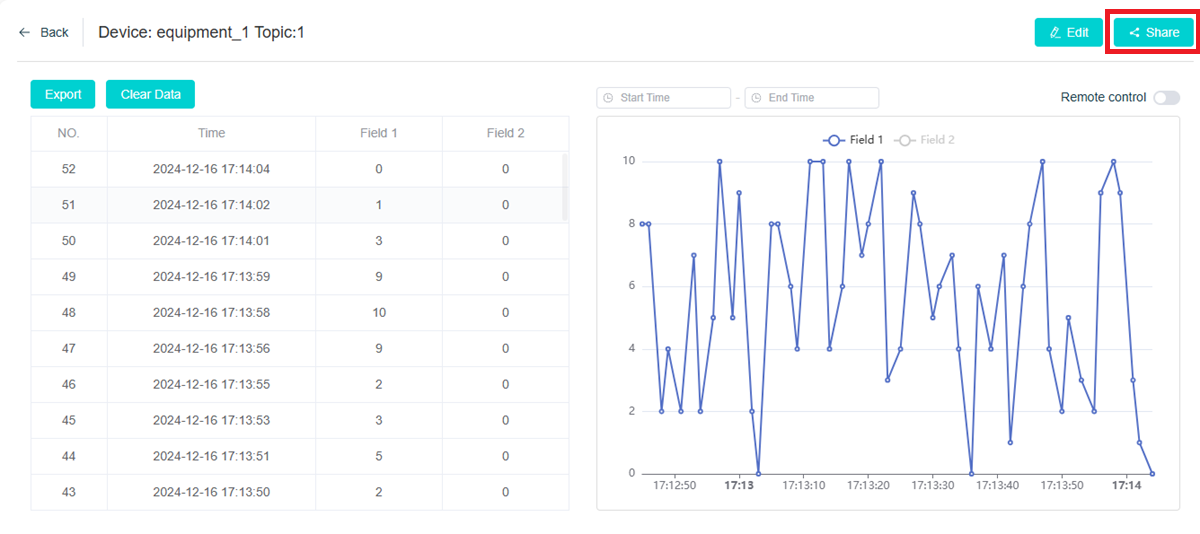
Click Share to go to the Device Sharing page.
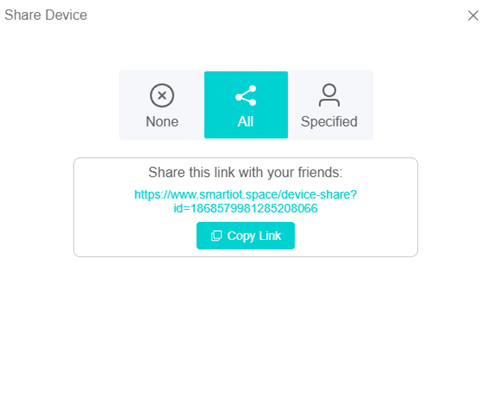
Click ALL to set the device as a publicly shared device, which can be accessed by anyone with a shared link to the device to view data.
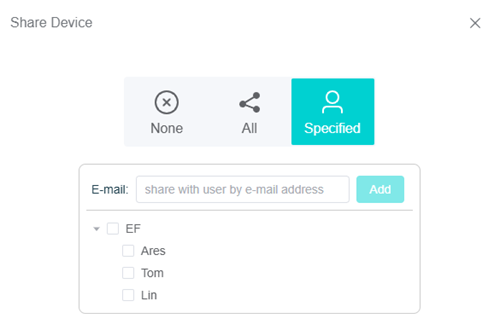
Click Specified to set the device as a private shared device, which can be shared via email by specifying an account, or if it's a teacher account, you can quickly share the device to class members using the option below.
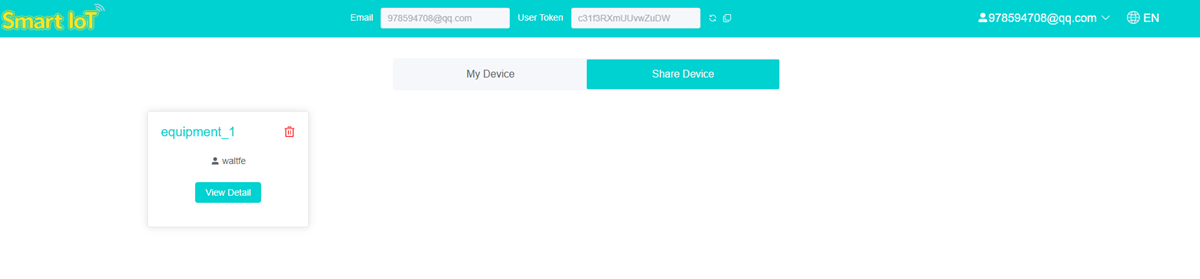
Shared devices are displayed in Share Device.
The person being shared only has read access and cannot make changes to the content of the data-to-graph.