How to Use MQTT Features
What Is MQTT?
Before learning how to use the MQTT features, let's first understand what MQTT is.
MQTT stands for Message Queuing Telemetry Transport. It is a lightweight IoT communication standard protocol based on TCP/IP, using a publish/subscribe (Pub/Sub) model.
Background
Designed by IBM in 1999 for remote low-bandwidth monitoring of oil pipelines, MQTT later became the de facto standard for the IoT industry. It is highly optimized for microcontrollers, sensors, battery-powered devices, and weak network environments. Today, it is widely used in smart homes, industrial equipment, STEAM education robotics, cloud device remote management, and many other scenarios.
Core Essence
MQTT is not a true "message queue" (it does not persistently accumulate messages). Its core function is to forward data through a central broker, enabling decoupled communication between devices and between devices and servers.
Five Core Features of MQTT
Ultra-Lightweight Data Packets
The protocol header can be as small as 2 bytes, with extremely small message sizes and very low bandwidth consumption — ideal for 4G/WiFi low-traffic embedded devices.
Publish-Subscribe Decoupled Architecture
Senders (publishers) and receivers (subscribers) do not need to establish direct connections or be aware of each other. All data is forwarded through a central broker, making the architecture flexible and easy to scale.
Three-Level QoS Message Reliability Guarantee
- QoS 0: At most once — fire and forget, no acknowledgment (ideal for periodic temperature/humidity reporting)
- QoS 1: At least once — guaranteed delivery, but messages may be received multiple times (device on/off commands)
- QoS 2: Exactly once — strictly delivered only once (billing, critical control commands)
Practical IoT-Specific Mechanisms
- Last Will and Testament (LWT): When a device goes offline abnormally or loses power, the broker automatically pushes an offline notification.
- Retained Messages: Newly connected subscribers can immediately receive the last known state of a topic.
- Keep-Alive Heartbeat: Periodic heartbeat packets determine the online/offline status of a device.
Topic Routing Mechanism
Messages are distributed through hierarchical topic strings, separated by / for levels, with wildcard support for bulk subscriptions.
How to Use SmartIoT MQTT Features
Open the SmartIoT platform:
Platform link: https://www.smartiot.space/
Register and log in to your account. For detailed instructions, please refer to the Quick Start Guide.
Open the MQTT feature option:
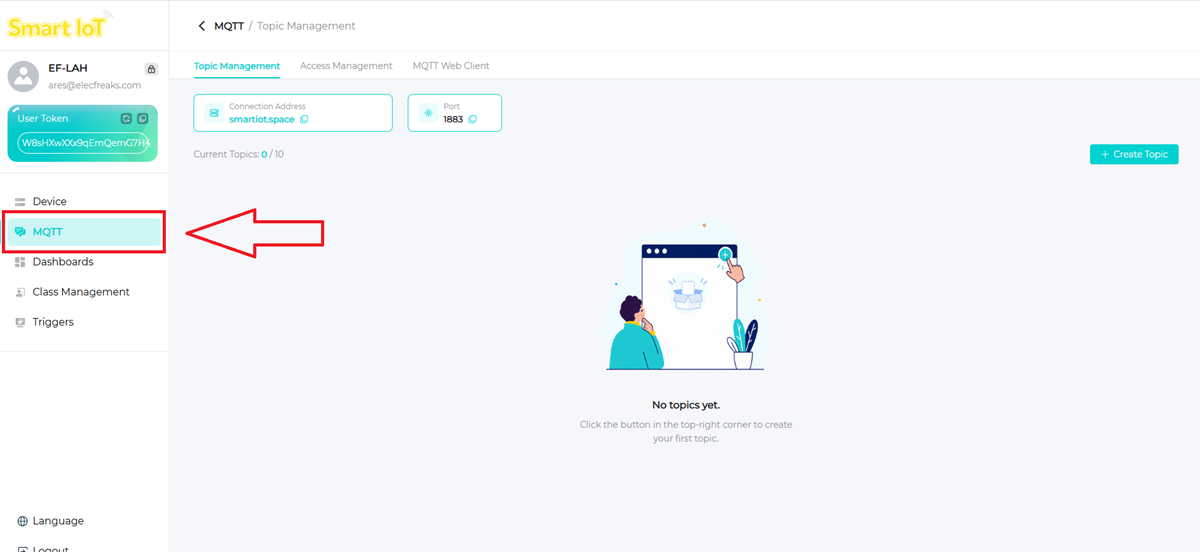
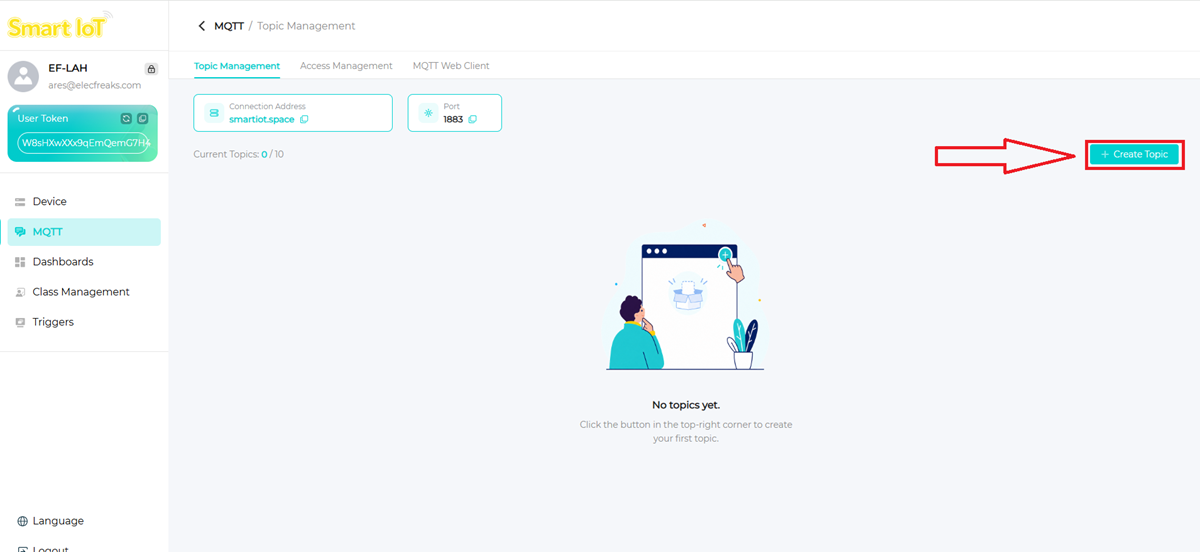
Click New Topic:
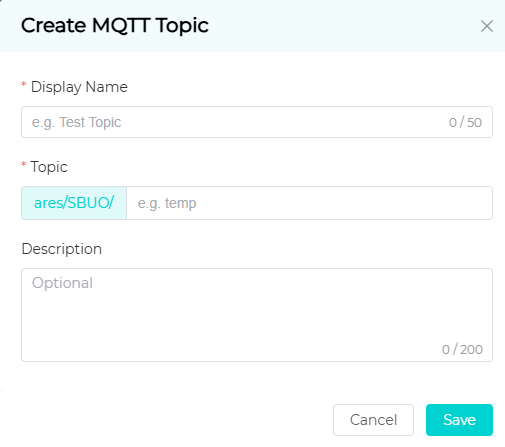
In the pop-up window, fill in the Display Name and Topic, then click Save:
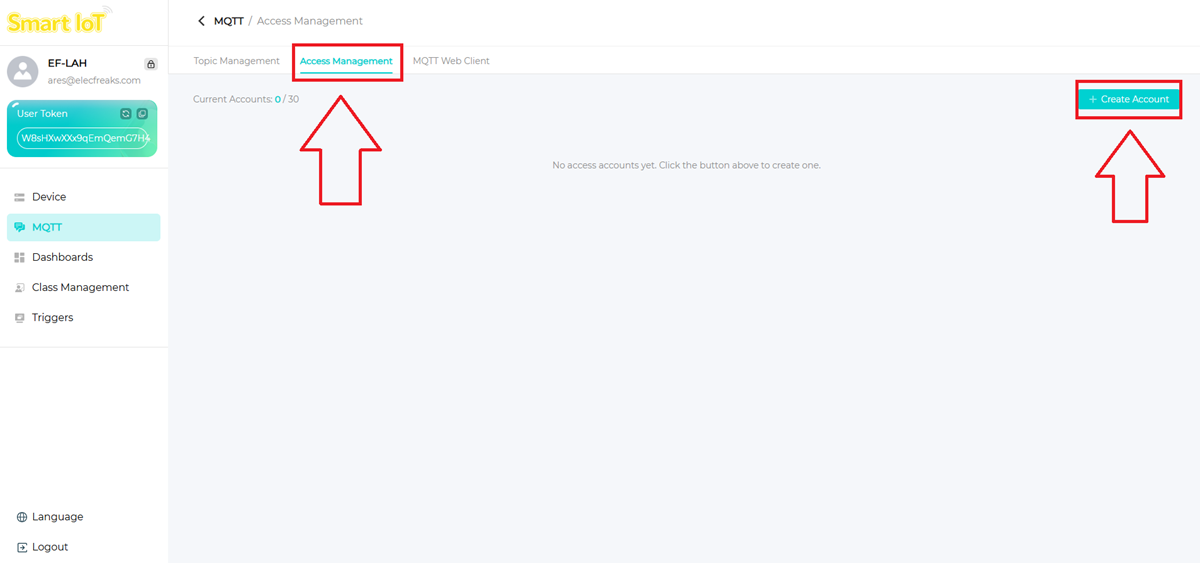
Click Access Management to switch to the access management page, then click New Account:
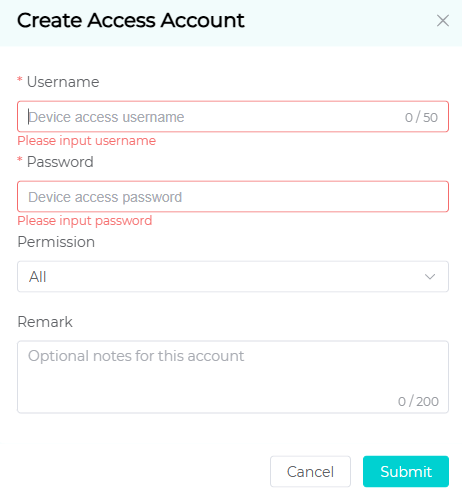
In the pop-up window, fill in the Username and Password, set the Permissions, and click Submit. Repeat the same steps to create two accounts:
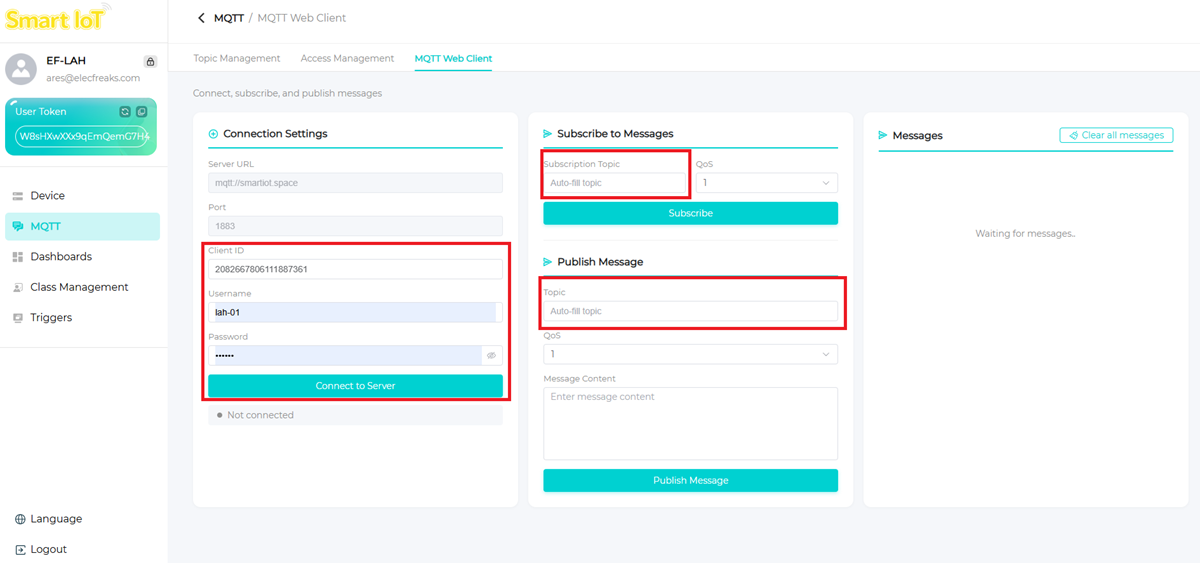
Switch to the MQTT Web Client, fill in Client ID, Username, Password, Subscription Topic, and Topic, then click Connect to Server and Subscribe to connect to the MQTT server and send messages:
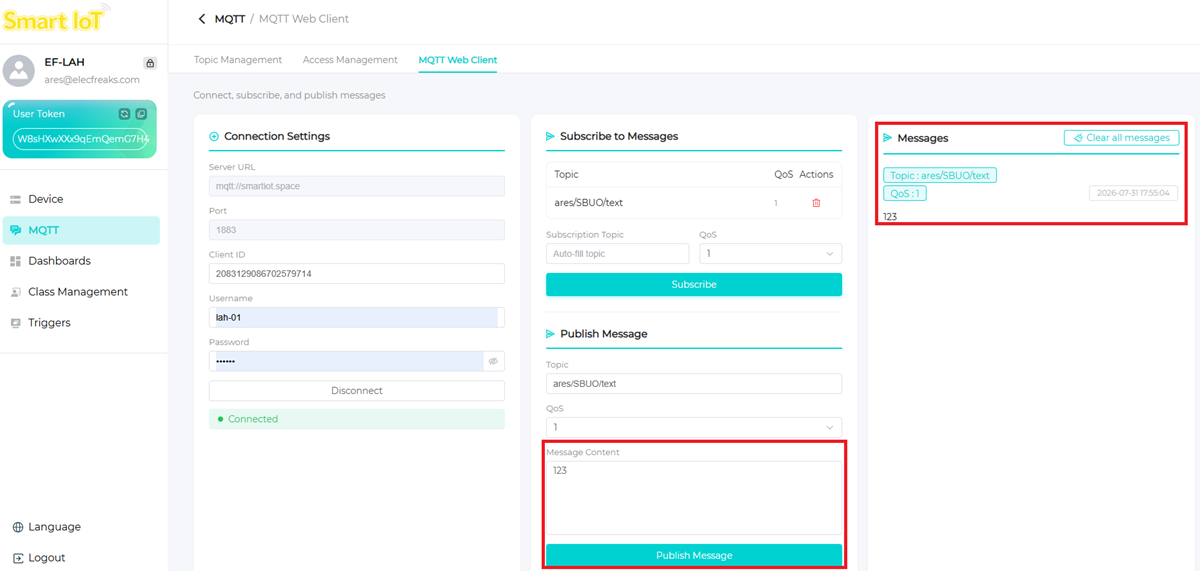
Edit the message content, click Publish Message, and you will see the message in the message viewer:
How to Publish or Subscribe to Messages from a Local Device
Here we use the Petal series as an example.
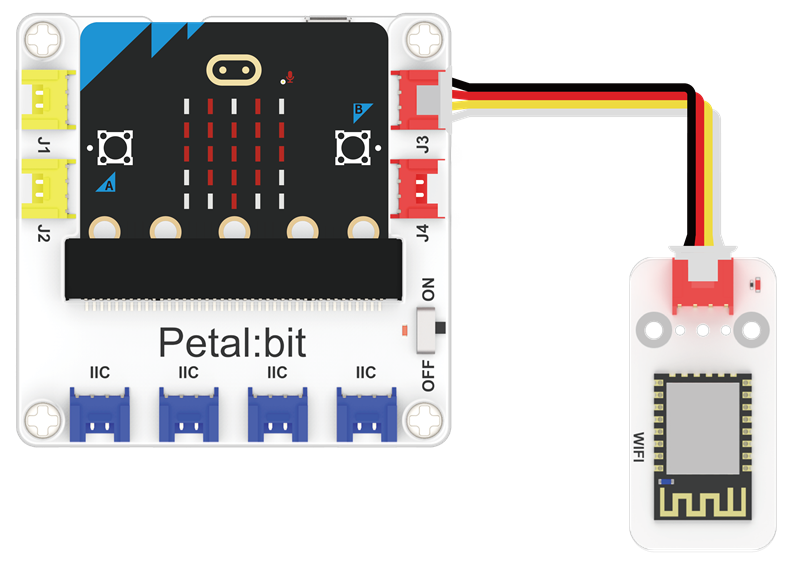
Hardware Connection
Connect the WiFi module to the J3 interface on the Portal:bit:
Writing Code
Programming
Go to "makecode.microbit.org" and click "New Project".

In the pop-up window, enter the project name and click "Create".

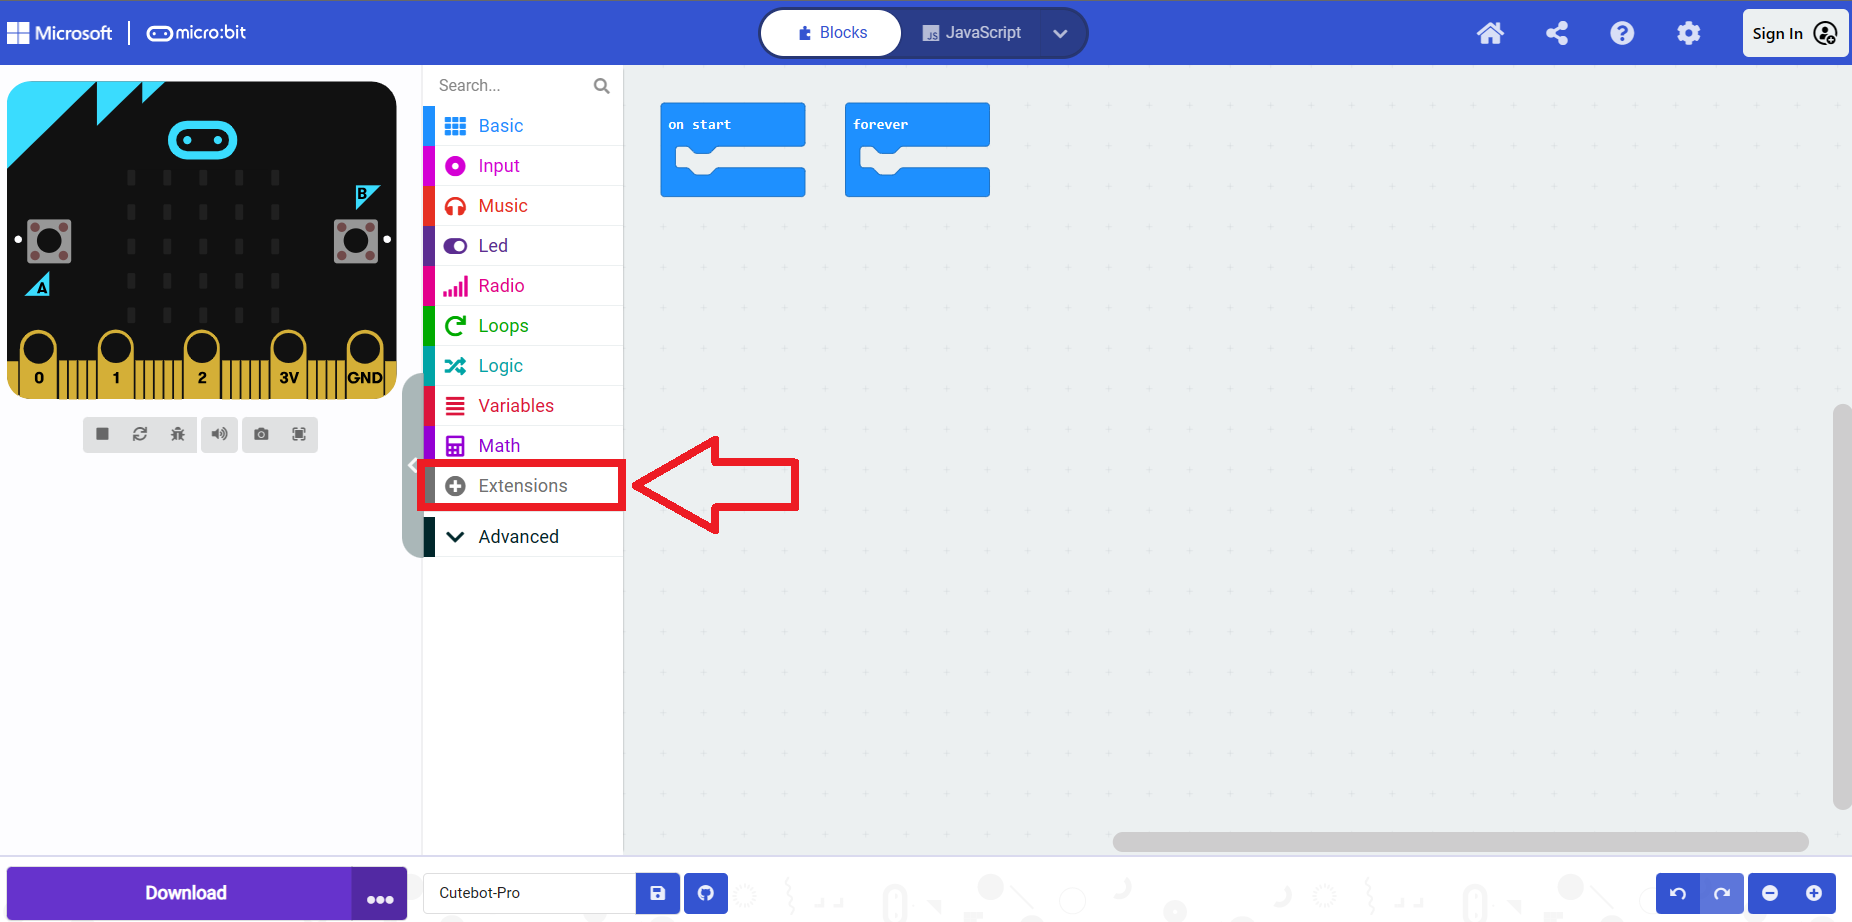
Click "Extensions" in the code drawer.
In the pop-up interface, type "Petal", press Enter to search, and select to load the Petal software library.
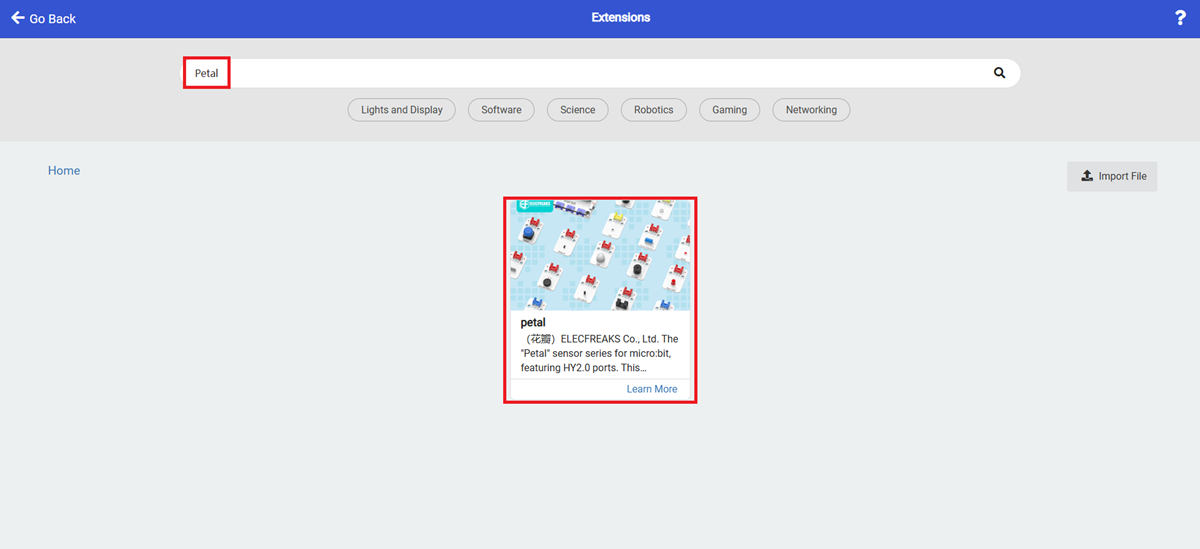
Note: If you get a prompt saying that some code libraries will be removed due to incompatibility, you can continue as prompted, or create a new project from the project menu bar.
Sample Code
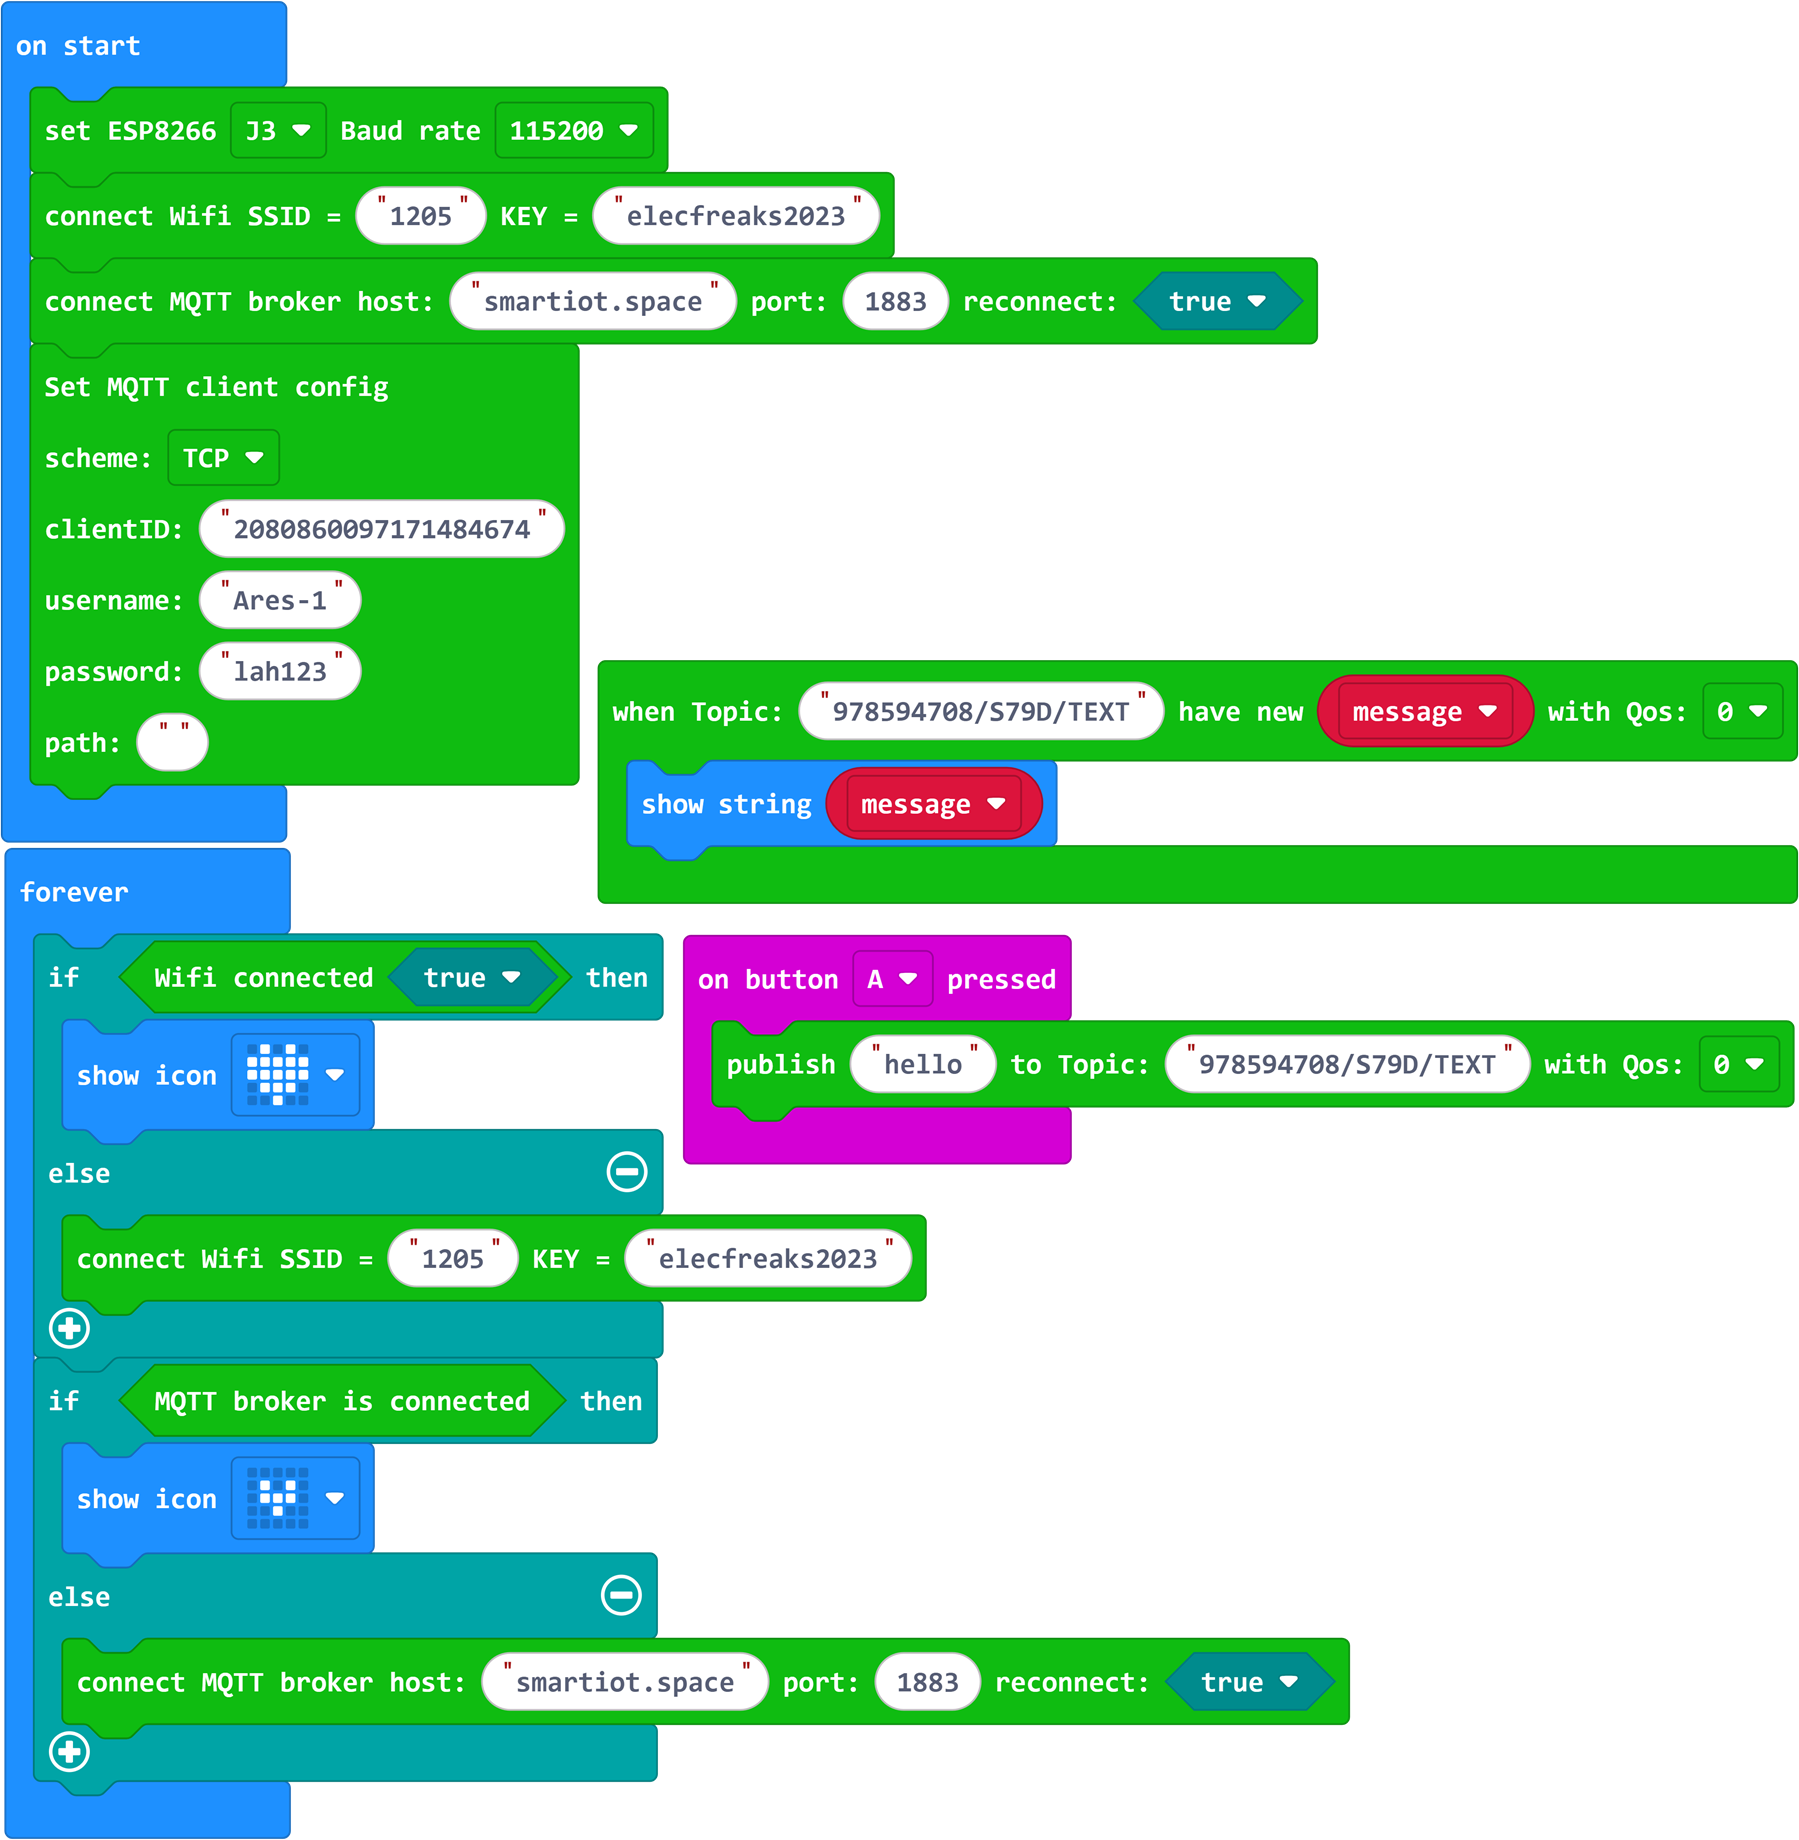
Program reference link: https://makecode.microbit.org/_Wyoa0F67qDxW
You can also modify the program via the web page below.
Result
After pressing button A, the platform receives the hello message, and the micro:bit LED matrix displays the message synchronously.
