micro:bit Retro Arcade Pro
Product Introduction
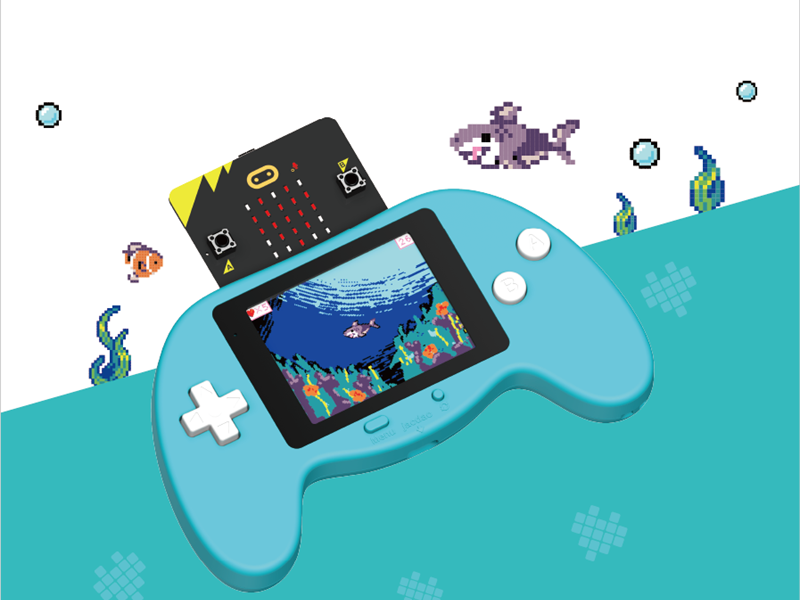
The micro:bit Arcade Pro is a handheld color screen expansion board tailor-made for the micro:bit V2. Centered on the core highlights of fun programming & multi-scenario application, it is hardware-equipped with a 240×320 TFT color screen, 4-way directional keys, AB function buttons, as well as reset, menu and power switches. It is compatible with Jacdac sensors and building block structures, featuring a compact, portable design and comfortable hand feel.
Its core value lies in learning through play. Paired with micro:bit V2, it connects to the Microsoft Arcade programming platform. Users can create offline playable games via block-based programming, enabling children to independently design games and understand creative logic. It supports custom characters, diverse scenes and storyline design, fully unlocking unlimited game creation potential.
It adapts to multiple application scenarios: it works as a portable game console for programming creation, a remote controller to communicate with and control robot cars, and a Jacdac expansion board to connect external Jacdac sensors for electronic experiments and intelligent interactive projects. Integrating learning tool, entertainment device and expansion platform in one, it is an all-in-one essential accessory for micro:bit.
Features
- Functions as a remote control handle for communication and control of robot cars
- Acts as an extended handheld game console to create customized games via block-based programming
- Serves as a Jacdac expansion board to connect external Jacdac sensors
Basic Specifications
| Item | Parameter |
|---|---|
| Product Name | micro:bit Arcade Pro |
| SKU | EF08438 |
| Product Dimension | 140mm(L) × 82mm(W) × 21mm(H) (excluding micro:bit main board) |
| Product Weight | 102g (including battery and shell) |
| Interface Type | Type-C, micro:bit, Jacdac |
| Screen Type | TFT LCD Screen |
| Screen Resolution | 240 × 320 |
| Power Supply | Lithium battery powered |
| Charging Voltage | 5V |
| Charging Current | 1A |
| Maximum Operating Voltage | 4.2V |
| Rated Operating Voltage | 3.7V |
| Minimum Operating Voltage | 3.5V |
| Standby Current | 0.03A |
| Jacdac Power Supply Voltage | 4.2V |
| Max Current of Jacdac Interface | 1A |
| Charging Time | 65min |
Packing List
- Arcade Pro Kit × 1
- Type-C Cable × 1
- Lanyard × 1
- User Manual × 1
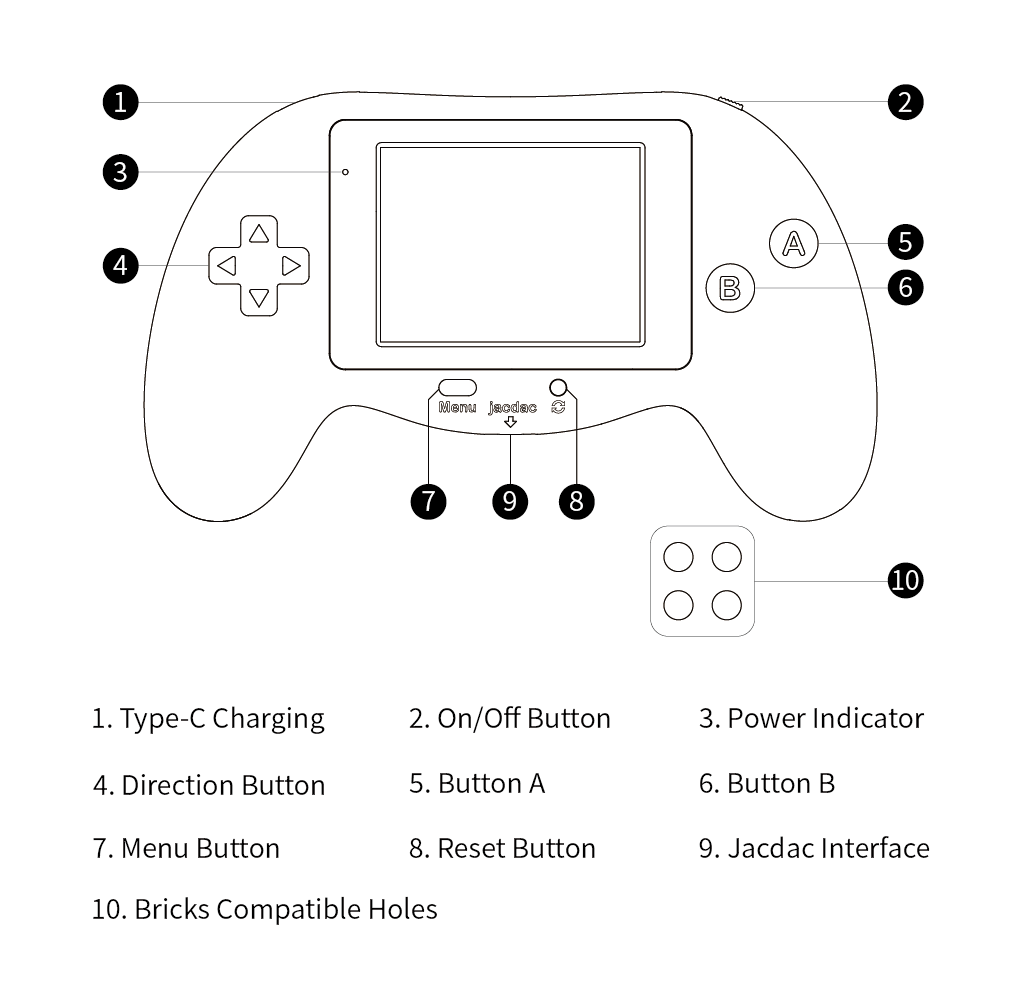
Product Layout
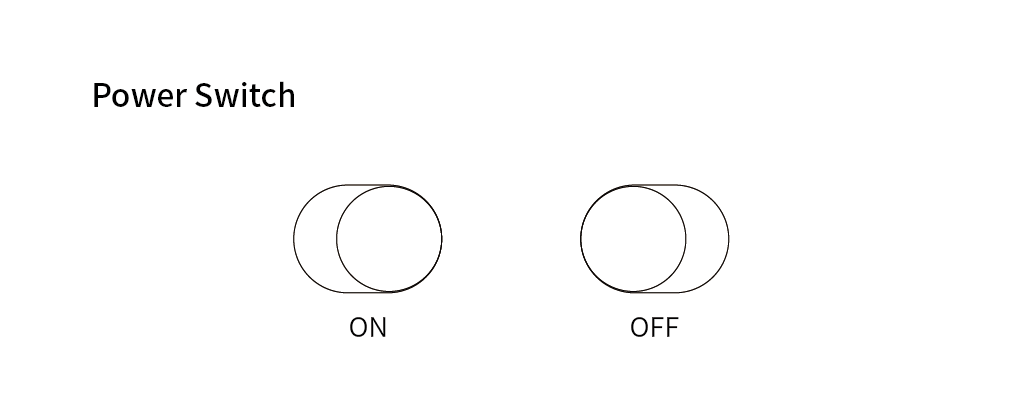
Switch Operation
Indicator Light Status
| Working Status | Light Indication |
|---|---|
| In Operation | Green Light |
| Low Battery (20% remaining power) | Red Light |
| Auto Shutdown Due to Extremely Low Battery | Red Light Flashes for 5 Seconds, Then Auto Shutdown |
| Charging | Flashing Red Light |
| Fully Charged | Green Light |
Game Programming Guide
Welcome to learning Retro Arcade Pro! For more information, please refer to: https://arcade.makecode.com/
Click on the corresponding project to access the project tutorial and learn through the process of game development.
At this time, if power is supplied from the micro:bit V2 side, the power switch of the expansion board will be on regardless of the switch. The expansion board power switch will control the power supply from the expansion board side.
Programming Platform
Arcade game programming platform address: https://arcade.makecode.com
Programming page introduction
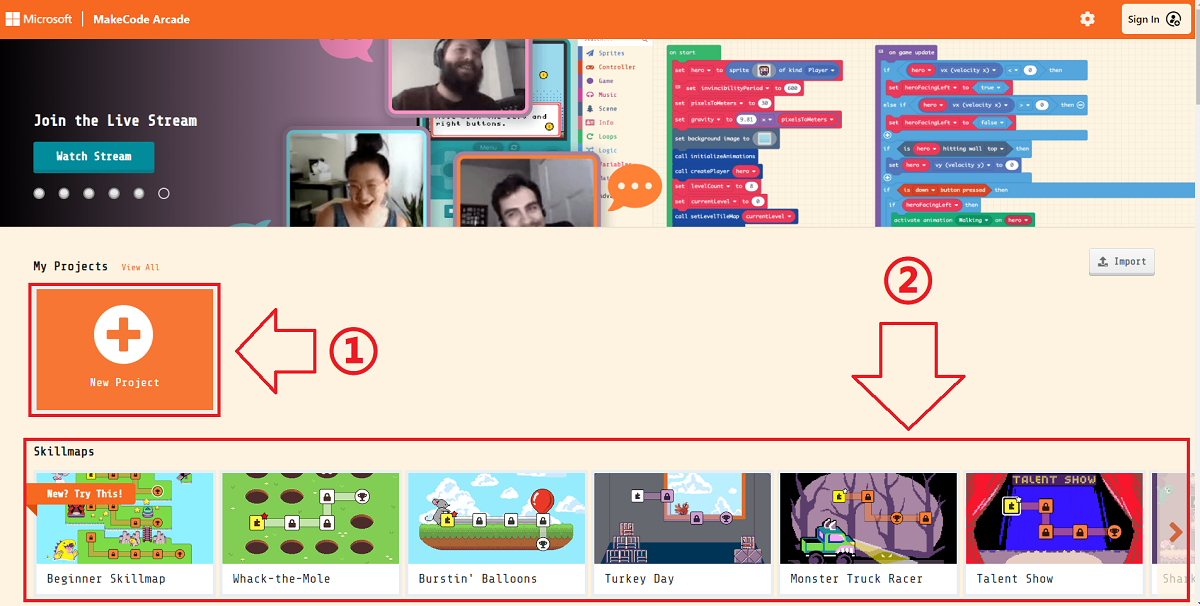
- Click on the section numbered 1 and enter the project name to create a project to start programming
- The following part of number 2 is a simple tutorial provided by some platforms and the game works shared by the community
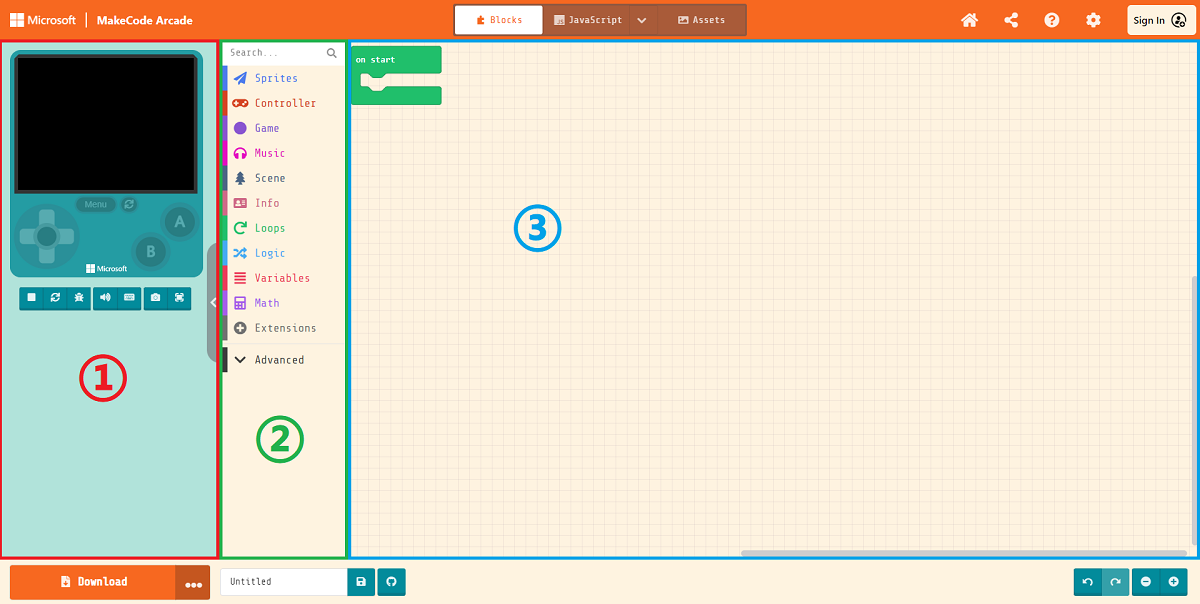
Introduction to the programming interface, for the basic introduction to the first roughly divided into 3 parts need to understand
- Online simulator: Simulate the running effect in real time according to the logic of the code
- Programming blocks bar: we drag in programming code from here for programming
- Code editing area: we drag out the code from the block bar and put it together here to finish building the image, interface and logic of the game
Rapid Creation
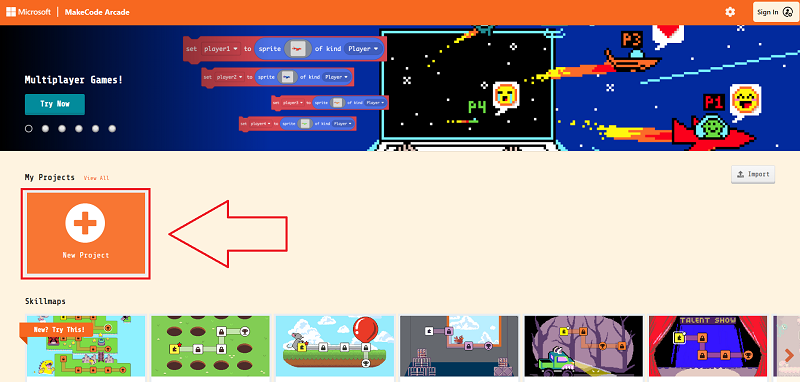
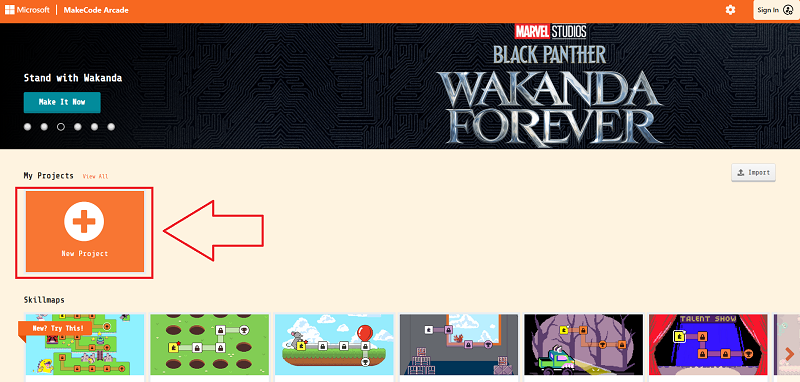
Click New Project.
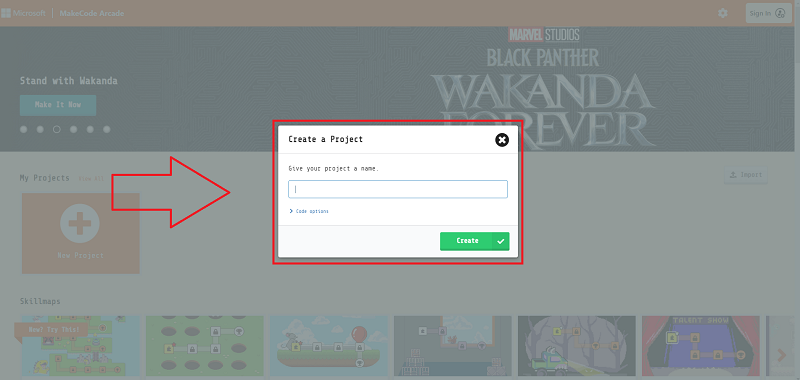
Enter a project name to create a new project.
Create sprites and click on the gray rectangle in the block to open the image editor.
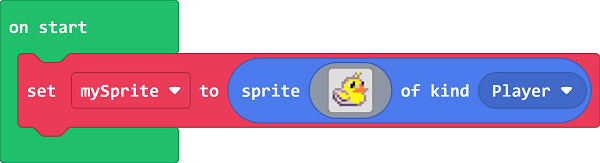
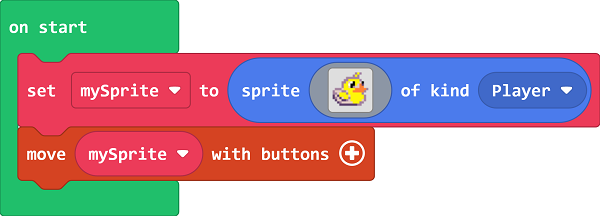
Customize the sprite image or just select a preset sprite from the gallery. Control sprite movement by moving the sprite blocks with the buttons.
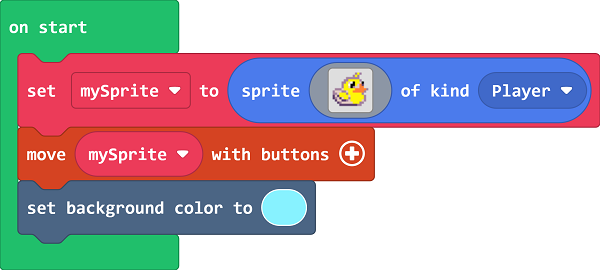
Set the screen background color.
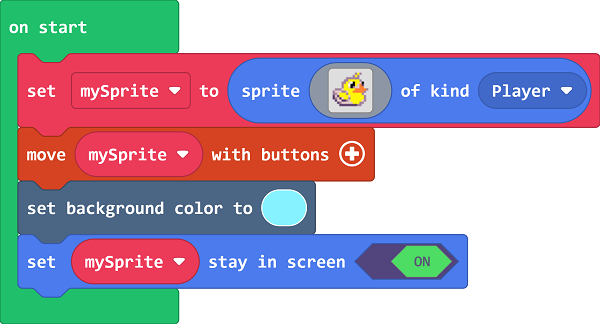
To prevent the sprite from moving out of the screen screen, set the sprite to be within the screen range.
Link: https://makecode.com/_C06X39Xb85Kd
Game Download
Download steps
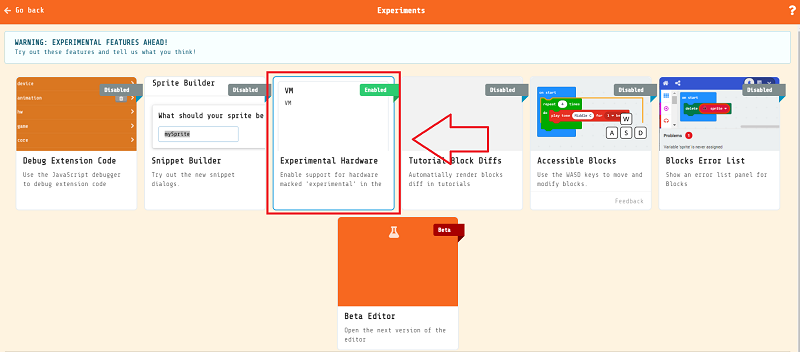
Since the micro:bit V2 (nRF52833) is still in beta for the Arcade platform officials, we need to first go to the platform's settings page to open up the hardware options that are still in the trial version.
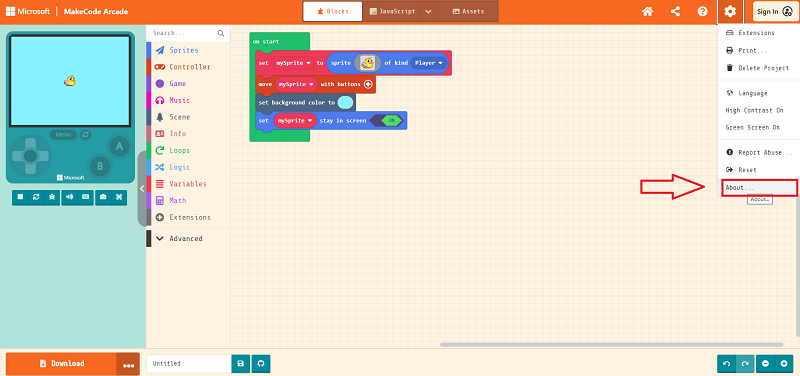
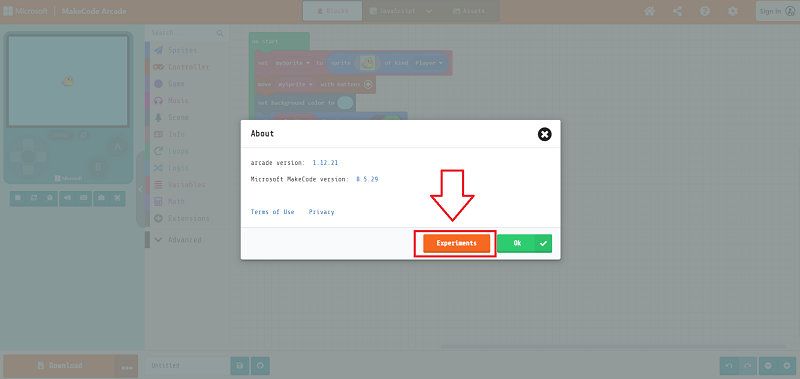
Make sure Expermental Hardware is enabled (you only need to set it once)
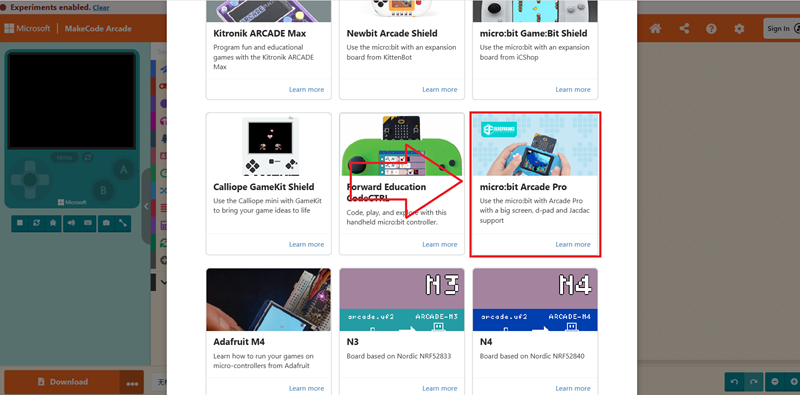
Then go back to the programming home page, click on the download button in the bottom left corner, and in the pop-up select hardware window pull down to the bottom and select N3
You will get a file in .hex format, drag it into the MICROBIT drive to run it on micro:bit V2 + Microbit Retro Arcade.
Remote Control Handle Guide
Material Preparation
The following materials are required for this case.
- micro:bit V2 × 2
- Microbit Retro Arcade × 1
- Cutebot × 1
Cutebot side program
Programming platform
Link: https://makecode.microbit.org/#
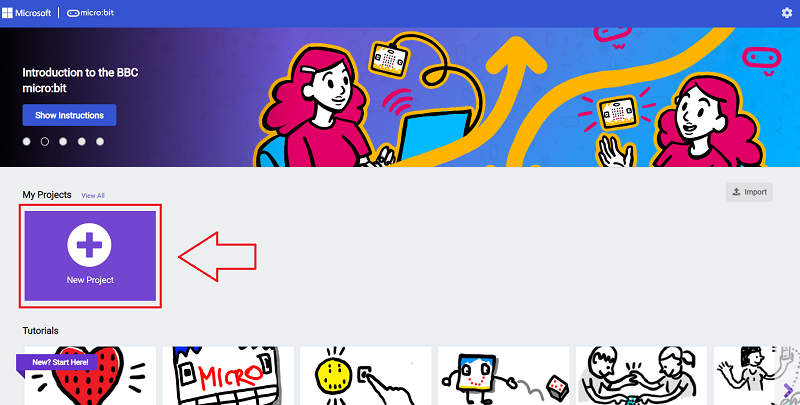
Create a new project to go to the programming home page
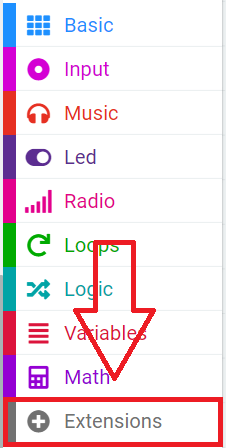
Add extension
Add the Cutebot Smart Racing Extension software library and click on the extension.
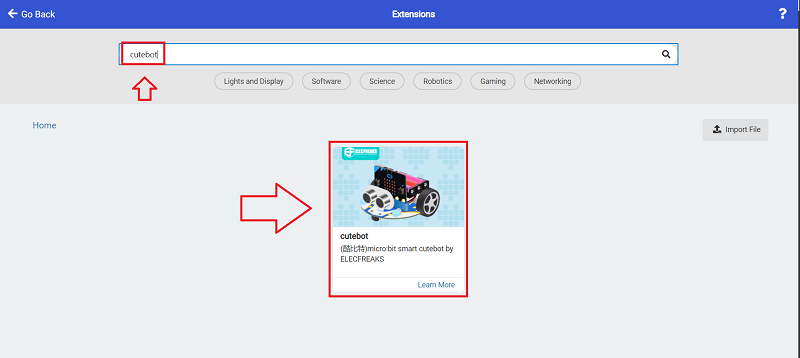
Type "cutebot" in the search field, click Search, and add the extensions library.
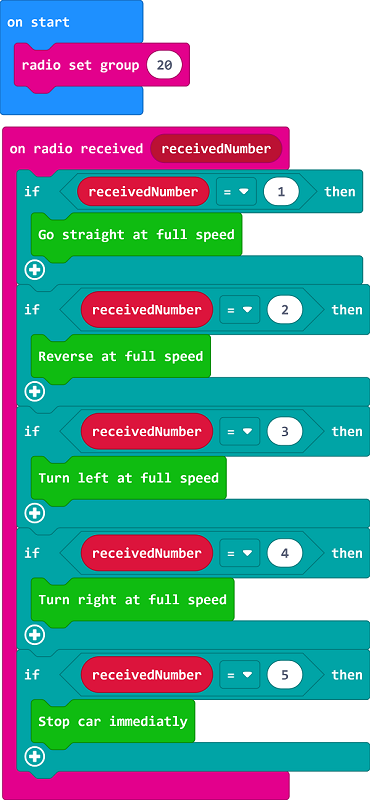
Writing programs .
Link: https://makecode.microbit.org/_gC9gJDET83xd
Remote control end program
Programming Platform
Link: https://arcade.makecode.com/#
Create a new project to go to the programming home page.
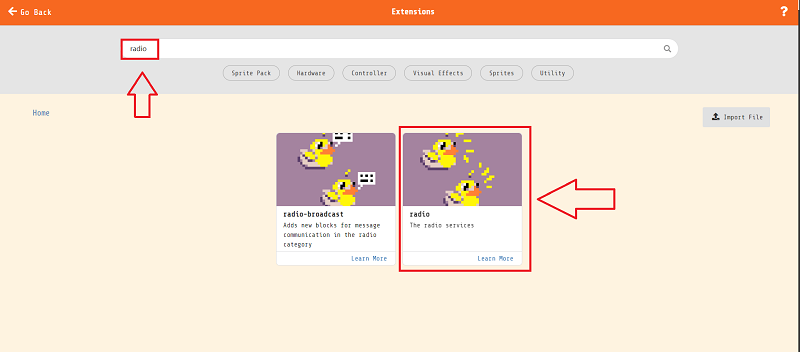
Add extension
Add the wireless communication extension library and click Extend.

Type "radio" in the search field and click Search to add the extension library.
Writing programs .
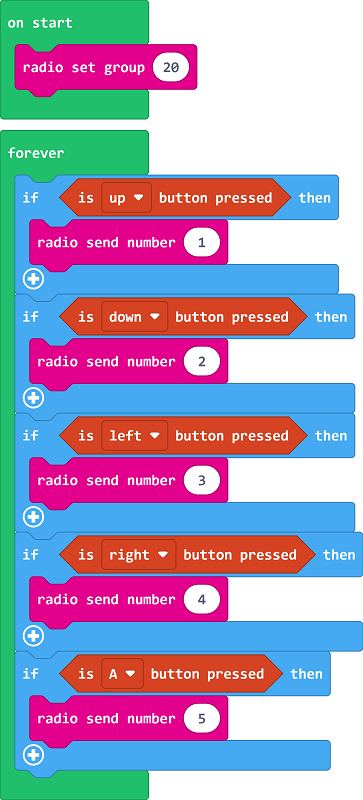
Link: https://makecode.com/_1HCLTf71TFJk
Download steps
Since the micro:bit V2 (nRF52833) is still in beta for the Arcade platform officials, we need to first go to the platform's settings page to open up the hardware options that are still in the trial version.
Make sure Expermental Hardware is enabled (you only need to set it once)
Then go back to the programming home page, click on the download button in the bottom left corner, and in the pop-up select hardware window pull down to the bottom and select micro:bit Arcade Pro。
Click to download, you will get a file in .hex format, drag it into the MICROBIT drive to run it on micro:bit V2 + Microbit Retro Arcade.
More Tutorials
For more tutorials, please refer to: https://arcade.makecode.com/