Nezha Pro Breakout Board(EF05070)
Introduction
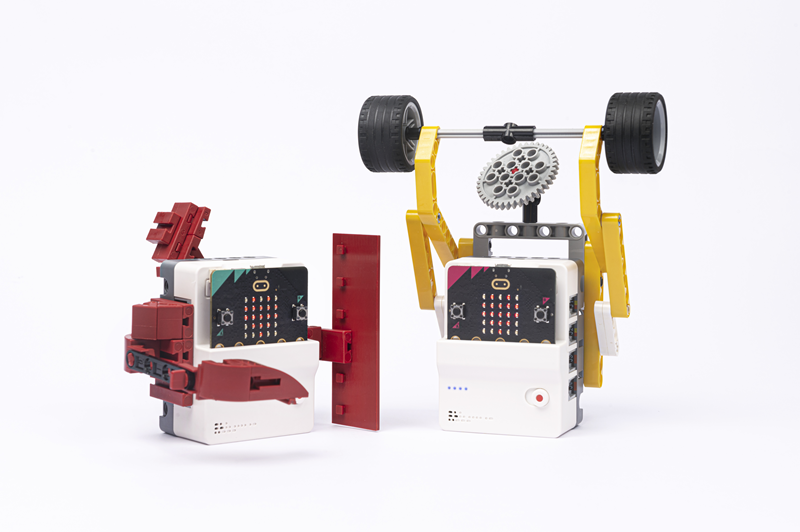
The Nezha Pro Breakout Board is a micro:bit expansion board designed for education and creative programming, aiming to stimulate students' innovative thinking and hands-on skills. It not only integrates two convenient motor control buttons and a 4-way motor driver, but also comes with an 8-way sensor expansion port, providing students with a versatile platform for experimentation and exploration. These motor control buttons allow direct control of the motor's direction of rotation without connecting the micro:bit, increasing flexibility of operation. All interfaces use RJ11 connectors with a dud-proof, anti-reverse plug design to ensure fast and accurate connections. The case of the expansion box is specially designed with interfaces that are compatible with LEGO and Fischertechnik building blocks, supporting students to combine electronic modules with mainstream building blocks to build personalised creative programming creations.

Characteristics
Independent Motor Control: Equipped with motor control buttons that allow students to directly control the direction of rotation of the motor without accessing the micro:bit, providing additional freedom of operation.
RJ11 port design: Adopting RJ11 connector, the design focuses on the anti-misplugging feature, which simplifies the wiring process and enhances the efficiency of classroom situaton.

Colour recognition system: The innovative colour recognition system provides students with an intuitive way of identifying and connecting the blocks through the port labels and sensor labels corresponding to the colours of the blocks, reducing the difficulty of learning.
Support for closed-loop motors: Through a closed-loop feedback system, it achieves more precise position control and speed regulation, enhancing the overall system's stability and reliability. Whether it's the operation of a precision robotic arm or complex motion simulation, it can be completed with ease.
Compatibility design: The LEGO and Fischertechnik structural components compatible interface on the shell not only enhances the versatility of the product, but also stimulates students' creativity and encourages them to explore the infinite possibilities of combining electronic technology with physical structures.
Slide Power Switch: The slide power switch requires a clear sliding action to switch the power state, reducing the risk of misuse due to accidental touch. It provides physical feedback to ensure that the user can confirm the state of the switch by touch and avoid uncertainty.

Technical Specification
| Item | Parameter |
|---|---|
| Name | Nezha Pro Breakout Board |
| SKU | EF02055 |
| Dimension | L80mm(Not include the micro:bit)x W60mm x H44mm |
| GW | 142g(Not include the micro:bit) |
| Charging Voltage | 5V |
| Charging Current | 3A |
| Charging Time | 50min |
| Battery Capacity | 900mAh/6.6Wh |
| Max. Working Voltage | 8.4V |
| Rated Working Voltage | 7.4V |
| Min. Working Voltage | 6.4V |
| Standby Current | 0.01A |
| micro:bit Supply Voltage | 3.3V |
| Motor Output Working Voltage | 6.4~8.4V |
| Motor Connection Rated Output Current | 1A |
| Motor Connection Max. Output Current | 2A |
| RJ11 Connection Output Voltage | 3.3V |
| RJ11 Connection Output Max. Current | 1.0A |
| Lasting Operation Time | 45min(Connect the AI Lens, 4 Smart Motors, 2 LED modules, there might be some difference because of the testing enviornment and so on) |
| Motor Connectors | 4 Units |
| Sensors Connectors | 8 Units |
Introduction to interface pins

Introduction to Main Modules

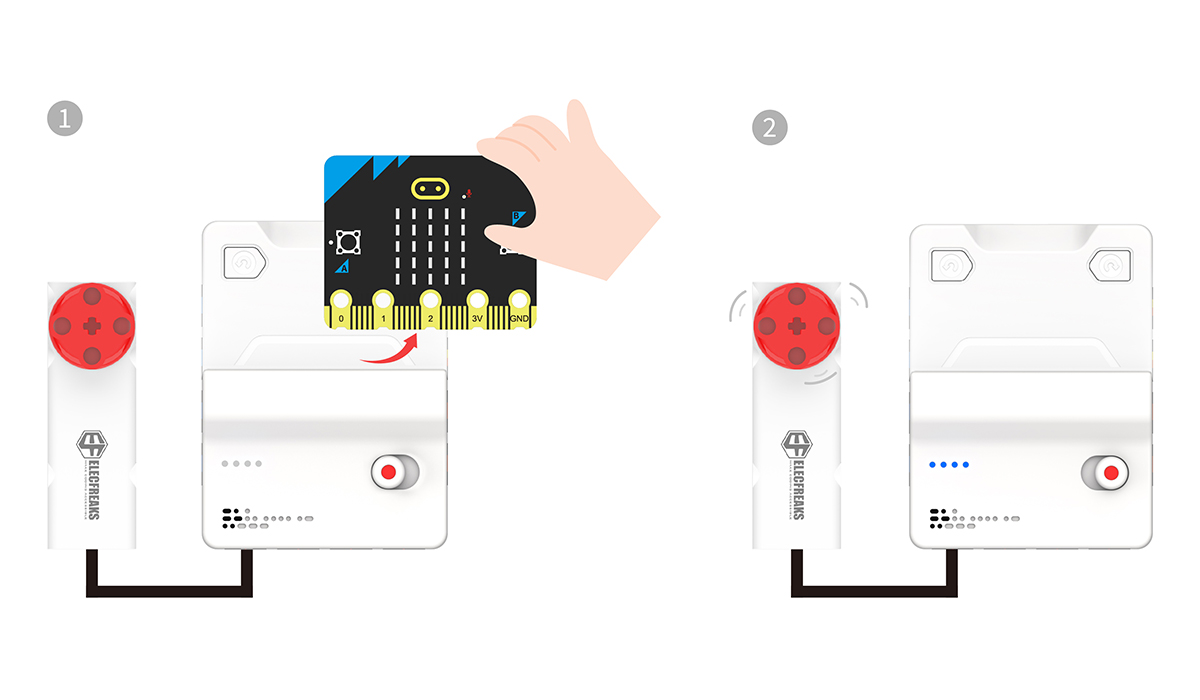
micro:bit Connector

Motor Control Buttons
The motor is controlled to rotate clockwise or anti-clockwise by the motor control buttons.

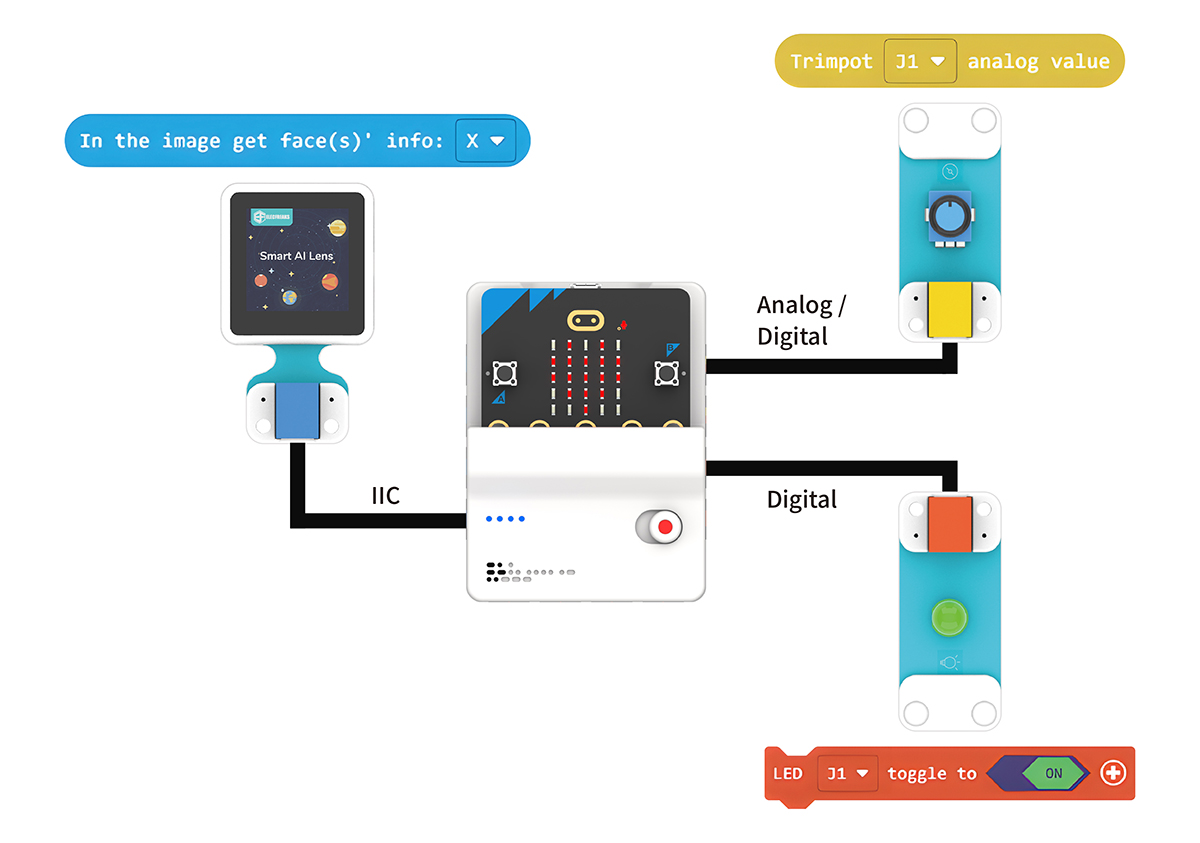
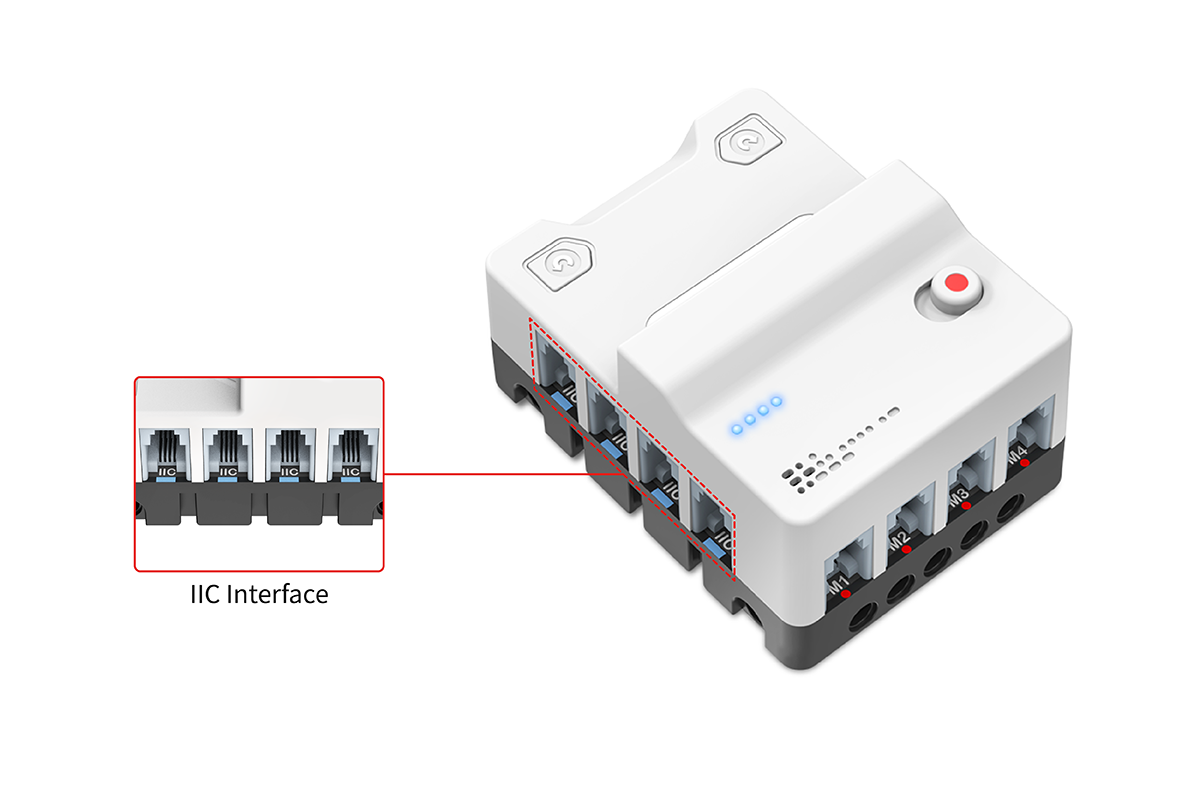
IIC Connections
Compatible with the colour recognition system of the PlanetX Sensors, with blue rectangular labels on the interfaces.
IO Ports
Compatible with the colour recognition system of the PlanetX sensors, with connectors for yellow rectangular labels(for analogue) or red rectangular labels(for digital).

Motor Connectors
The connectors have a red circular label.

Power Switch
Control the power on or off by toggling the power switch.

Charging Port
Type-C charging port, maximum support 5V 3A, charging time is about 50min.

Power Indicators
Power indicators are able to display the current battery level.
 Indicate that the LED is always on
 Indicate that the LED is off
 Indicate that the LED is flashing
Discharging
| Current Status | LED 1 | LED 2 | LED 3 | LED 4 | Battery Capacity |
|---|---|---|---|---|---|
| Discharging Status | | | | | 76% ~ 100% |
| | | | 51% ~ 75% | |
| | | | 26% ~ 50% | |
| | | | 1% ~ 25% |
Charging
| Current Status | LED 1 | LED 2 | LED 3 | LED 4 | Battery Capacity |
|---|---|---|---|---|---|
| Charging Status | | | | | 100% |
| | | | 75% ~ 99% | |
| | | | 50% ~ 74% | |
| | | | 26% ~ 49% | |
| | | | 0% ~ 25% |
- Connect the power supply after the power is off.
- The power indicator light will show the current power level and blink in charging state.
- When fully charged, the power indicator lights are all lit, please disconnect the power supply to complete the charging.
Add Extensions
For programming Nezha Breakout board V2, we need to add an extension. Click "Extensions" in the MakeCode drawer to see more choices.

Search with "nezha2" and have it downloaded.

Note: If you get a prompt that some codebase will be removed for incompatibility, you can either follow the prompt and continue, or create a new project.
Introduction to Software Building Blocks
| Building Block | Function | Parameters |
|---|---|---|
 | Set the motor at the corresponding interface to rotate in a specified direction. | Parameter 1: Drop-down option Options: M1, M2, M3, M4 Parameter 2: Drop-down option Options: Clockwise, Counterclockwise Parameter 3: Integer Parameter 4: Drop-down option Options: Degree, Revolution, Second |
 | Set the motor at the corresponding interface to rotate a specified angle in a specified direction. | Parameter 1: Drop-down option Options: M1, M2, M3, M4 Parameter 2: Drop-down option Options: Clockwise, Counterclockwise Parameter 3: Integer |
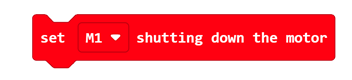 | Stop the motor at the corresponding interface. | Parameter 1: Drop-down option Options: M1, M2, M3, M4 |
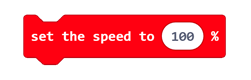
 | Set the motor at the corresponding interface to run at a specified speed. | Parameter 1: Drop-down option Options: M1, M2, M3, M4 Parameter 2: Integer Value range: -100~100 |
 | Obtain the relative angle value of the current motor through this building block. | Parameter 1: Drop-down option Options: M1, M2, M3, M4 |
 | Obtain the absolute angle value of the current motor through this building block. | Parameter 1: Drop-down option Options: M1, M2, M3, M4 |
 | Obtain the speed of the current motor through this building block. | Parameter 1: Drop-down option Options: M1, M2, M3, M4 |
 | Set the current position of the motor at the corresponding interface as the zero position of the relative angle. | Parameter 1: Drop-down option Options: M1, M2, M3, M4 |
 | Set the motor at the corresponding interface to rotate to the zero position. | Parameter 1: Drop-down option Options: M1, M2, M3, M4 |
 | Set the connection interfaces of the left and right motors of the car. | Parameter 1: Drop-down option Options: M1, M2, M3, M4 Parameter 2: Drop-down option Options: M1, M2, M3, M4 |
 | Set the speed and driving direction of the car. | Parameter 1: Value Value range: -100~100 Parameter 2: Drop-down option Options: forward, backward |
 | Stop the car from running. | Parameter 1: Value Value range: -100~100 Parameter 2: Value Value range: -100~100 |
 | Set the circumference of the wheel. | Parameter 1: Integer Parameter 2: Drop-down option Options: cm, inch |
 | Set the car to move a specified distance in a specified direction at a specified speed. | Parameter 1: Value Value range: -100~100 Parameter 2: Drop-down option Options: forward, backward Parameter 3: Integer Parameter 4: Drop-down option Options: degrees, turns, seconds, cm, inch |
 | Set the speeds of the left and right wheels of the car. | Parameter 1: Value Value range: -100~100 Parameter 2: Value Value range: -100~100 |
 | Obtain the current firmware version number. |
Notes:
Relative Angle:
The relative angle refers to the offset of the servo from its current position. When controlling the relative angle, only the rotation direction and offset need to be specified, without concerning the mechanical zero point.
Example: If the current angle of the servo is 30°, sending a relative command of "+60°" will make the servo rotate 60° in the positive direction and finally stop at 90°.
Absolute Angle:
The absolute angle refers to the angular position of the servo relative to a fixed reference point (usually the mechanical zero point). When controlling the absolute angle, it is necessary to clearly specify that the servo rotates to a fixed position, which is independent of the current position.
Example: If the mechanical zero point of the servo is 0° and its maximum rotation angle is 180°, the absolute angle range is typically 0°–180° (the specific range depends on the servo model).
Operation Methods
Hardware Connections
Connect the PlanetX Smart Brick Motor to the Motor A connector on Nezha Pro Breakout Board as the diagram suggests.
Sample Code
Take the current position as the zero point and run 180 degrees clockwise

Link:
Link: https://makecode.microbit.org/_E6vawDM7yX87
You may also download it directly below:
Result
The motor connected to port A rotates 180° clockwise when button A is pressed.
The servo turns to the preset zero position and runs 180 degrees in a clockwise direction

Link
Link: https://makecode.microbit.org/_1w9VLsEE8fdi
You may also download it directly below:
Result
The motor connected to port A automatically rotates to the preset zero position when button A is pressed, and the motor connected to port A rotates 180° clockwise when button B is pressed.
Set the rotation speed of the motor and control the motor to start or stop

Link
Link https://makecode.microbit.org/_fdiPdcJ71f4X
You may download it directly below:
Result
Set the motor rotation speed and control the motor to start or stop via A and B buttons.
Get the rotation angles

Link
Link: https://makecode.microbit.org/_Axw3drgX6Y3V
You may also download it directly:
Result
After turning on the power, press the button A to control the motor to rotate for 3 seconds, and then display the current angle value.
Get the rotation speed (Laps/Seconds)

Link
Link: https://makecode.microbit.org/_01x60dRX9Ros
You may download it directly below:
Result
After powering on, the motor starts turnning and the micro:bit displays the current rotation speed (Laps/Seconds).
Get the version number of the hardware

Link
Link: https://makecode.microbit.org/_V0tJ15dkhLVq
You may download it directly below:
Result
The micro:bit displays the current hardware version number after powering on.
Python Programming
Step 1
Download the package and unzip it:EF_Produce_MicroPython-master
Open Python editor

For programming, we need to add the file of Nezha_V2.py. Click Project and click open, select Nezha_V2.py.
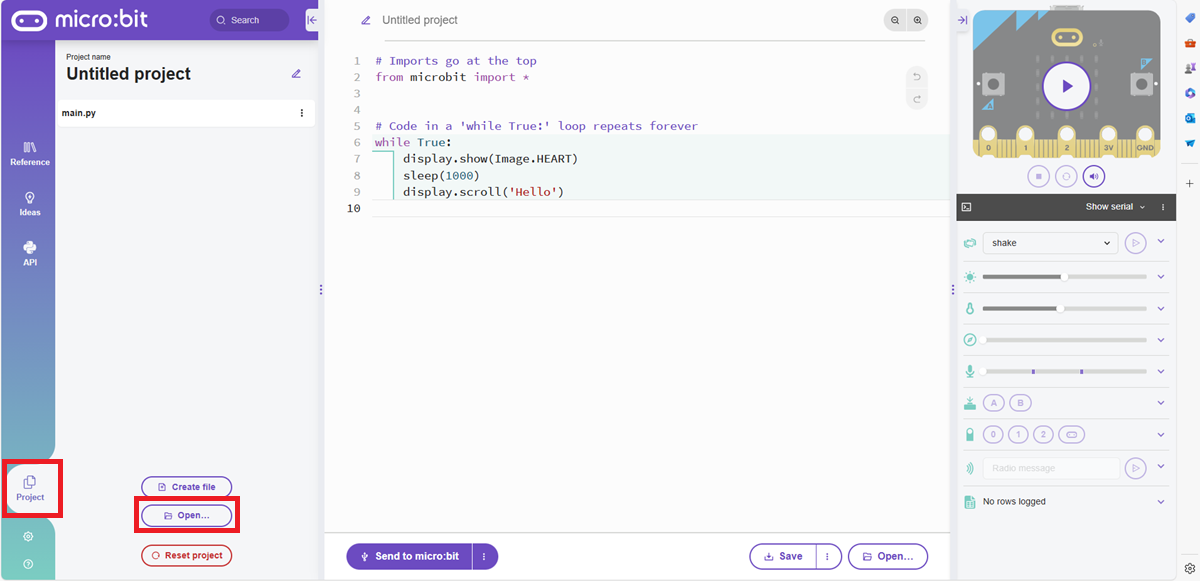
Set to Add file Nezha_V2.py and confirm Motor.

Step 2
Program
from microbit import *
from Nezha_V2 import *

nezha_v2 = NEZHA_V2()

while True:
    if button_a.was_pressed():
        nezha_v2.Motorspeed(motor.A,direction.clockwise,100,MotorFunction.degrees)
    if button_b.was_pressed():
        nezha_v2.Motorspeed(motor.A,direction.counterclockwise,100,MotorFunction.degrees)
Result
The motor is controlled to rotate 100 degrees clockwise or anti-clockwise by the A and B buttons.
Program
from microbit import *
from Nezha_V2 import *

aaa = NEZHA_V2()

while True:
    if button_a.was_pressed():
        aaa.goToAbsolutePosition(motor.A,modePostion.clockwise,100)
    if button_b.was_pressed():
        aaa.goToAbsolutePosition(motor.A,modePostion.clockwise,-100)
Result
With the current position as the zero point, the motor is controlled to rotate to 100 degrees or -100 degrees by the A and B buttons.
Program
from microbit import *
from Nezha_V2 import *

aaa = NEZHA_V2()

while True:
    if button_a.was_pressed():
        aaa.nezha2MotorStart(motor.A,direction.clockwise)
    if button_b.was_pressed():
        aaa.nezha2MotorStart(motor.A,direction.counterclockwise)
    if pin_logo.is_touched():
        aaa.nezha2MotorStop(motor.A)
Result
The motor is controlled to rotate clockwise or anti-clockwise by the A and B buttons and stopped by touching the logo on the micro:bit.
Program
from microbit import *
from Nezha_V2 import *

aaa = NEZHA_V2()

while True:
    if button_a.was_pressed():
        aaa.nezha2MotorSpeedCtrolExport(motor.A,100)
    if button_b.was_pressed():
        aaa.nezha2MotorSpeedCtrolExport(motor.A,-100)
    if pin_logo.is_touched():
        aaa.nezha2MotorStop(motor.A)
Result
Use the A and B buttons to control the motor to rotate at a specified speed, and touch the logo on the micro:bit to stop it.
Program
from microbit import *
from Nezha_V2 import *

aaa = NEZHA_V2()

while True:
    if button_a.was_pressed():
        aaa.Motorspeed(motor.A,direction.clockwise,100,MotorFunction.degrees)
    if button_b.was_pressed():
        aaa.Motorspeed(motor.A,direction.counterclockwise,100,MotorFunction.degrees)
    if pin_logo.is_touched():
        display.show(aaa.readServoAbsolutePostion(motor.A))
Result
Use the A and B buttons to control the motor to rotate at a specified angle, and touch the logo on the micro:bit to display the current angle value.
Program
from microbit import *
from Nezha_V2 import *

aaa = NEZHA_V2()

while True:
    if button_a.was_pressed():
        aaa.nezha2MotorSpeedCtrolExport(motor.A,100)
    if button_b.was_pressed():
        aaa.nezha2MotorSpeedCtrolExport(motor.A,-100)
    if pin_logo.is_touched():
        display.show(aaa.readServoAbsoluteSpeed(motor.A))
Result
Use the A and B buttons to control the motor to rotate clockwise or counterclockwise. Touch the logo on the micro:bit to display the current motor rotation speed (laps/seconds).
Program
from microbit import *
from Nezha_V2 import *

aaa = NEZHA_V2()

while True:
    if button_a.was_pressed():
        aaa.Motorspeed(motor.A,direction.clockwise,100,MotorFunction.degrees)
    if button_b.was_pressed():
        aaa.Motorspeed(motor.A,direction.counterclockwise,100,MotorFunction.degrees)
    if pin_logo.is_touched():
        aaa.servoPostionReset(motor.A)
Result
Use the A and B buttons to control the motor to rotate 100 degrees clockwise or counterclockwise. Touch the logo on the micro:bit to control the motor to rotate to the preset zero position.