micro:bit Arcade Pro
Product Introduction
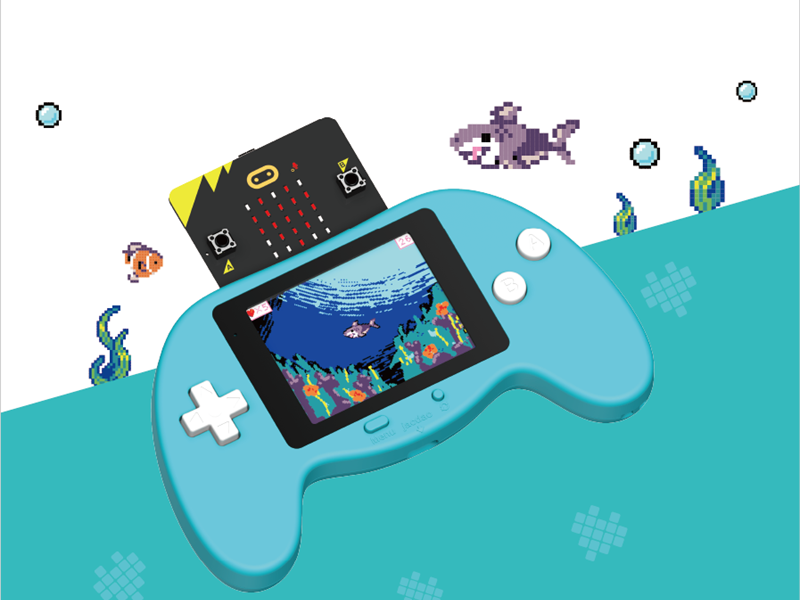
The micro:bit Arcade Pro is a color display gamepad-style expansion board specifically designed for the micro:bit V2, with "fun programming + multi-scenario" as its core highlights. Hardware-wise, it integrates a 240×320 TFT color display, 4-way directional keys, AB function keys, as well as reset/menu/power switches. It is compatible with jacdac sensors and building block structures, featuring a compact and portable design with a comfortable grip.
The product's core value lies in "learning through play": when paired with the micro:bit V2, it can connect to Microsoft's Arcade programming platform. Through block-based programming, it enables offline gameplay, helping children independently create games and understand creation logic. It supports custom characters, diverse scenarios and plot designs, allowing easy unleashing of unlimited game creativity.
It also has multi-scenario adaptability: it can not only serve as an expanded handheld game console focusing on programming creation, but also act as a remote control to communicate and control robot cars. Additionally, it can connect external jacdac sensors to expand more creative possibilities such as electronic experiments and intelligent interactions. It is an excellent micro:bit accessory that integrates "learning tool + entertainment device + expansion platform" into one.
Features
- Can act as a remote control to communicate with and control robot cars
- Can serve as an expanded handheld game console for creating personalized games via block-based programming
- Can work as a jacdac-series expansion board to connect external jacdac sensors
Basic Specifications
| Item | Specification |
|---|---|
| Product Name | micro:bit Arcade Pro |
| SKU | EF08438 |
| Product Dimensions | 140mm (L) × 82mm (W) × 21mm (H) (excluding micro:bit main board) |
| Product Weight | 102g (including battery and case) |
| Interface Type | Type-C, micro:bit, jacdac |
| Display Type | TFT LCD Display |
| Display Specification | 240 × 320 |
| Screen Size | 2.4 inches |
| Power Supply | Lithium Battery Power Supply |
| Charging Voltage | 5V |
| Charging Current | 1A |
| Maximum Operating Voltage | 4.2V |
| Rated Operating Voltage | 3.7V |
| Minimum Operating Voltage | 3.5V |
| Standby Current | 0.03A |
| jacdac Supply Voltage | 4.2V |
| Maximum Current of jacdac Interface | 1A |
| Charging Time | 65min |
Package Contents
- Arcade Pro Kit × 1
- Type-C Cable × 1
- Lanyard × 1
- User Manual × 1
Product Description
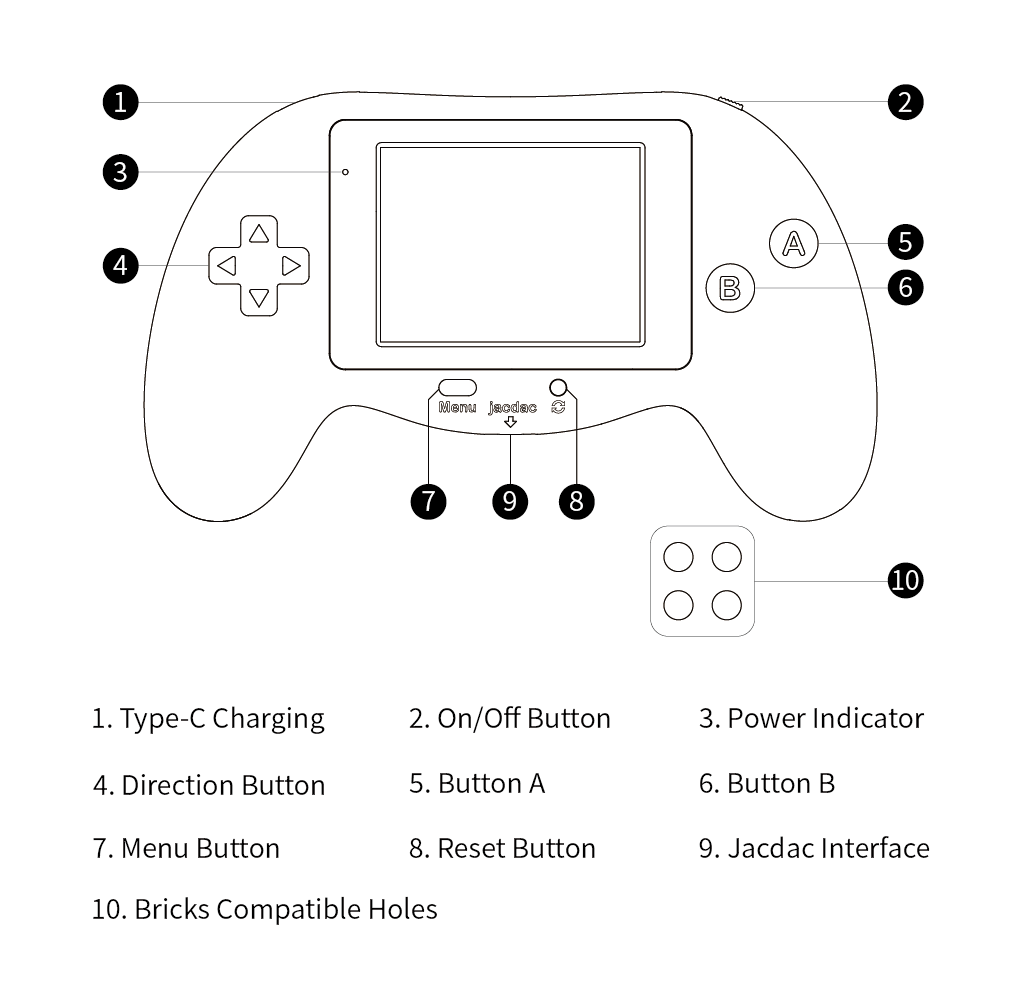
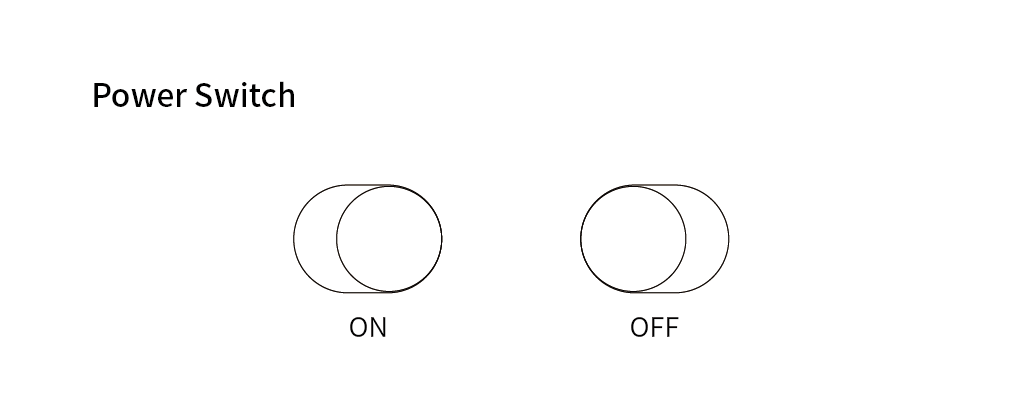
Power Switch Operation
Indicator Light Status
| Working Status | Light Status |
|---|---|
| In Operation | Green Light |
| Low Battery (20% remaining power) | Red Light |
| Auto Shutdown Due to Extremely Low Battery | Red Light Flashes for 5 Seconds, Then Auto Shutdown |
| Charging | Flashing Red Light |
| Fully Charged | Green Light |
Quick Start
Welcome to the Retro Arcade Pro User Guide! This document only provides a simple program writing example to test if the device is in normal working condition.
For more related knowledge, please refer to: https://arcade.makecode.com/
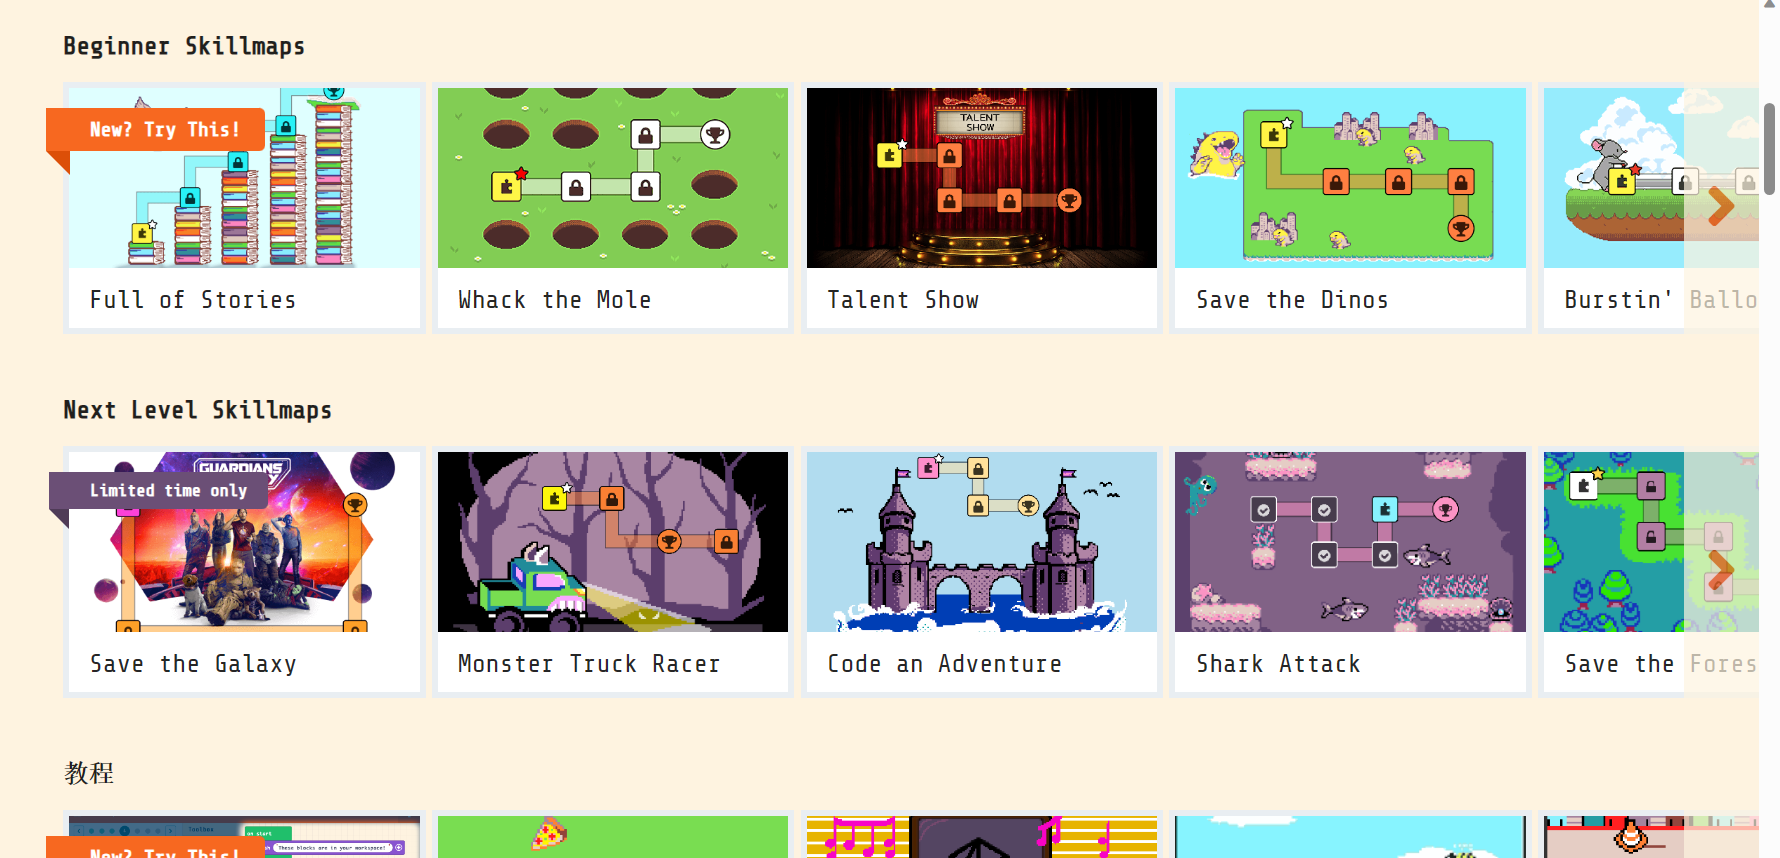
Click on the corresponding project to access the project tutorial and learn through the process of creating games.
Programming Platform
Arcade Game Programming Platform URL: https://arcade.makecode.com
Introduction to the Programming Page
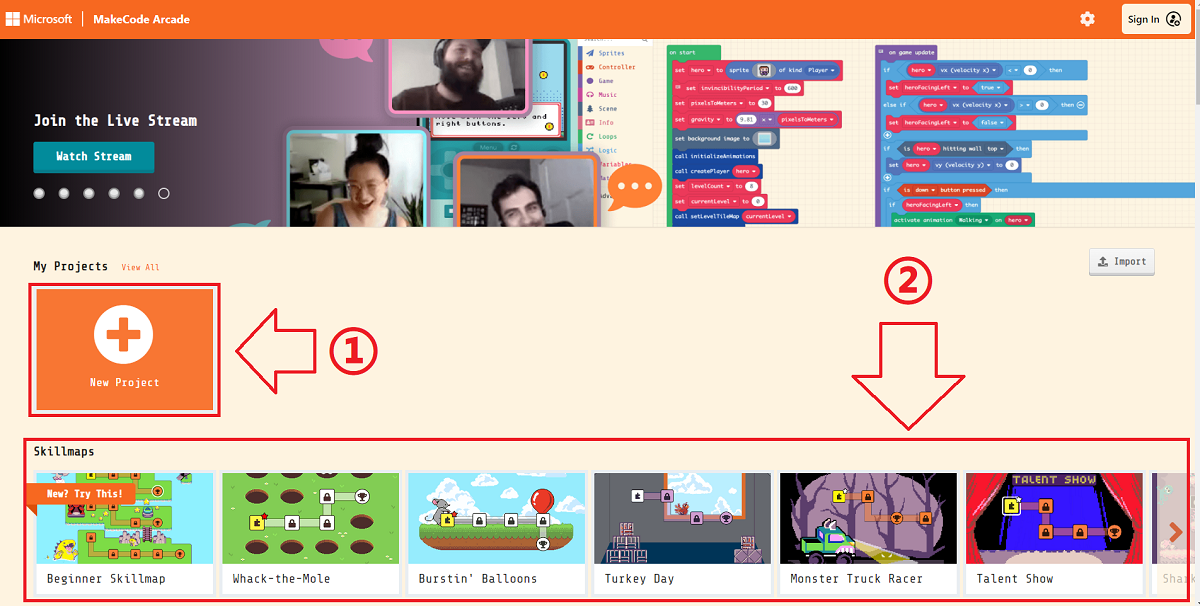
- Click the area marked "1" to enter a project name and create a project to start programming.
- The area below the mark "2" contains simple tutorials provided by the platform and game works shared by the community.
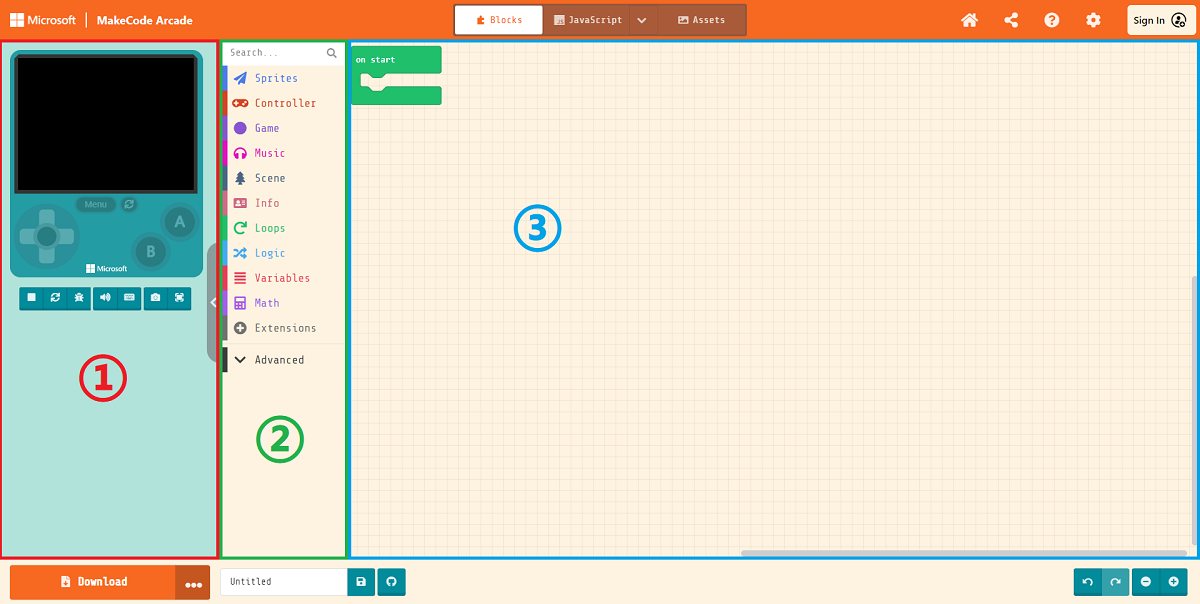
For beginners, the programming interface can be roughly divided into 3 key sections to understand initially:
- Online Simulator: Simulates and runs the program in real time according to the logic of the code.
- Programming Block Panel: Drag programming blocks from here to write code.
- Code Editing Area: Drag blocks from the panel and assemble them here to complete the creation of game characters, interfaces, and logic.
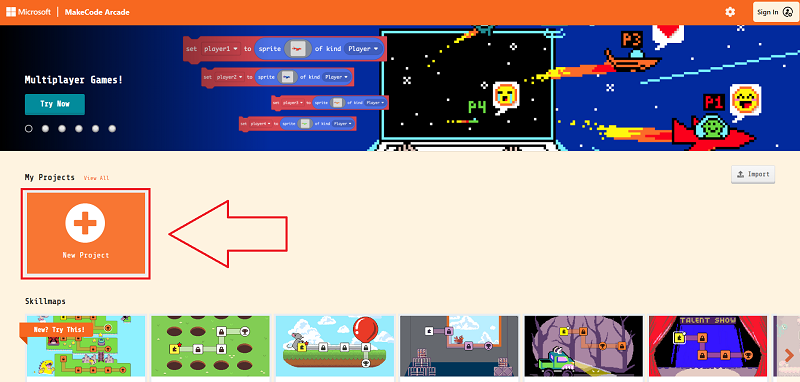
Quick Creation
Click "New Project".
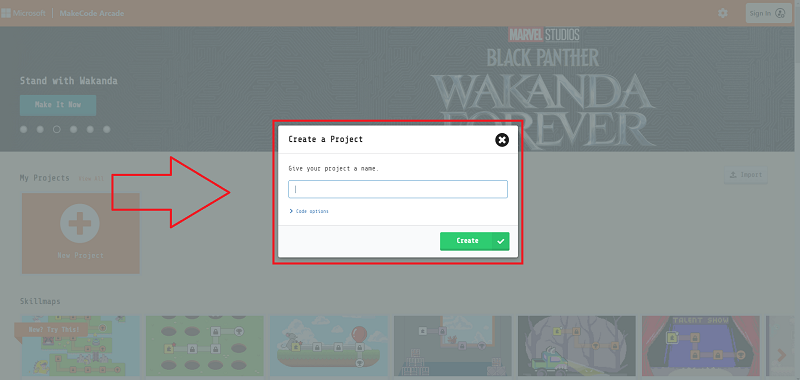
Enter a project name to create a new project.
Create a sprite, then click the gray rectangle in the block to open the image editor.
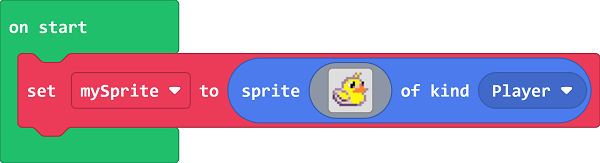
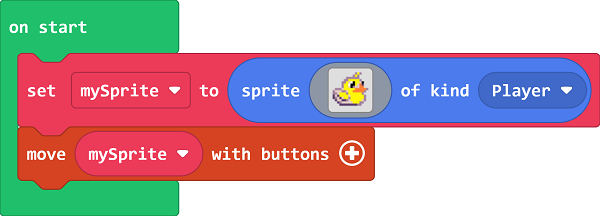
You can customize the sprite image or select a preset sprite from the image library. Control the sprite's movement using the "move sprite with buttons" block.
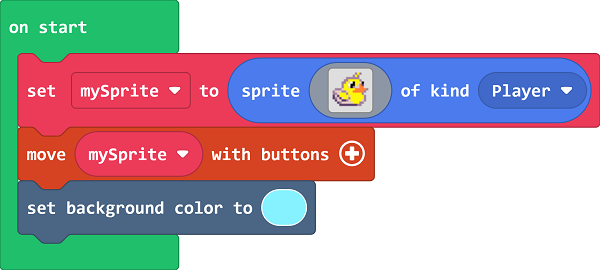
Set the background color of the screen.
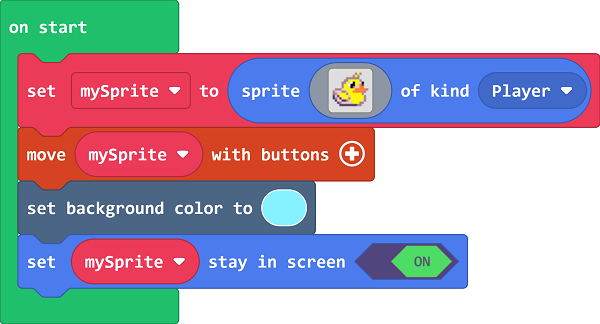
To prevent the sprite from moving outside the screen, set the sprite to stay within the screen boundaries.
Program Download Tutorial
Currently, for the official Arcade platform, the micro:bit V2 (nRF52833) is still in the testing phase. Therefore, you first need to go to the platform's settings page to enable the experimental version of the hardware option.
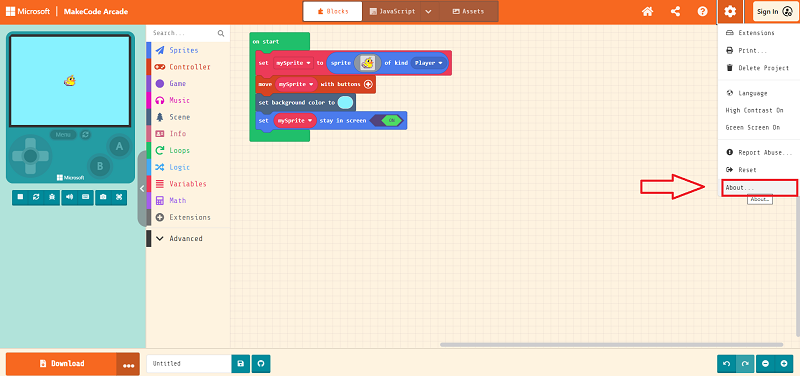
Click the small gear icon in the upper right corner of the programming interface and select About.
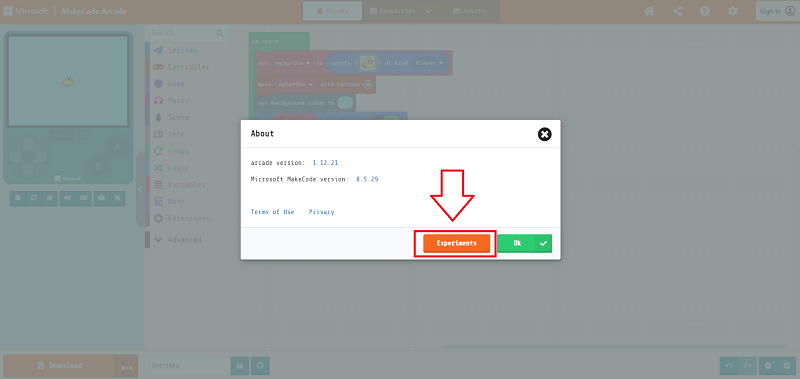
In the pop-up page, select Experiments.
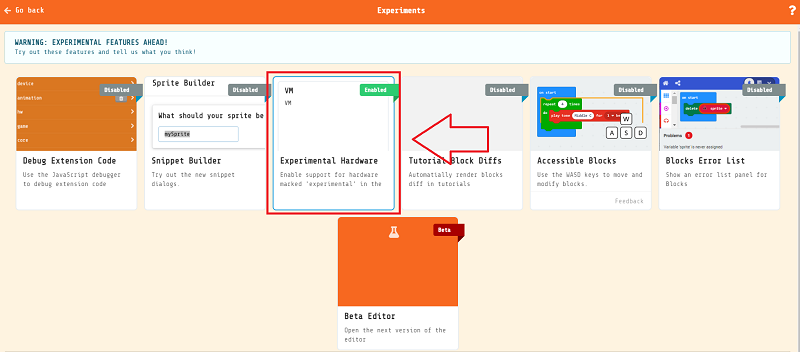
Ensure that "Experimental Hardware" is in the Enabled state (this setting only needs to be configured once).
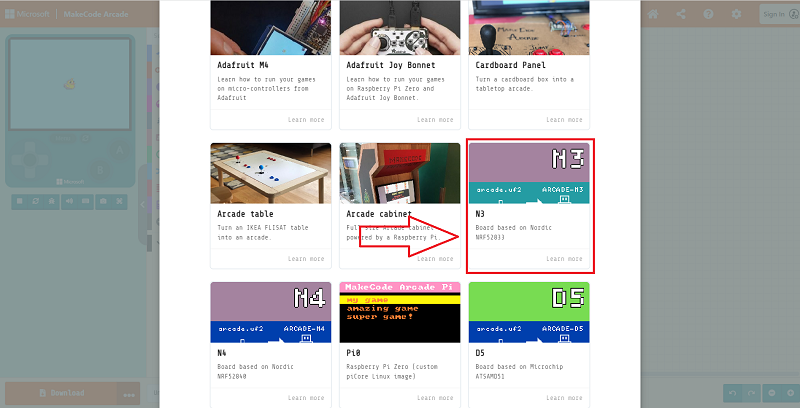
Then return to the programming homepage, click the download button in the lower left corner. In the pop-up hardware selection window, scroll to the bottom and select micro:bit Retro Shield.
Click "Download" to obtain a .hex file. Drag this file into the MICROBIT drive, and it can then run on the micro:bit V2 + micro:bit Retro Arcade.