MicroBlocks-Pico:ed v2 Quick Start

This tutorial will introduce you to the way you can programmatically interact with Pico:ed v2 on the MicroBlocks platform.
MicroBlocks Introduction
MicroBlocks is an open source blocks programming platform that allows you to learn programming while interacting with your microcontroller. Although MicroBlocks is just one of many graphical programming platforms, what really makes MicroBlocks stand out is its combination of live programming and autonomous operation.
Its excellent features are listed below:
- MicroBlocks is a real-time programming environment, no need to wait for the program to be compiled and downloaded, just click on the code block and see the result instantly.
- MicroBlocks allows you to control each component by writing separate scripts for each and and running them at the same time.
- MicroBlocks can run on a wide range of microcontroller boards. Scripts controlling various components run the same on different machines with similar components, and are ignored if any component is not present. So the code you write is highly portable.
- MicroBlocks scripts are stored on the microcontroller like a memory stick. They can be shared by exchanging the microcontrollers and loading on-board scripts to the IDE for further editing, providing easy access and sharing.
For more information about MicroBlocks programming platform, you can visit its official website: MicroBlocks official website.
Programming Preparation
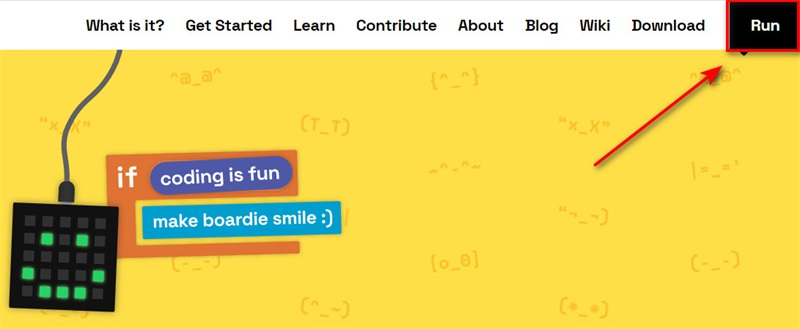
First, you need to open the MicroBlocks official website in your computer browser and click the "Run" button in the upper right corner to enter the block programming interface.

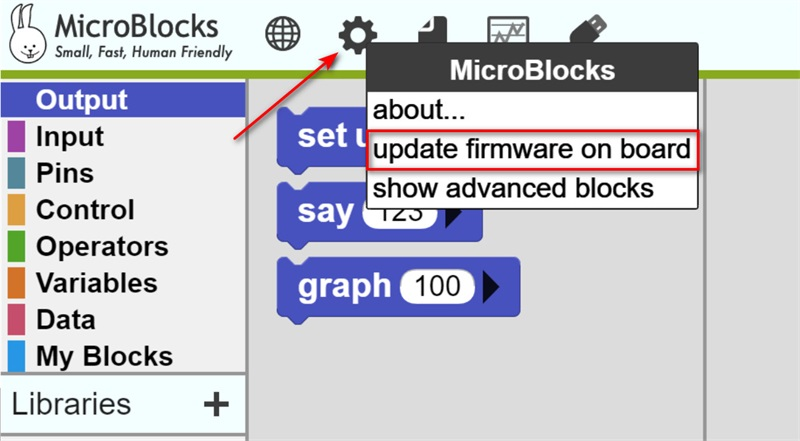
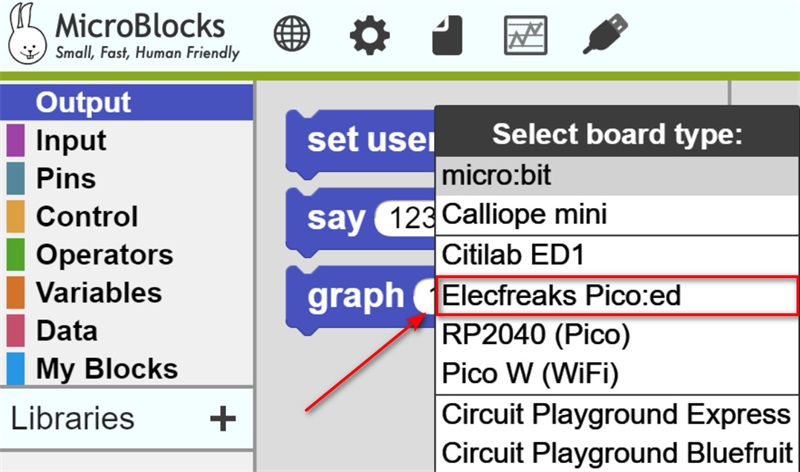
Click on the small gear icon in the upper left corner of the MicroBlocks programming platform screen, select the "updata firmware on board" option from the drop-down options, and select "Elecfreaks Pico:ed" firmware.
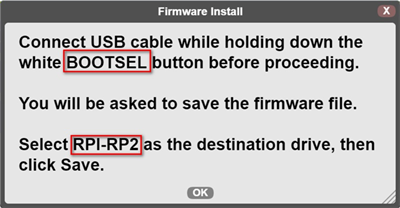
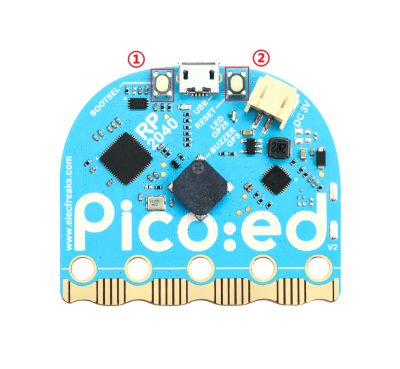
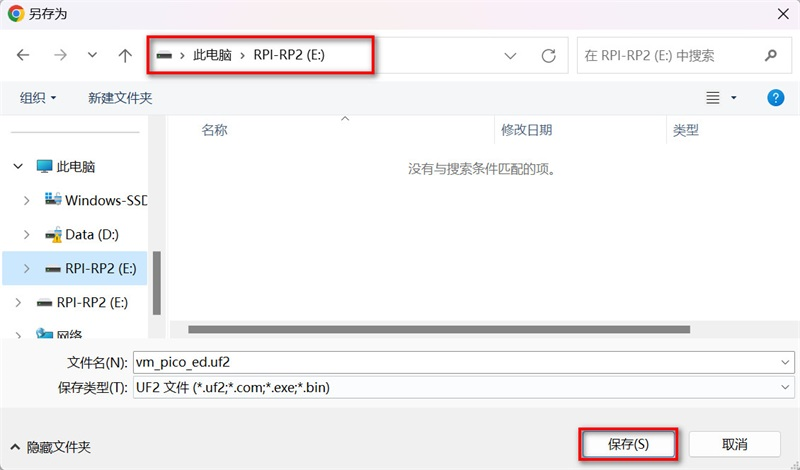
According to the pop-up window that appears, first you need to press the "BOOTSEL" button on the back of the Pico:ed v2 ( where ① is the BOOTSEL button and ② is the RESET button), and connect the Pico:ed v2 to your computer using the USB cable, then click the "OK" button on the MicroBlocks platform pop-up window to save the firmware to the "RPI-RP2" disk.
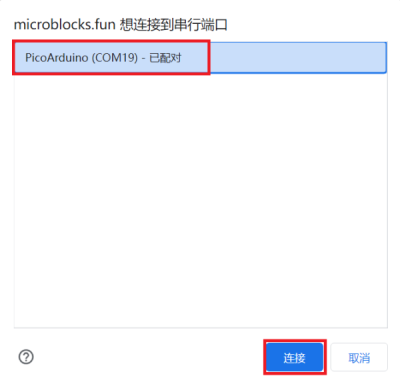
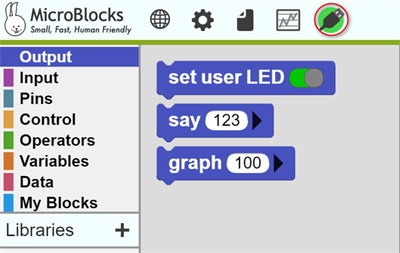
After you have finished loading the firmware of Pico:ed v2 to the microcontroller, you still need to connect MicroBlocks platform with Pico:ed v2 before you start programming. Click on the USB cable female icon in the menu bar, click on the "connect" option, and in the pop-up window, select "PicoArduino", (*COM19 is the recognized port number of this computer, the number shown here may be different than the one shown on your computer). When you click "connect" you can see the menu bar USB cable female icon change to a green background, which proves that it has been successfully connected. Now you can start programming.

Start programming
Next, we will learn to program each programmable component of the Pico:ed v2 board, such as the A/B buttons, the 7x17 LED screen, the buzzer, the gold finger pins, and the on-board LED indicator (pin number 25) that is unique to the Pico:ed v2. Let's get started.
Light up the Pico:ed v2 on-board LED logo indicator
Tap on the "Output" category in the Block Categories menu and drag the "set user LED " block to the edit area on the right. The "set user LED" block has two modes(on/off) corresponding to the Pico:ed v2 on-board LEDs(on/off) status, see them in the figure below:
Tip: To program in MicroBlocks platform, you don't need to download your program to the microcontroller. Just click on the blocks in the Blocks Palette or the ones you have dragged to the editing area and you can see the results immediately.

Light up the Pico:ed v2 LED light matrix screen
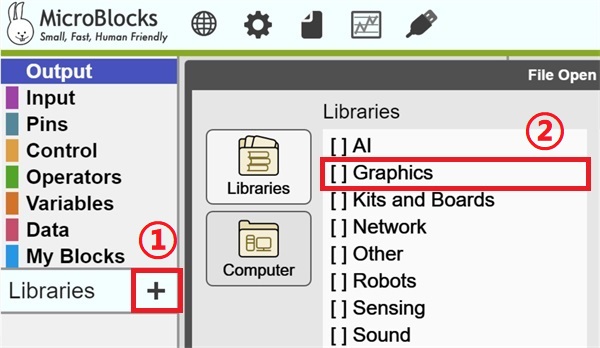
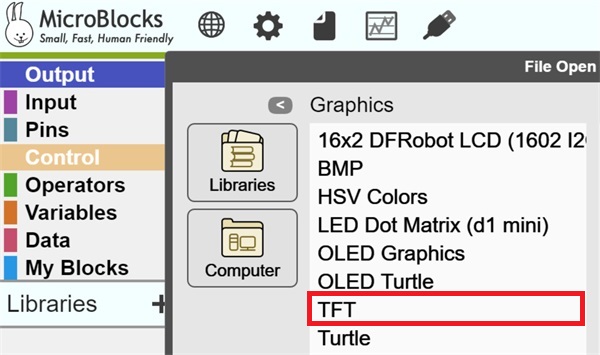
To program the Pico:ed v2 LED light matrix screen you need to add the " TFT" library. Click on the "Libraries" right side of the "+ ", select "Graphics" from the options that appear, then double click on the "TFT" library, or single-click and select "Open " and you're done adding the TFT library to the IDE.
Lights up each LED on the 7*17 LED matrix screen
The MicroBlocks platform defines the coordinates of the LEDs in the upper left corner of the Pico:ed v2 7*17 LED matrix screen as zero (0, 0) and the coordinates of the LEDs in the lower right corner as (16, 6). You can use the "set TFT pixel x()y()to()" block to light up or light down each LED.
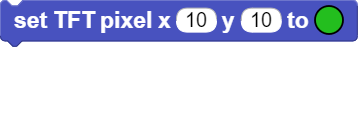
Examples are as follows:
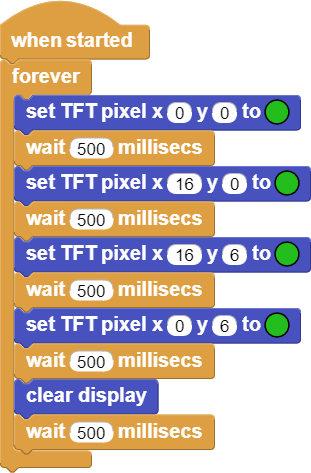
Link to demonstration programs such as lighting LEDs by coordinates
There are also blocks for drawing shapes in the TFT block library for you to try them out. Here is a very interesting case for reference:
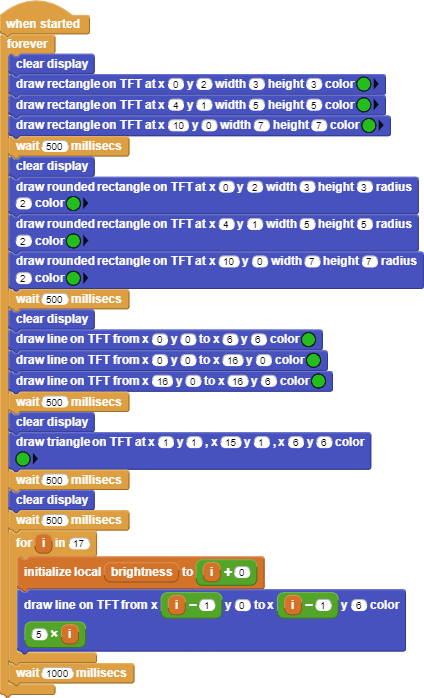
Links to graphical case programs
A/B key programming
Programming button interactions is relatively easy to learn. You can use the following commands directly from the "Control" and "Input" Blocks Categories menu.
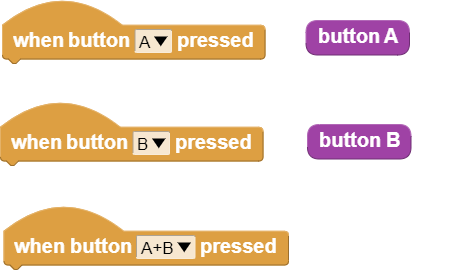
An example of A/B button programming is as follows.
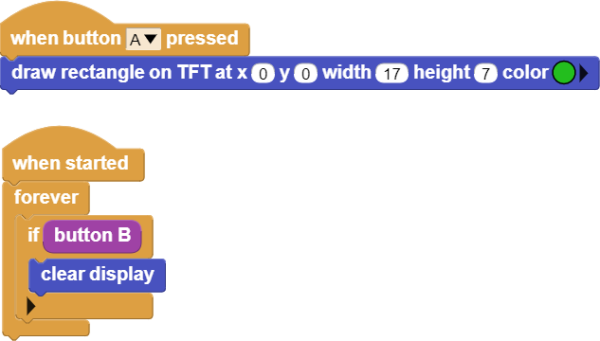
A\B Button Programming Case Links
Buzzer Programming
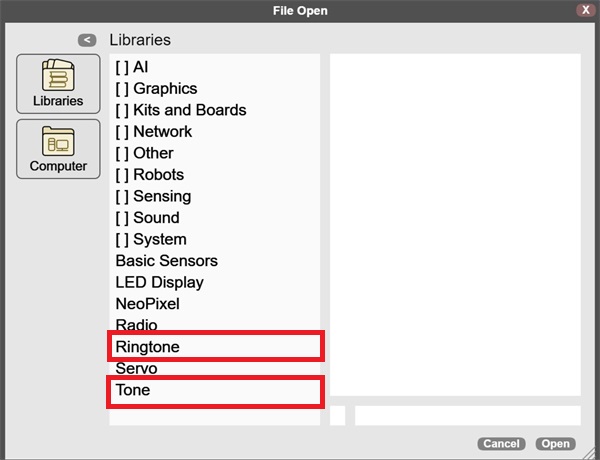
To program the buzzer, you need to add the "Ringtone" block library and the "Tone" block library. As shown in the figure below.
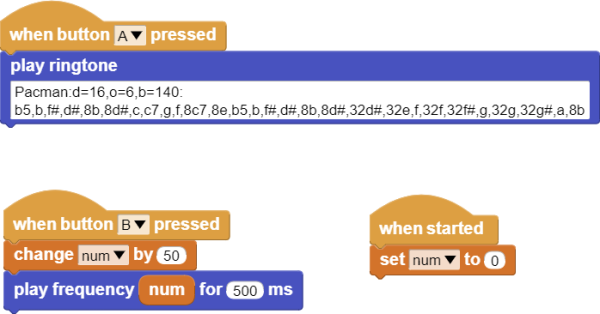
The "play ringtone" block in the "Ringtone" library allows you to compose any ringtones you want. If you are looking for already written ringtones, the website link below has a collection of nearly 10,000 ringtones for you to choose from.

The "Tone" library allows you to set how long to play a specific note, and also how often to play it, etc.
An example of how the buzzer is programmed is as follows.
Link to buzzer case demo program
Programming the Pico:ed v2 pins
Next we will use the Pico:ed Starter Kit to demonstrate the control of LEDs by the MicroBlocks platform, using the Pico:ed v2 gold finger pins. This example can also be reproduced if you have alligator wires, leds, 100Ω resistors and other components.
Pico:ed Starter Kit purchasing link: Pico:ed Starter Kit .
Hardware Connections
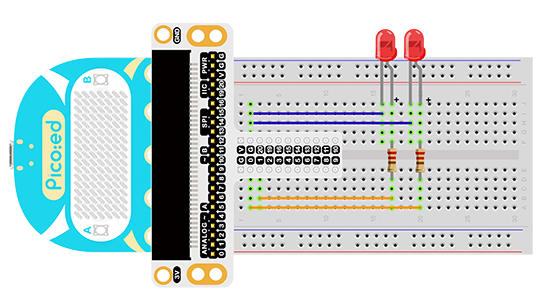
Connect your components according to the following pictures.
connect the short pins of the LEDs to GND.
Connect the long pins of the LEDs to the P0 and P1 ports through a resistor.
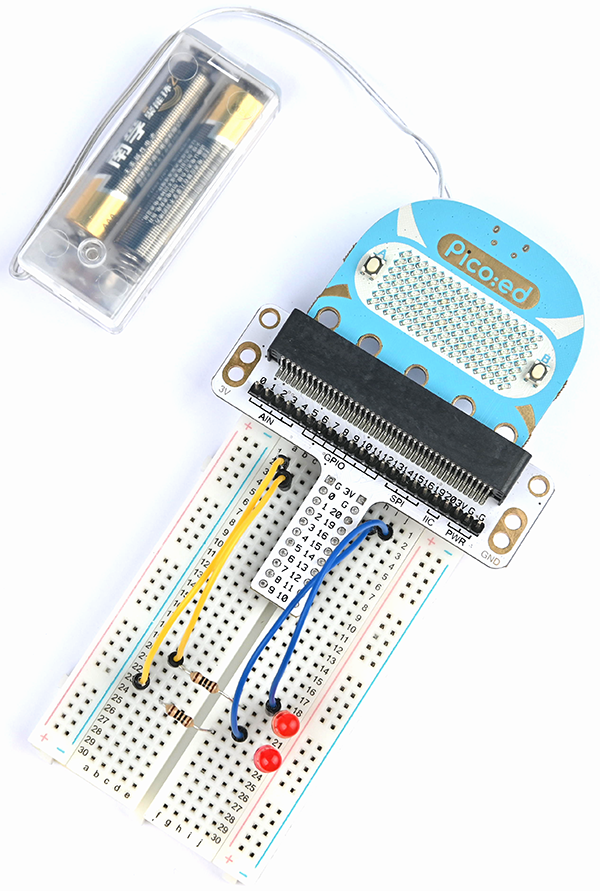
After the connection is completed, the picture is as follows.
The Pico:ed v2 pin programming demonstration case is programmed as follows.
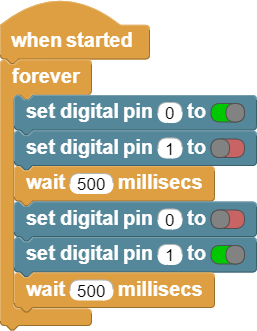
Link to Pico:ed v2 pin programming demo case
Case presentation
Concluding remarks
The above is a simple demonstration of how Pico:ed v2 is programmed in MicroBlocks platform. You can explore more interesting and fun programming cases. We also welcome you to share your programs with us at our official media account. We will update the collection with the selected programs and you are welcome to follow and participate in the discussion:
Facebook: https://www.facebook.com/ElecFreaksTech
Discord: https://discord.gg/WuJ8xPW8jQ
YouTube: https://www.youtube.com/ELECFREAKS
Twitter: https://twitter.com/ELECFREAKS
Official web: https://shop.elecfreaks.com