Case 04: Fast Finger

Introduction
In some playgrounds we can see dancing machines where the challenger makes the appropriate moves according to the movements shown on the screen. In this process, the challenger learns the dance moves and at the same time exercises observation and reaction skills. This example uses the A\B buttons of the Wukong 2040 and two rainbow lights to create a quick reaction effect, so let's get started.
Materials Requested
1 × Raspberry Pi Pico
1 × Wukong2040 expansion board
1 × USB cable
1 × OLED display
Relevant Information Introduction
Button

The keypad principle on the Wukong 2040 expansion board is based on the working principle of electronic switches. There are two keys on the main board, the A and B buttons.
Each key is a mechanical switch and when the key is pressed, the internal metal contact closes and conducts a current. By detecting whether a key is closed, it is possible to determine whether a key has been pressed or not.
On the Wukong 2040 expansion board, the key closure status is detected via the GPIO pins. When the key is closed, the corresponding GPIO pin is pulled low, i.e. potential 0. When the key is not closed, the pin is held high, i.e. potential 1.
By reading the level of the GPIO pins, it is possible to determine whether a key has been pressed or not. In the programming environment, the corresponding code can be used to detect the state of the key and perform the corresponding operation.
OLED Display
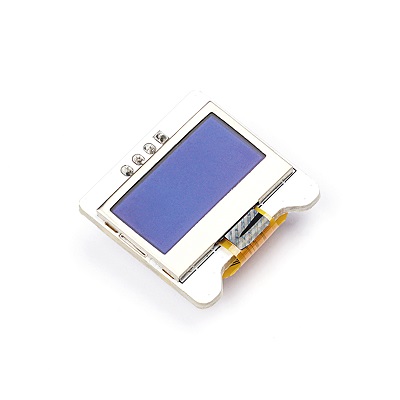
The 0.96" OLED display module uses the SSD1306 driver chip with 128x64 self-luminous white pixels and uses both IIC/SPI communication methods, with the default setting being IIC.
The 0.96" OLED module supports 3.3V and 5V, internal power-on reset handling and default IIC communication makes wiring easy and simple, and if you want to use SPI, you only need to change one resistor position. In addition the display is encapsulated in an aluminium frame, which protects the screen from damage while preventing you from scratching the glass edges of the screen during use.
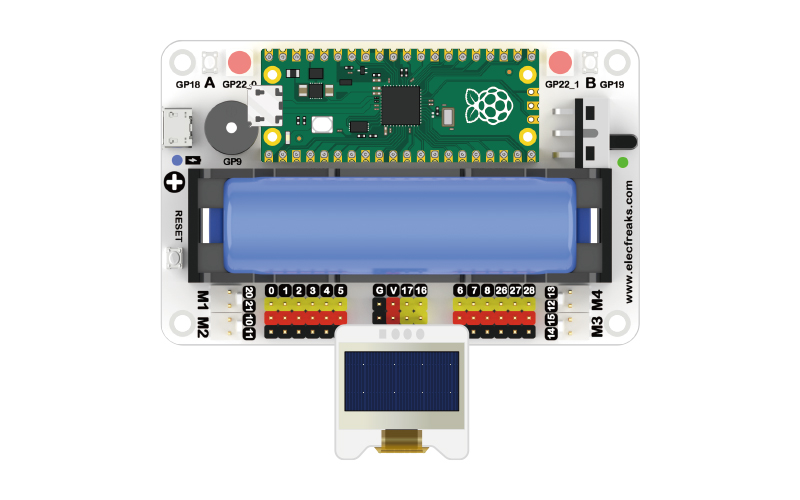
Hardware Connection
Connect your components according to the following connection diagram:
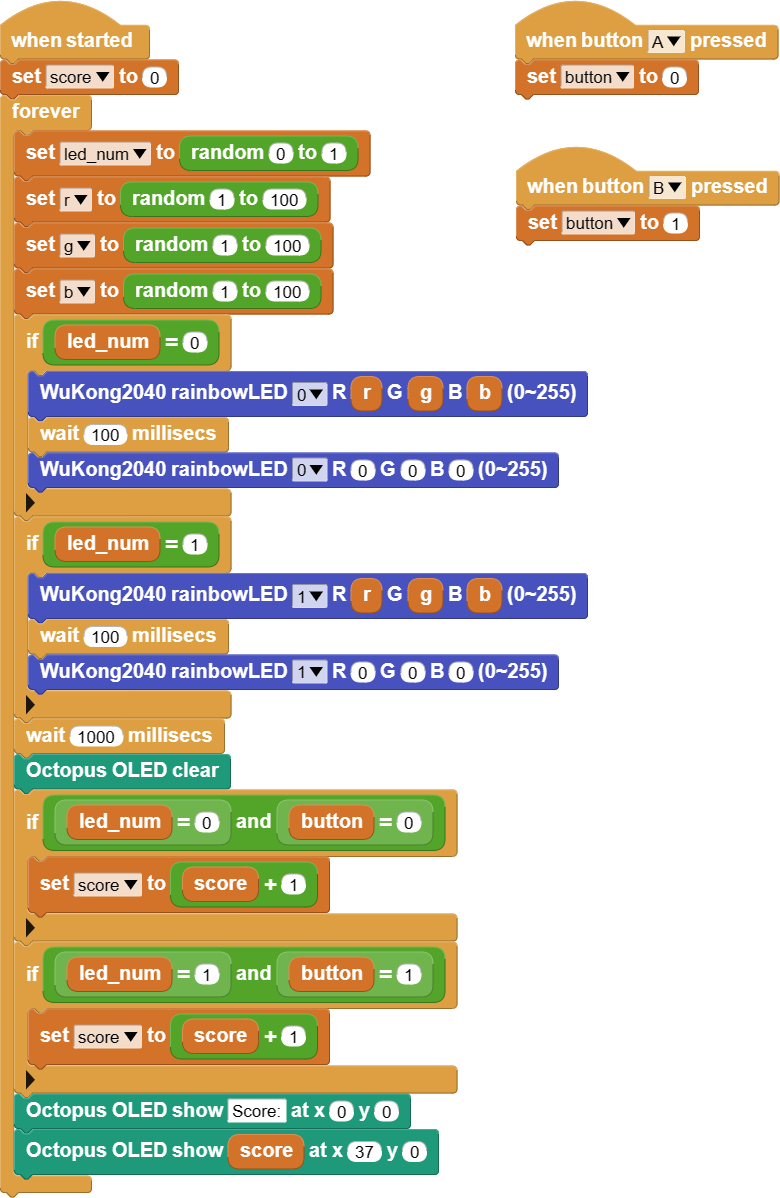
MicroBlocks Graphical Programming
CircuitPython Code
# Import the relevant libraries
from WuKong2040 import *
from OLED import *
from random import *
import time

#  Create objects
wukong2040 = WuKong2040()
oled = OLED(board.GP17, board.GP16)

# Initialize the score variable to 0
score = 0

while True:
    num = randint(0, 1)  # Randomly generated rainbow light numbers
    r = randint(0, 10)
    g = randint(0, 10)
    b = randint(0, 10)
    wukong2040.rainbow_led(num, r, g, b)  # Set random colours for randomly numbered rainbow lights
    time.sleep(0.1)
    wukong2040.rainbow_led(num, 0, 0, 0)
    time.sleep(1)
    oled.set_clear()
    if wukong2040.button_is_pressed("ButtonA") and num == 0:  # Detects if the A key has been pressed after the rainbow light with the number 0 is illuminated
        score += 1  # 得分+1
    if wukong2040.button_is_pressed("ButtonB") and num == 1:  # Detects if the B key is pressed when the rainbow light with number 1 is on
        score += 1

    # Score recorded and displayed on the OLED screen
    oled.set_show(0, 0, "Score:")
    oled.set_show(37, 0, score)
Case Display
Think
Can you make a program that adds 1 to the score by pressing B when rainbow light 0 is on and 1 to the score by pressing A when rainbow light 1 is on?