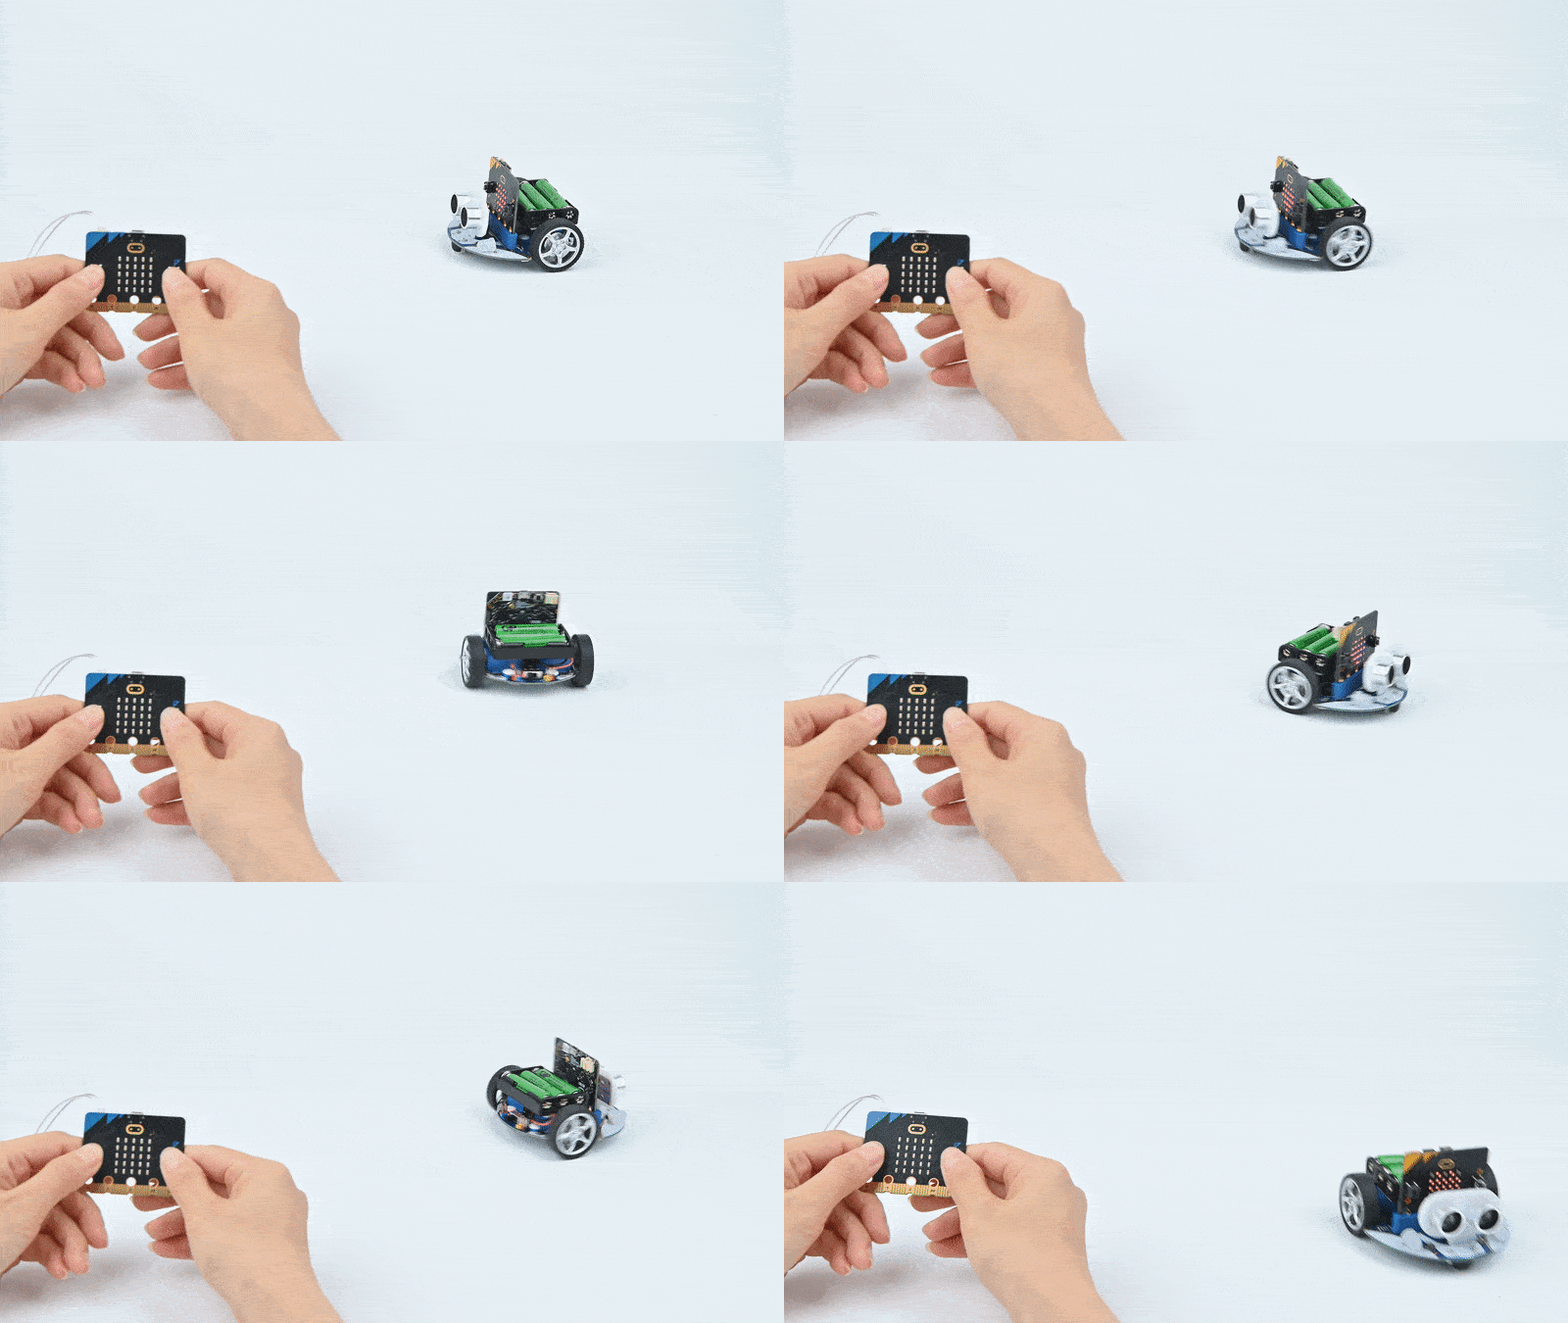
Case 11: micro:bit Remote Control
Purpose
Use another micro:bit as a remote control for your Cutebot
Both micro:bit needs to be programmed.

Materials
1 x Cutebot Kit
1 x micro:bit
Software Platform
Programming
Step 1
Click the "Advanced" to see more choices in the MakeCode drawer.
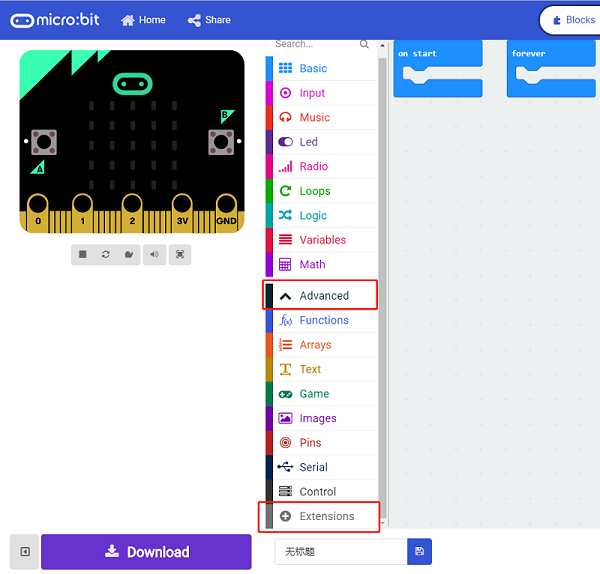
A codebase is required for Cutebot programming, click “Add Package” at the bottom of the drawer, search Cutebot in the dialogue box and download it.
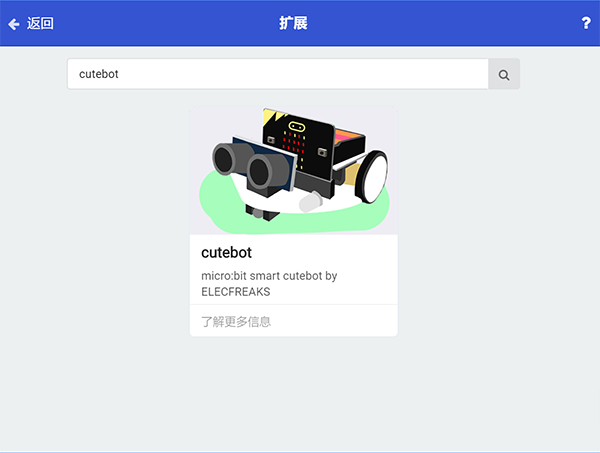
Note: If you met a tip indicating incompatibility of the codebase, you can continue with the tips or build a new project there.
Step 2: Remote Control Programming
Set the "radio set group" to 1 in the On start brick.
Send radio number in 1 when pressing button A.
Send radio number in 2 when pressing button B.
Send radio number in 3 when pressing button A+B.
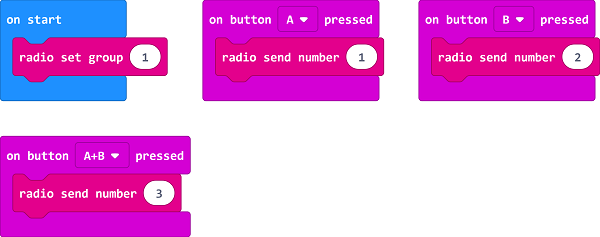
Programming
links: https://makecode.microbit.org/_9JCE5Ta78DL9
You can also download it directly below:
Step 3: Cutebot Programming
Drag "show icon" brick into the On start brick and set the "radio set group" to 1. Items must be the same with the remote control for the correct match.
Drag three "if" bricks into the on radio received brick and judge if the received number is 1, 2 or 3.
When the received number is 1, turn left.
When the received number is 2, turn right.
When the received number is 3, go straight.
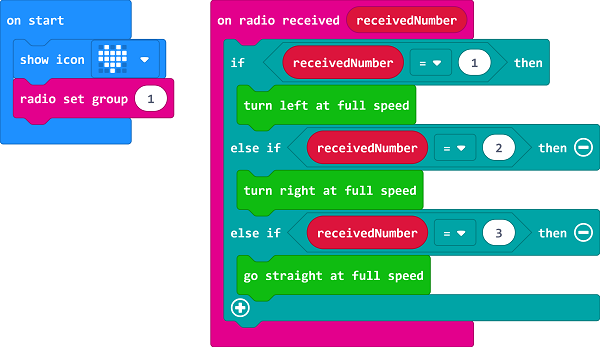
Programming
Links: https://makecode.microbit.org/_eTEdPEKvRHEa
You can also download it directly below:
Result
When button A+B being pressed on the remote control, the Cutebot goes straight.
When button A being pressed on the remote control, the Cutebot turns left.
When button B being pressed on the remote control, the Cutebot turns right.
