Case 03: Turn at An Angle
Introduction
Hello, we've learnt how to run a shape in case 02, but how can we draw a circle with the Ring:bit car? Let's start this case with the question.
Hardware Connection
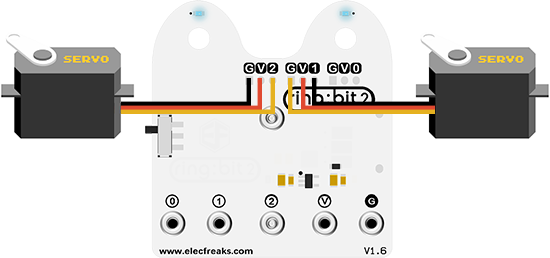
Also with the same assembly steps with former practices, connect the left wheel servo to P1 of the Ring:bit board and the right wheel servo to P2.
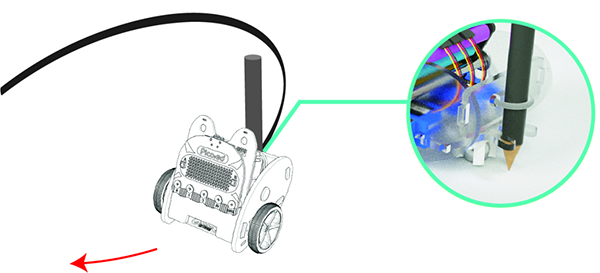
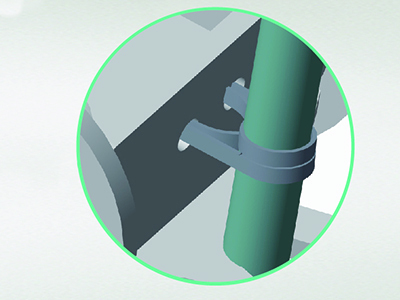
Use a rubber band to fix a pencil on the base board of the Ring:bit car.
Software Programming
You should prepare the programming platform ready, if not, please can refer to this essay: Preparation for programming
Sample Projects
# Import the modules that we need
import board
from ringbit import *
from picoed import *

# Set the pins of the servos
ringbit = Ringbit(board.P2, board.P1)

# While true, detect if button A/B is pressed to make the [Ring:bit](https://shop.elecfreaks.com/products/elecfreaks-pico-ed-ring-bit-v2-car-kit-with-pico-ed-board?_pos=2&_sid=18032a345&_ss=r) car drive the circle or stop.
while True:
    if button_a.is_pressed():
        ringbit.set_speed(-100, -50)
    elif button_b.is_pressed():
        ringbit.set_speed(0, 0)
Details of program:
Import the modules that we need.
boardis the common container, and you can connect the pins you'd like to use through it;ringbitmodule contains classes and functions for Ring:bit smart car operation;picoedmodule contains the operation functions to button A/B.import board
from ringbit import *
from picoed import *Set the pins of the servos.
ringbit = Ringbit(board.P2, board.P1)While true, detect if button A/B is pressed to make the Ring:bit car drive the circle or stop.
while True:
    if button_a.is_pressed():
        ringbit.set_speed(-100, -50)
    elif button_b.is_pressed():
        ringbit.set_speed(0, 0)
Result
On button A pressed, the car draws a circle.
On button B pressed, stop the car.
Exploration
How can you make your car draw a figure of eight?