Hardware Problem
XGO cannot walk straight
- XGO is corrected through a gyroscope. When starting up, the XGO needs to be placed on the ground or table. After pressing the switch, the gyroscope will undergo an initialization process of 3-5 seconds. During this time, do not move the XGO and wait for the switch light to remain on before operating.
- If the problem with gyroscope initialization is ruled out and the XGO still has a significant deviation in walking, it is necessary to recalibrate the XGO.
Recalibrate XGO
When you notice that your XGO posture is abnormal, such as when standing, one leg deviates significantly, resulting in the inability of all four legs to land at the same time or obvious body deviation, it is likely that the initial position deviates from the preset value due to loose screws or sliding teeth of the servo. At this time, you can perform initial position calibration to recalibrate the initial position preset value of the XGO.
Open the XGOBOT APPAfter connecting to the robot through WiFi, click the settings button to run as a developer, as shown in the following figure.

Return to the main page and click on the calibration icon.

Enter the calibration page and a pop-up prompt will appear.
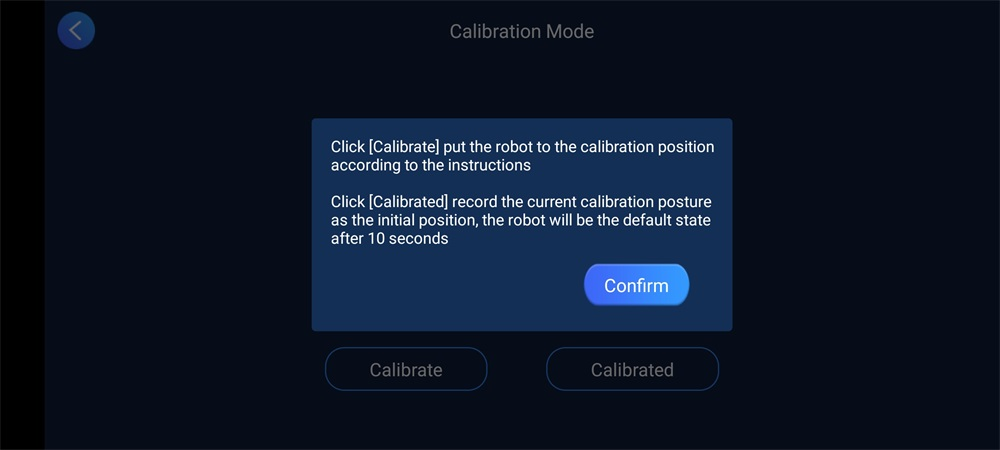
Click on "Start Calibration", and the XGO's servo will no longer output torque and allow you to rotate all joints. Place the XGO in the position shown in the figure, paying attention to ensuring that each leg's shoulder is perpendicular to the body, thighs are perpendicular to the ground, and calves are perpendicular to the thighs. * Open the gripper to the maximum range *, fold the robotic arm on your back, and whether the placement is vertical will directly affect the posture of the XGO during operation.


- After placing the standard, click the "Complete Calibration" button in the calibration interface, and XGO will return to its initial standing position after 10 seconds.

Replace the servo
Taking the replacement of the knee joint servo as an example, the diagram shows the replacement of the servo Note: There are a total of 15 different IDs for the robotic dog servo, which must be replaced with the same ID.
Servo replacement video tutorial link: https://www.elecfreaks.com/download/xgo/XGO-LITE2_servo_replacement.mp4
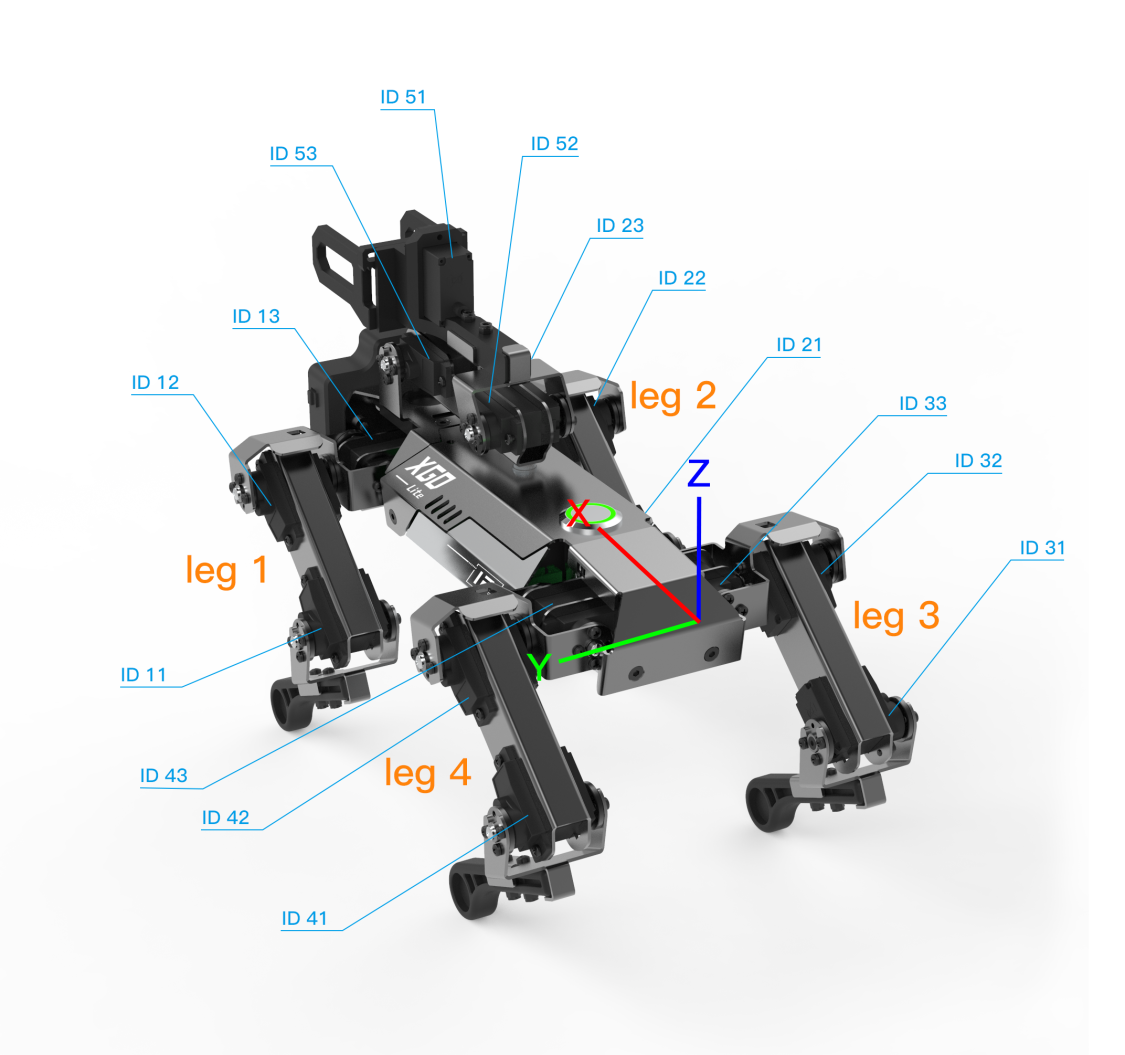
XGO coordinate system, legs, servo, numbering diagram
Step 1: Open the back cover of the robotic dog and remove the damaged knee joint servo cable from the drive board.

Step 2: Remove the servo wheel screws from the main and auxiliary servo wheels of the knee joint servo, and remove the lower legs.

Step 3: Remove the damaged servo and be careful not to pull the cable too hard.

Step 4: Thread the knee joint servo line through the corresponding position and fix the servo on the thigh sheet metal.


Step 5. Fix the lower legs on the main and auxiliary servo wheel, and note that the lower legs and thighs need to form a 90 ° right angle.

Step 6. Insert the cable onto the motherboard, close the upper cover of the machine dog, turn on the machine, and recalibrate the XGO.
