micro:bit Retro Arcade
Product introduction
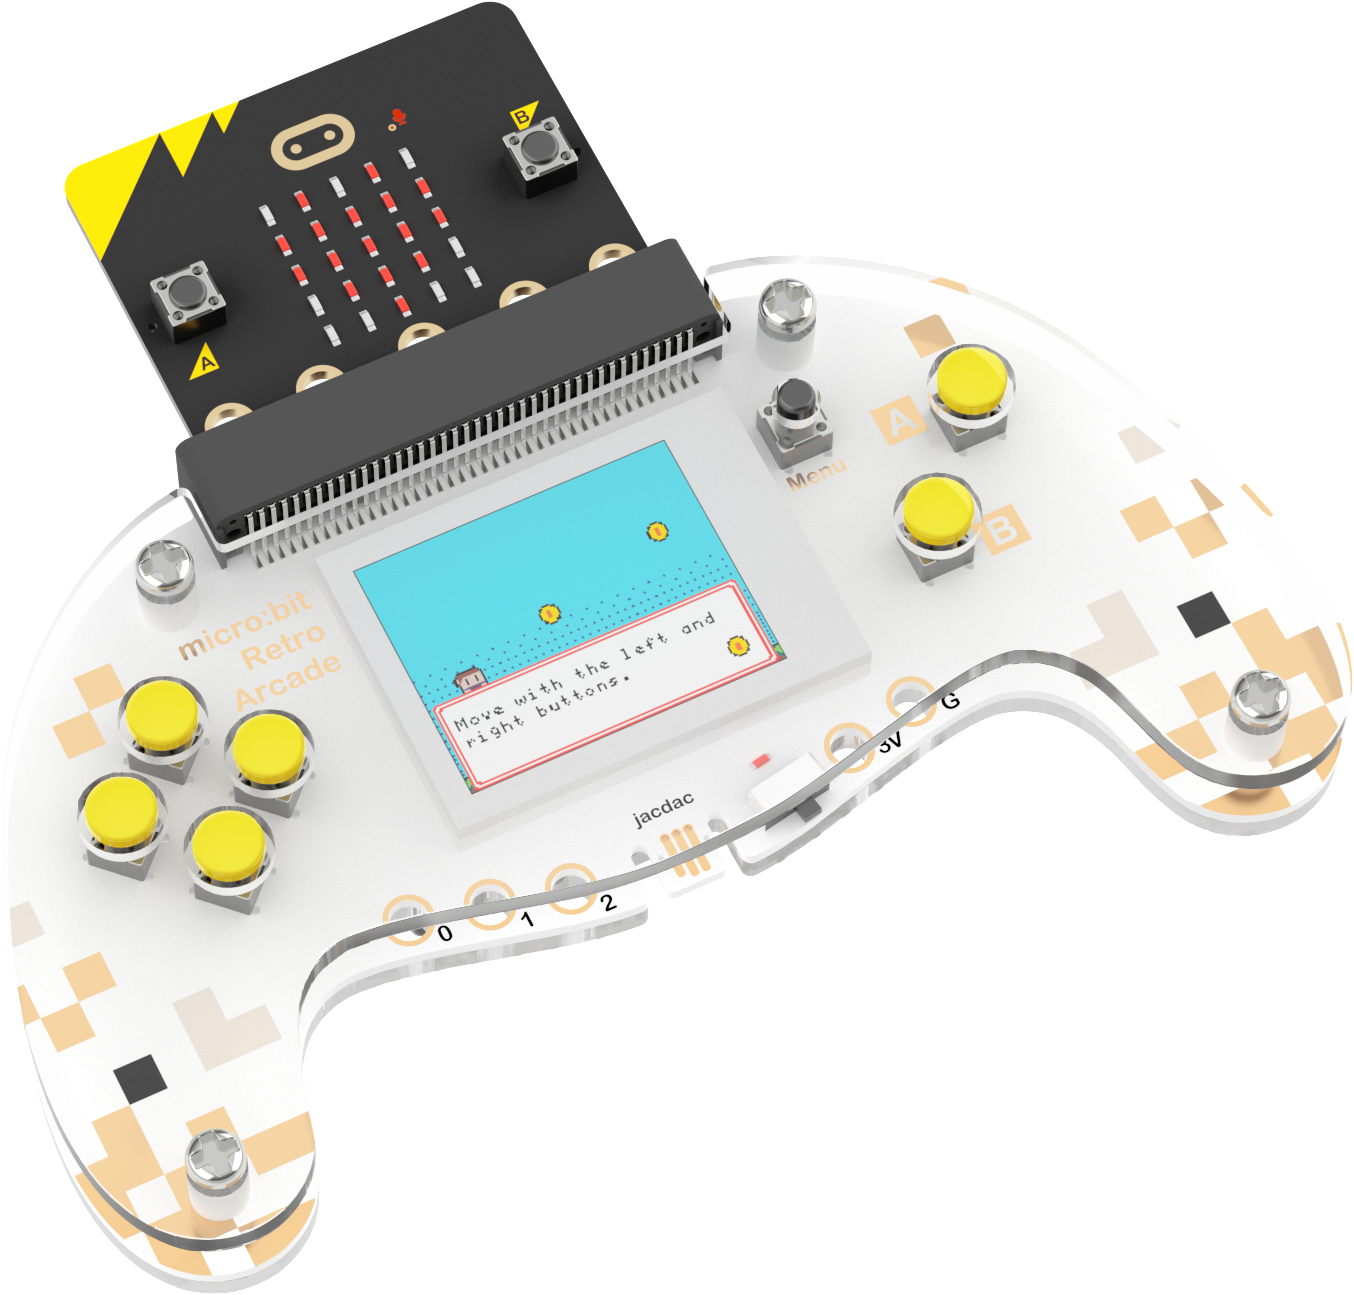
micro:bit Retro Arcade is a color screen joystick expansion board for micro:bit V2, it contains a TFT 160*128 color screen, 4 directional buttons, two A/B buttons and a reset button. micro:bit Retro Arcade can be used with micro:bit V2 to program games online and play offline on the Microsoft Arcade programming platform. It is a simple and fun way to help children write their own games and understand the mystery behind them. It also supports custom game characters, diverse scenarios and plot design using graphical programming software, making it easy for everyone to achieve fun electronic creations and unlimited game ideas. micro:bit Retro Arcade can also be used as a remote control handle in addition to a game programming learning machine.
Purchase link
Features
- It can be used as a remote control handle to communicate with the robot trolley
- It can be used as an extended game handheld to create individual games through graphical programming
Basic parameters
| Projects | Parameters |
|---|---|
| Screen Type | TFT screen |
| Screen size | 128 x 160 |
| Size | 13.79cm x 8.13cm |
| Net weight | 52g |
| Power supply method | Dry Battery |
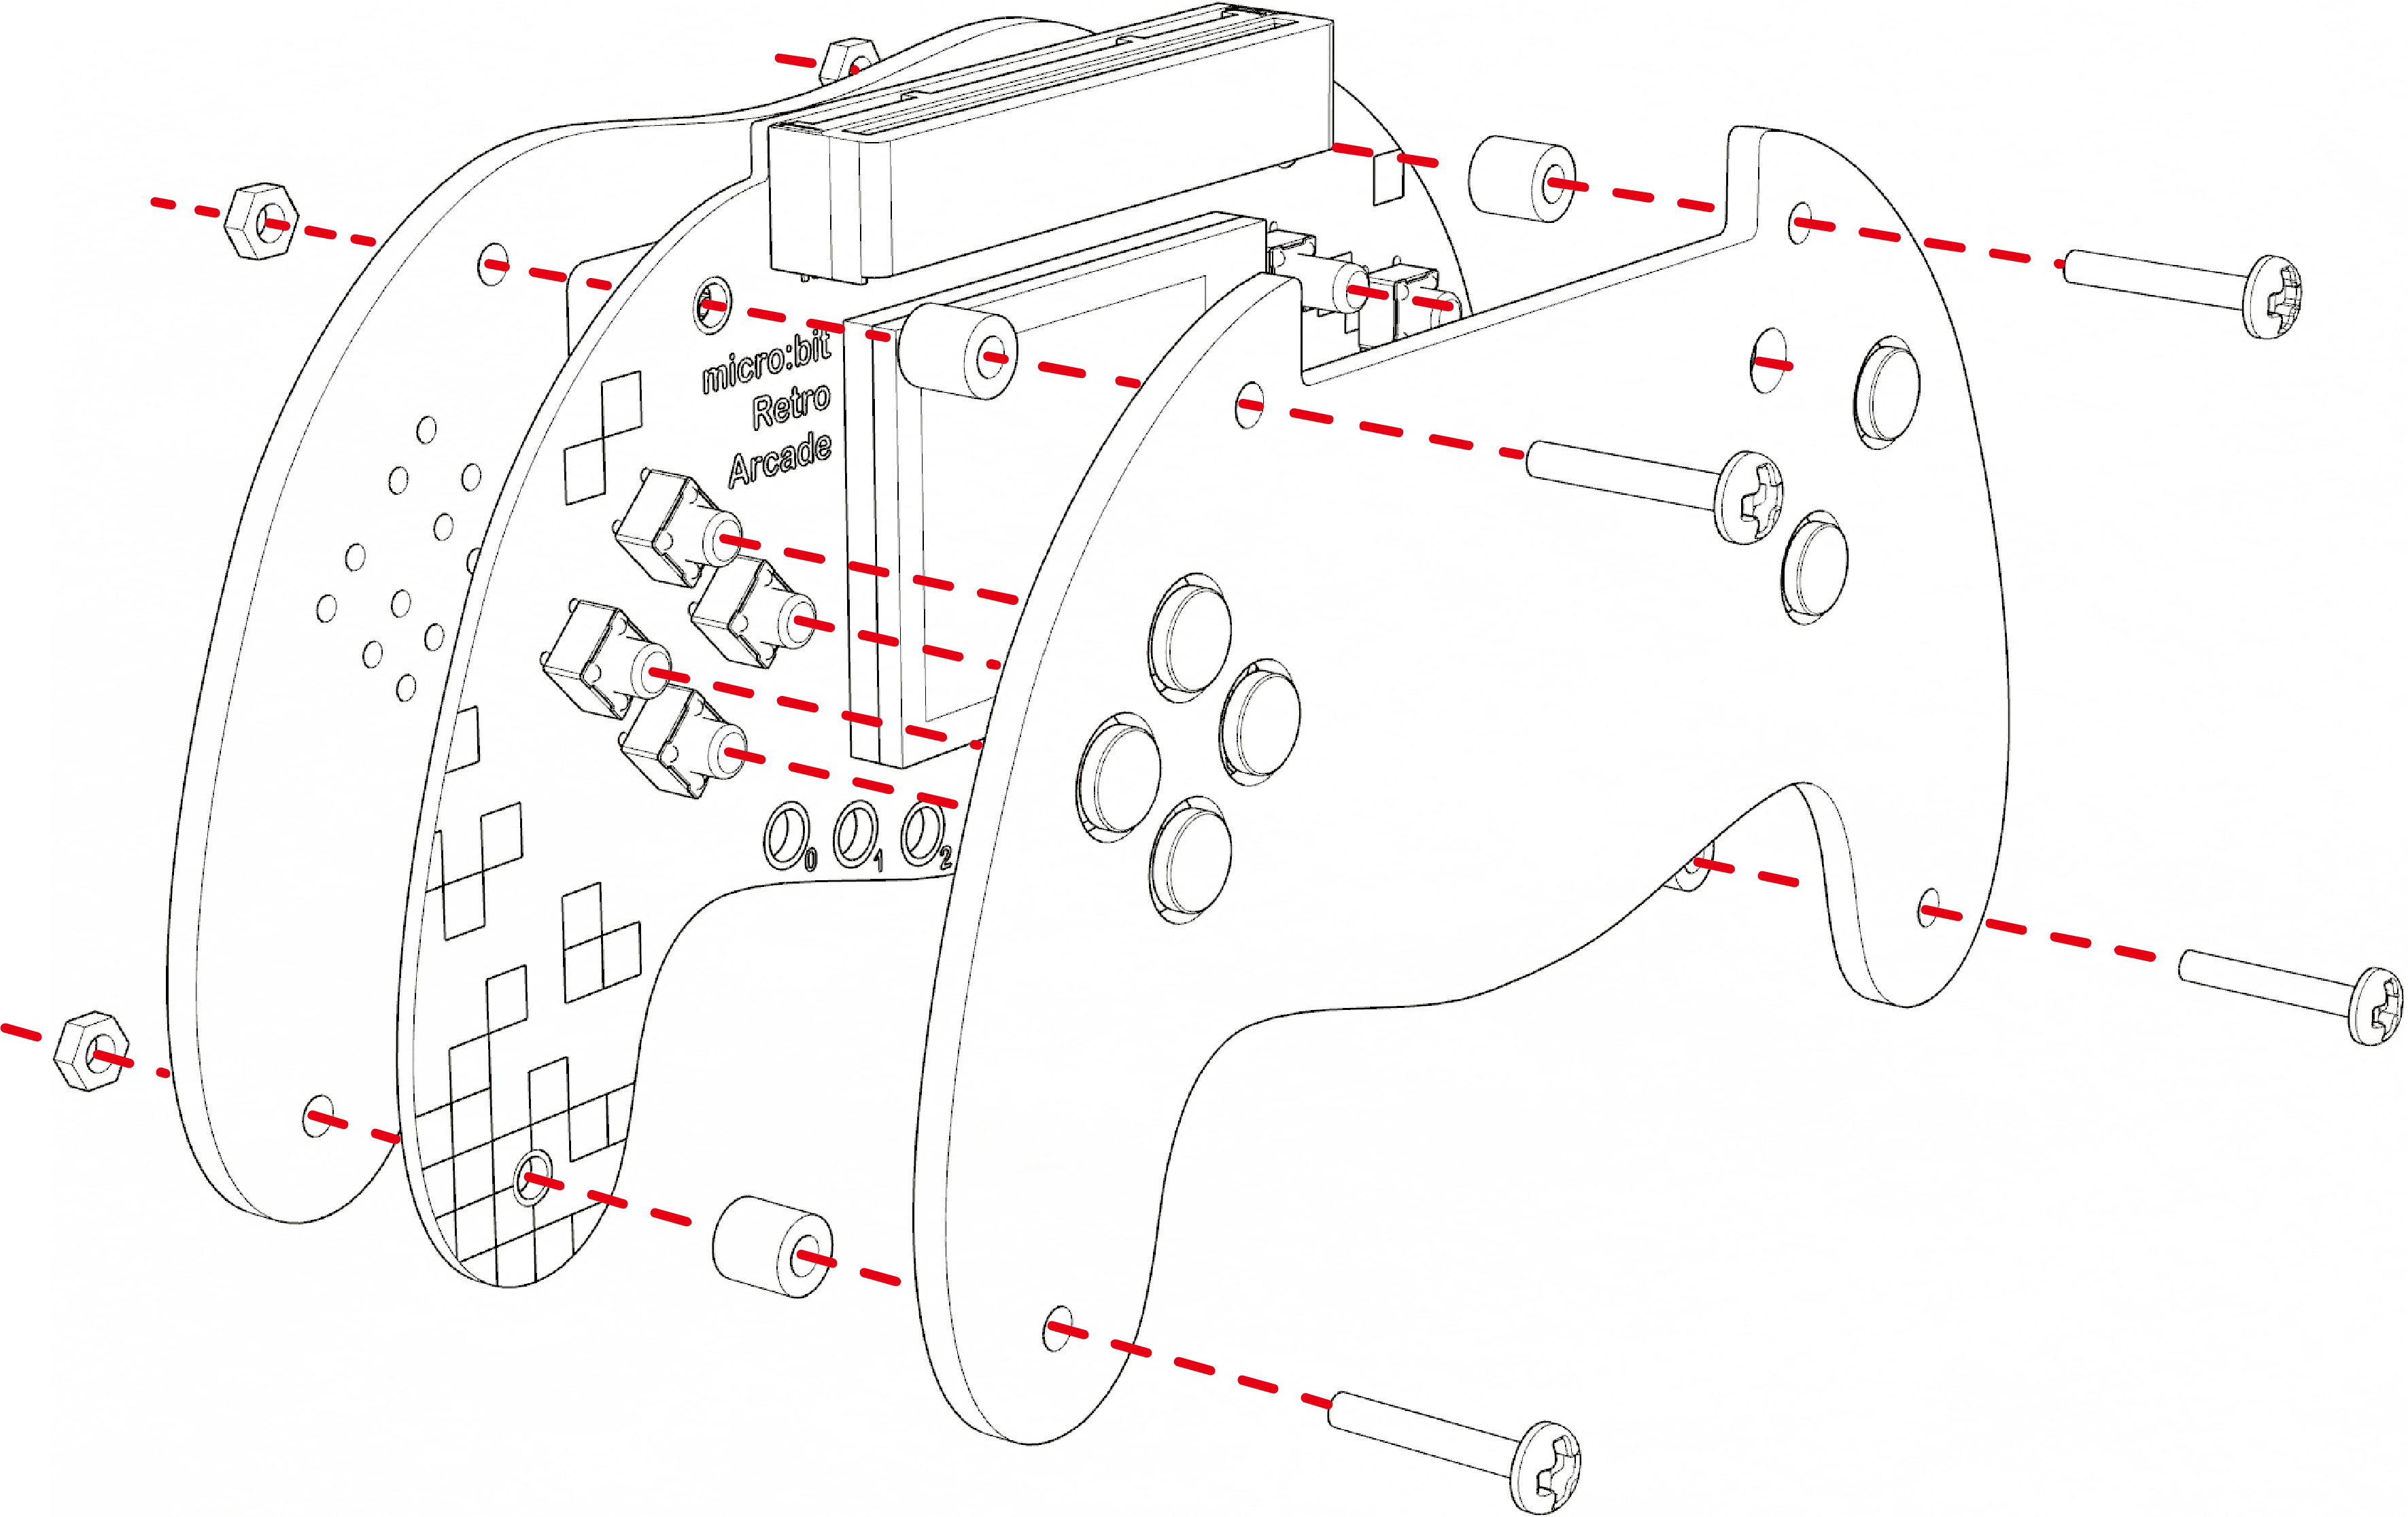
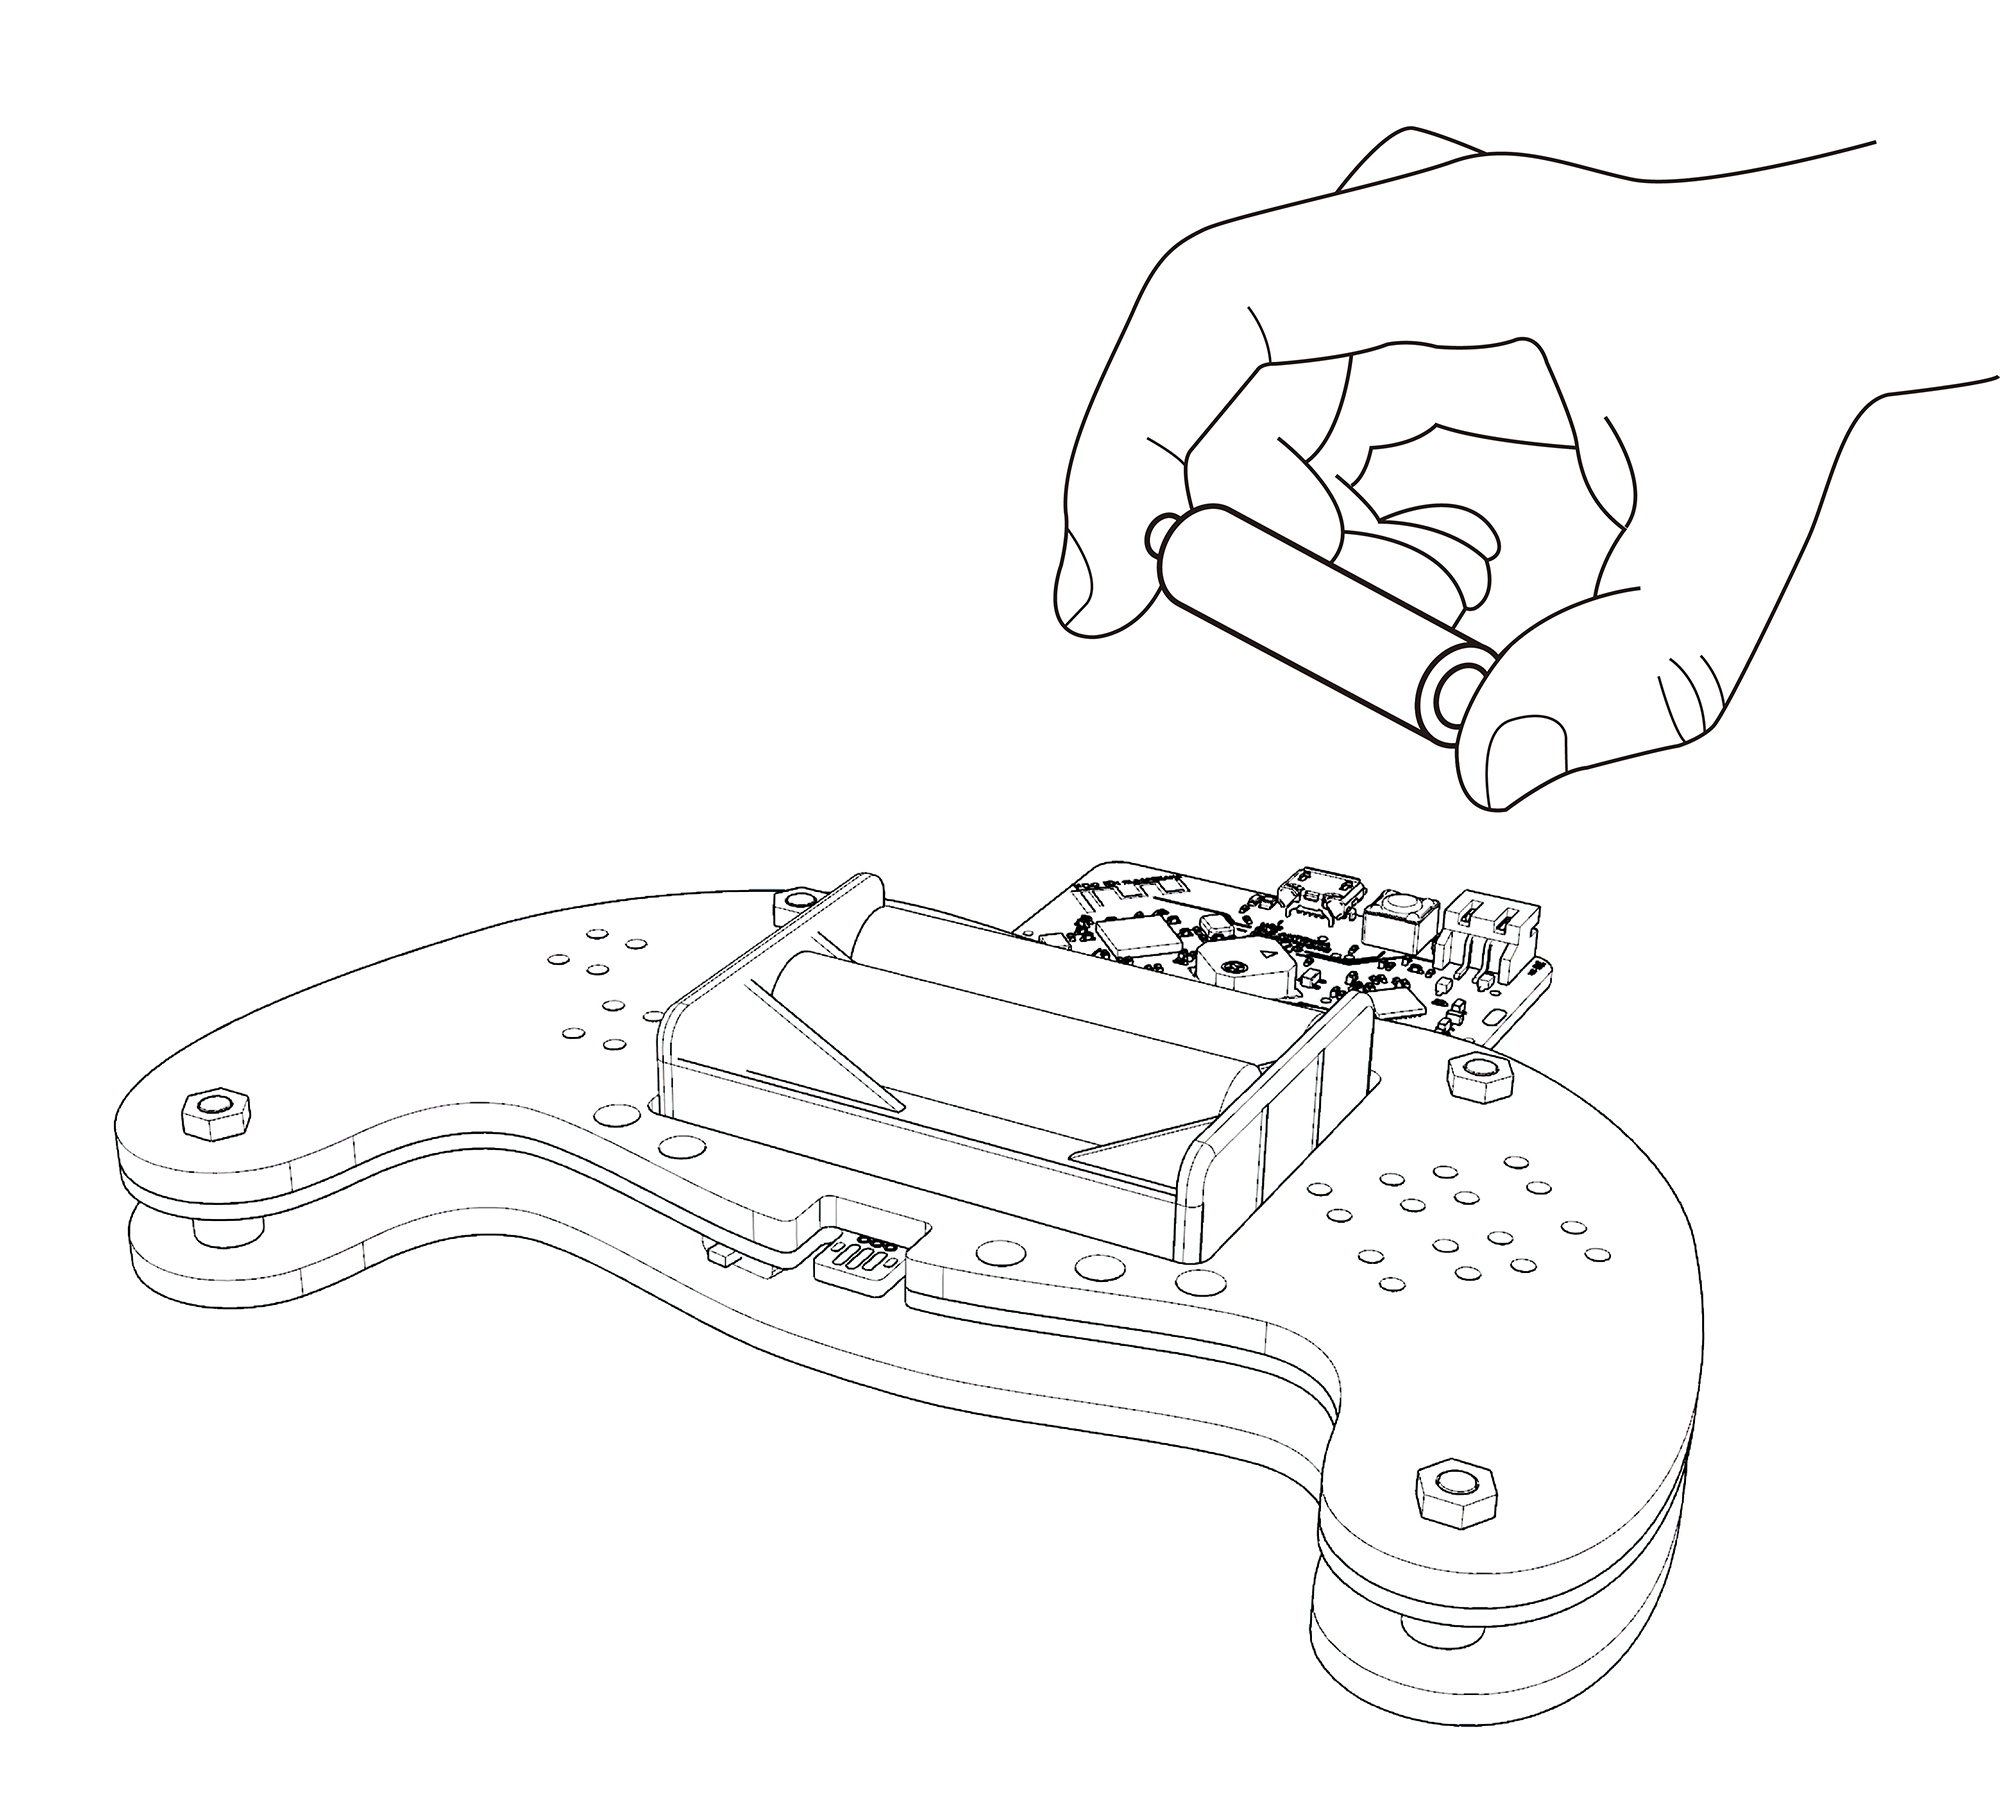
Installation steps
Assemble the micro:bit retro arcade
install battery
turn on the power
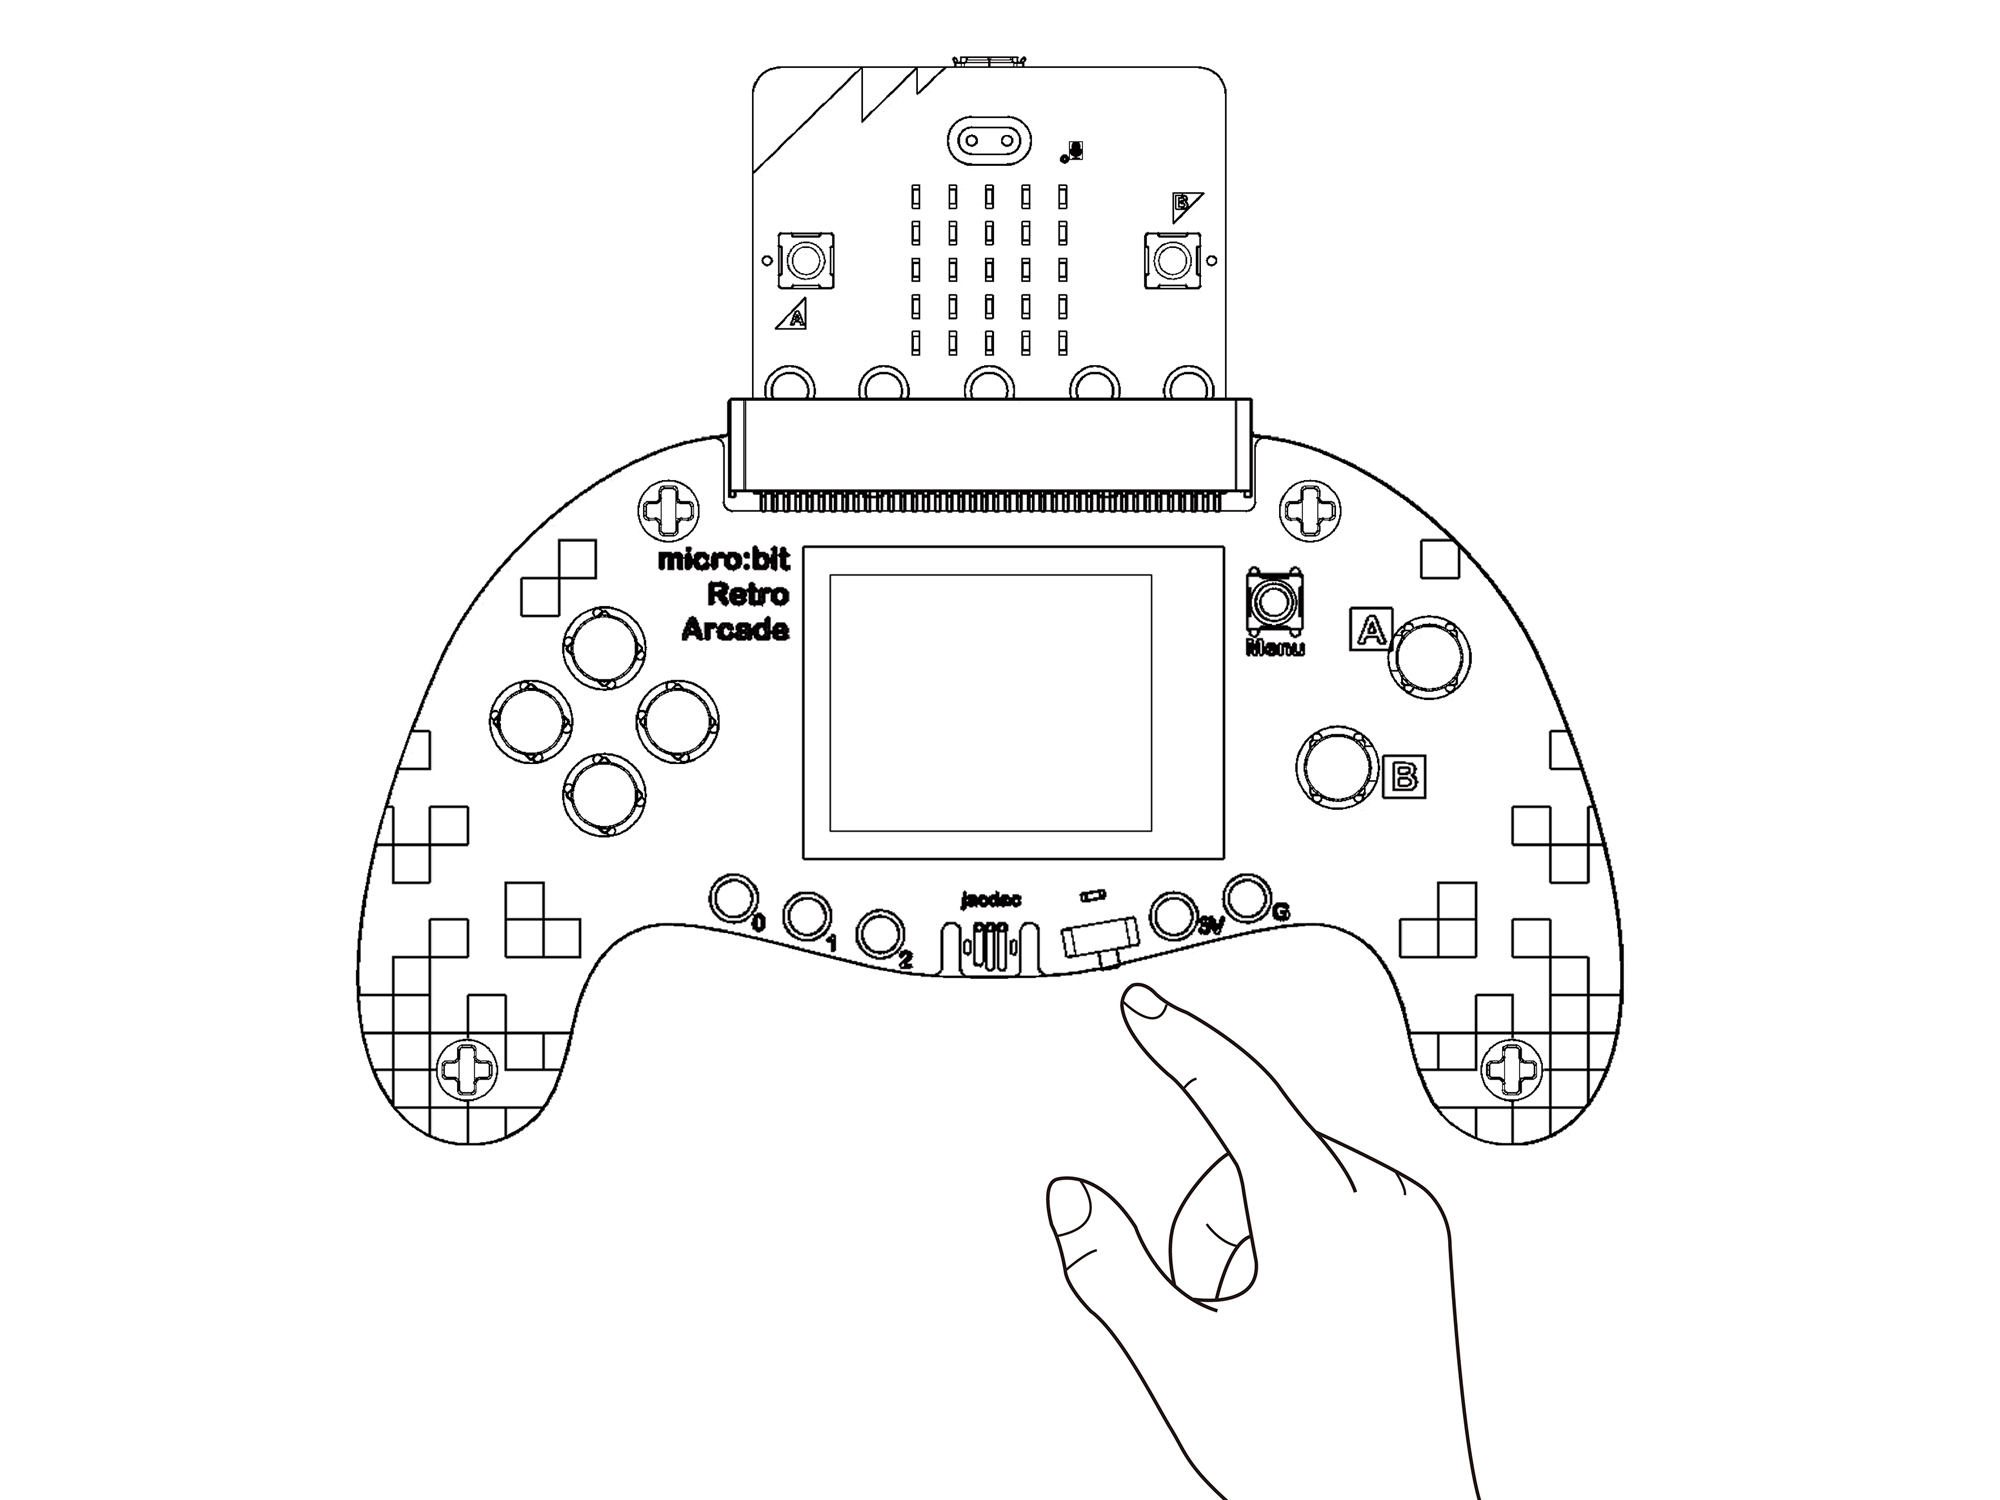
The micro:bit V2 is combined with an expansion board and microUSB is connected to the micro:bit V2.
Game Programming Guide
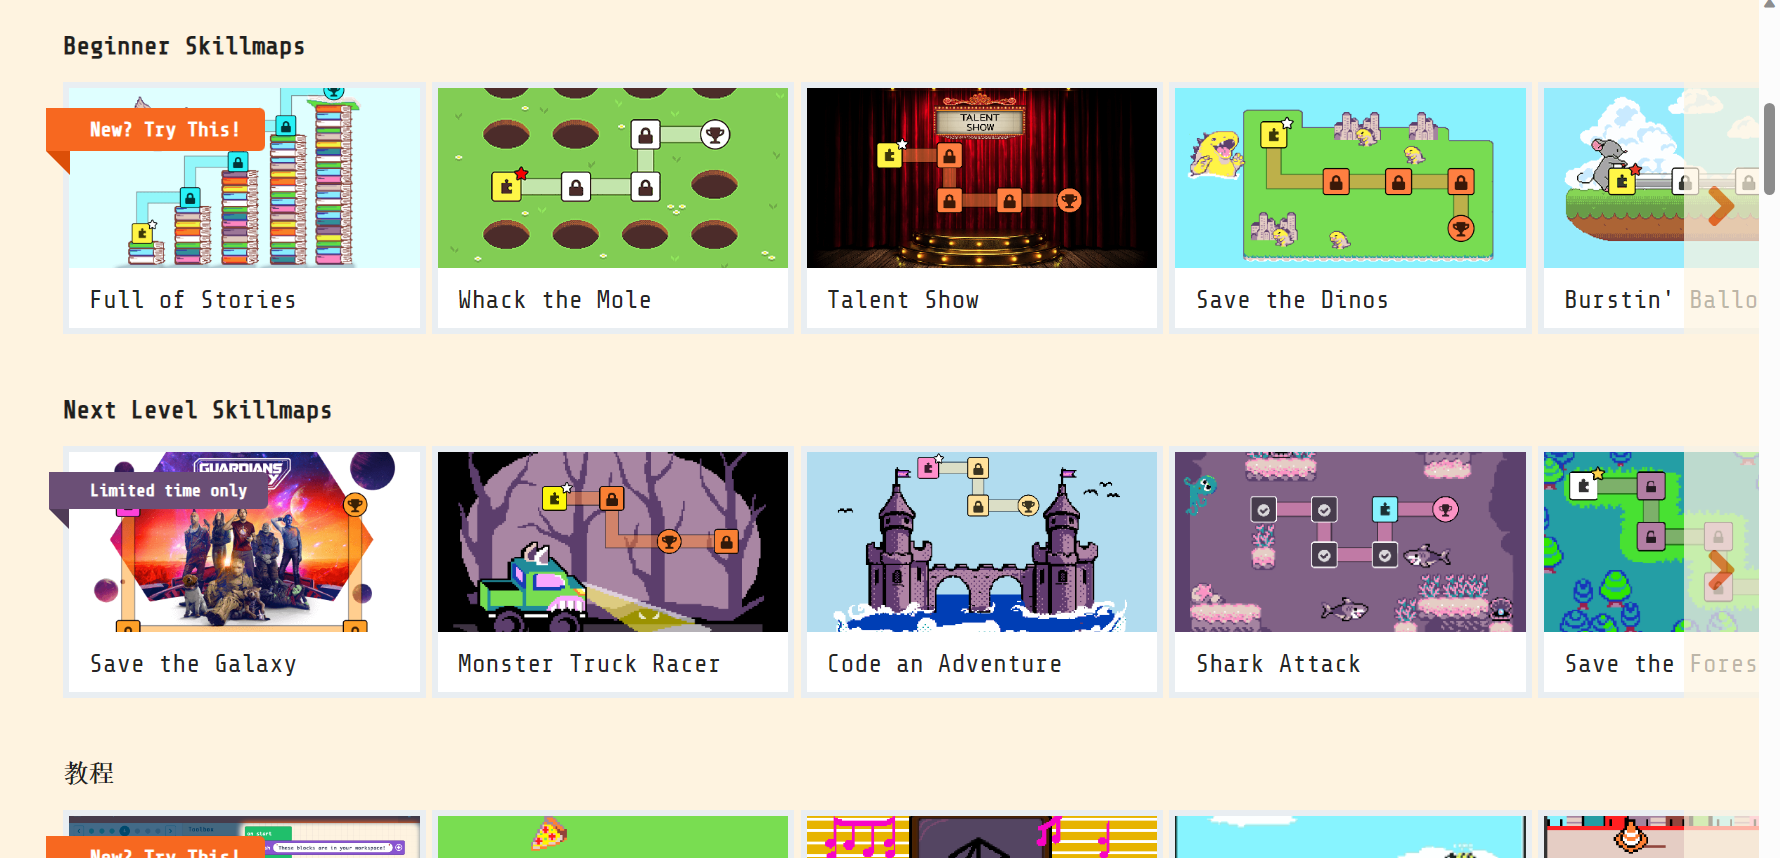
Welcome to learning Retro Arcade! For more information, please refer to: https://arcade.makecode.com/
Click on the corresponding project to access the project tutorial and learn through the process of game development.
At this time, if power is supplied from the micro:bit V2 side, the power switch of the expansion board will be on regardless of the switch. The expansion board power switch will control the power supply from the expansion board side.
Programming Platform
Arcade game programming platform address: https://arcade.makecode.com
Programming page introduction
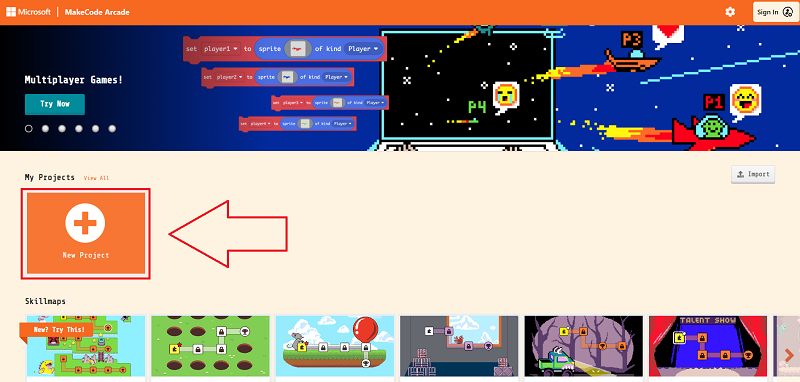
- Click on the section numbered 1 and enter the project name to create a project to start programming
- The following part of number 2 is a simple tutorial provided by some platforms and the game works shared by the community

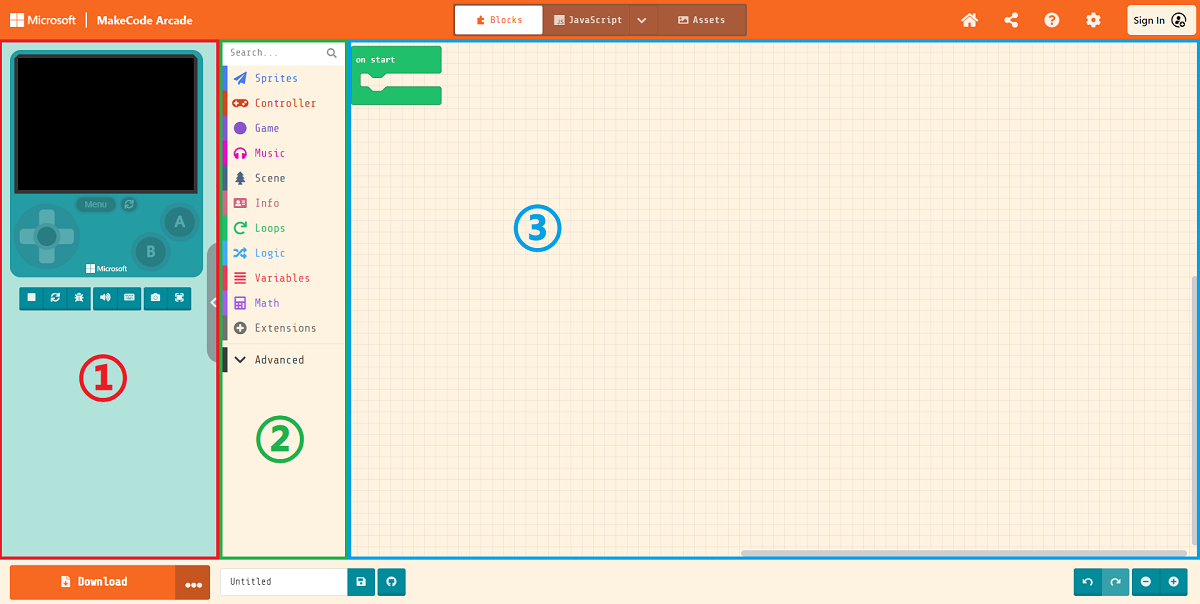
Introduction to the programming interface, for the basic introduction to the first roughly divided into 3 parts need to understand
- Online simulator: Simulate the running effect in real time according to the logic of the code
- Programming blocks bar: we drag in programming code from here for programming
- Code editing area: we drag out the code from the block bar and put it together here to finish building the image, interface and logic of the game
Rapid Creation
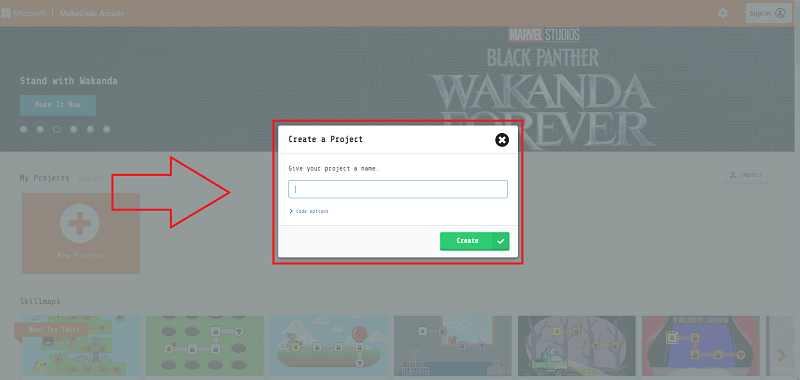
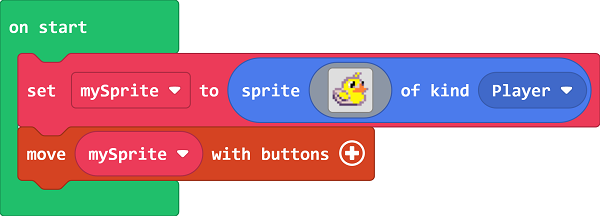
Click New Project.
Enter a project name to create a new project.
Create sprites and click on the gray rectangle in the block to open the image editor.
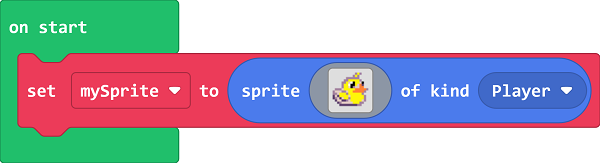
Customize the sprite image or just select a preset sprite from the gallery. Control sprite movement by moving the sprite blocks with the buttons.
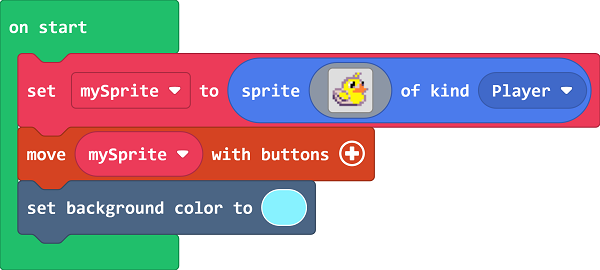
Set the screen background color.
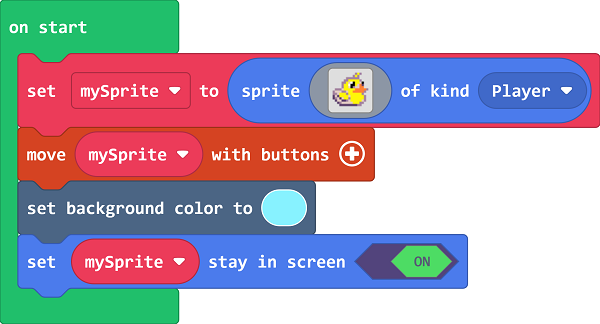
To prevent the sprite from moving out of the screen screen, set the sprite to be within the screen range.
Game Download
Download steps
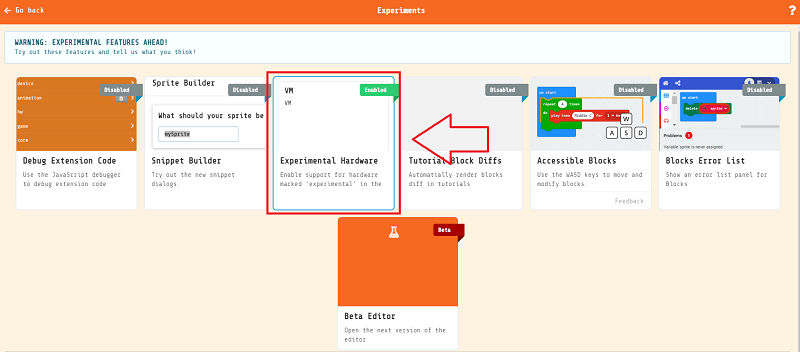
Since the micro:bit V2 (nRF52833) is still in beta for the Arcade platform officials, we need to first go to the platform's settings page to open up the hardware options that are still in the trial version.
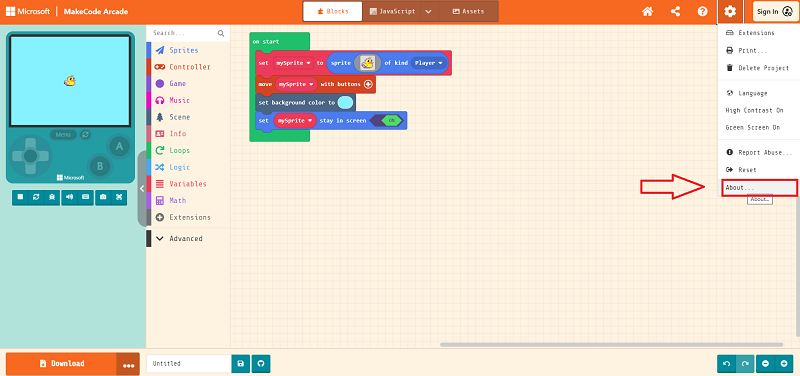
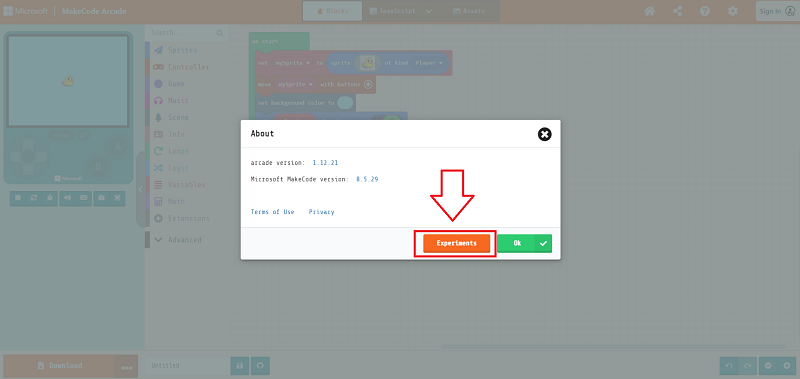
Make sure Expermental Hardware is enabled (you only need to set it once)
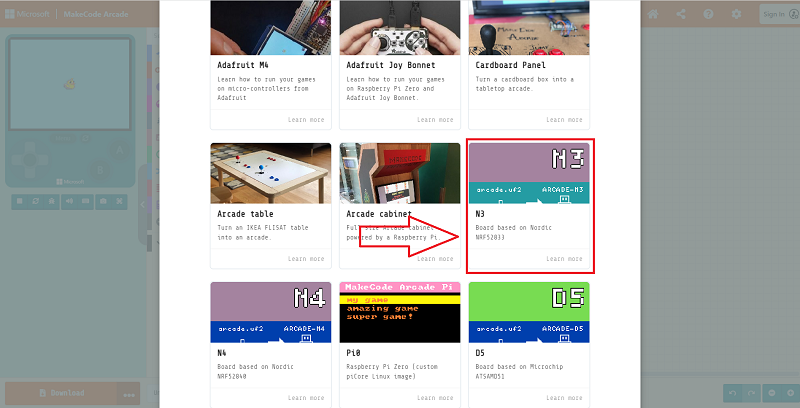
Then go back to the programming home page, click on the download button in the bottom left corner, and in the pop-up select hardware window pull down to the bottom and select N3
You will get a file in .hex format, drag it into the MICROBIT drive to run it on micro:bit V2 + Microbit Retro Arcade.
Remote Control Handle Guide
Material Preparation
The following materials are required for this case.
- micro:bit V2 × 2
- Microbit Retro Arcade × 1
- Cutebot × 1
Cutebot side program
Programming platform
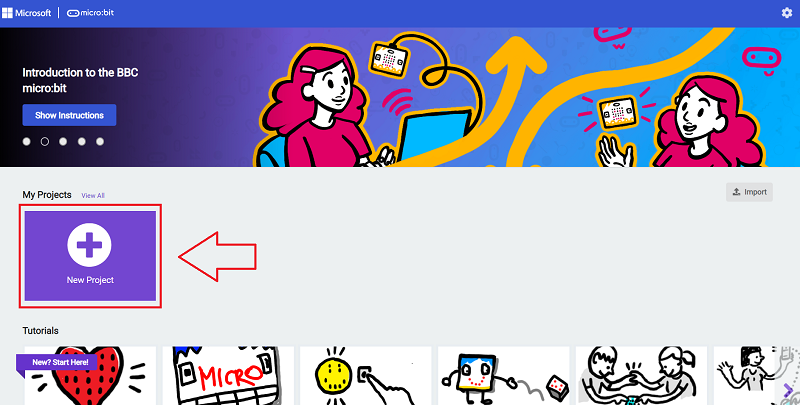
Link: https://makecode.microbit.org/# Create a new project to go to the programming home page
Add extension
Add the Cutebot Smart Racing Extension software library and click on the extension.
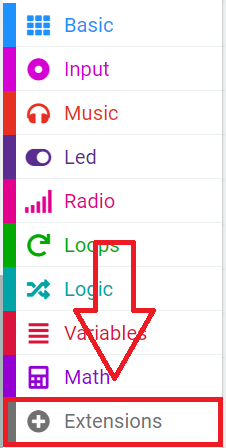
Type "cutebot" in the search field, click Search, and add the extensions library.

Writing programs .
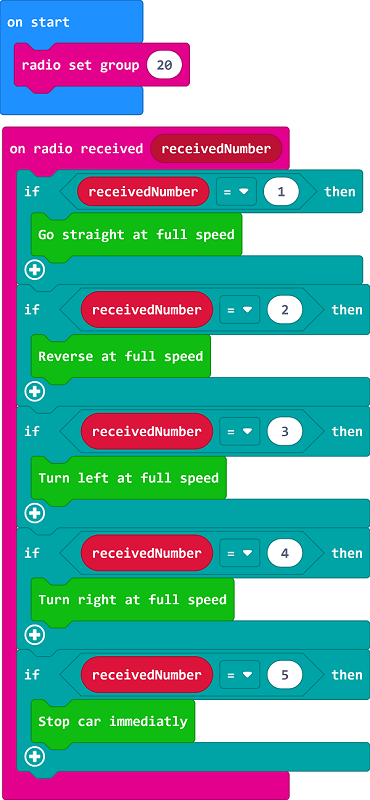
Link: https://makecode.microbit.org/_gC9gJDET83xd
Remote control end program
Programming Platform
Link: https://arcade.makecode.com/#
Create a new project to go to the programming home page.
Add extension
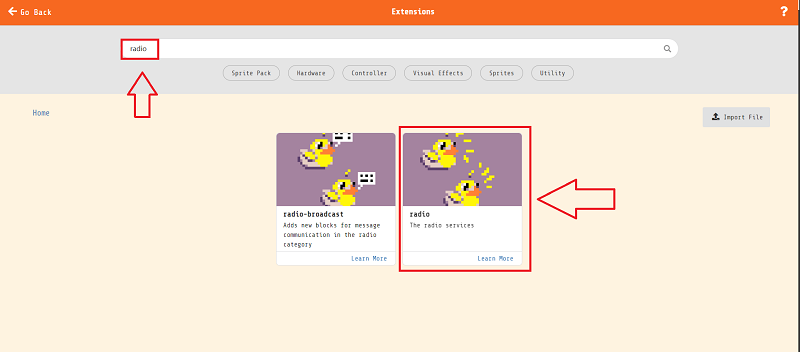
Add the wireless communication extension library and click Extend.
Type "radio" in the search field and click Search to add the extension library.
Writing programs .
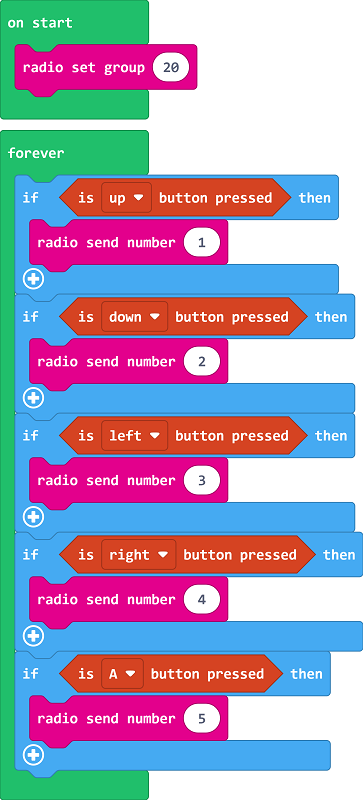
Link: https://makecode.com/_1HCLTf71TFJk
Download steps
Since the micro:bit V2 (nRF52833) is still in beta for the Arcade platform officials, we need to first go to the platform's settings page to open up the hardware options that are still in the trial version.
Make sure Expermental Hardware is enabled (you only need to set it once)
Then go back to the programming home page, click on the download button in the bottom left corner, and in the pop-up select hardware window pull down to the bottom and select N3
You will get a file in .hex format, drag it into the MICROBIT drive to run it on micro:bit V2 + Microbit Retro Arcade.
More Tutorials
For more tutorials, please refer to: https://arcade.makecode.com/