Case 01 The Pull Ups Robot
Introduction
Pull-ups are exercises where you use your own strength to pull your body up to a bar and then lower it back down, repeating it several times. It is a great exercise for the body and can make our back, shoulders and arms stronger. Pull-up exercises also make our bodies more upright and toned. In this lesson we will use the Nezha Inventor's Kit V2 to create a robot that can do pull-ups.
Teaching Objectives
- By creating a pull-up robot, students will learn about the ease with which parallelograms can be deformed and how to use this property to move the robot arm.
- Through the creation of the pull-up robot, students will learn how motors work and how to use them to drive the movement of the robot arm.
- By building a pull-up robot, students will understand the meaning and benefits of the pull-up movement and how to simulate the process of pulling up.
- Students will develop their hands-on, creative, collaborative and problem-solving skills through the creation of a pull-up robot.
Teaching Preparation
A timer
Teaching Process
Introduce
Introduce students to the background and objectives of pull-up exercises and robot building to stimulate their interest and curiosity.
Pull-ups are an exercise that works our back, shoulders and arms, but some people may find it too difficult or there is no suitable place for it, so we can use blocks to make a robot that will do pull-ups. In this way, we will not only be able to exercise our hands and creativity, but also learn knowledge and skills in mechanical construction, programming and more. Would you guys like to give it a try?
Exploration
In small groups, students are asked to think about how to use block materials to create a robot that does pull-ups, focusing on the properties of parallelogram blocks, the use of motors and the design options for the robotic arm.
- The fact that parallelogram blocks can be deformed and that the opposite sides are still parallel after deformation so that the robotic arm can be bent and straightened;
- what is reciprocal movement, i.e. movement that is repeated in two opposite directions, e.g. in a pull-up movement, the body moves reciprocally in both directions, up and down;
- the motion of the motor is circular, while the motion of the pull-up is reciprocal and we need a structure to convert the circular motion into a reciprocal motion;
- The design of the mechanical arm can be determined according to your own ideas and creativity, but attention should be paid to the stability and feasibility of the structure.
Practice
Work in groups to create a robot that can do pull-ups using building blocks according to your design.
Build a robot that does pull-ups from blocks according to your own design. For example, use parallelograms to build the skeleton of the robot arm and motors to drive the joints of the robot arm.
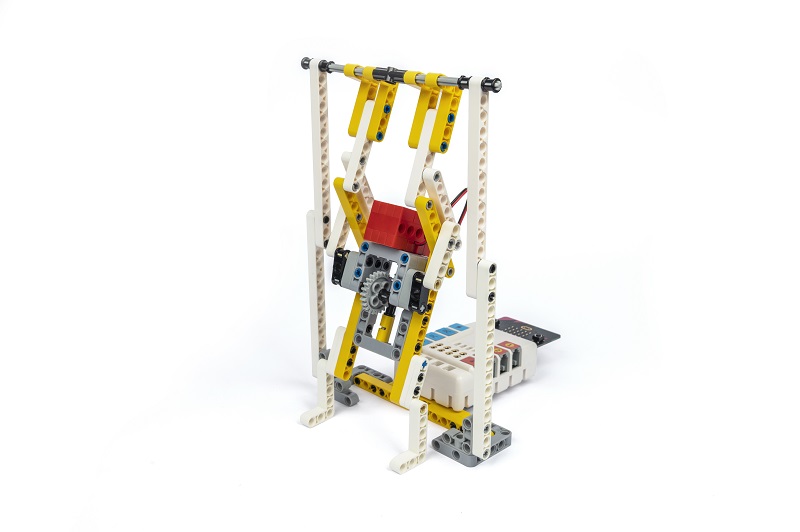
Examples
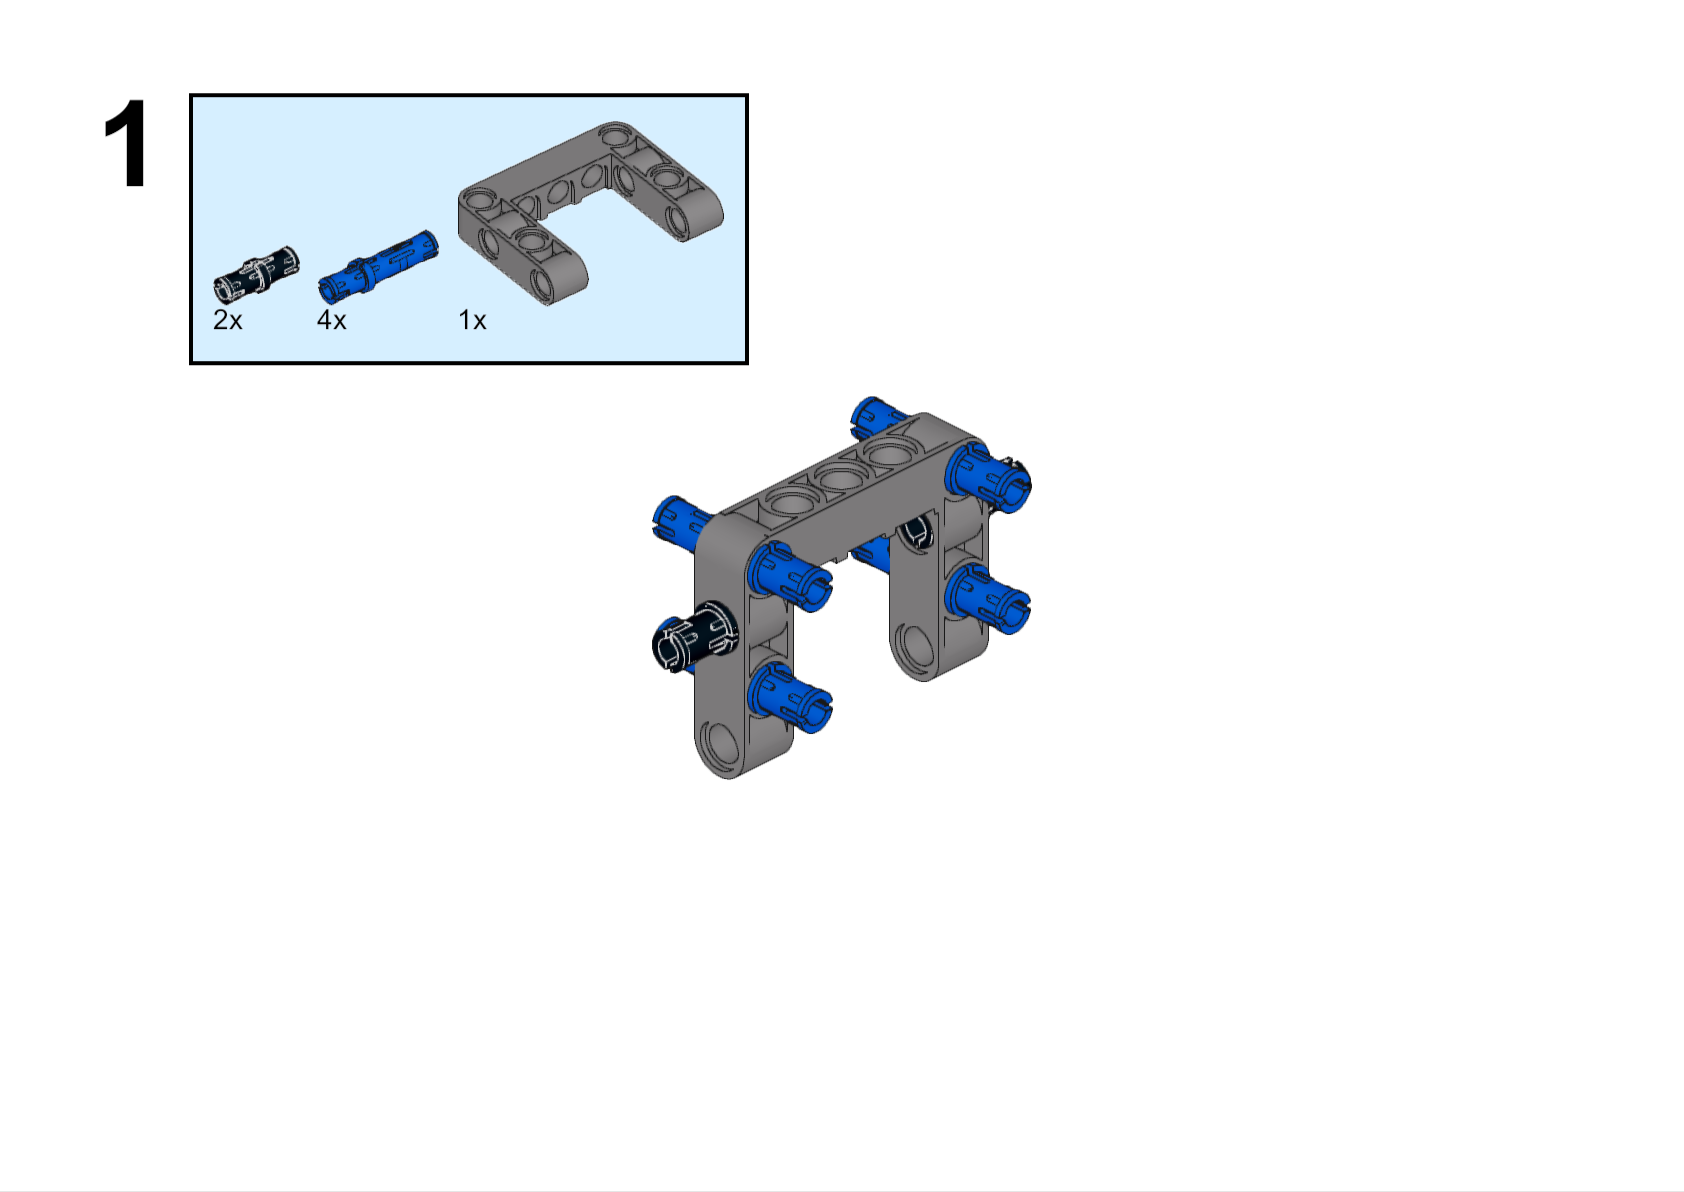
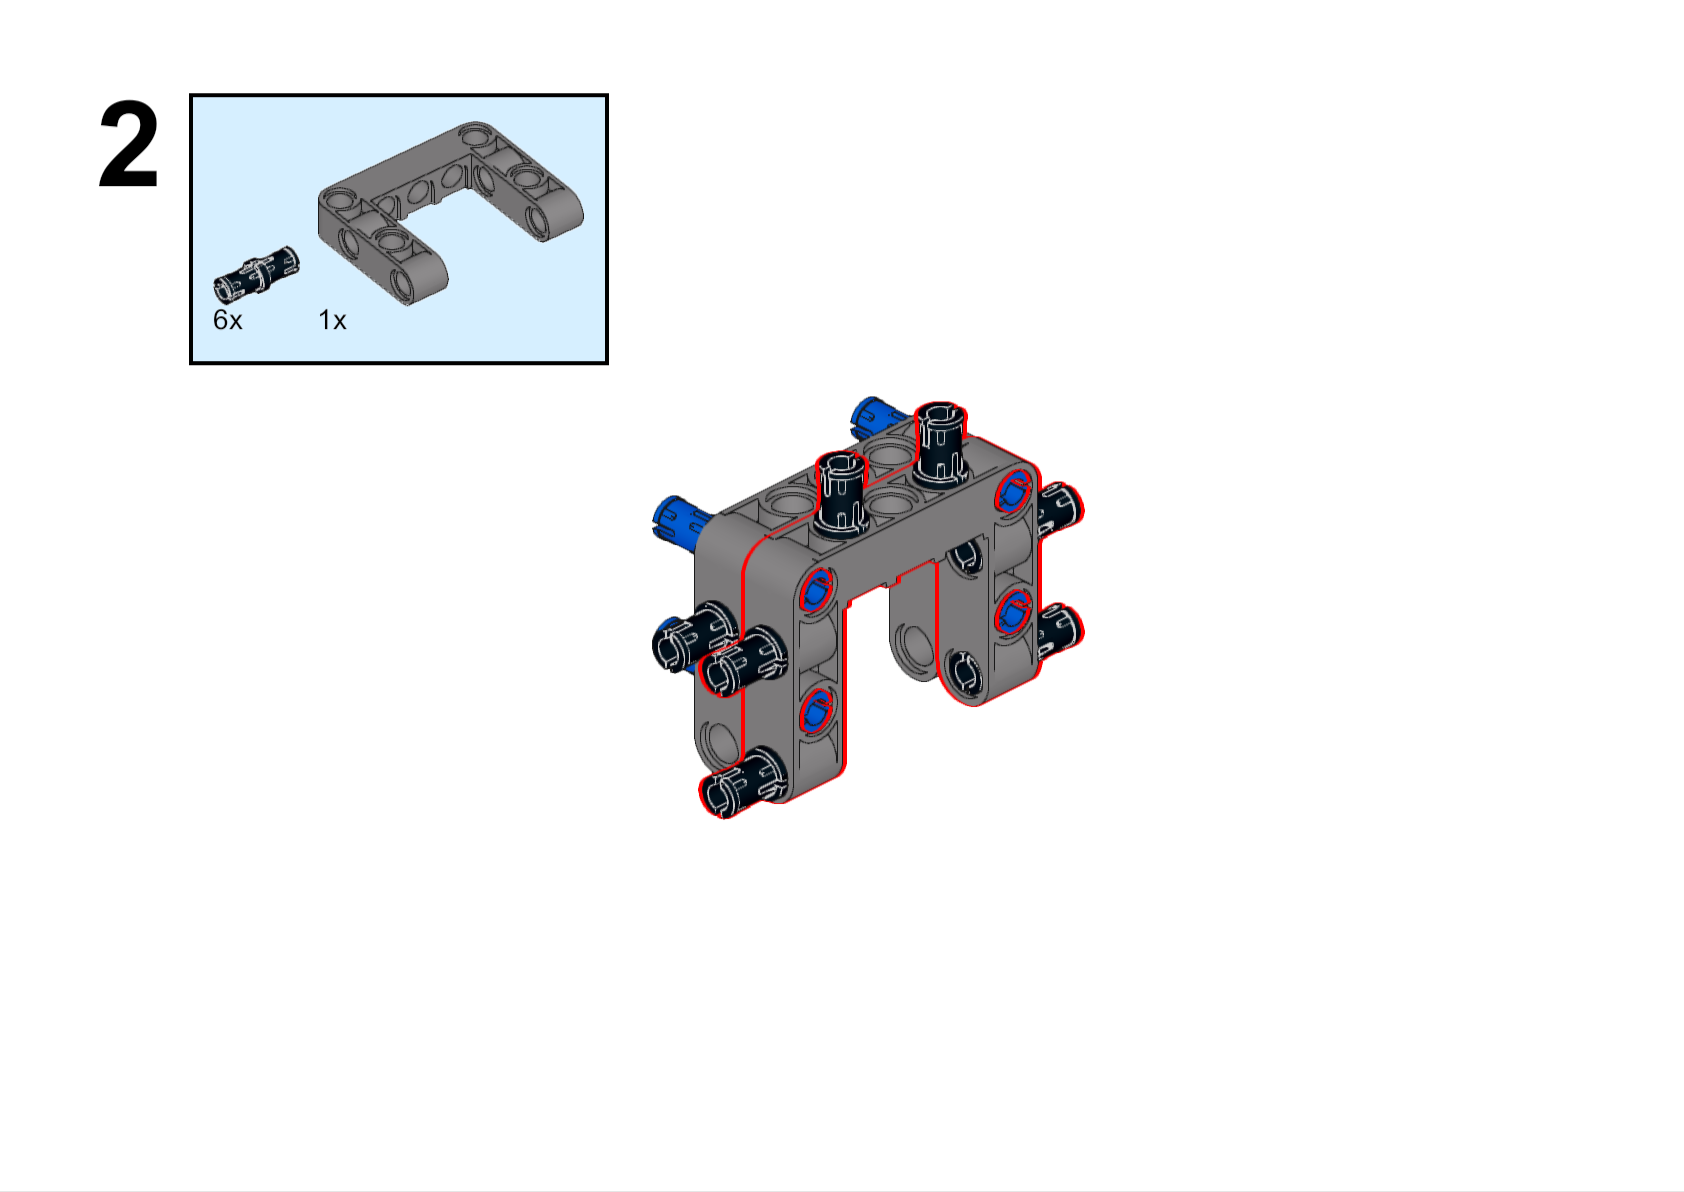
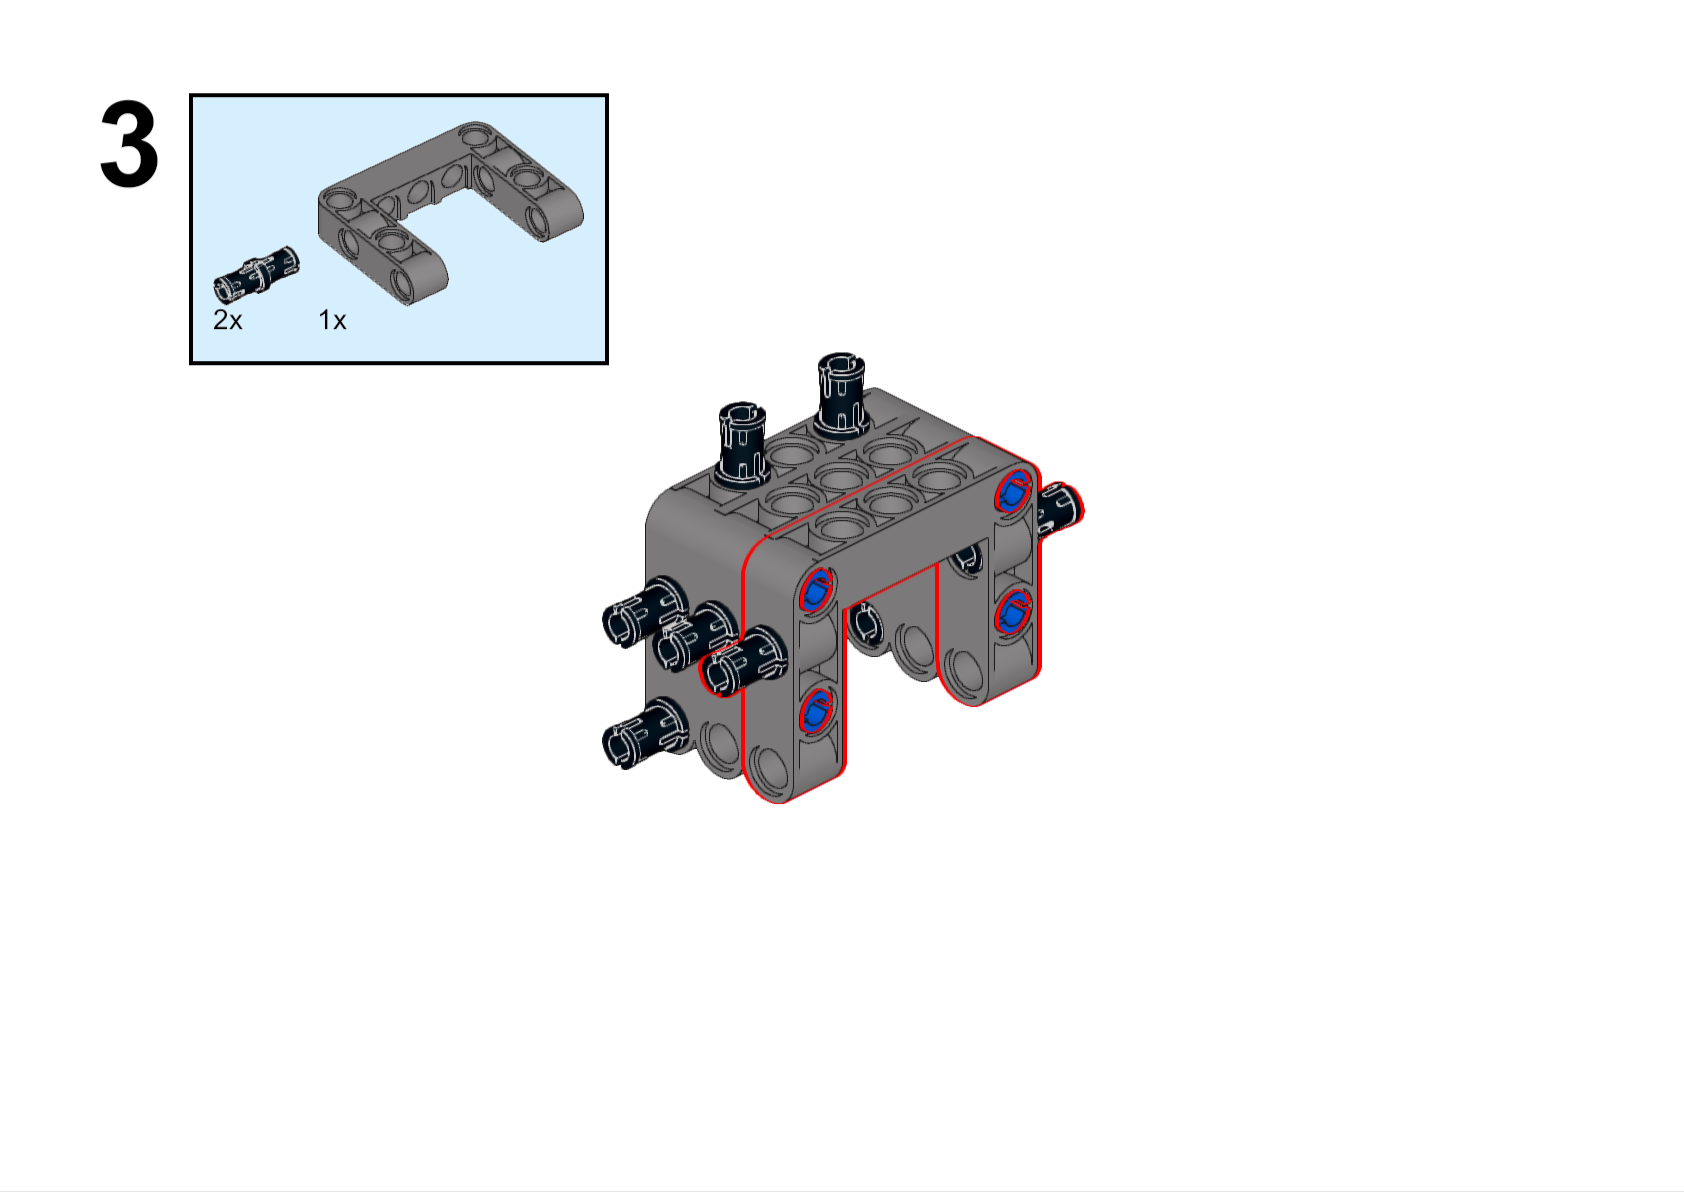
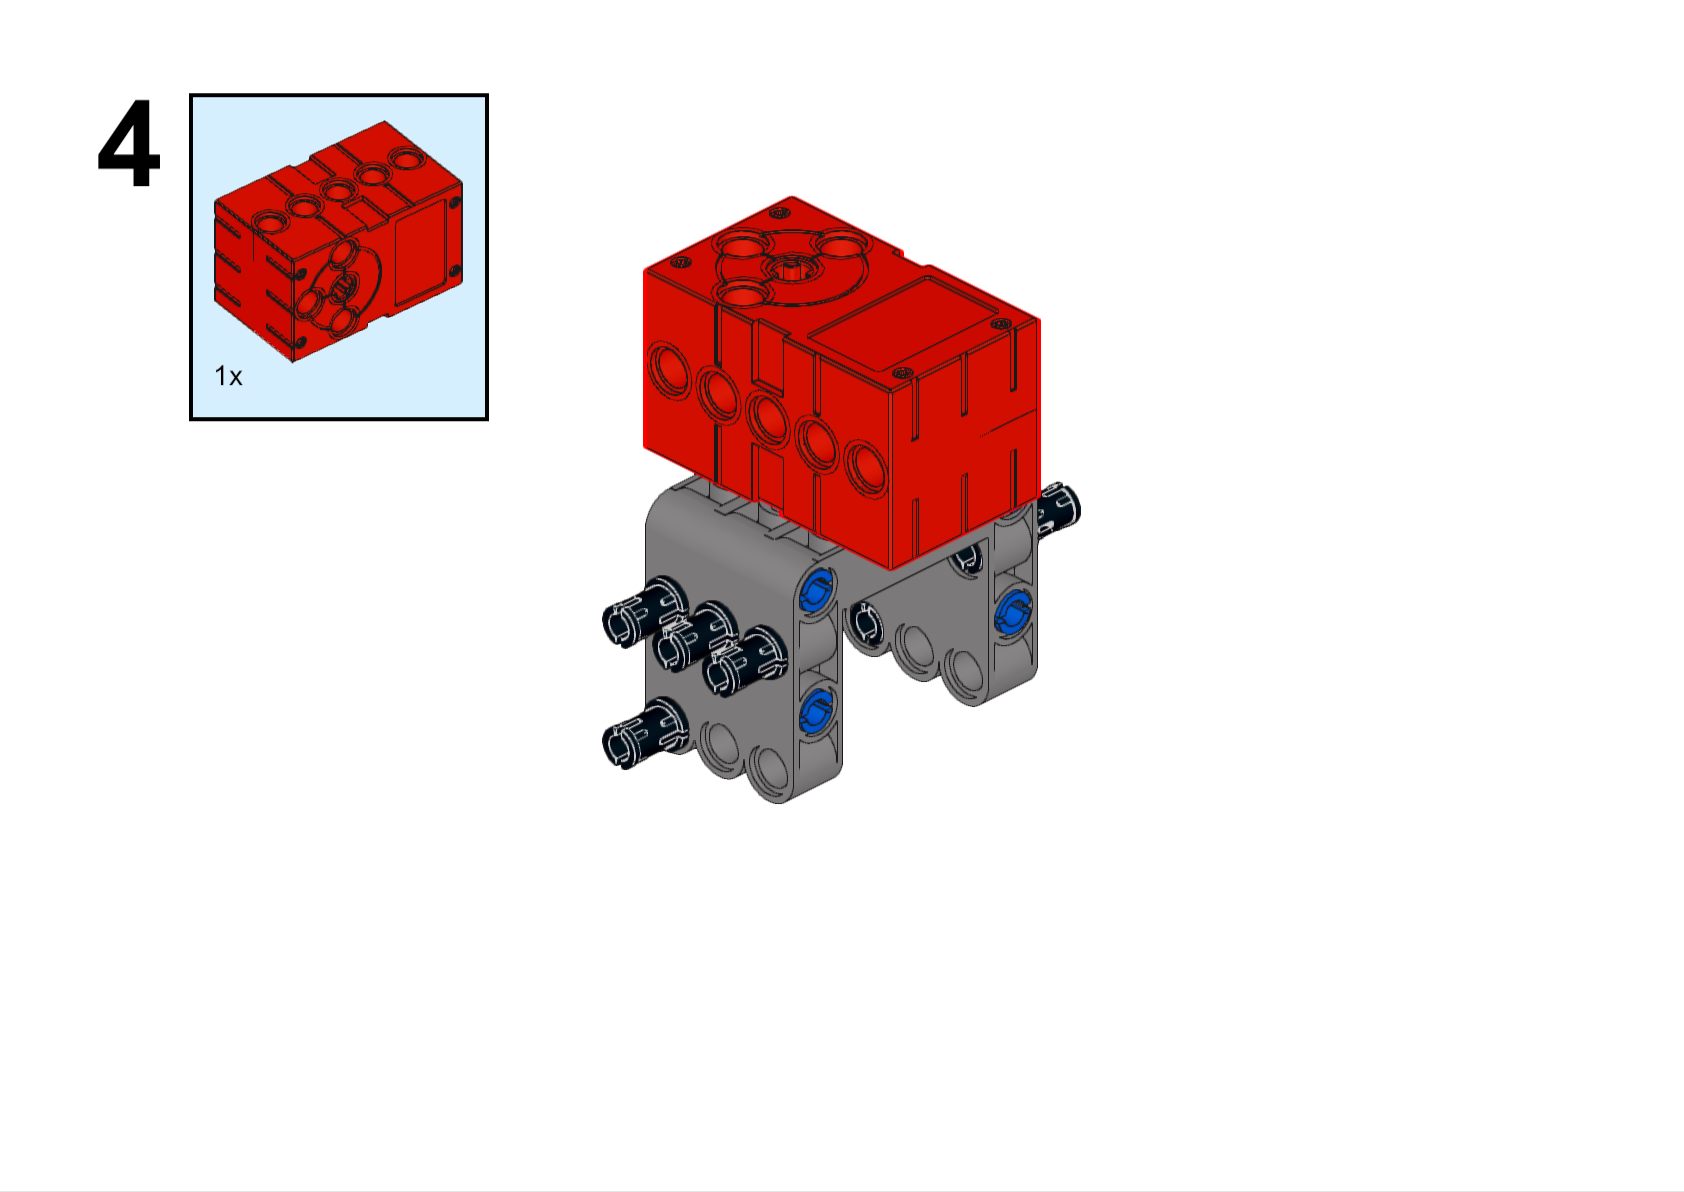
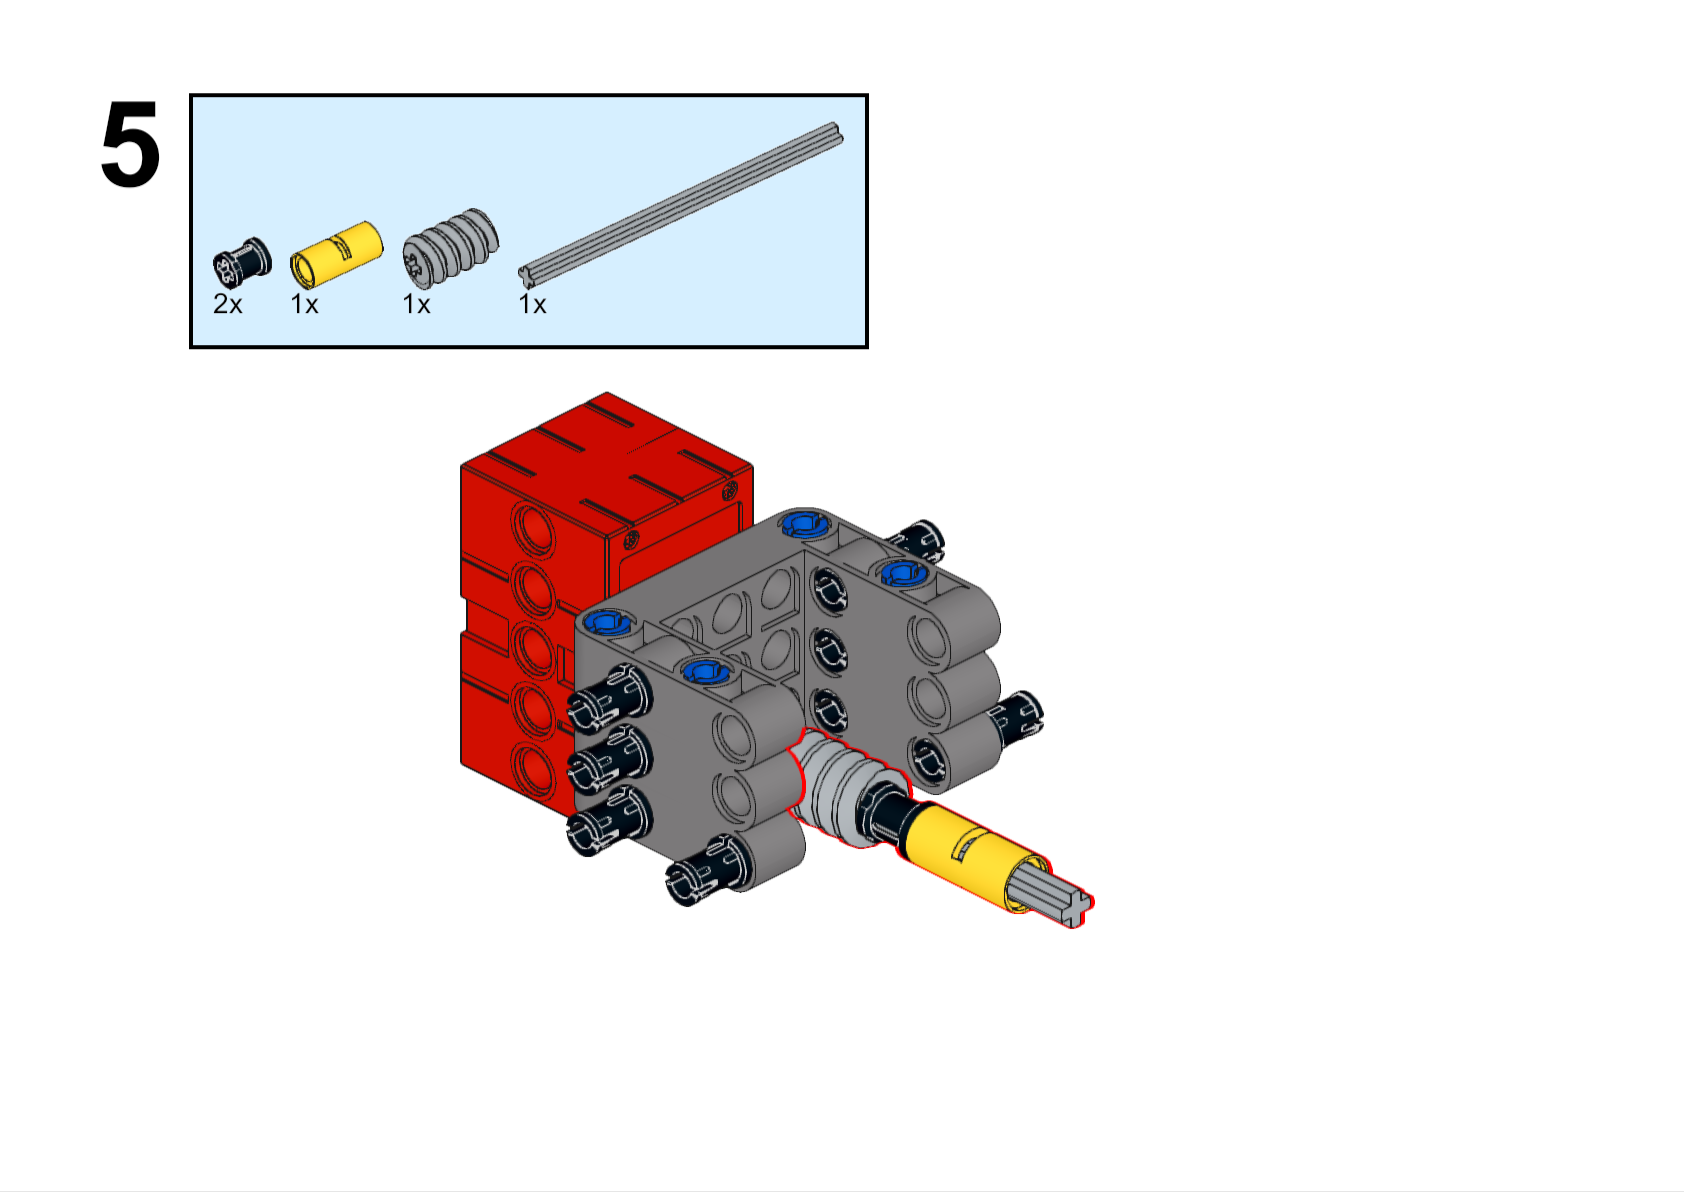
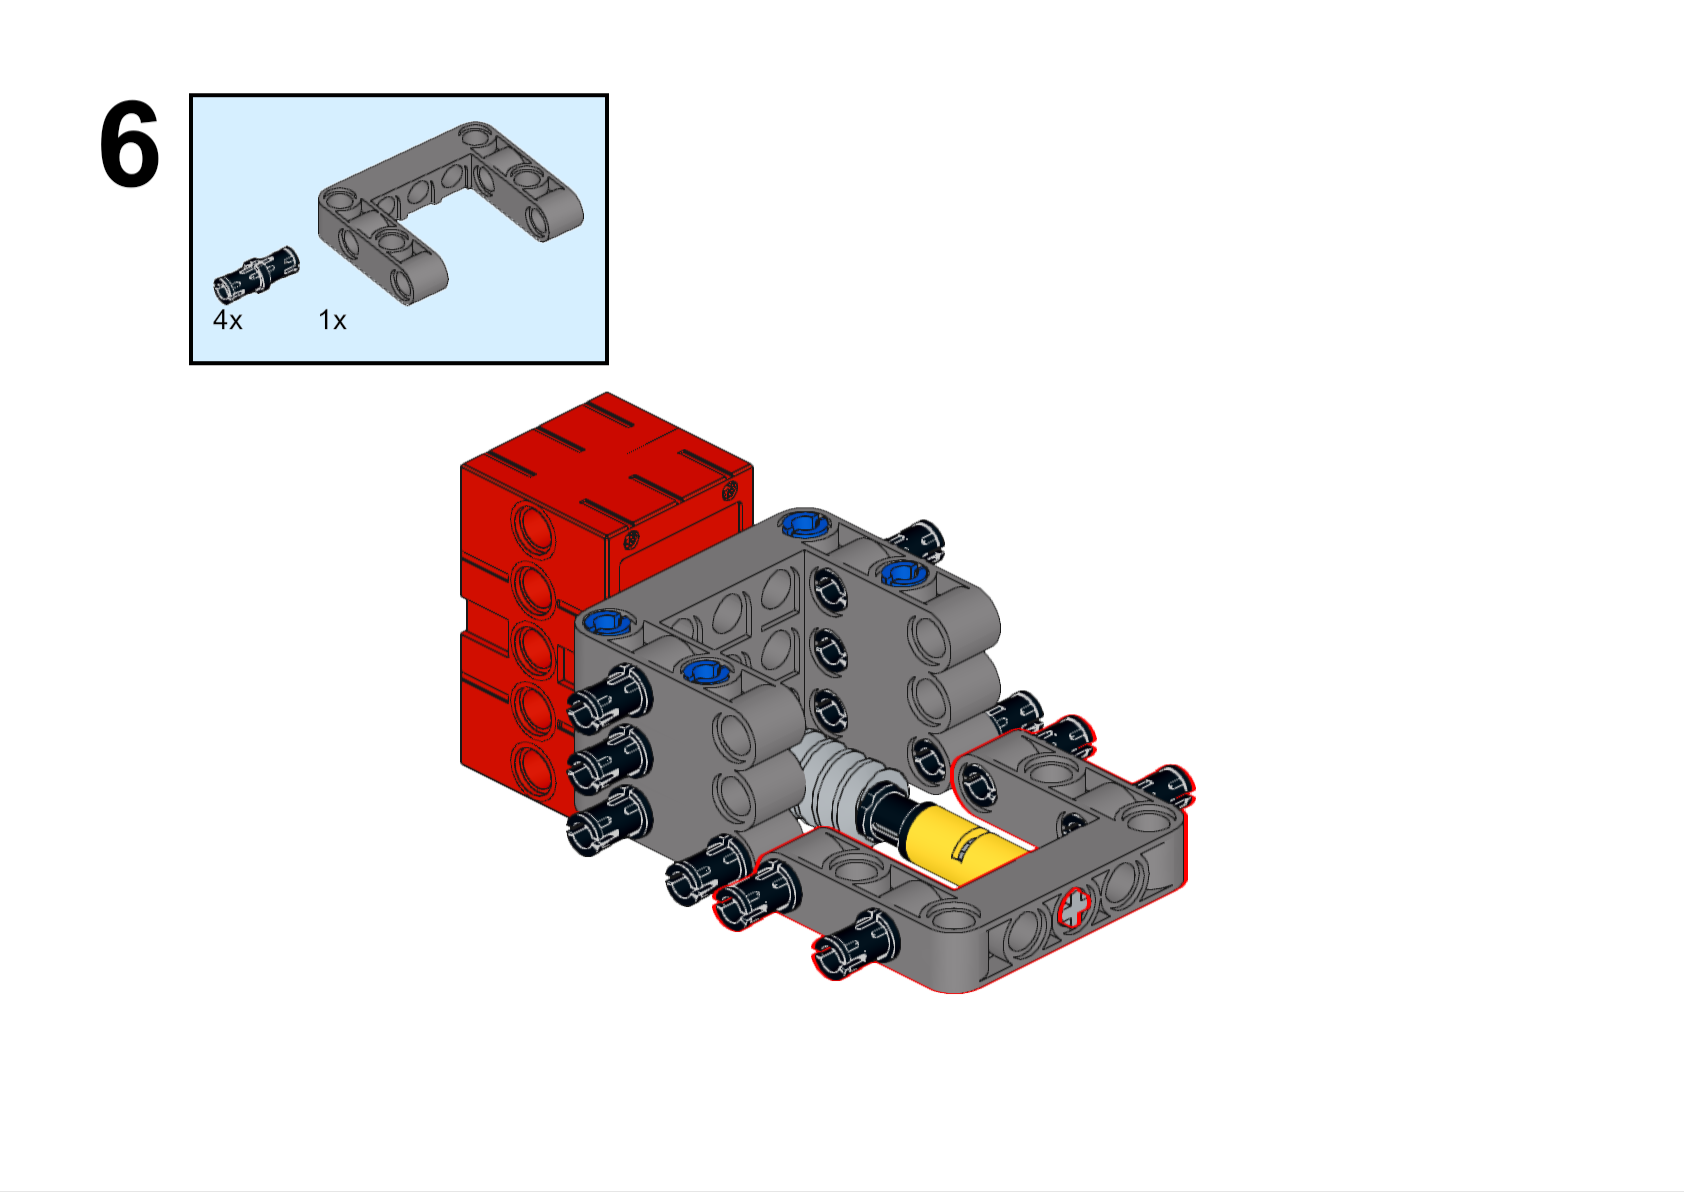
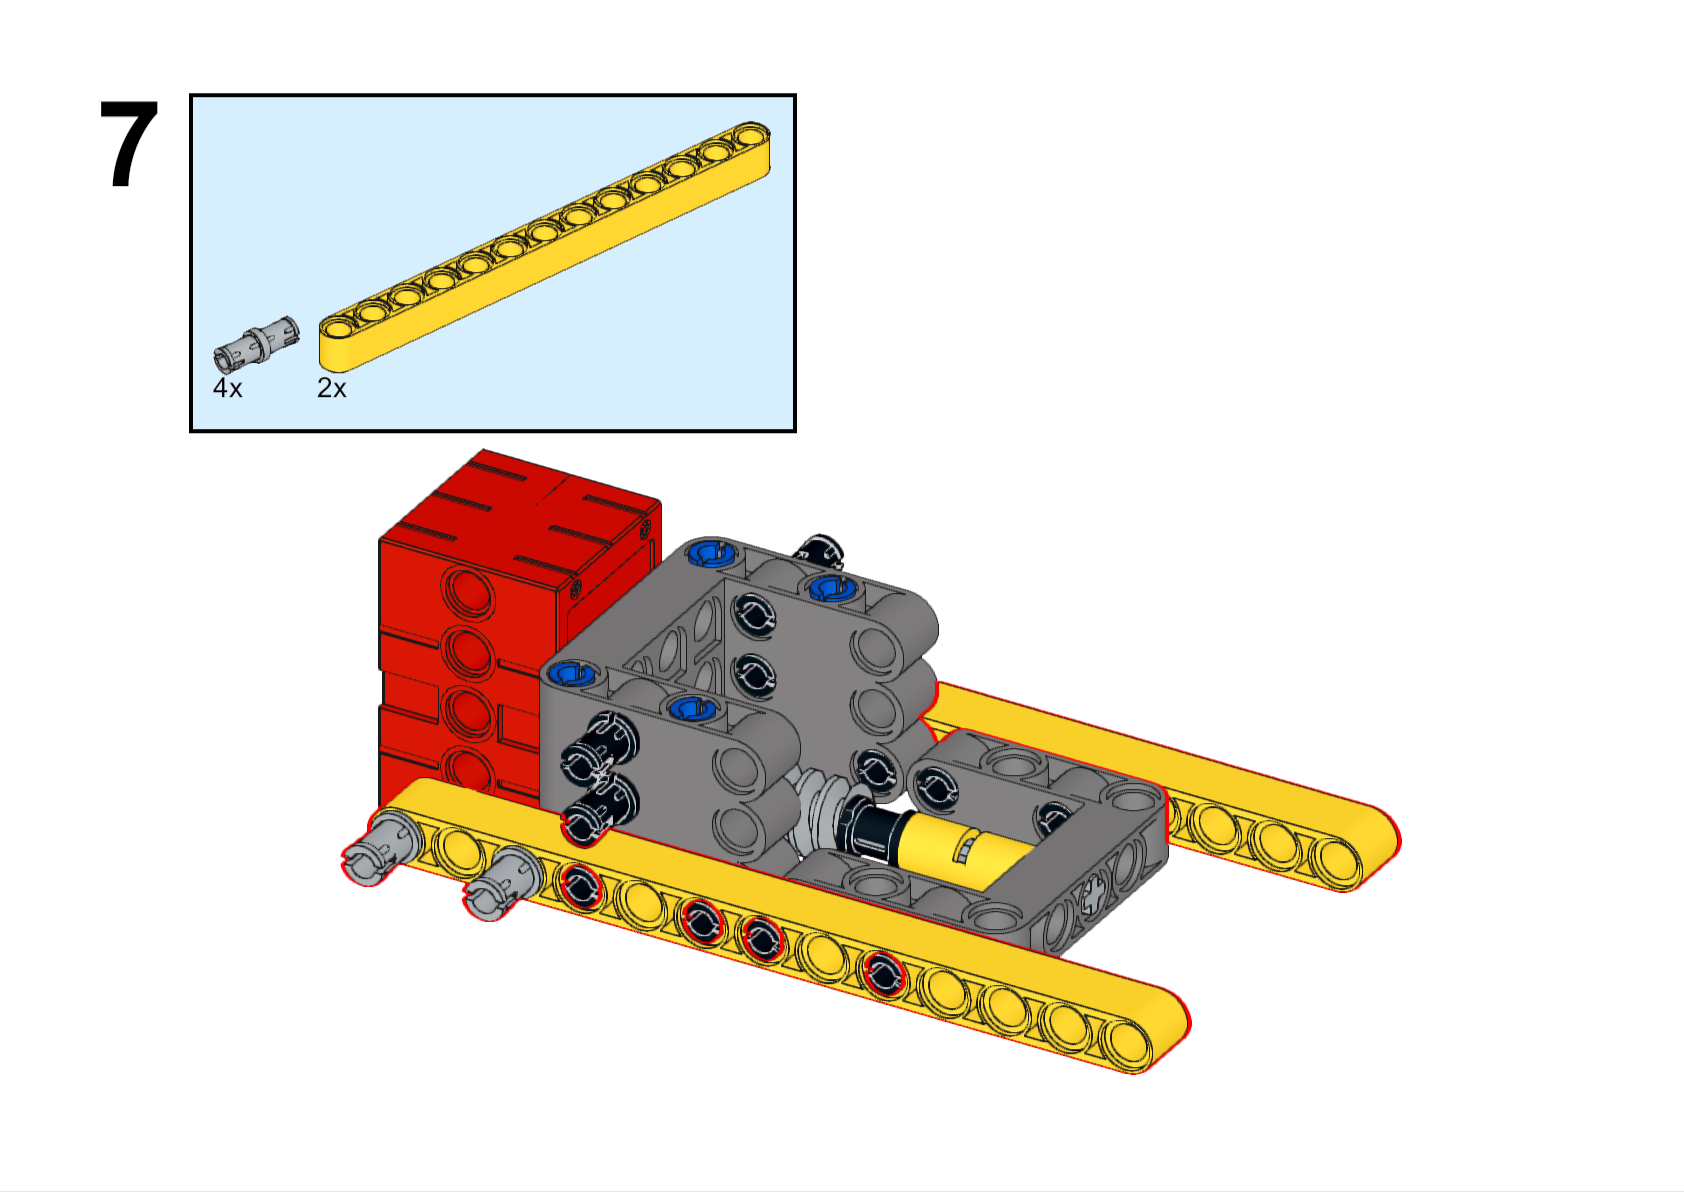
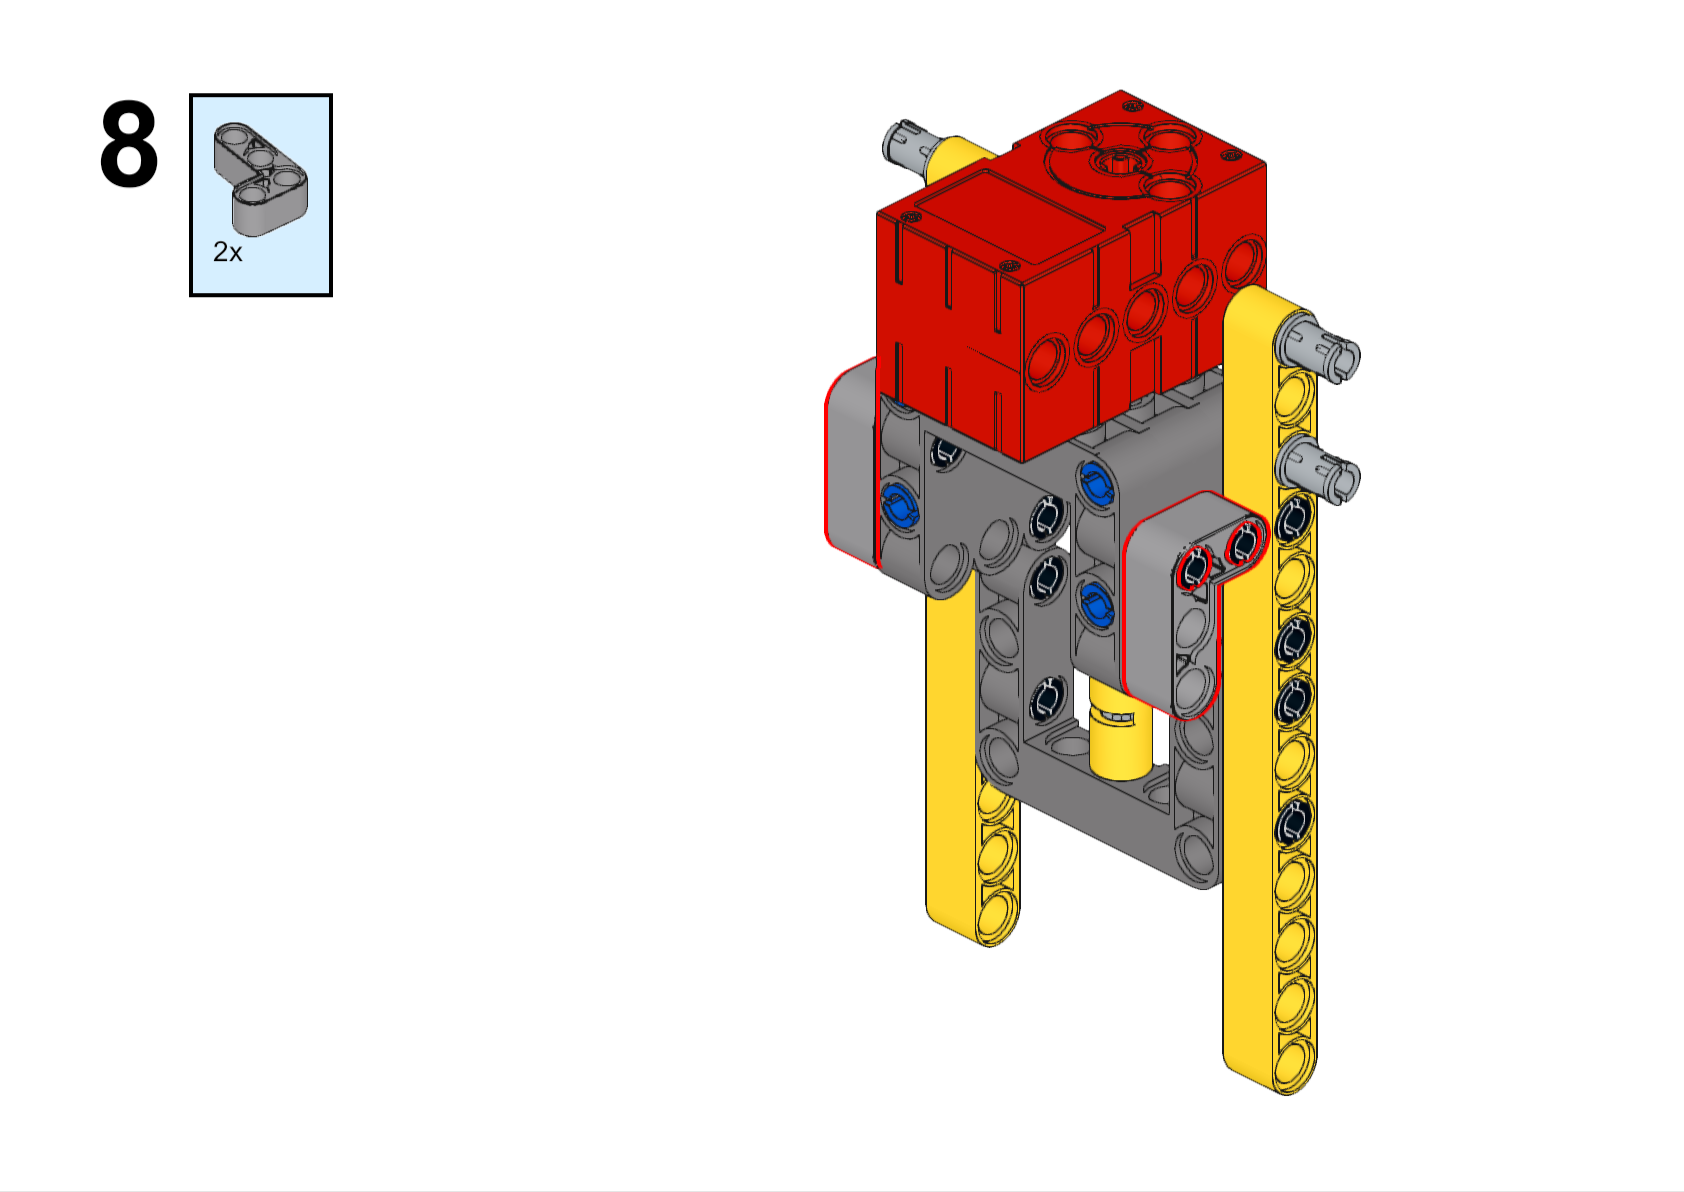
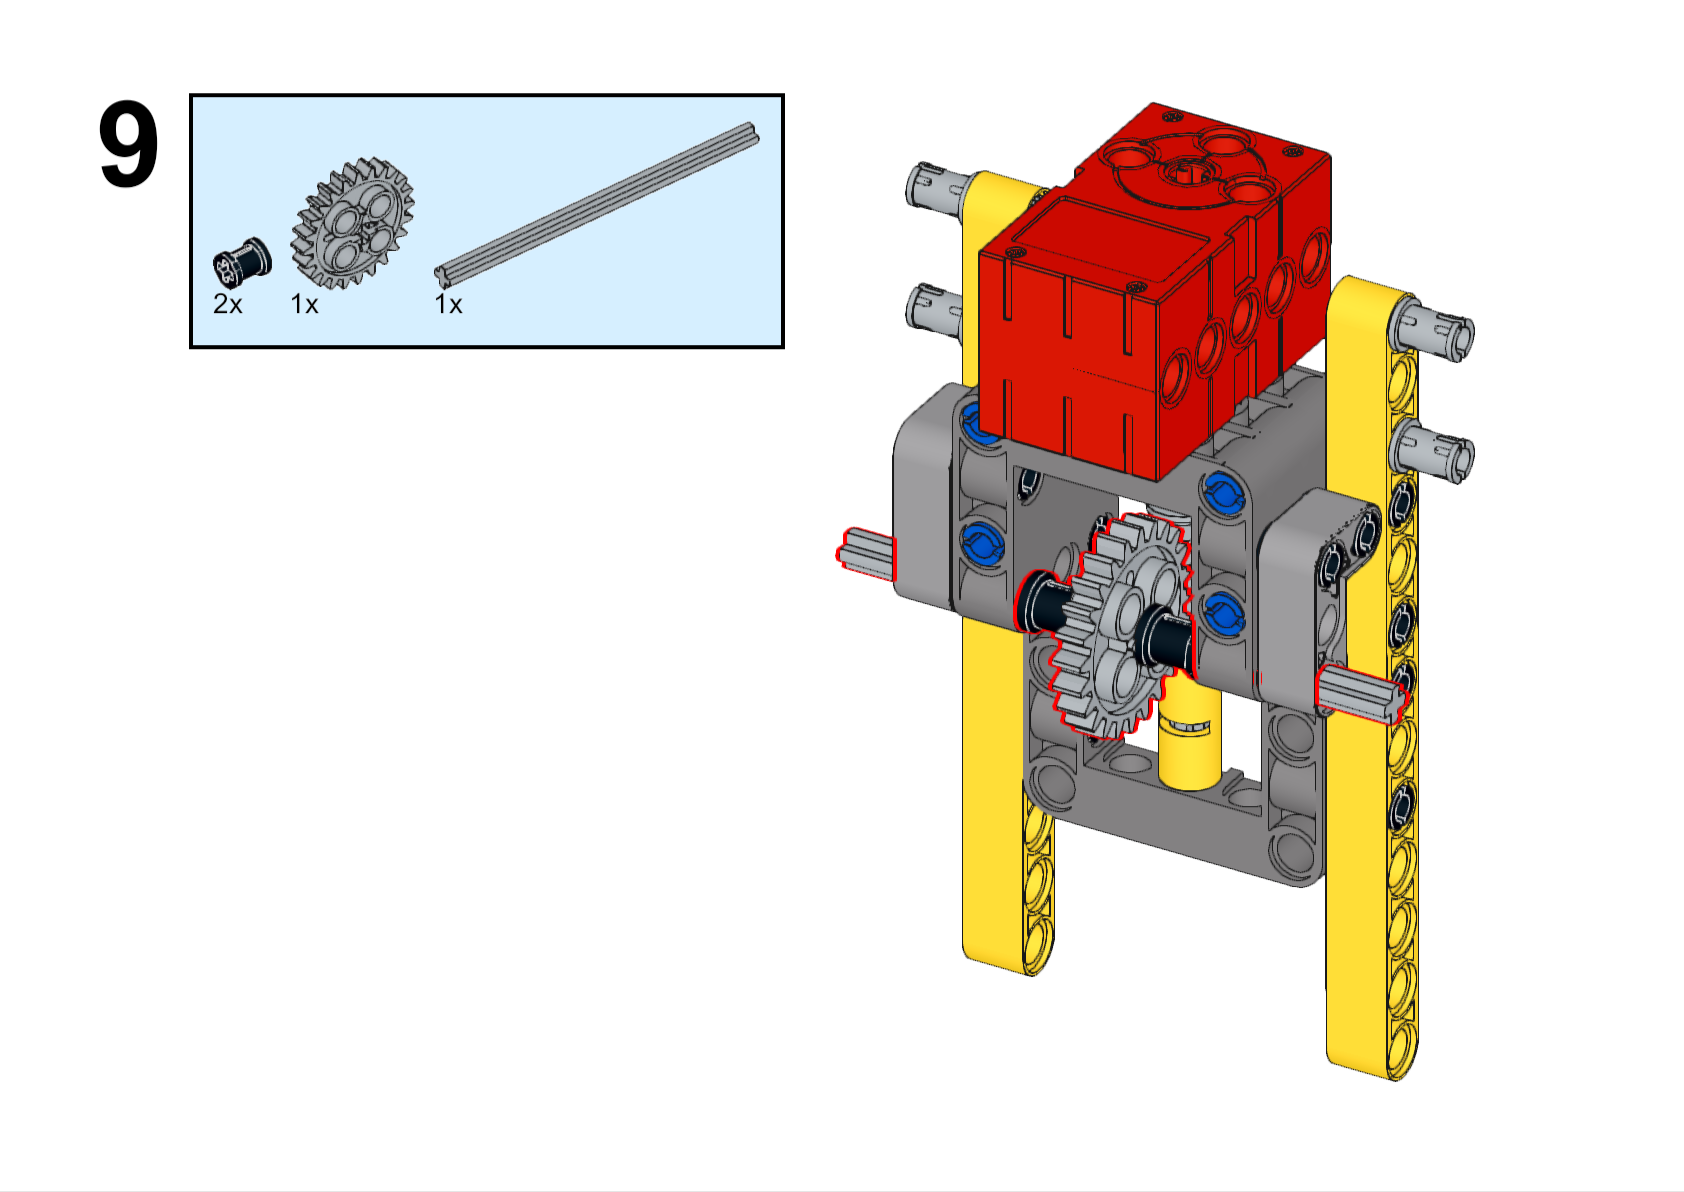
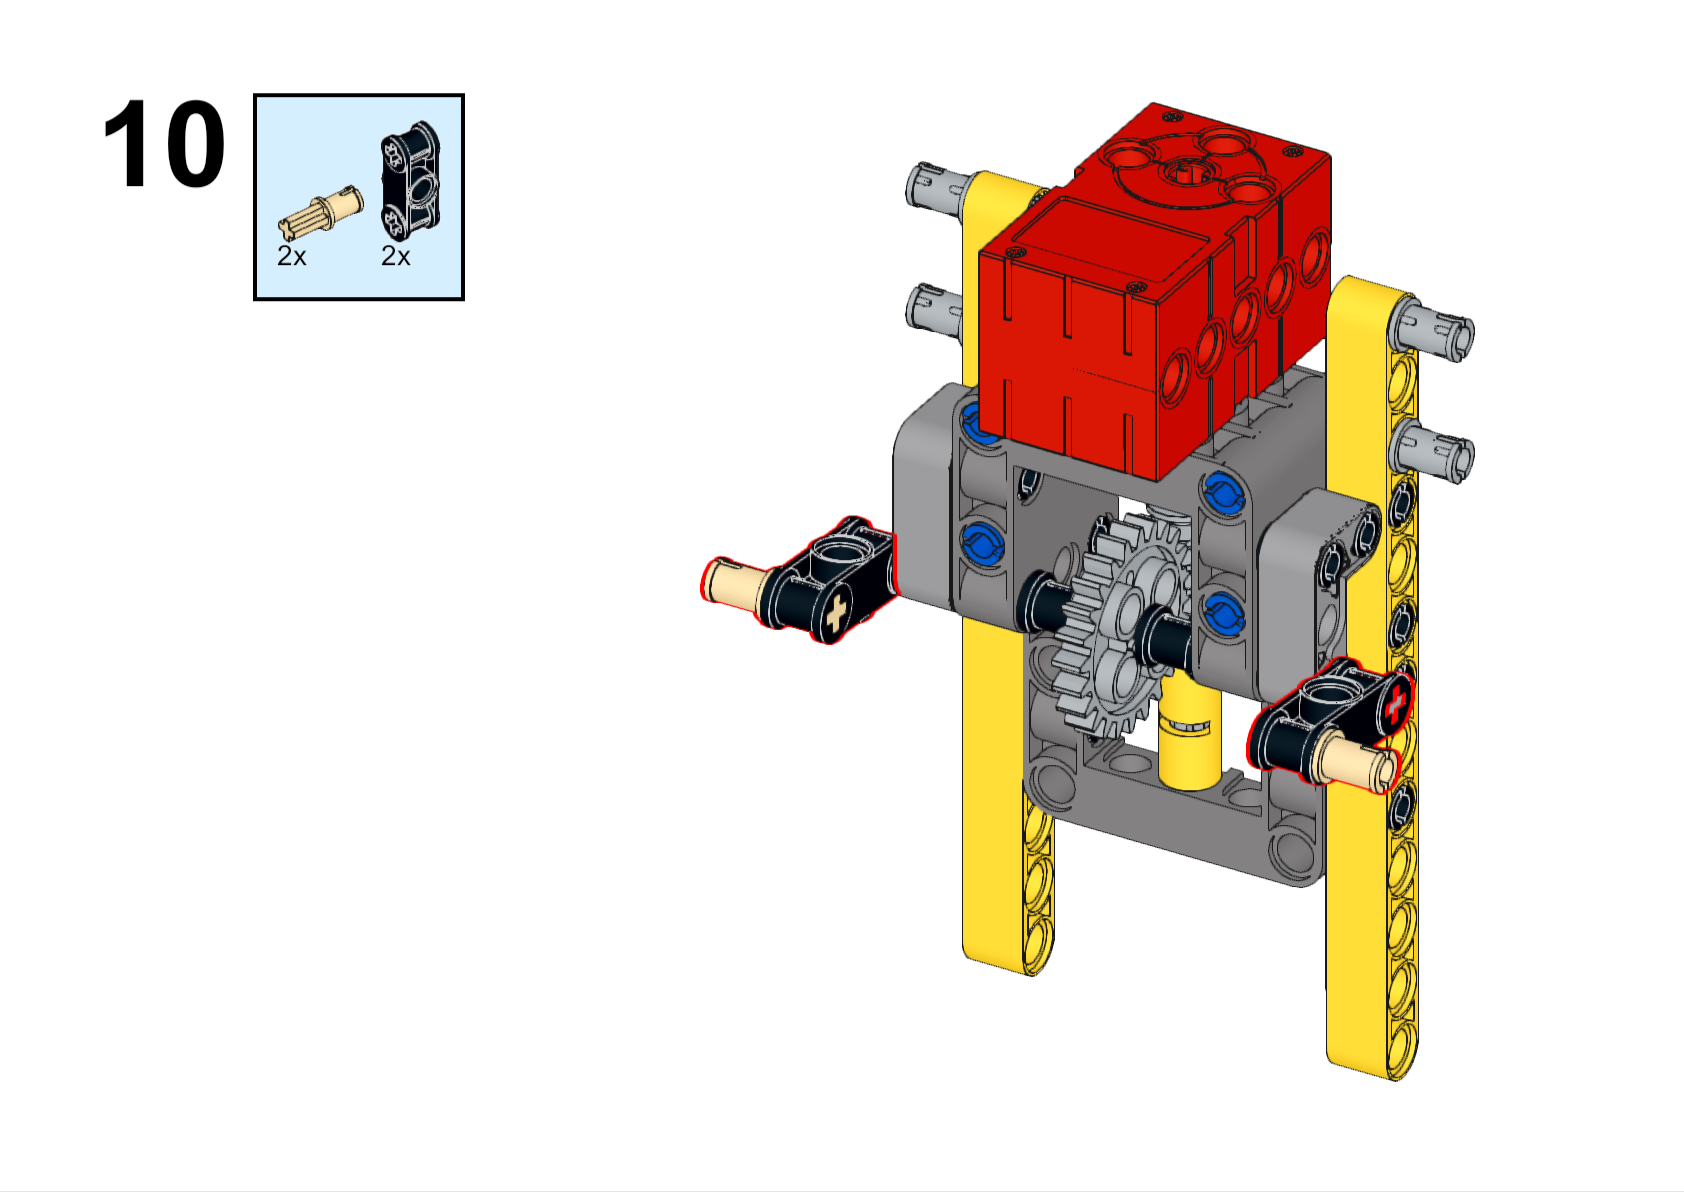
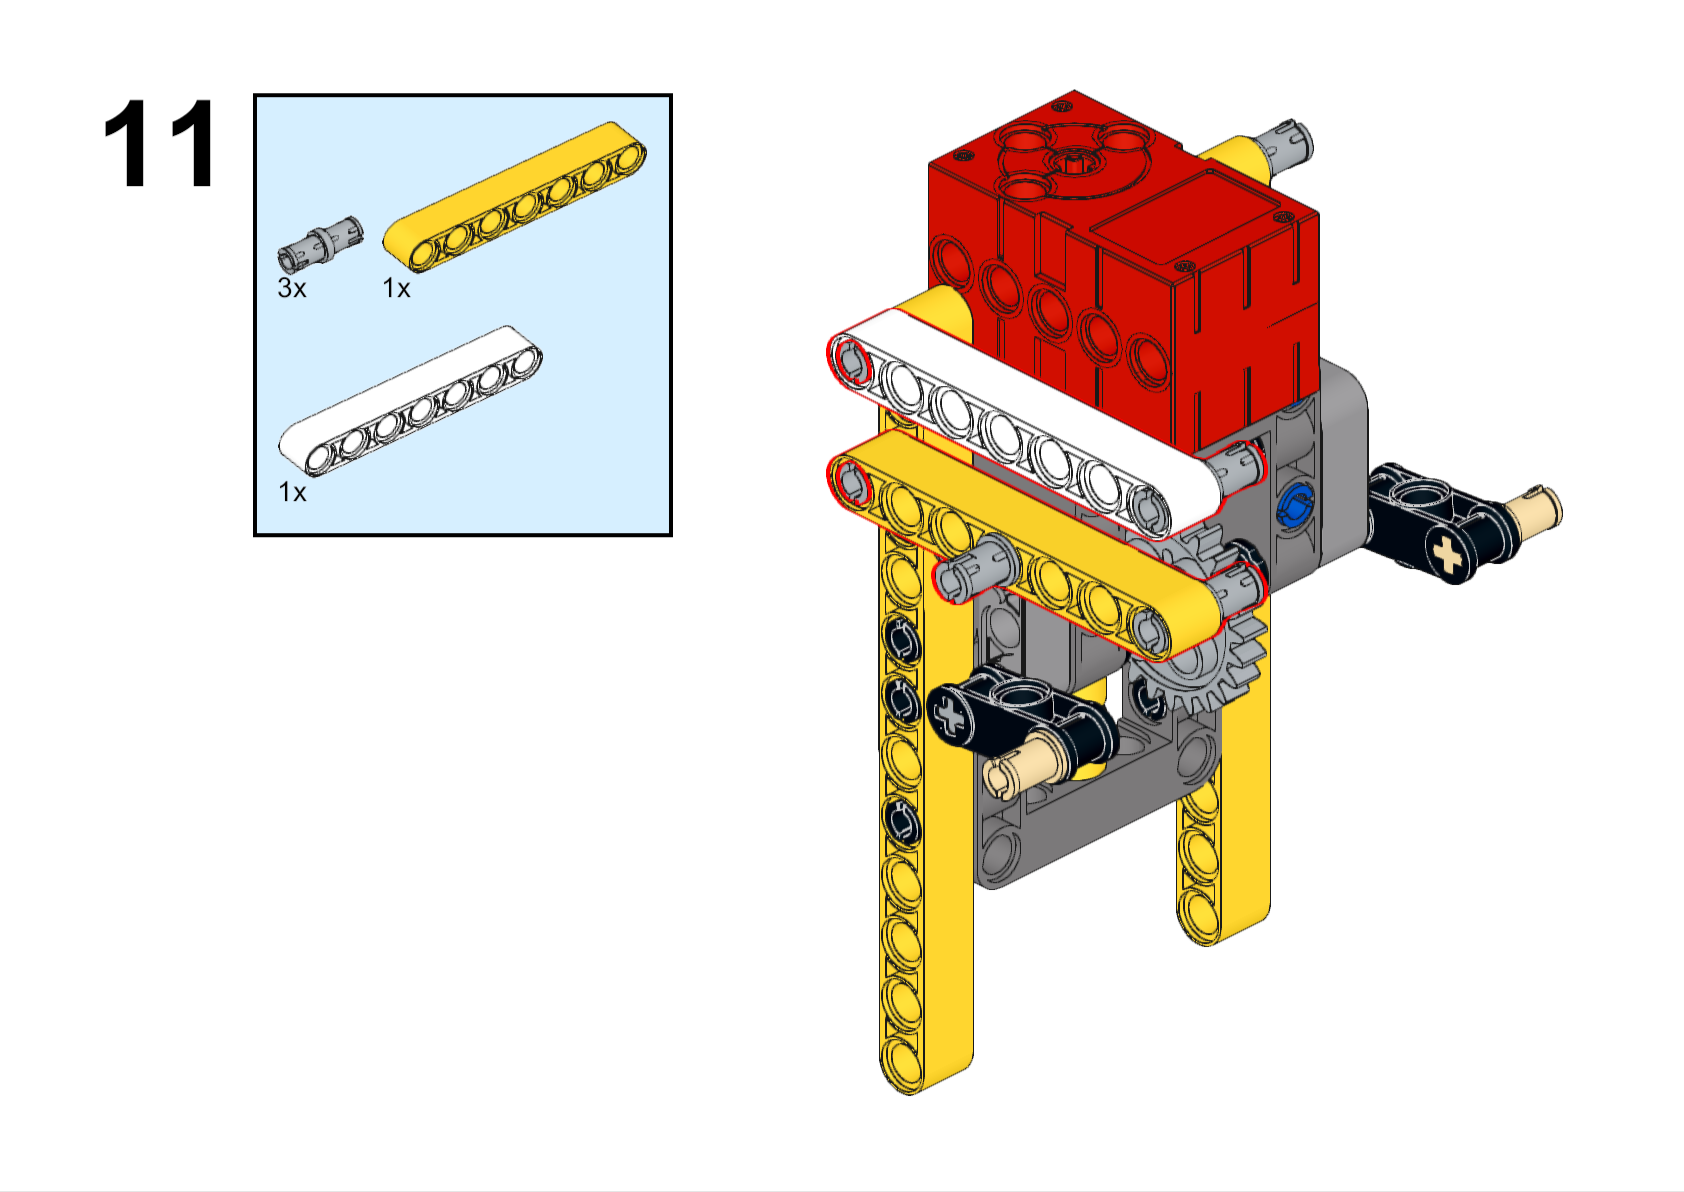
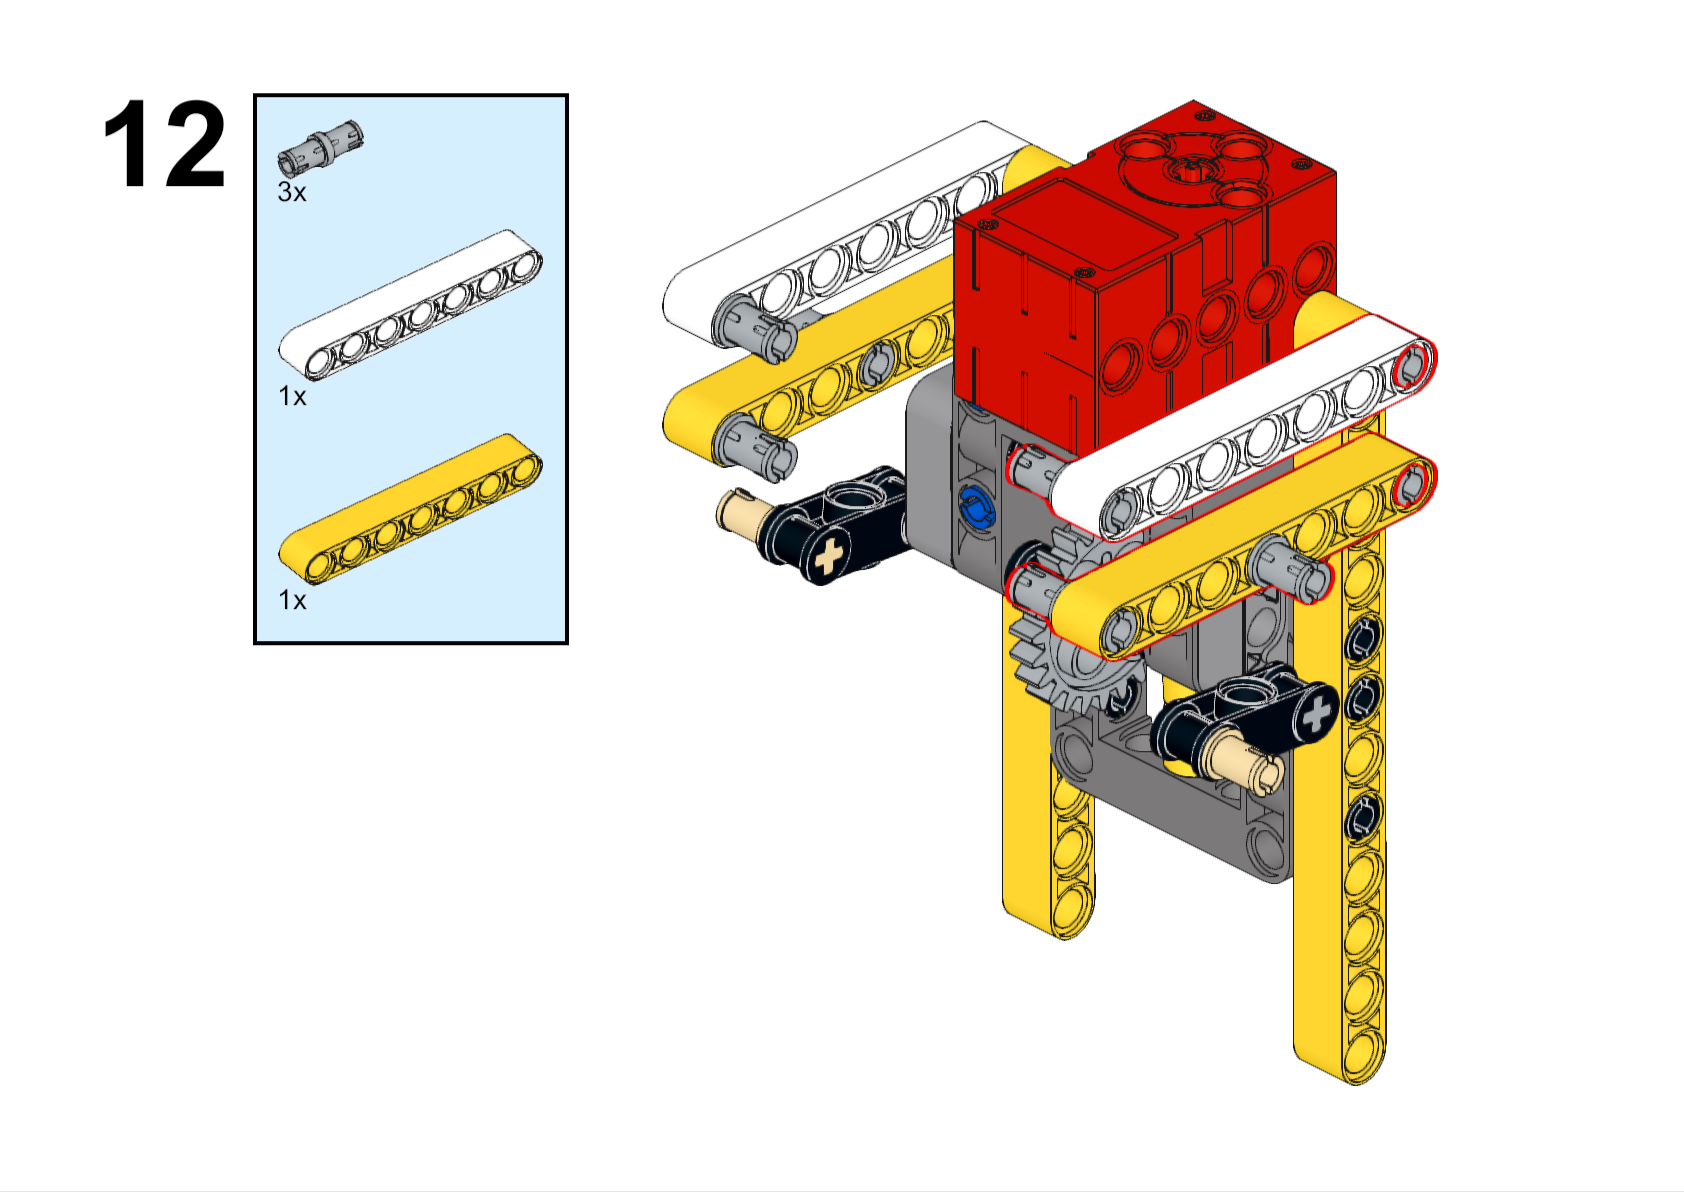
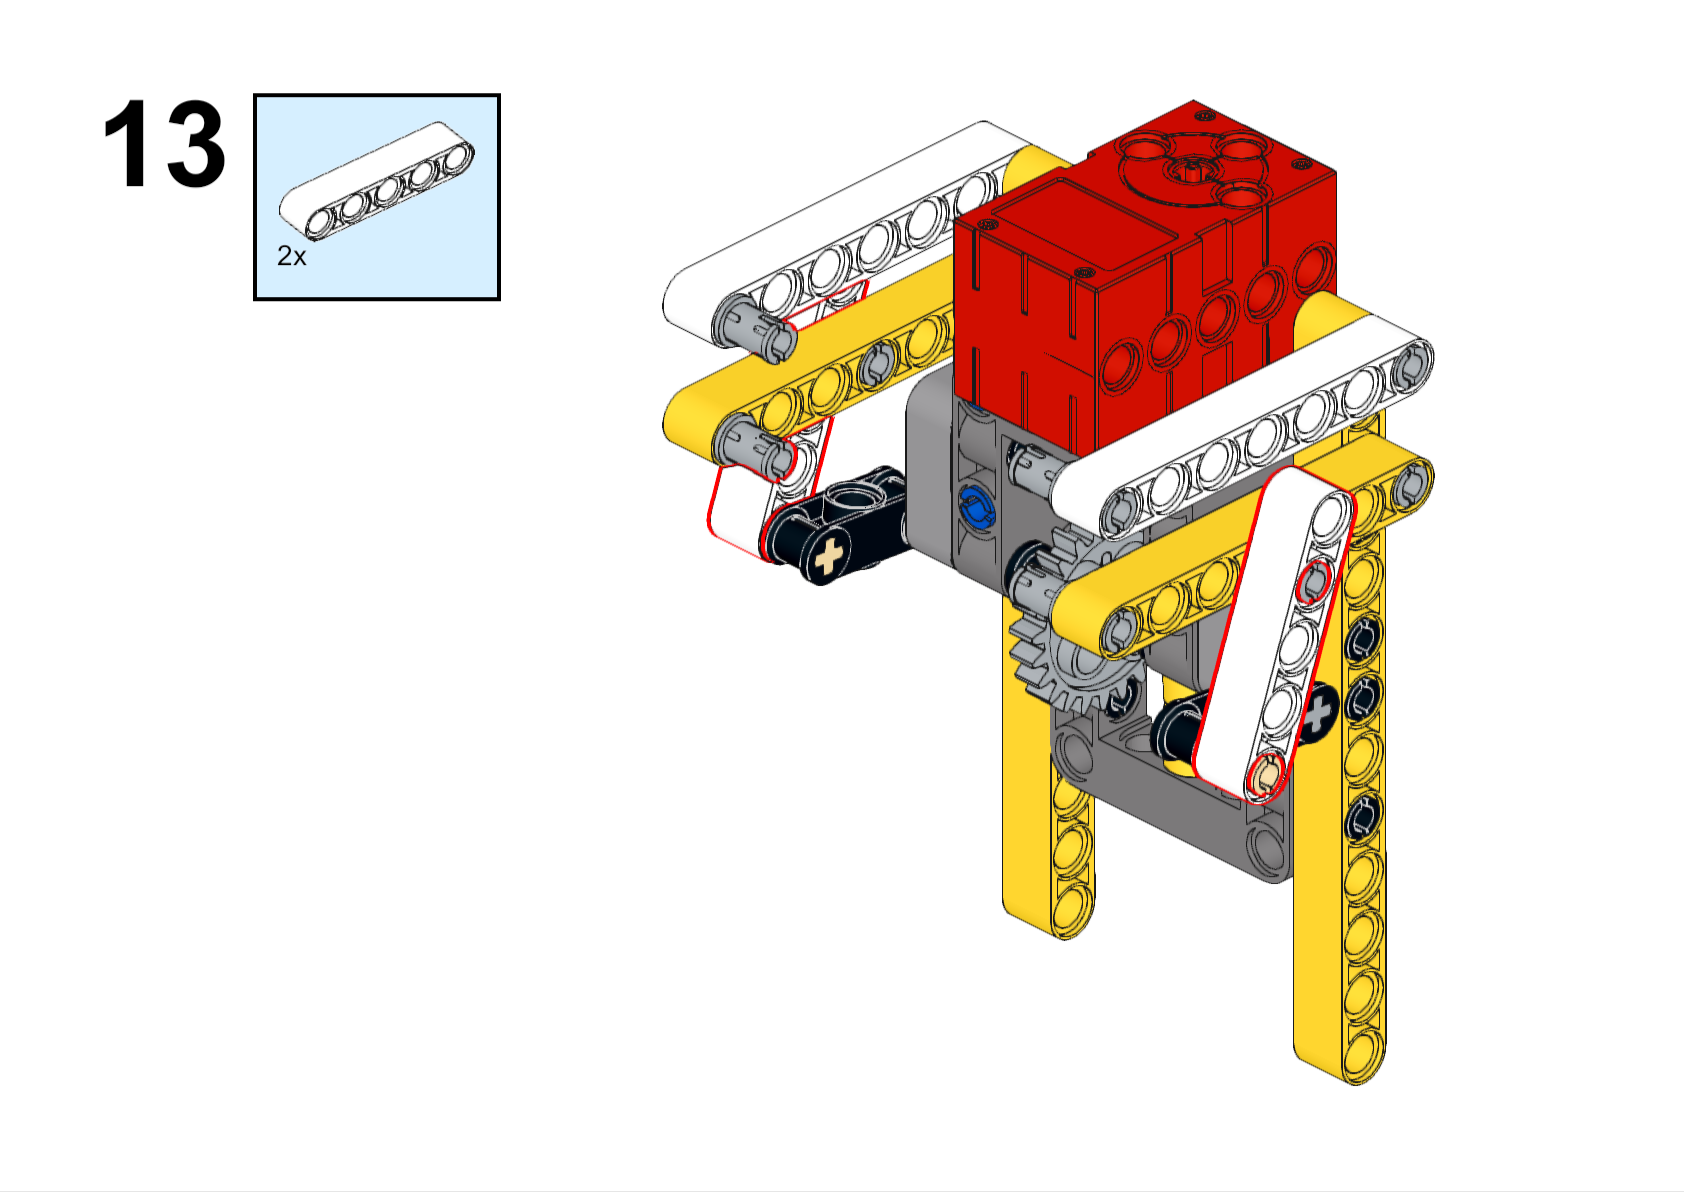
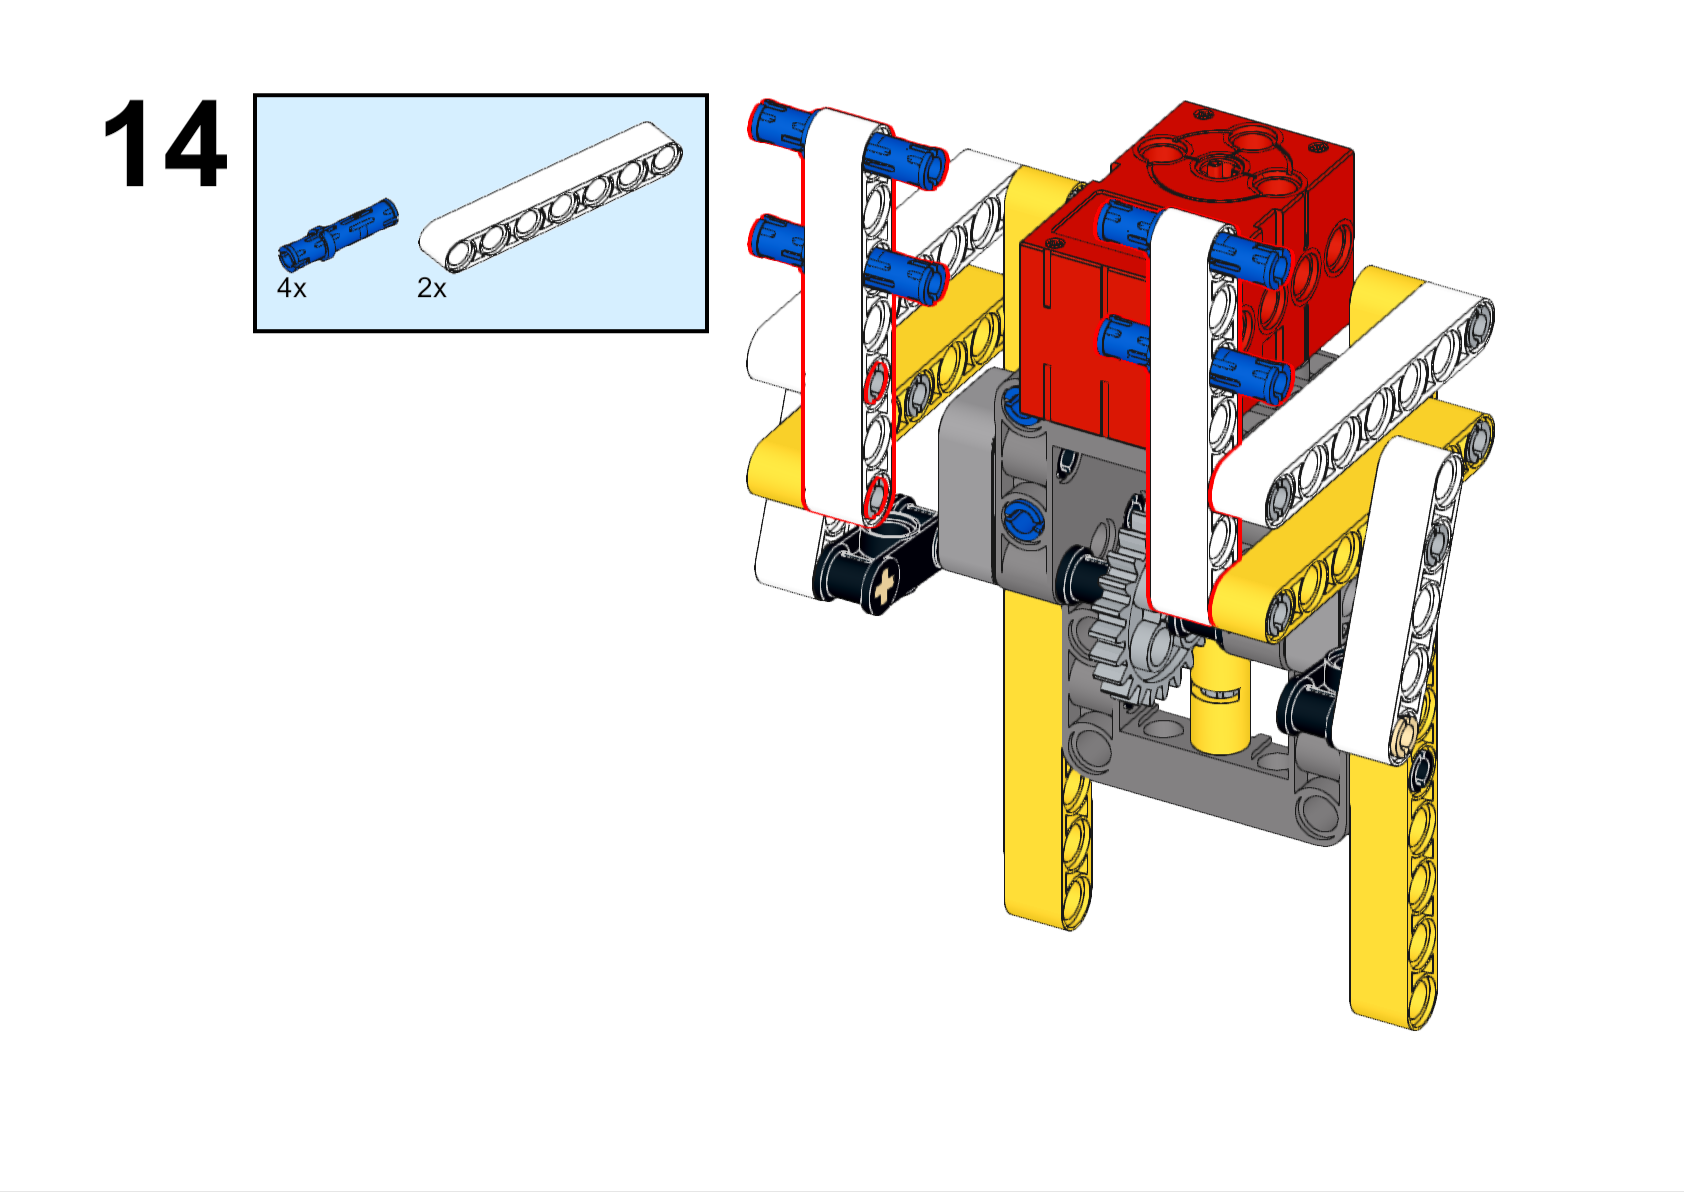
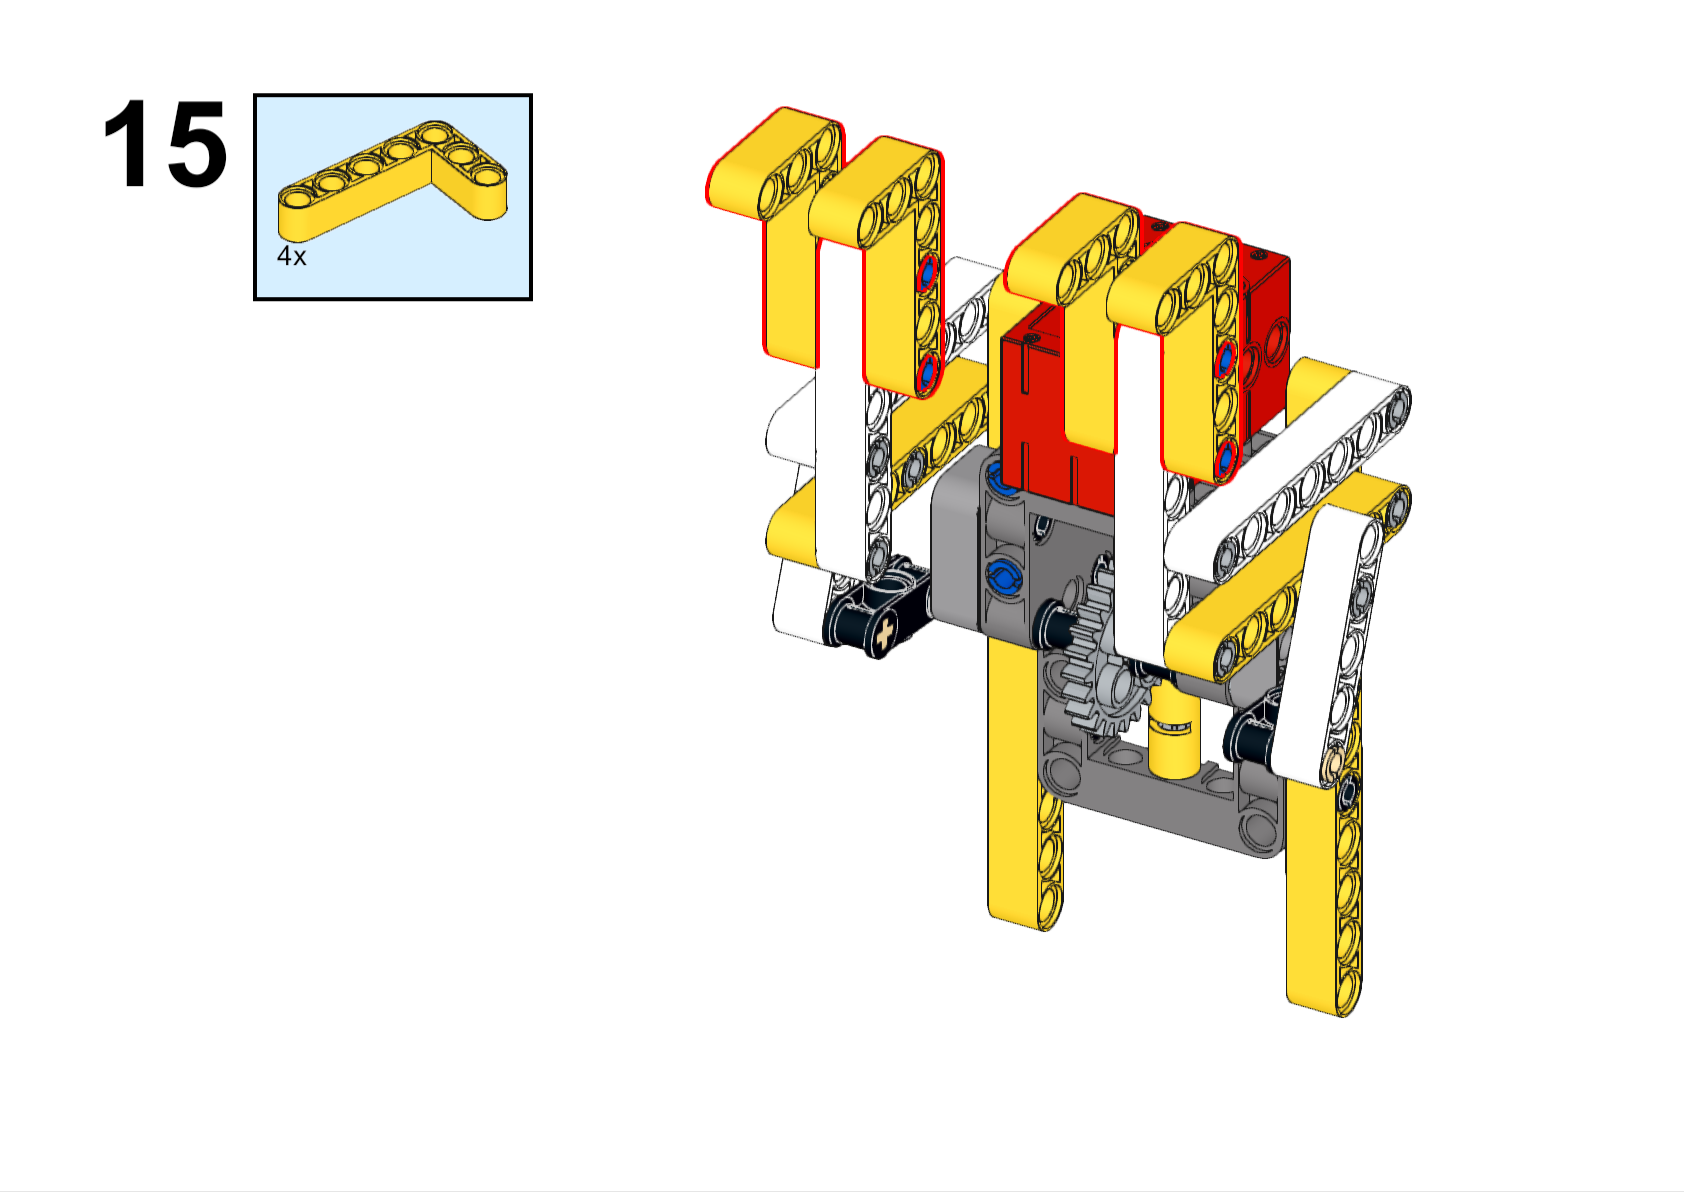
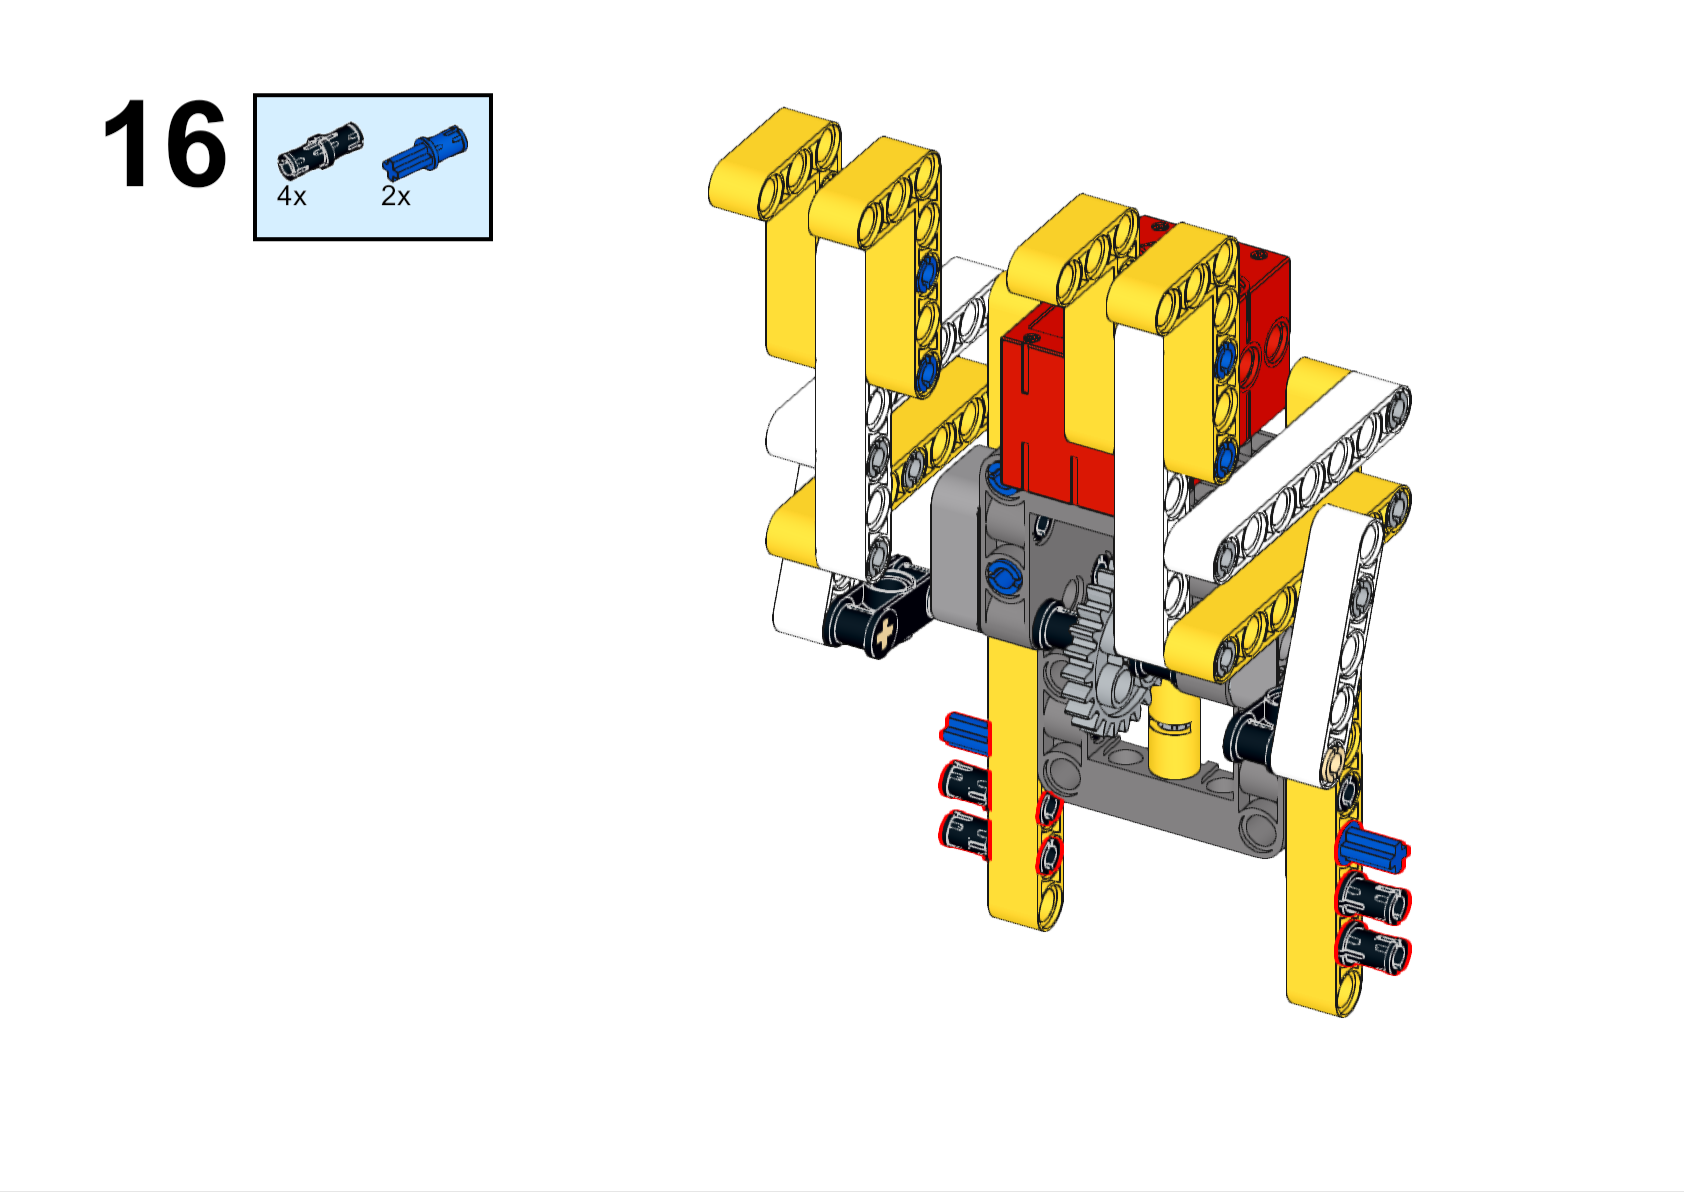
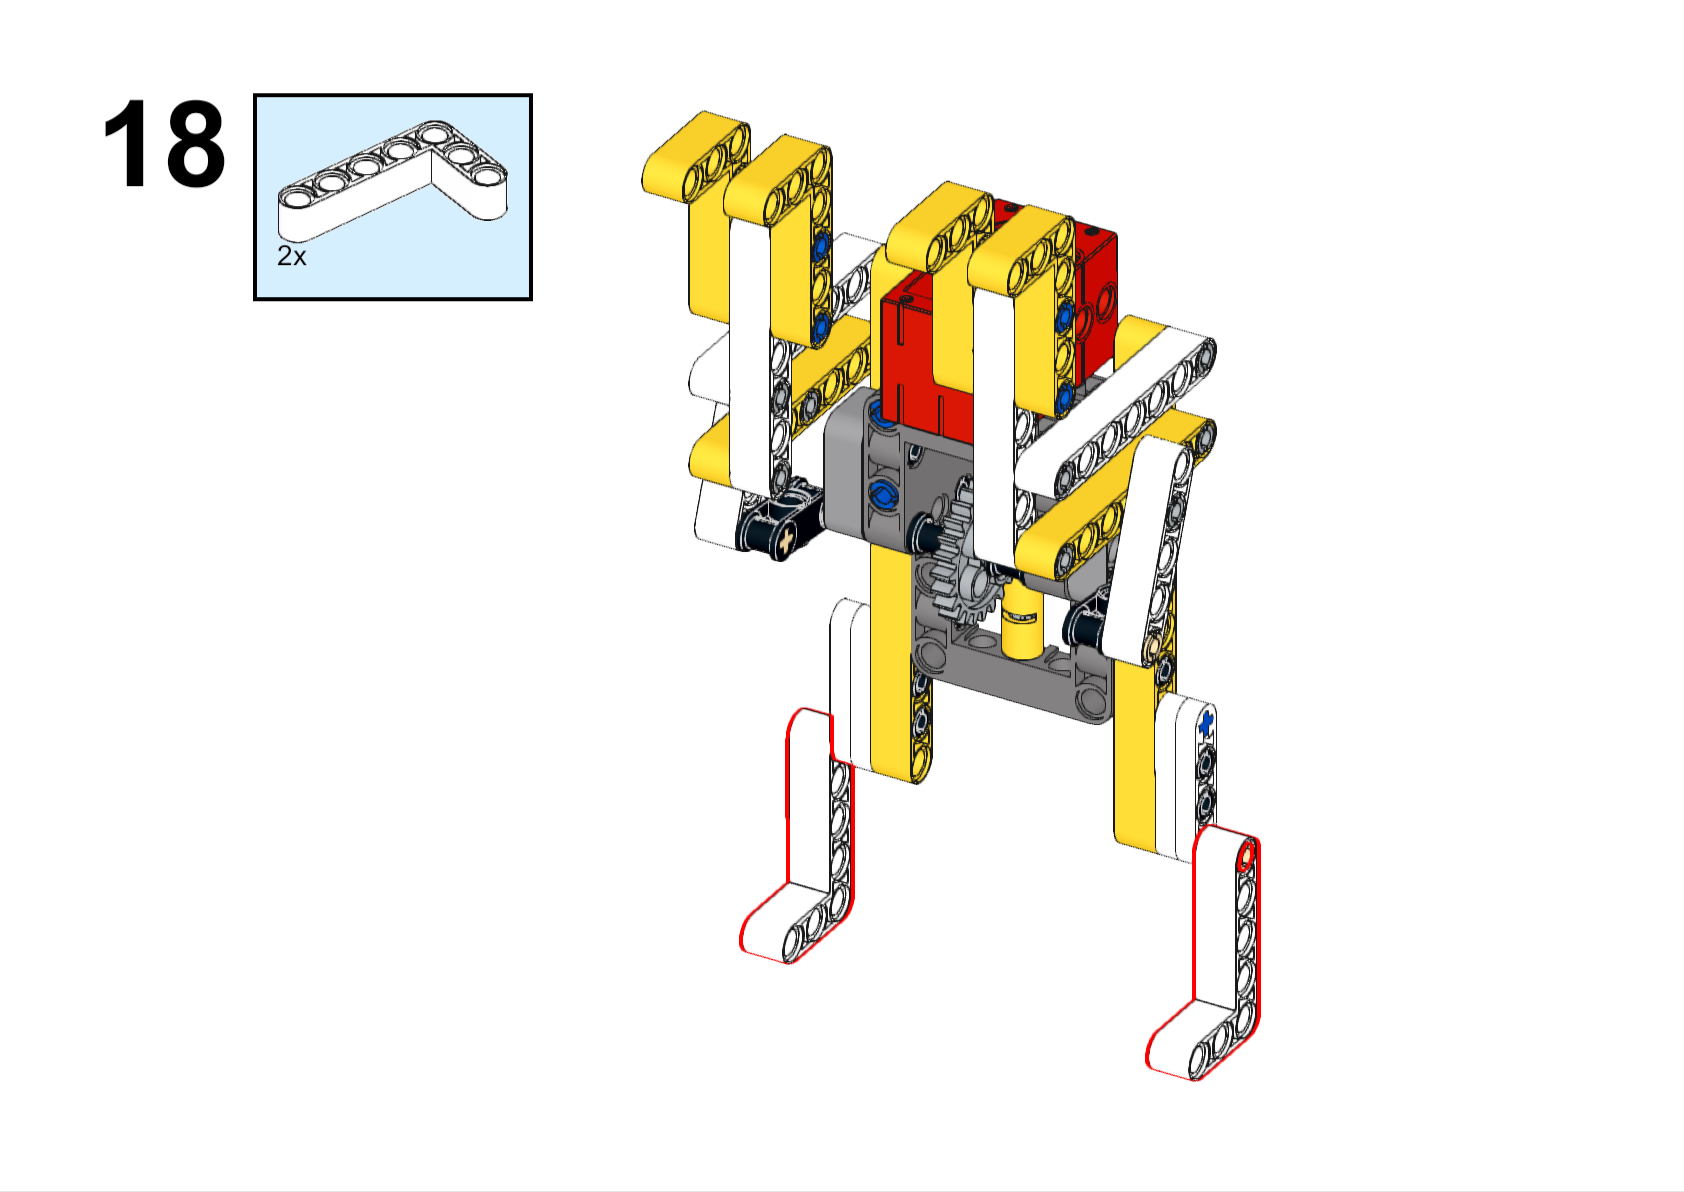
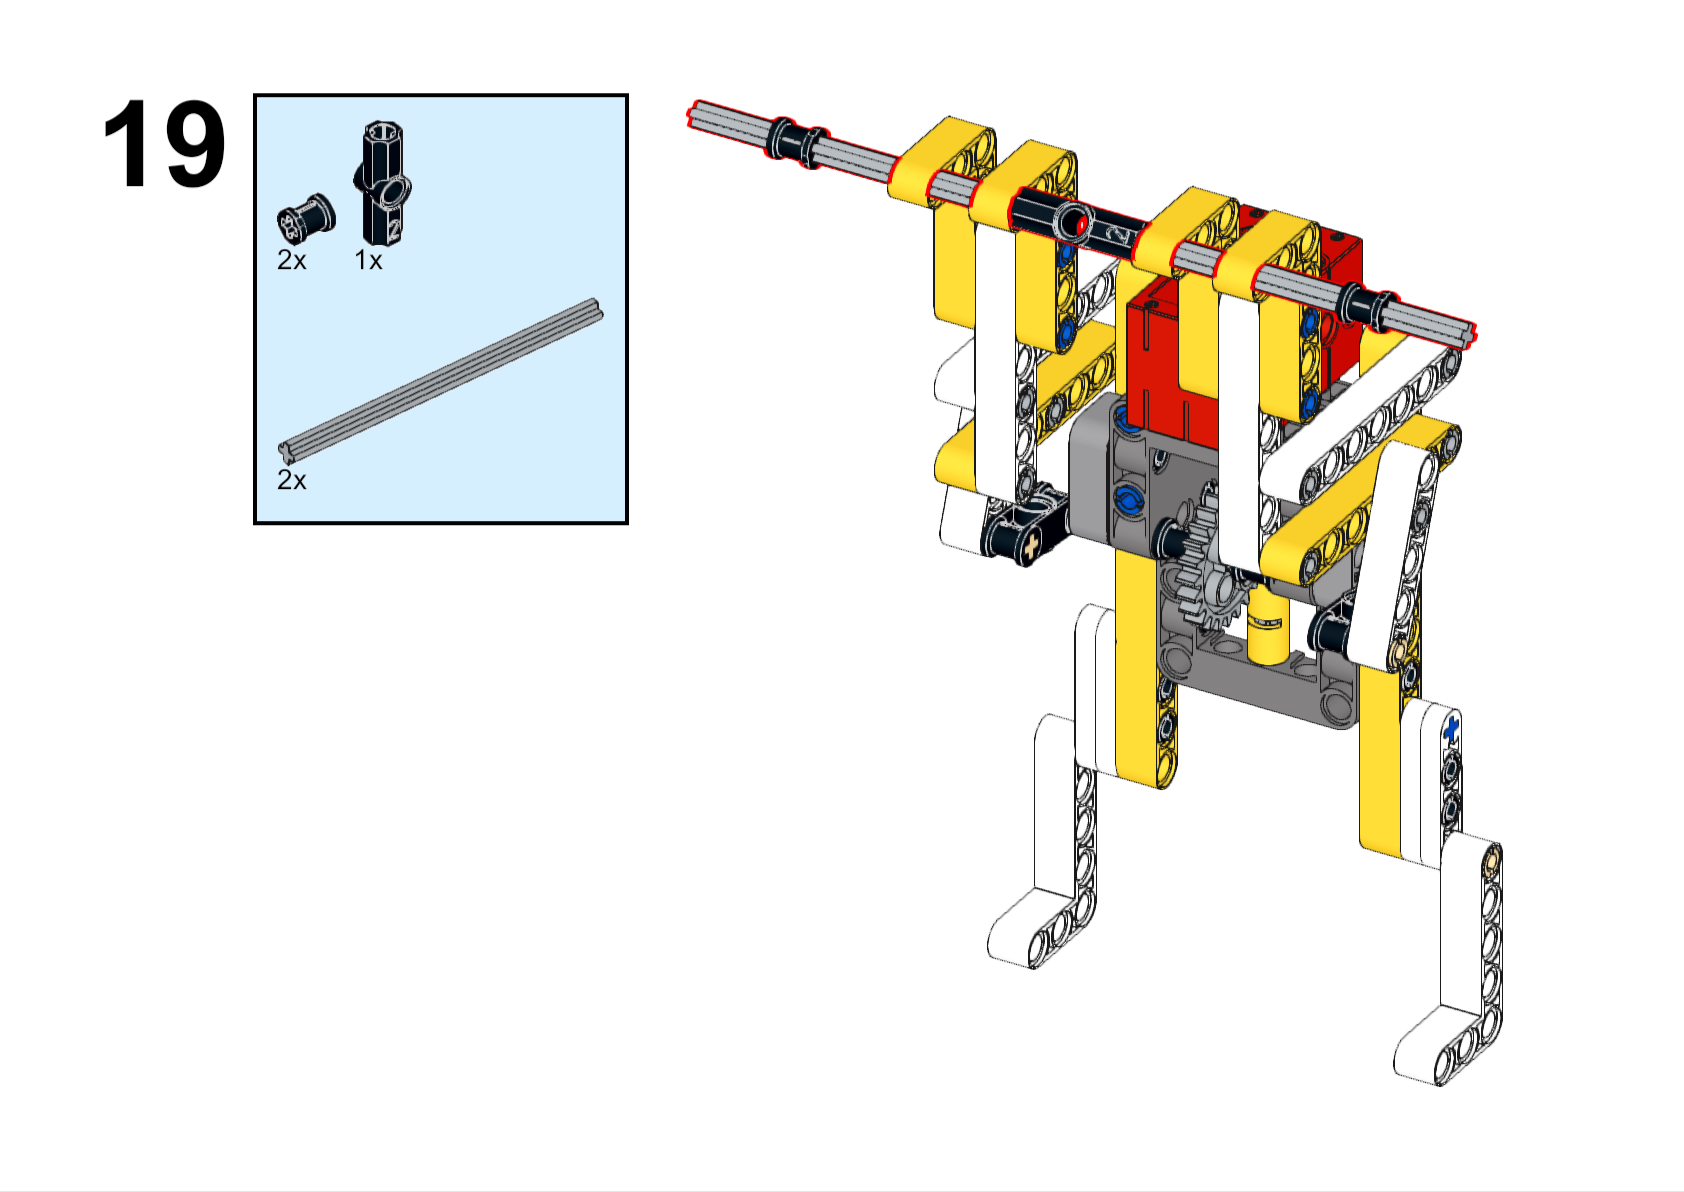
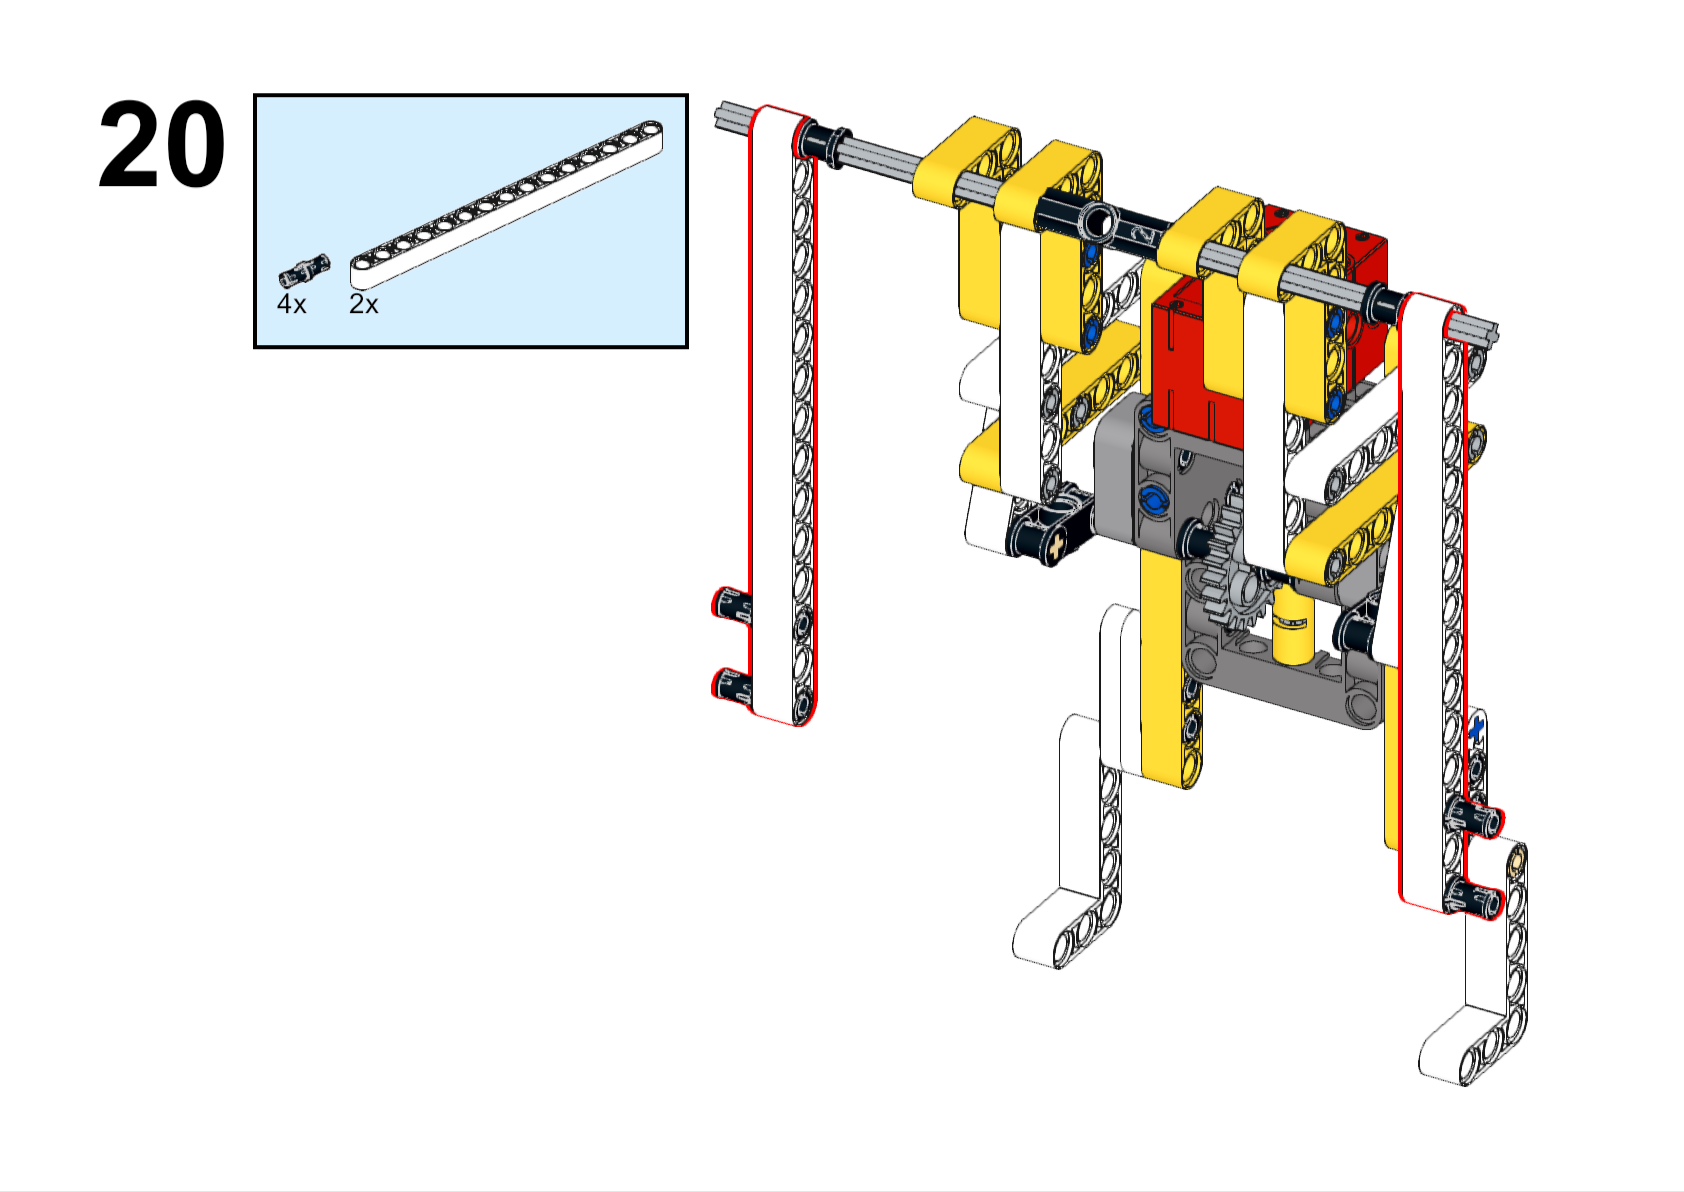
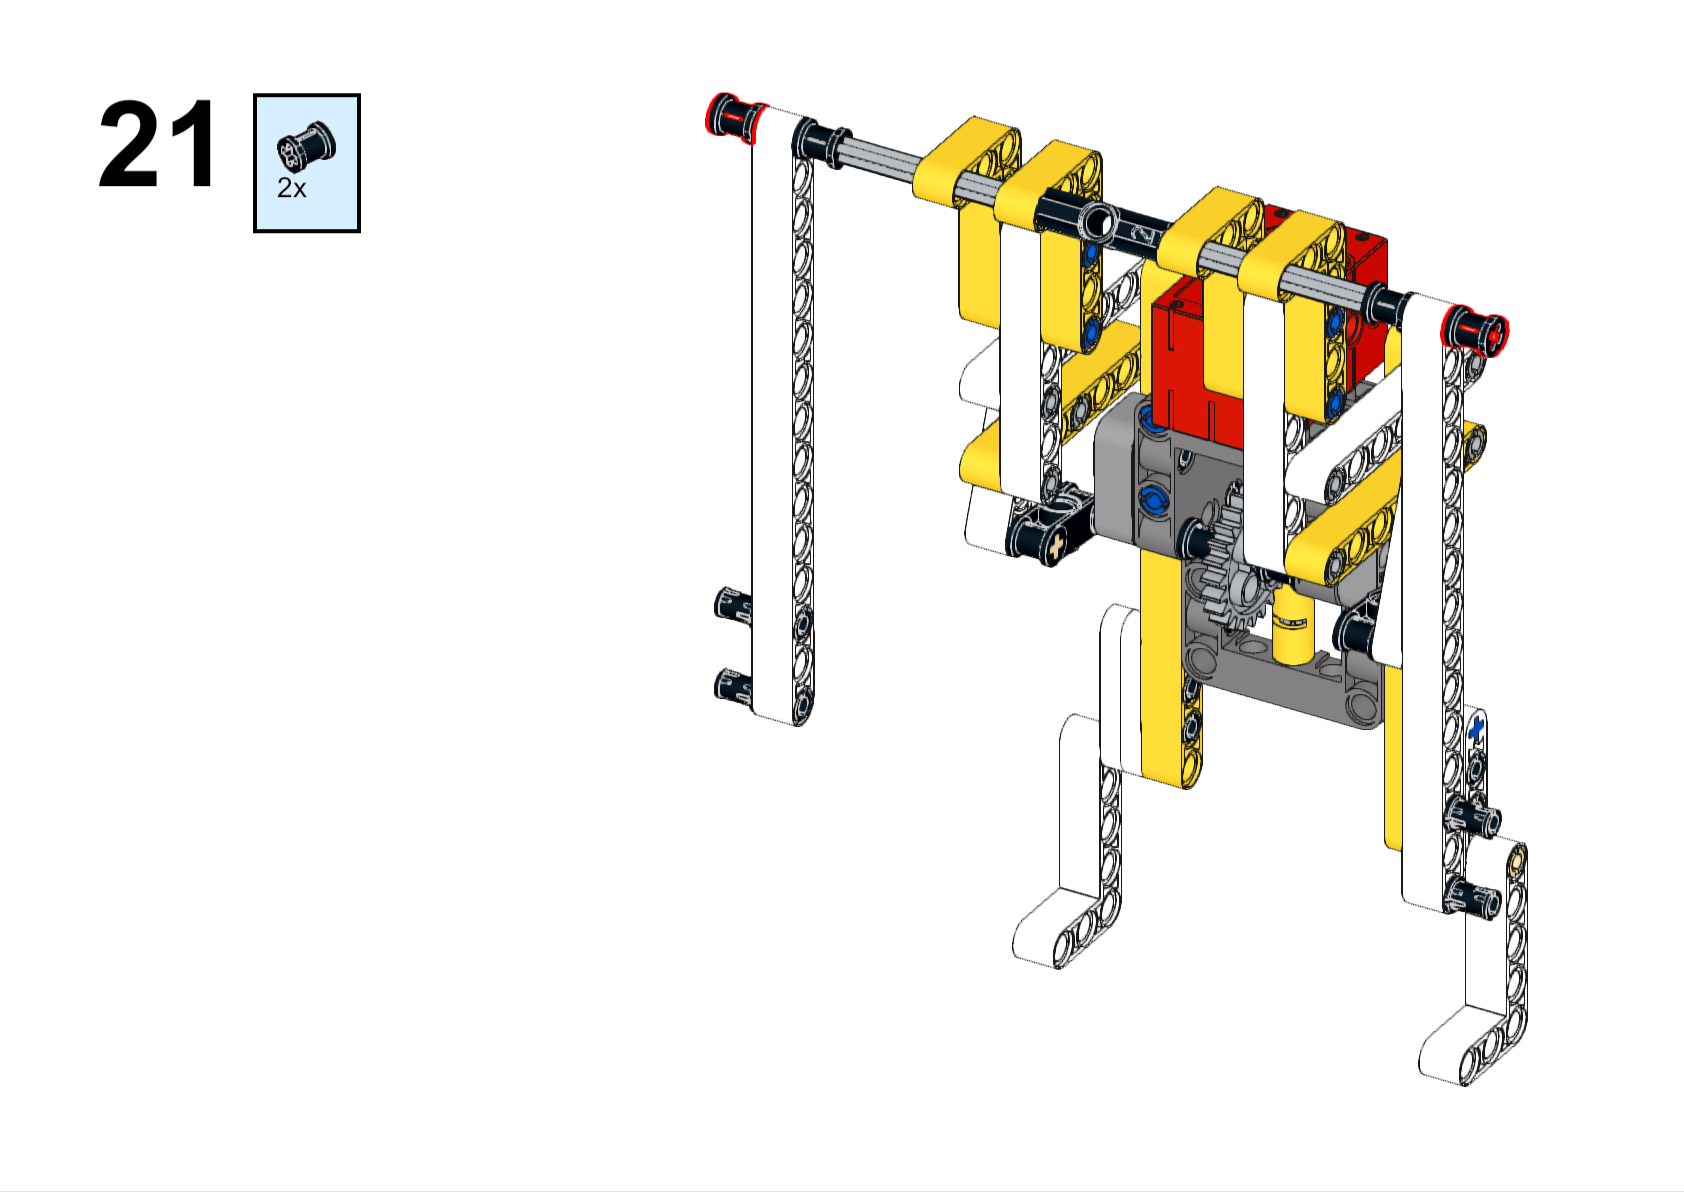
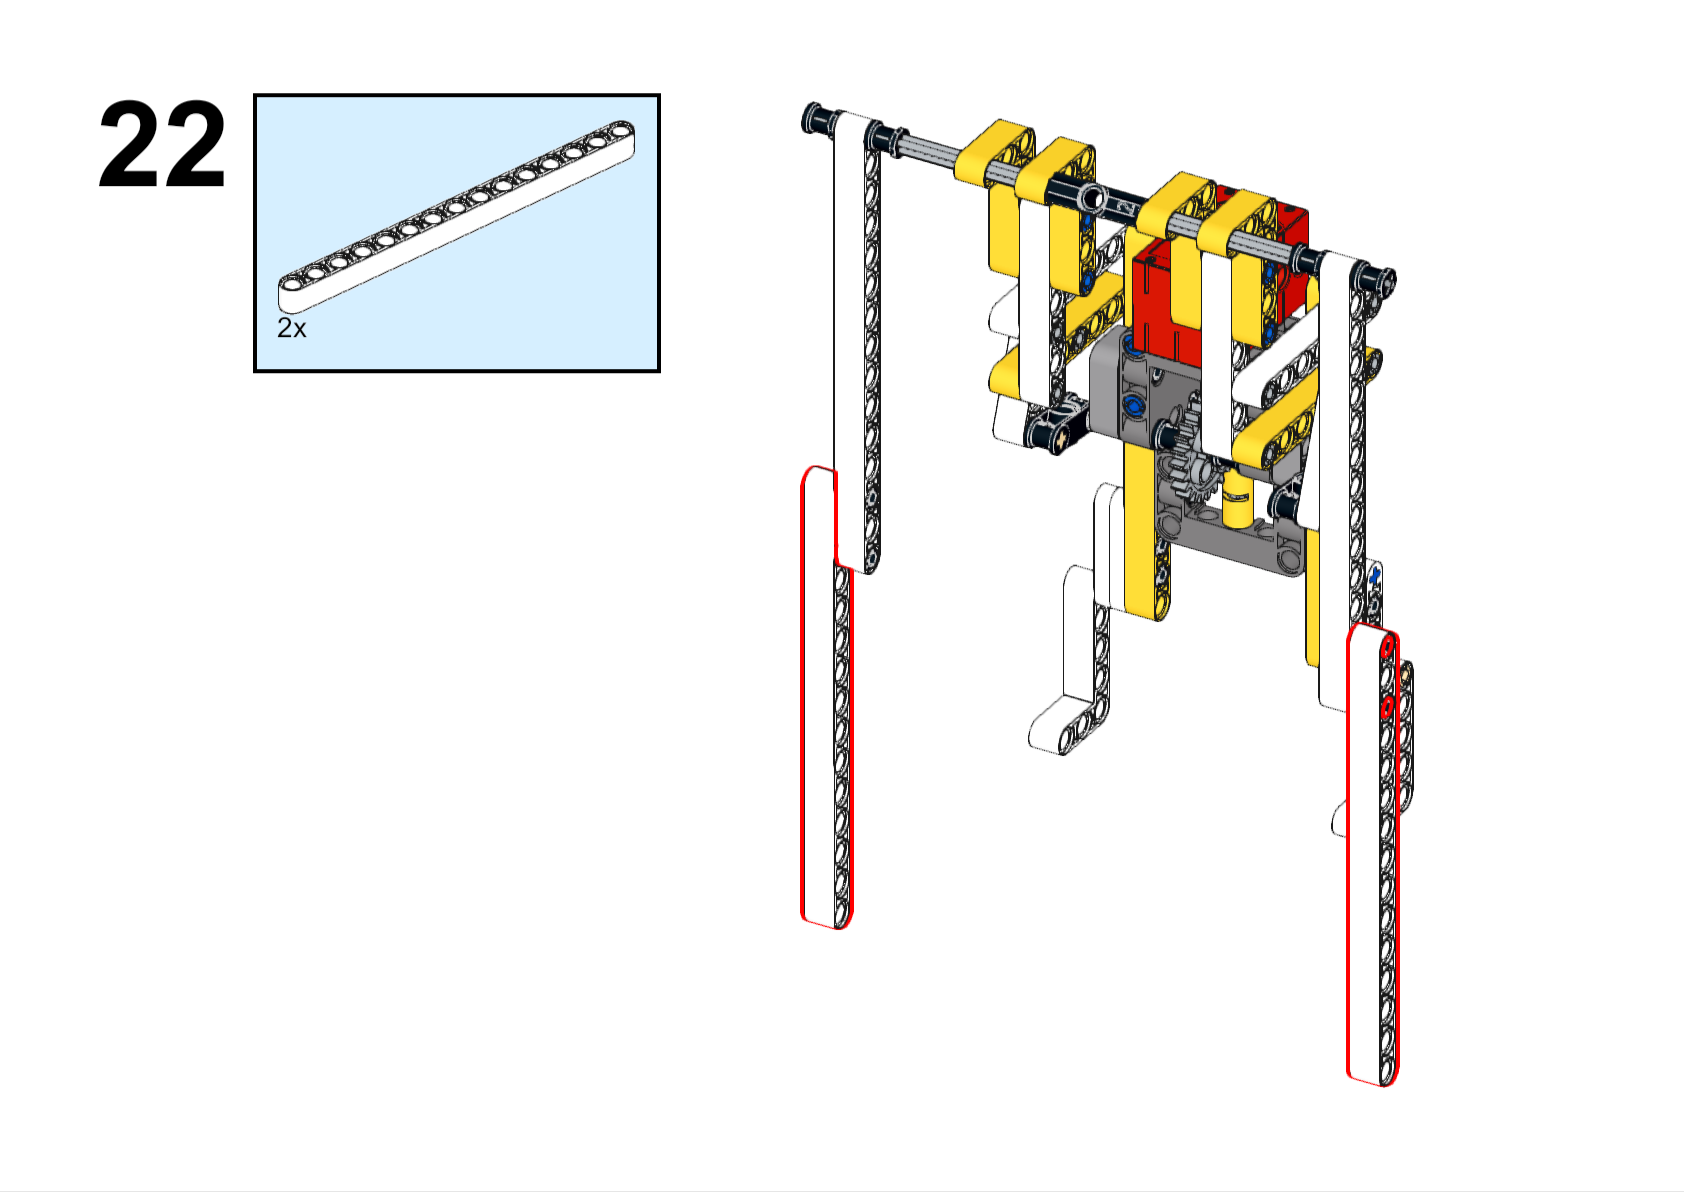
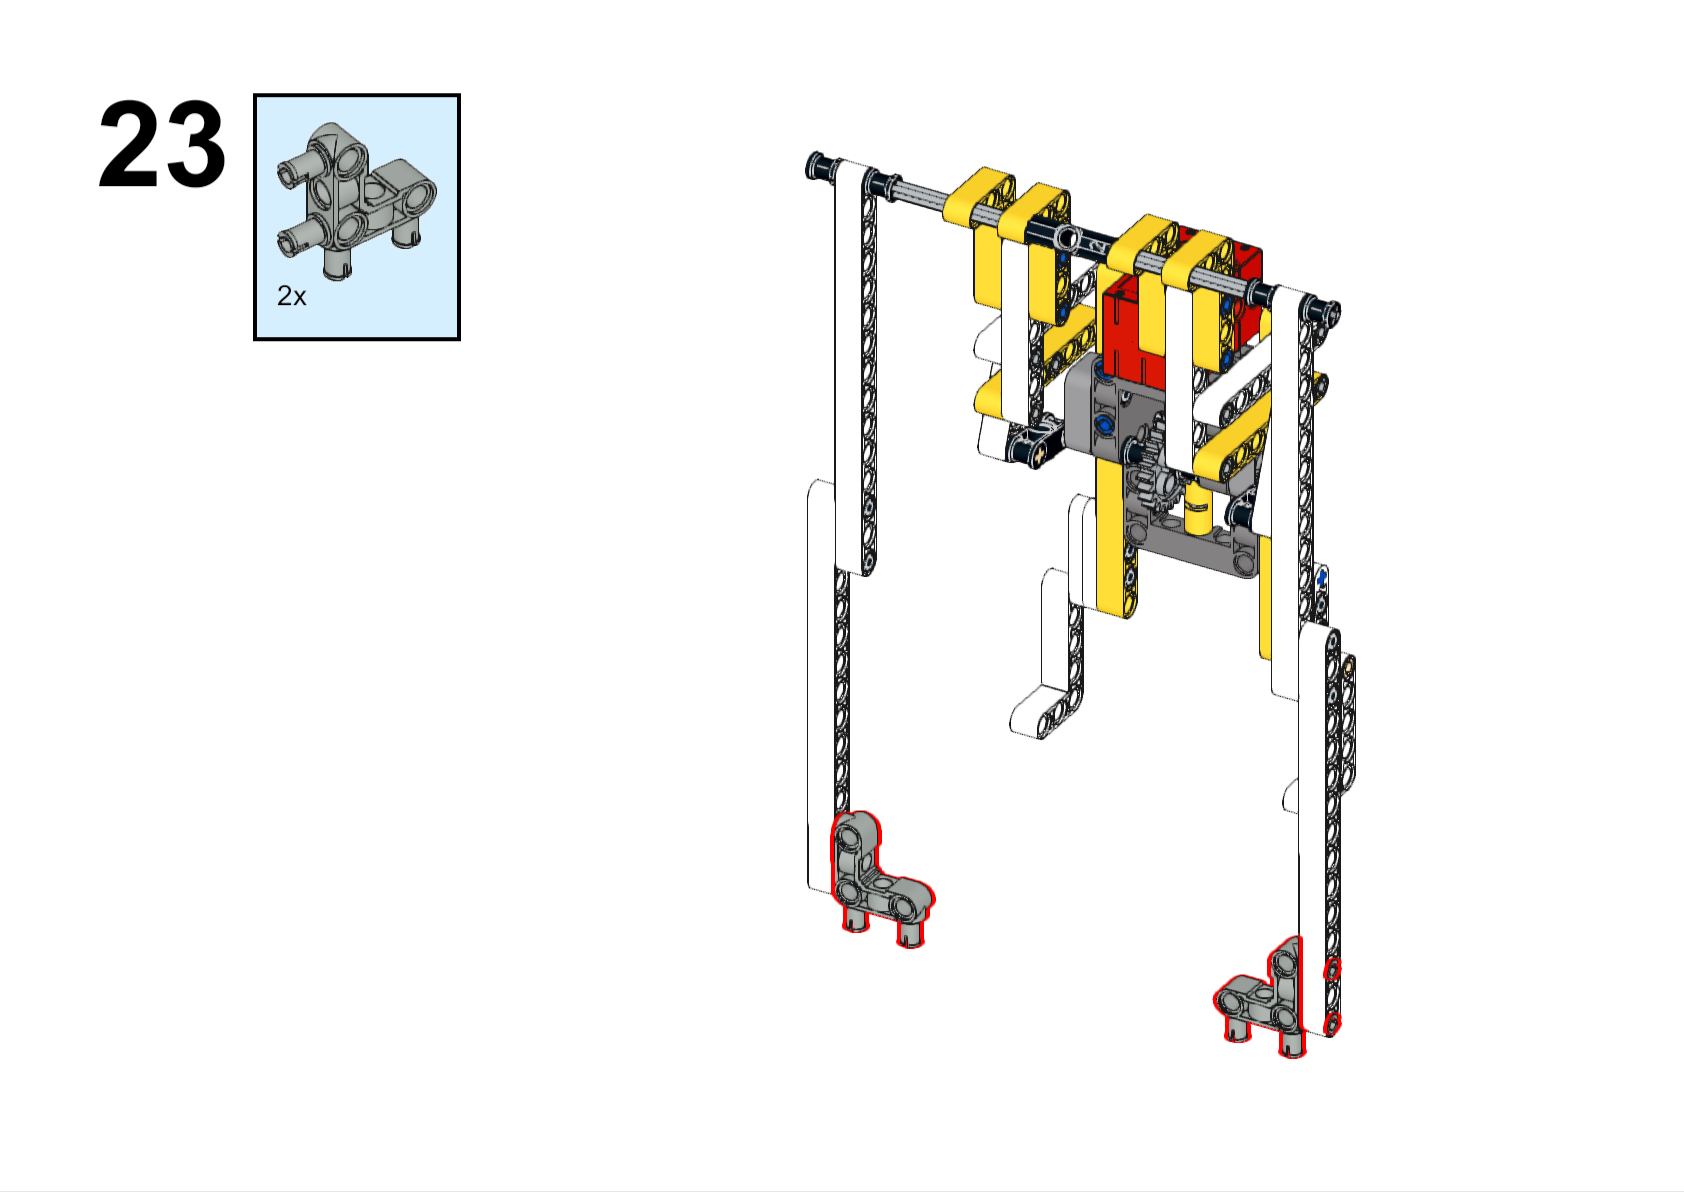
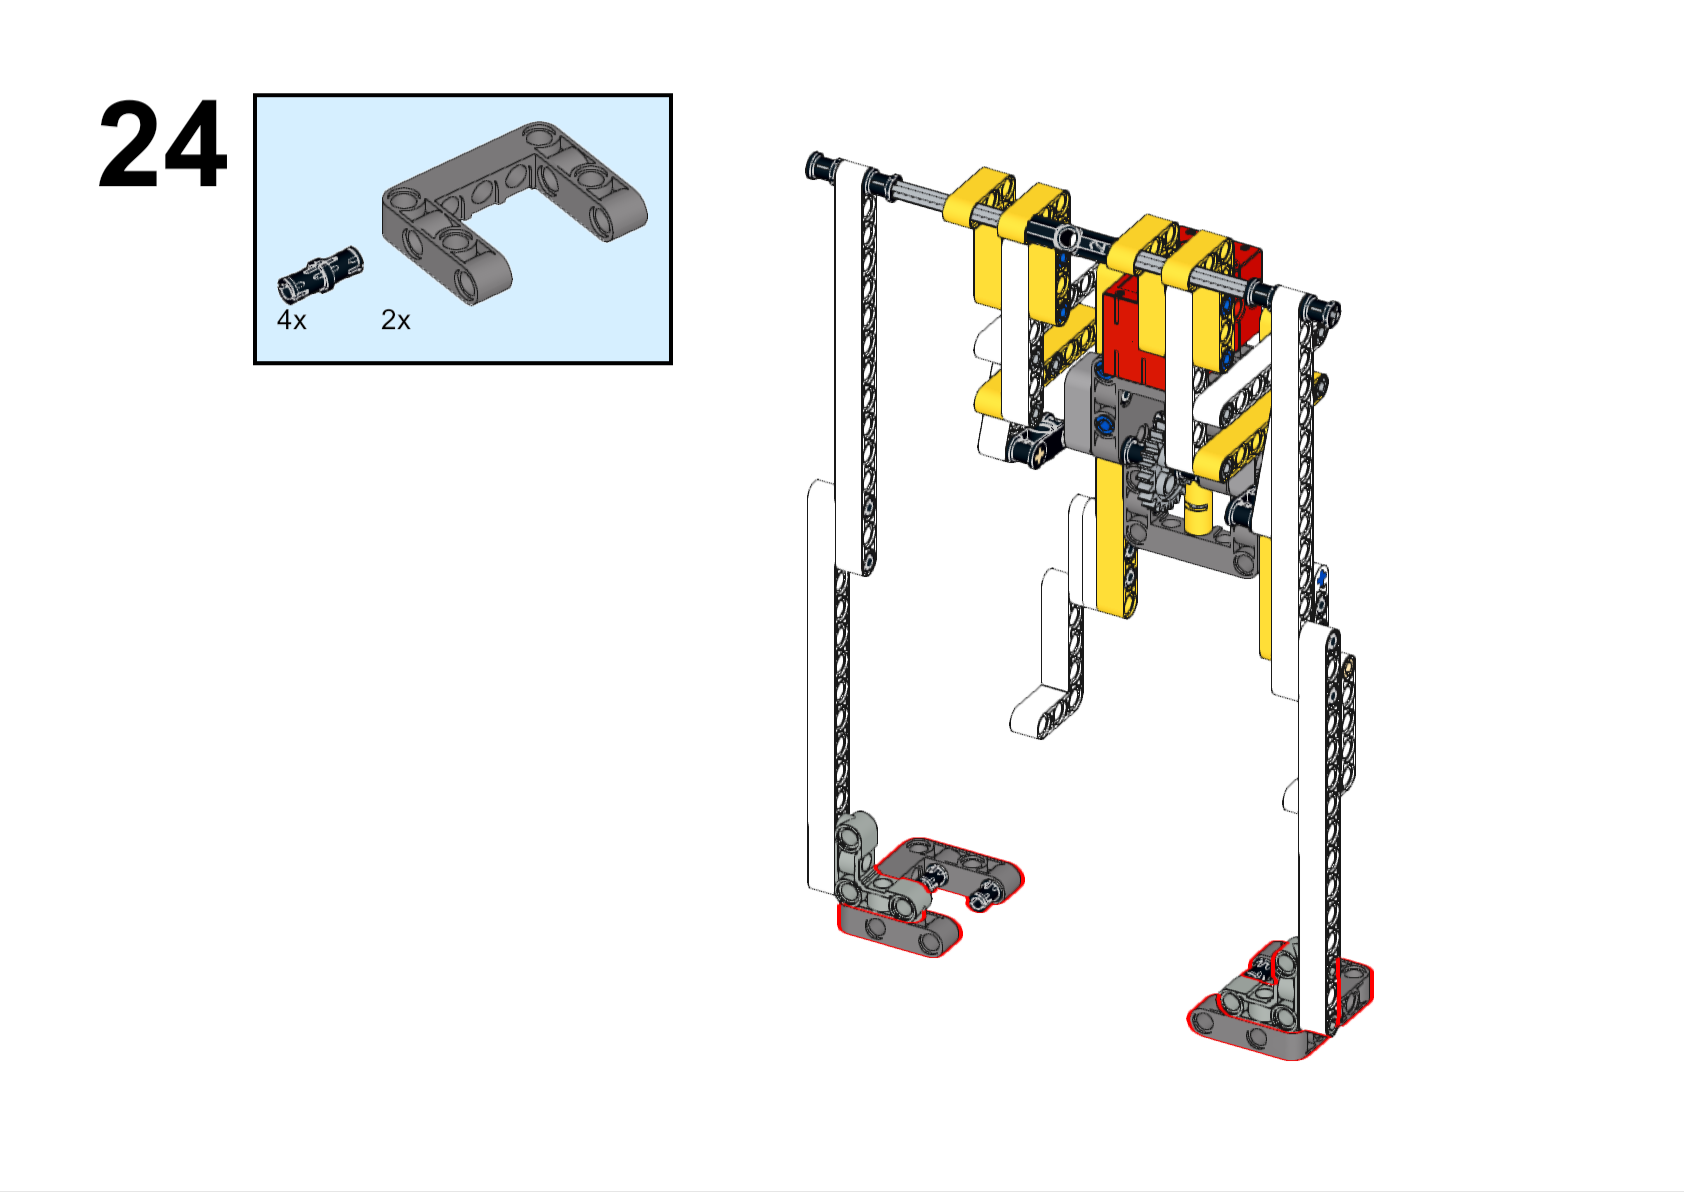
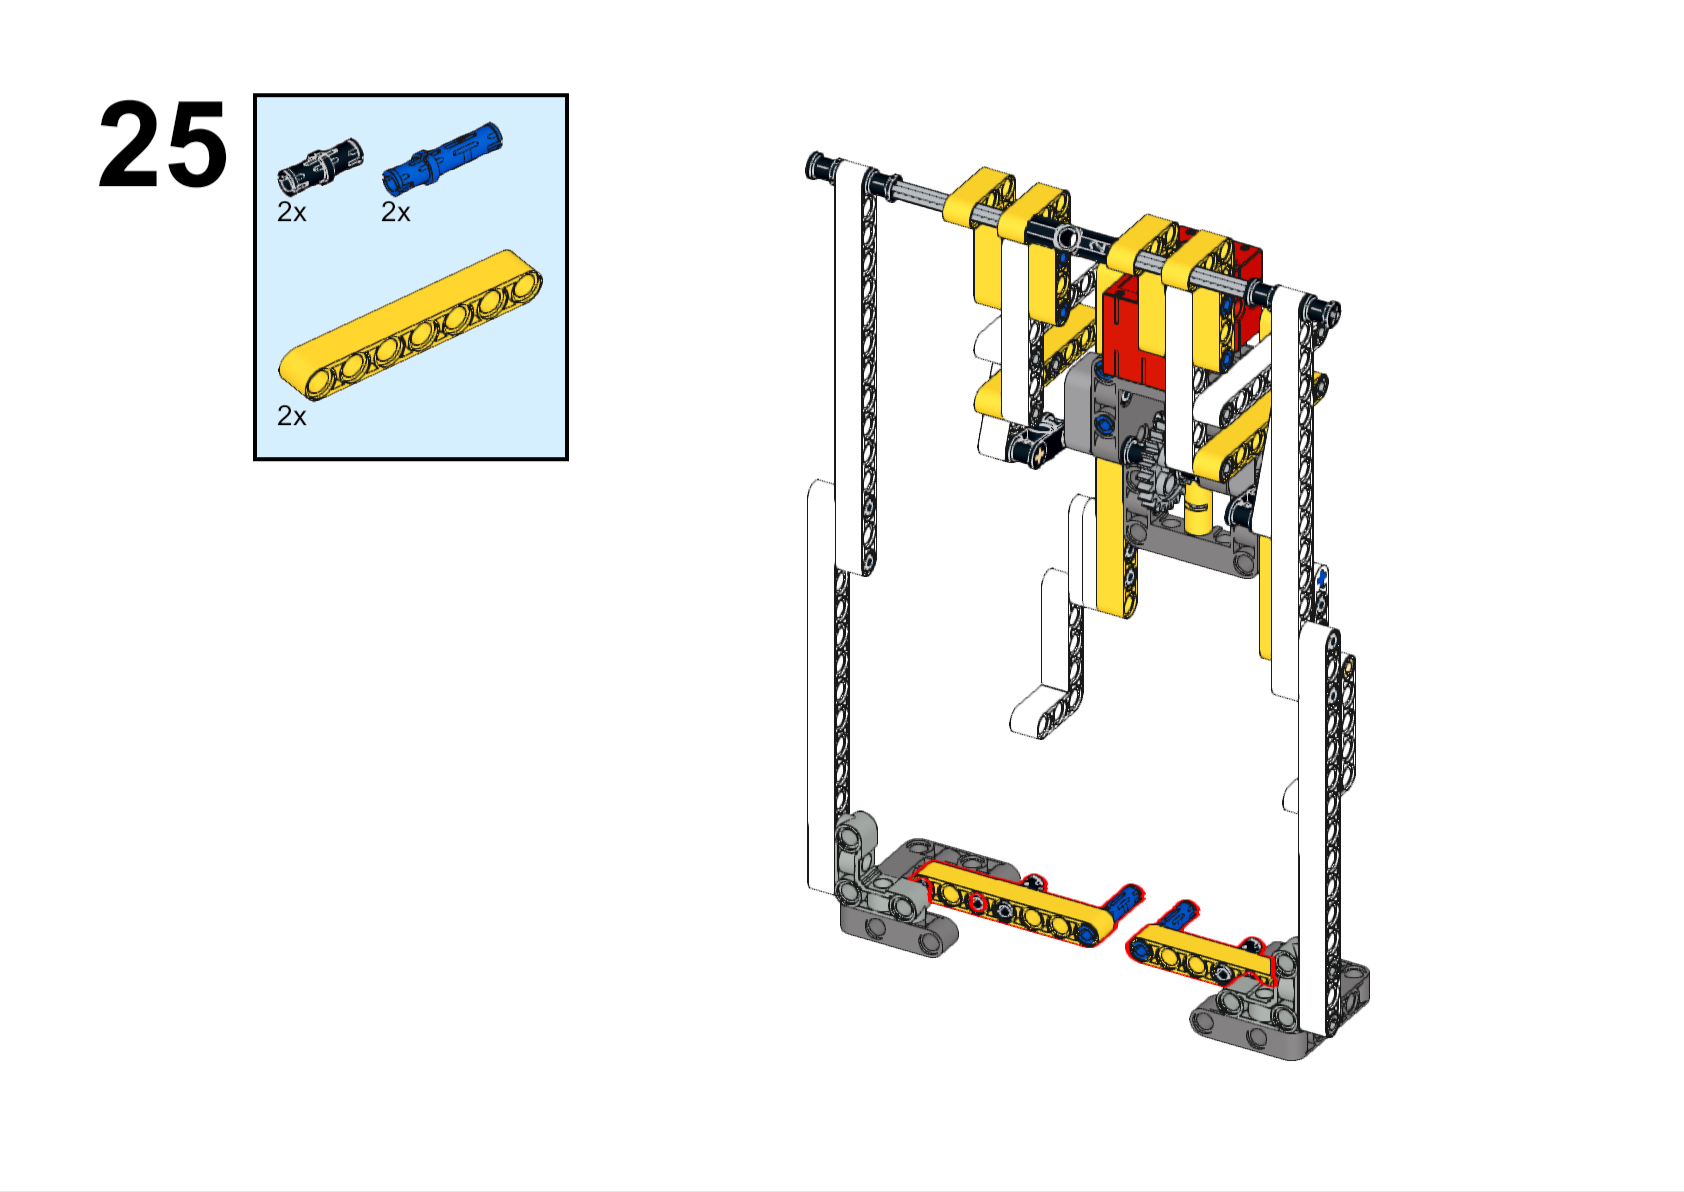
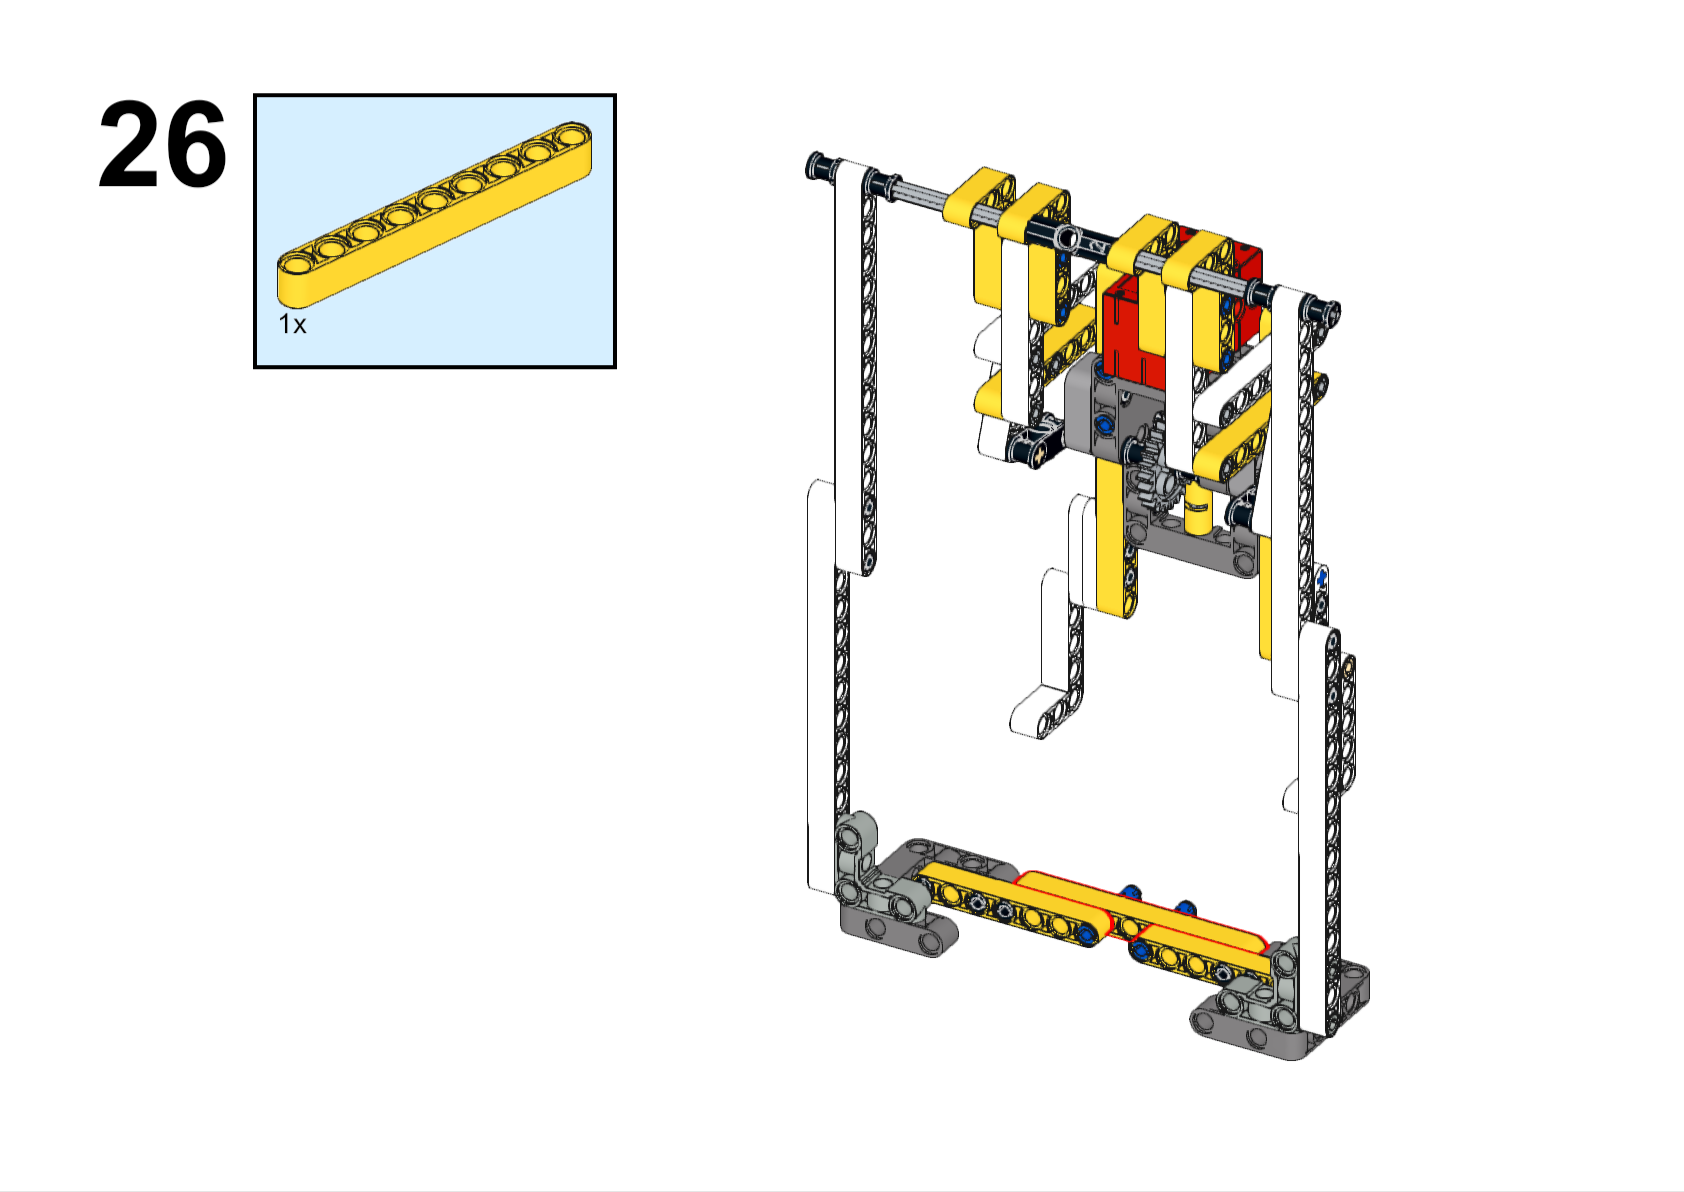
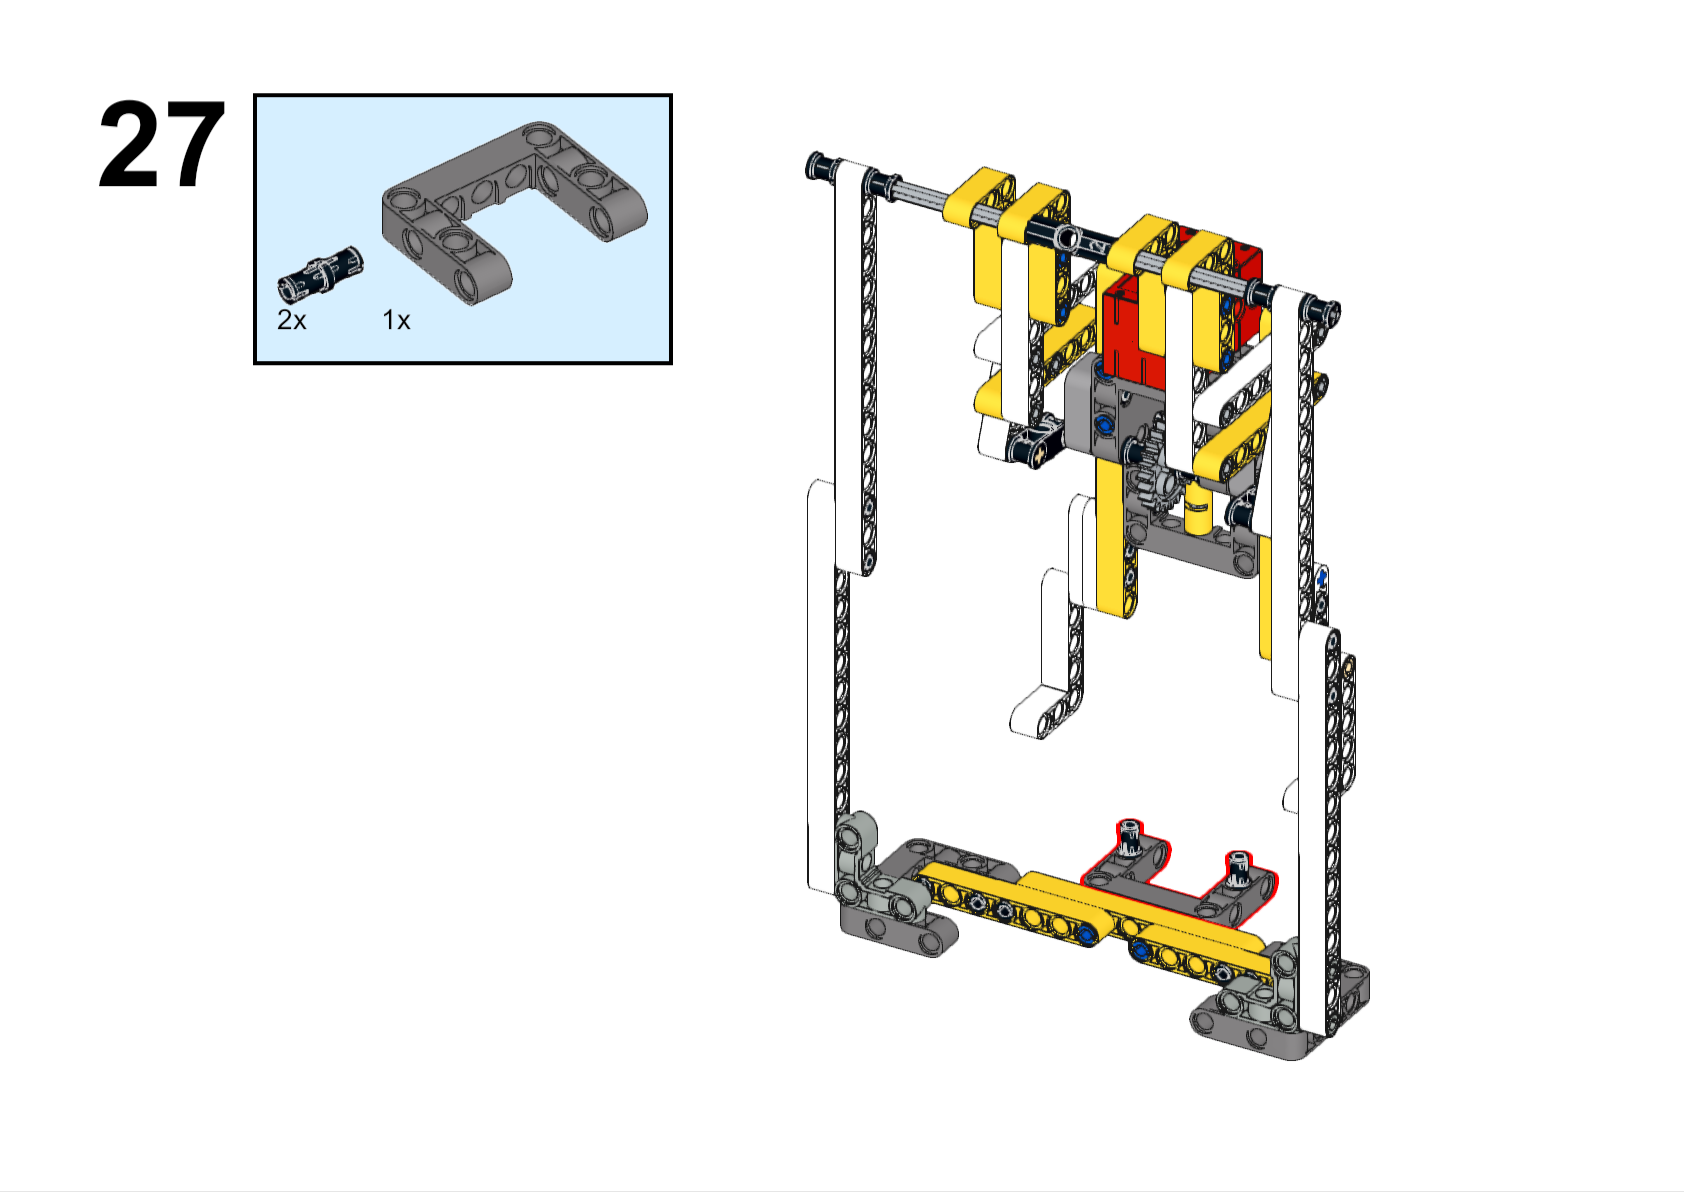
Assembly Steps

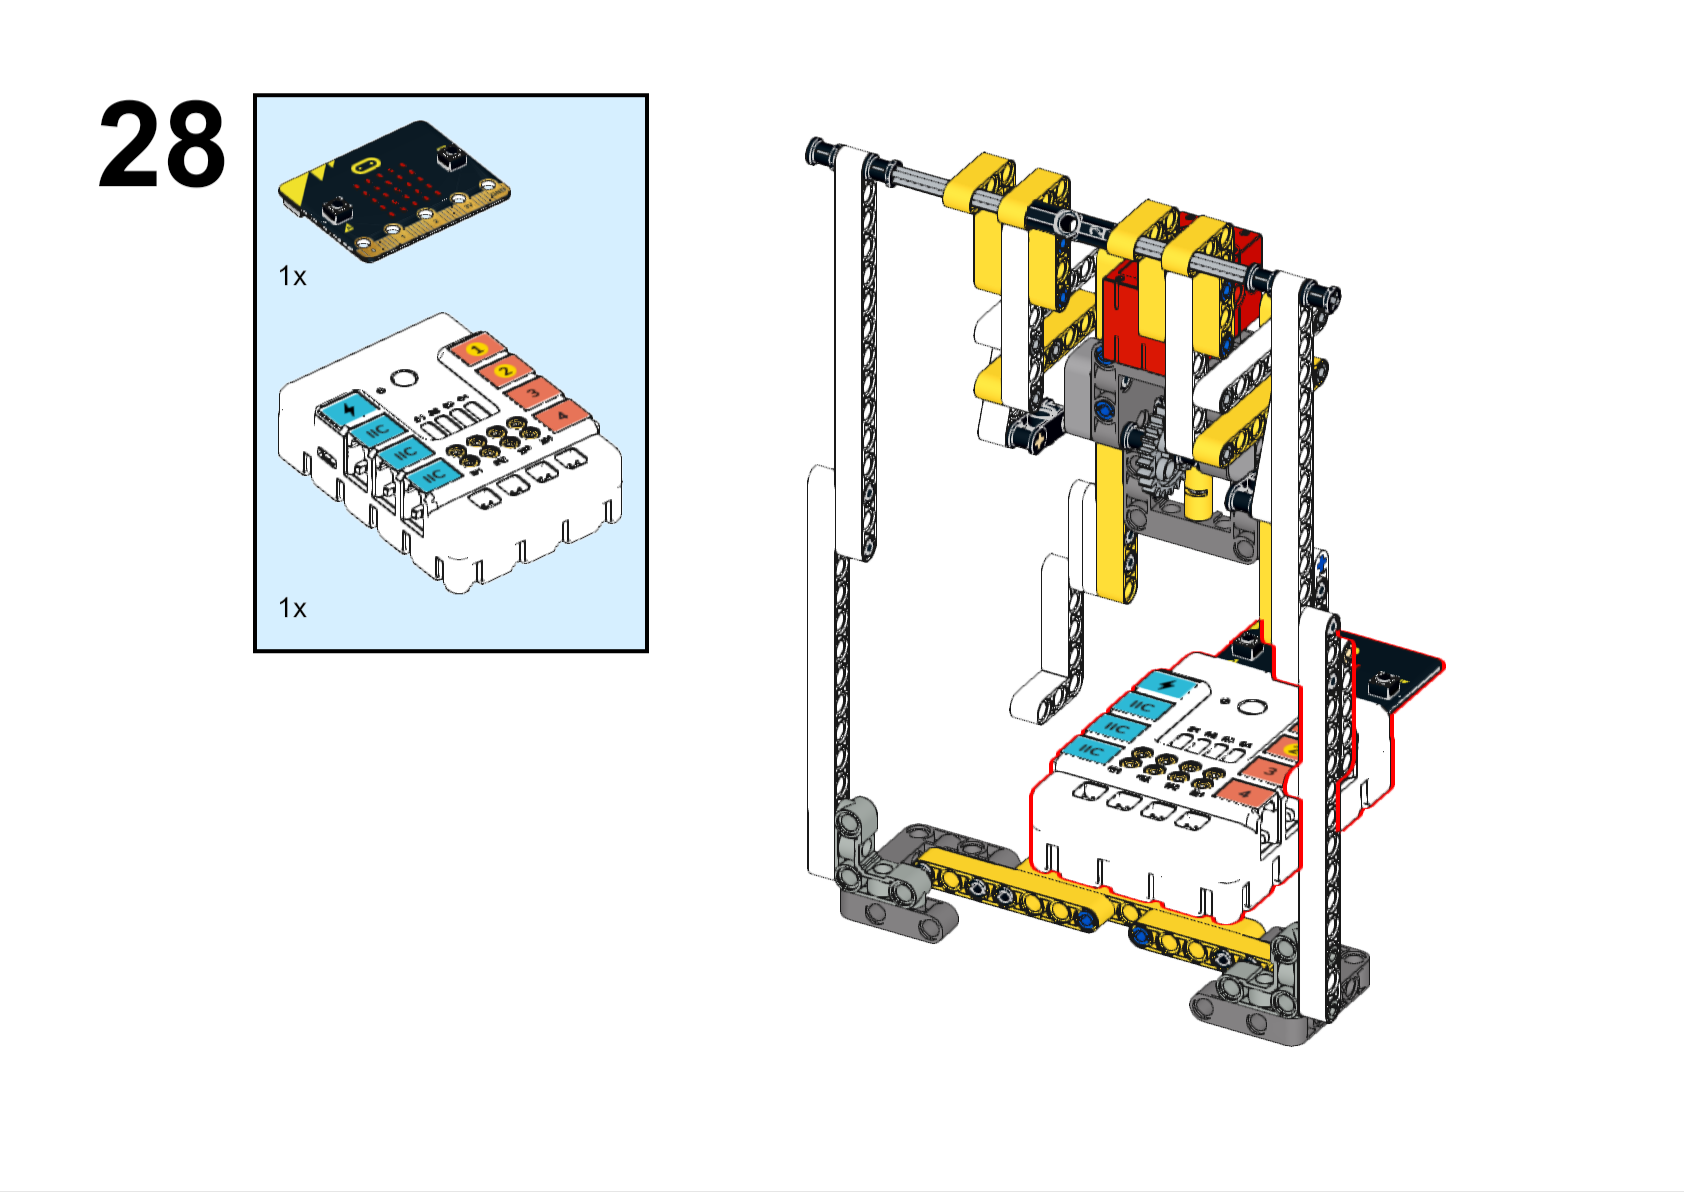
Completed
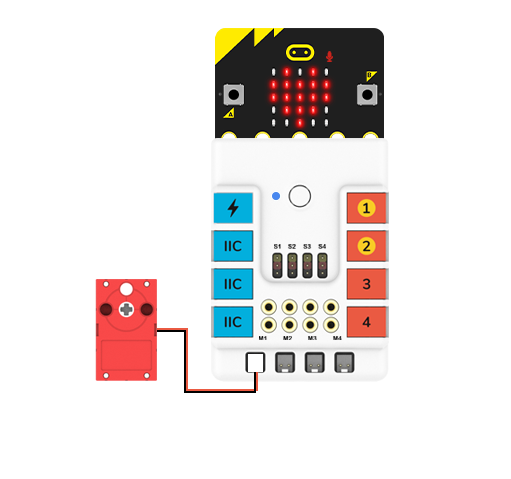
Hardware Connection
Connect the motor to M1 on Nezha expansion board.
Programming
Go to makecode
Create new projects

Click extensions
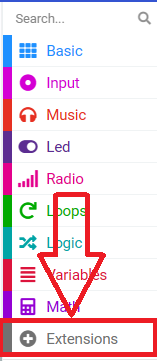
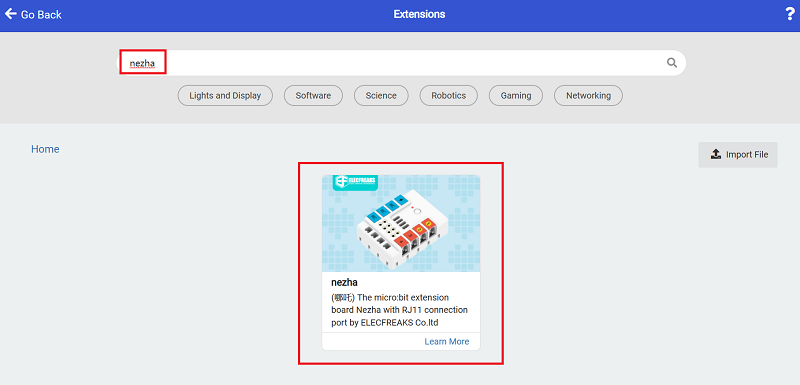
Search with nezha to download the package.
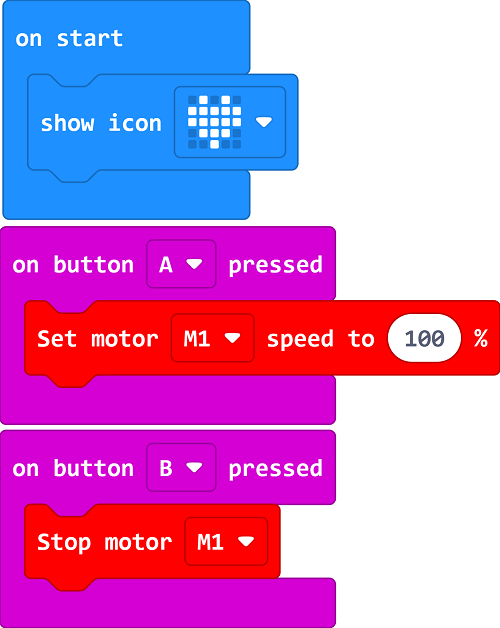
Code
Link: https://makecode.microbit.org/_8bYg1C9v1WJA
You may download it directly below:
Demonstration
Demonstrate in groups by having each group's robot do pull-ups on a bar and record the time with a timer to compare the results and effectiveness of each group.
Result
Press A on the micro:bit to start the robot doing pull-ups, press B on the micro:bit to stop the robot doing pull-ups.
Reflection
Share in groups so that students in each group can share their production process and insights, summarise the problems and solutions they encountered, and evaluate their strengths and weaknesses.